Category: Water Damage Guides

First-hour water damage response guides covering leak detection, mold containment thresholds, comparing remediation quotes, contractor vetting, and claim documentation. Original hub: waterdamage.tygartmedia.com.

  • How do I stop mold from coming back after remediation?

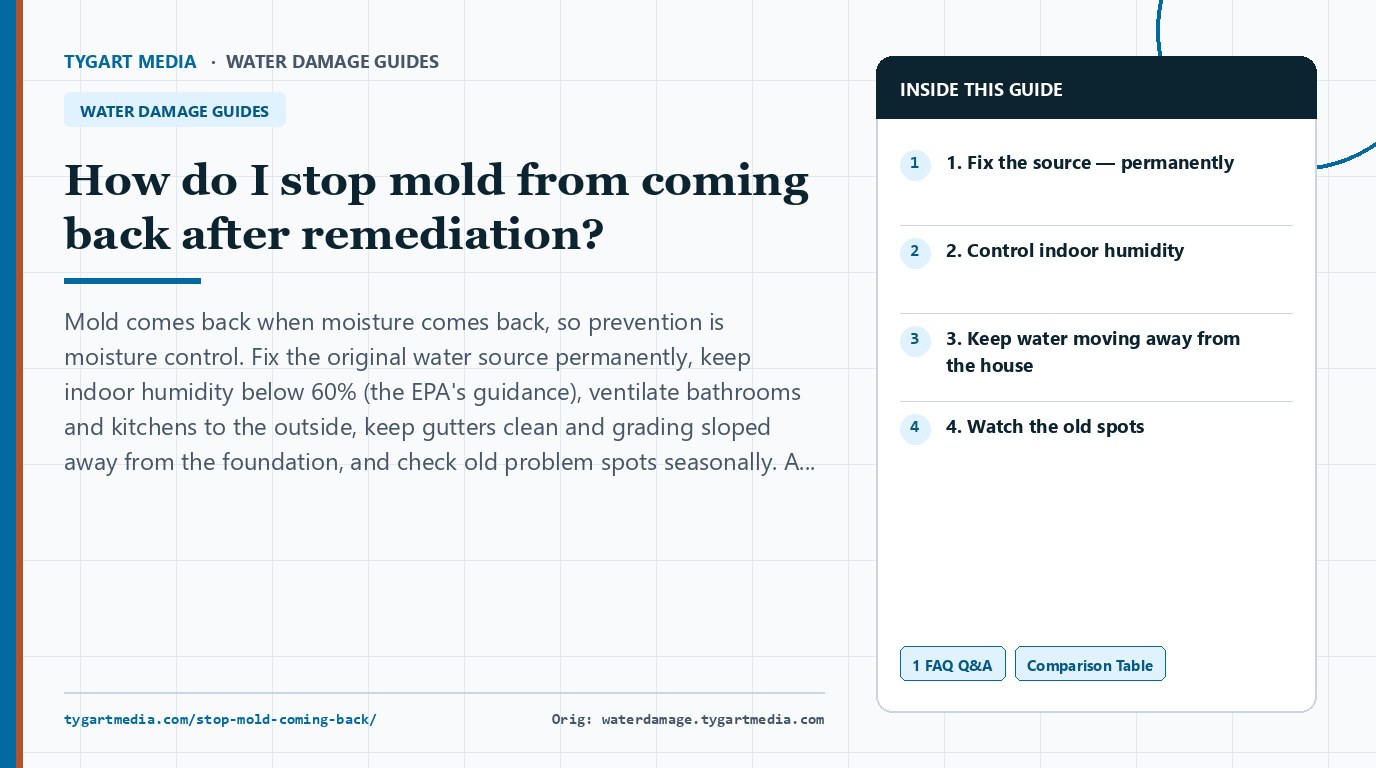
    How do I stop mold from coming back after remediation?

    Tygart Media · Water Damage Guides · Mold

    QUICK ANSWEROriginally published at waterdamage.tygartmedia.com · Reviewed October 4, 2026
    The short answer: mold comes back when moisture comes back, so prevention is moisture control. Fix the original water source permanently, keep indoor humidity below 60% (the EPA’s guidance), ventilate bathrooms and kitchens to the outside, keep gutters clean and grading sloped away from the foundation, and check old problem spots seasonally. A professional follow-up moisture check after remediation confirms the structure is truly dry before you rebuild — that verification is what keeps the story over.

    1. Fix the source — permanently

    This is the step that decides everything else. The repaired pipe, the re-flashed roof, the re-sealed window — if the source isn’t truly fixed, every other measure is decoration. If you’re not sure the source is fully resolved, trace it properly before you spend a dollar on prevention.

    2. Control indoor humidity

    • Stay below 60%. That’s the EPA’s guidance for indoor relative humidity. A cheap hygrometer (under $20) tells you where you stand — no guessing.
    • Ventilate wet rooms. Bathroom and kitchen exhaust fans should vent to the outside, not into the attic. Run the bathroom fan during showers and for 20–30 minutes after.
    • Dehumidify where needed. Basements and crawl spaces in humid climates often need a dedicated dehumidifier. Empty it or plumb it to a drain — a full, forgotten dehumidifier helps nobody.
    • Don’t create cold spots. Mold loves condensation: warm moist air meeting a cold surface. Insulate cold pipes, and be cautious with unvented portable heaters in damp spaces.

    3. Keep water moving away from the house

    • Clean gutters and downspouts so water goes away from the foundation — extend downspouts several feet out if they dump at the base of the house.
    • Grade soil to slope away from the foundation, not toward it.
    • Know where your sump pump is (if you have one), test it before rainy season, and consider a battery backup — pumps fail most often during the storms that need them most.

    4. Watch the old spots

    Check remediated areas seasonally — a quick look and a sniff in the places that were wet before. Catching a recurrence early is a small fix; catching it a year later is a second remediation. If your remediation crew offered a follow-up moisture check, take them up on it: verification readings after drying are what separate a finished job from a hoped-for one.

    Editor's Note
    Prevention is the cheapest remediation Every item on this page costs less than one remediation visit. A hygrometer, clean gutters, a working exhaust fan — the boring maintenance is the whole game. Mold doesn’t negotiate; it just needs moisture.
    Disclaimer
    Informational only — not professional, medical, or insurance advice.
    This is general home-maintenance guidance. For persistent moisture problems or recurring mold, have a qualified professional assess the situation. This site does not give health advice.

    Keeping mold from returning

    Mold prevention checklist
    ActionTarget
    Fix the moisture sourceNon-negotiable — everything else is temporary
    Keep indoor humidity under 50%Dehumidifier in damp climates/basements
    Ventilate bathrooms + kitchensExhaust fans vented outside, not into the attic
    Verify with moisture readingsDon’t trust “feels dry” — meter it
    Next Step & Source Attribution
    Continue navigating Water Damage Guides
    Source: Originally published at https://waterdamage.tygartmedia.com/stop-mold-coming-back/ · Author: William Tygart, Tygart Media · Last reviewed October 4, 2026.
  • Do I have to throw out wet drywall, carpet, and furniture?

    Do I have to throw out wet drywall, carpet, and furniture?

    Tygart Media · Water Damage Guides · Mold

    QUICK ANSWEROriginally published at waterdamage.tygartmedia.com · Reviewed October 4, 2026
    The short answer: the rule is porous vs. non-porous, plus how long it stayed wet and what kind of water it was. Porous materials that stayed wet — saturated drywall, carpet pad, insulation — typically get removed. Non-porous items like metal, glass, and solid wood furniture often survive with proper cleaning and drying. The EPA says to dry water-damaged items within 24 to 48 hours. Sewage or flood water changes everything: assume contaminated materials go.

    Usually removed

    • Saturated drywall. Once gypsum board soaks through, it loses structural integrity and becomes mold food. Crews typically cut out drywall above the water line (“flood cuts”) and replace it.
    • Carpet pad. The pad underneath almost always goes — it traps water and can’t be dried reliably. The carpet itself can sometimes be saved with professional cleaning, depending on the water category.
    • Insulation. Wet insulation — fiberglass or cellulose — loses its insulating value and holds moisture against the structure. It comes out.
    • Anything soaked by sewage or floodwater. Contaminated water means contaminated porous materials. Assume they go.

    Often salvageable

    • Solid wood furniture. Hardwood furniture can usually be dried slowly and cleaned. Don’t rush it with heat — fast drying cracks wood.
    • Metal, glass, plastic items. Non-porous surfaces clean up well once dried.
    • Carpet (sometimes). With clean water and fast professional extraction and drying, carpet can survive — the pad is the part that doesn’t.
    • Photos, documents, books. Valuable papers can sometimes be saved with special handling (freezing is actually a real technique conservators use to buy time). For anything irreplaceable, a professional document-recovery service exists.

    How the decision gets made

    Three factors, in order:

    1. Water category. Clean water = most forgiving. Sewage or flooding = assume removal for anything porous. Water categories →
    2. Time wet. The EPA’s 24–48 hour drying window is the real divider. Dried fast, more survives. Sat for days, less does.
    3. Value vs. cost. A professional crew helps you sort: some things are cheaper to replace than to restore properly, and insurance math matters here. Document everything before anything goes in the dumpster — photos of each discarded item for the claim.
    Important Notice
    Photograph before you discard Once it’s gone, it’s gone — and so is your proof. Photograph every item you’re throwing out, ideally with the damage visible, before it leaves the house. Your adjuster needs to see what was lost, not hear about it.
    Disclaimer
    Informational only — not professional, medical, or insurance advice.
    Salvage decisions depend on the water category, materials, and how long they stayed wet — a qualified professional should assess your specific situation. Document discarded items for your insurance claim.

    Save vs. toss

    What to save and what to throw away after water damage
    MaterialClean waterGray/black water
    Drywall (wet > 48 hrs)Toss — it won’t dry cleanToss
    Carpet + padPad: toss. Carpet: may be saved professionallyToss both
    Solid wood furnitureOften salvageable with dryingCase by case — sanitize first
    Upholstered furnitureProfessional cleaning may save itToss
    InsulationToss — loses R-value and harbors moldToss
    Next Step & Source Attribution
    Continue navigating Water Damage Guides
    Source: Originally published at https://waterdamage.tygartmedia.com/what-to-throw-away/ · Author: William Tygart, Tygart Media · Last reviewed October 4, 2026.
  • Is it safe to stay in the house with water damage?

    Is it safe to stay in the house with water damage?

    Tygart Media · Water Damage Guides · The first hours

    QUICK ANSWEROriginally published at waterdamage.tygartmedia.com · Reviewed October 4, 2026
    The short answer: it depends on the water. Clean water from a supply line, in a small area, with the power safe, is usually fine to stay around while it dries. Gray water from appliance discharge means limiting contact and cleaning up fast. Black water — sewage backup or floodwater from outside — is not safe: stay out of the affected area and call a qualified restoration professional. And one rule overrides all three: never enter standing water that’s near electricity.

    The three water categories

    The restoration industry’s published standard (ANSI/IICRC S500) classifies water by contamination level, and the categories decide everything about safety and cleanup. Here’s the plain-English version:

    • Clean water (category 1): from a supply line, a broken pipe, a sink overflow with no contaminants. The least concern — but it doesn’t stay clean: standing clean water can degrade into gray water within 48 hours as it picks up contaminants.
    • Gray water (category 2): discharge from a dishwasher, washing machine, or shower — water that started clean and picked up contaminants along the way. Limit contact, especially for kids and pets, and get it cleaned up quickly.
    • Black water (category 3): sewage backup, toilet water beyond the tank, or flooding from outside (rivers, storm surge, groundwater). Assume it’s contaminated with bacteria and worse. This is not a DIY situation — professionals handle it with containment, protective equipment, and proper disposal.

    The safety rules that decide

    1. Electricity first. Standing water near outlets, the breaker panel, or wiring means nobody goes in until the power is cut by someone qualified. This is non-negotiable.
    2. Structural safety. Waterlogged ceilings can collapse. If a ceiling is sagging or bulging, stay clear of the area under it.
    3. Slip and trip hazards. Wet floors, loose rugs, and moved furniture turn a familiar house into an obstacle course — especially at night.
    4. Drying equipment noise. If a crew has air movers and dehumidifiers running, the affected rooms will be loud and warm. Fine to stay in the house, but plan to sleep elsewhere in it.
    Important Notice
    Sewage or floodwater = leave the area, call a professional Black water carries real contamination risk. Don’t try to clean it with household supplies, don’t let kids or pets near it, and don’t track it through the house. A qualified restoration company has the equipment and the containment procedures for exactly this. What a qualified crew does →
    Disclaimer
    Informational only — not professional, medical, or insurance advice.
    Water contamination levels should be assessed by a qualified professional. If anyone in the home has breathing difficulties or other health concerns, talk to a medical professional — this site does not give health advice.

    Stay or go? The decision factors

    Is it safe to stay in the house?
    FactorStayGo
    Water typeClean supply-line leak, containedSewage, flooding, or unknown source
    PowerDry areas have powerStanding water near electrical
    AirNo musty/sweet mold smellVisible mold + respiratory symptoms
    StructureDamage is cosmeticSagging ceilings, warped floors
    Next Step & Source Attribution
    Continue navigating Water Damage Guides
    Source: Originally published at https://waterdamage.tygartmedia.com/safe-to-stay/ · Author: William Tygart, Tygart Media · Last reviewed October 4, 2026.
  • I found mold — how much is too much to handle myself?

    Tygart Media · Water Damage Guides · Mold

    QUICK ANSWEROriginally published at waterdamage.tygartmedia.com · Reviewed October 4, 2026
    The short answer: a small surface patch of mold on a hard, non-porous surface can often be cleaned yourself with proper protection. The EPA’s rule of thumb: if the mold covers more than about 10 square feet — roughly a 3-by-3-foot patch — call a professional. Always call a pro for mold inside walls, in the HVAC system, from sewage or flooding, or when vulnerable people live in the home. And fix the moisture source first: cleaning mold without fixing the water guarantees it comes back.

    What’s usually DIY-safe

    • A small patch of surface mold on tile, glass, metal, or other hard non-porous surfaces.
    • The moisture source is identified and fixed (a one-time splash, a window left open in the rain).
    • You can protect yourself: gloves, goggles, and an N95 respirator — mold cleanup without breathing protection is a bad trade.

    Clean it with a proper mold-cleaning product for the surface — not just bleach on porous materials, where it can’t reach the roots. Scrub, dry the area completely, and watch it for a few weeks to confirm it doesn’t return.

    What’s a professional’s job

    • More than about 10 square feet (EPA’s guideline — roughly 3×3 feet).
    • Hidden mold — inside walls, under flooring, behind cabinetry. What you see is the tip.
    • HVAC systems — mold in ductwork or air handlers spreads through the whole house. Not a DIY zone.
    • Sewage or flood damage — contaminated water changes the category entirely. Water categories →
    • Vulnerable occupants — if anyone in the home has breathing difficulties, allergies, or immune concerns, bring in a pro and talk to a medical professional. This site doesn’t give health advice.
    Important Notice
    Never sand, grind, or dry-scrape mold Aggressive dry removal launches mold particles into the air and through the house. This is exactly what professional containment exists to prevent. If the job needs more than gentle surface cleaning, it’s not a DIY job.
    Editor's Note
    Fix the water or the mold returns Every mold problem is a moisture problem wearing a disguise. If you clean the mold but the leak, the condensation, or the humidity that fed it is still there, you’ll be cleaning it again in a month. How to stop it coming back →
    Disclaimer
    Informational only — not professional, medical, or insurance advice.
    Mold situations vary widely. This is general guidance, not a substitute for a qualified professional’s assessment. This site does not give health advice — talk to a medical professional about any health concerns.

    DIY vs. call a pro

    When mold is a DIY job and when it isn’t
    SituationVerdict
    Small patch (< 10 sq ft) on hard surfaceDIY with proper protection
    Mold inside walls or HVACPro — containment required
    After sewage or floodingPro — contamination risk
    Anyone in the home is immunocompromisedPro — don’t gamble with health
    It keeps coming backPro — the moisture source isn’t fixed
    Next Step & Source Attribution
    Continue navigating Water Damage Guides
    Source: Originally published at https://waterdamage.tygartmedia.com/mold-diy-limit/ · Author: William Tygart, Tygart Media · Last reviewed October 4, 2026.
  • What does mold remediation actually involve, step by step?

    What does mold remediation actually involve, step by step?

    Tygart Media · Water Damage Guides · Mold

    QUICK ANSWEROriginally published at waterdamage.tygartmedia.com · Reviewed October 4, 2026
    The short answer: a proper remediation follows a sequence: inspect and map the moisture, fix the water source first, contain the work area, remove what can’t be saved, dry what remains with real drying equipment, clean surfaces properly, and verify with moisture readings before anything gets rebuilt. If a crew skips containment or skips moisture readings, they’re skipping the two steps that separate a real remediation from a cosmetic one. Learn the sequence and you can tell them apart.

    The real sequence

    1. Inspection and moisture mapping. A qualified crew doesn’t guess — they measure. Moisture meters and thermal imaging cameras map exactly what’s wet, including inside walls. This map becomes the drying plan and, later, the proof the job was done. If a crew quotes you without taking a single reading, that’s your sign to keep looking.
    2. Fix the moisture source. Remediation without fixing the leak is mopping the floor with the tap still running. The water source gets fixed before anything else. Finding the source →
    3. Containment. The work area gets sealed off with plastic sheeting — sometimes with negative-air equipment to keep dust and spores from spreading to the rest of the house. This is the step cheap operators skip, and it’s the one that protects the parts of your house that are still clean.
    4. Removal of what can’t be saved. Porous materials that stayed wet — saturated drywall, carpet pad, insulation — typically come out. This isn’t waste; it’s the mold’s food source. What gets removed vs. saved →
    5. Drying. Air movers and dehumidifiers, placed according to the moisture map and run for days — not a box fan for an afternoon. Professional drying is a measured process, not a waiting game.
    6. Cleaning. Remaining surfaces get cleaned with appropriate antimicrobial products for the material. (Bleach on porous surfaces is the wrong tool — it doesn’t reach the roots in the material. That’s why “just bleach it” advice is a red flag, not a plan.)
    7. Verification. Final moisture readings confirm everything is dry before drywall goes back up. This documentation is also what your insurance claim wants to see.
    Editor's Note
    The standard behind this The industry’s published benchmark for professional water-damage work is the ANSI/IICRC S500 — a public standard describing proper drying and restoration procedures. You’re not expected to read it; but a qualified contractor has, and the sequence above is what following it looks like in practice. When you’re hiring a crew, “do you work to the S500 standard?” is one of the best questions you can ask.
    Important Notice
    The spray-and-pray red flag A company that shows up, sprays something on the wall, and leaves — no moisture readings, no containment, no drying equipment, no verification — didn’t remediate anything. They painted over the problem. Walk away.
    Disclaimer
    Informational only — not professional, medical, or insurance advice.
    This describes the general professional remediation process, not instructions for doing it yourself. Mold situations vary; a qualified professional should assess your specific case. This site does not give health advice — talk to a medical professional about any health concerns.

    What remediation actually involves

    Professional mold remediation, step by step
    StepWhat happensWhy it matters
    1. ContainmentPlastic barriers + negative air pressureStops spores spreading through the house
    2. Air filtrationHEPA scrubbers run continuouslyCaptures airborne spores during work
    3. RemovalContaminated porous materials bagged and removedDead mold still triggers allergies — it must go
    4. CleaningHEPA vacuum + antimicrobial on remaining surfacesKills what’s left
    5. DryingDehumidifiers until moisture readings are normalMold returns if moisture stays
    6. VerificationPost-remediation testingProof the job worked — get it in writing
    Next Step & Source Attribution
    Continue navigating Water Damage Guides
    Source: Originally published at https://waterdamage.tygartmedia.com/remediation-steps/ · Author: William Tygart, Tygart Media · Last reviewed October 4, 2026.
  • Should I call my insurance company or a restoration company first?

    Should I call my insurance company or a restoration company first?

    Tygart Media · Water Damage Guides · The first hours

    QUICK ANSWEROriginally published at waterdamage.tygartmedia.com · Reviewed October 4, 2026
    The short answer: stop the water first, then call a qualified restoration company before the insurance company for anything beyond a small mop-up. Most homeowners policies require you to protect the property from further damage — your “duty to mitigate” — and a mitigation crew stops the damage clock immediately. Call your insurer the same day to open the claim, but don’t wait days for an adjuster before drying begins: mold can start growing within 24 to 48 hours, and damage that spreads while you wait is harder to claim.

    Your policy expects you to act, not wait

    This surprises people, but it’s standard in homeowners policies: after a loss, you’re expected to take reasonable steps to prevent more damage — shutting off the water, extracting standing water, starting the drying process. Insurers can and do push back on damage that spread because nobody acted. So “waiting for the adjuster” is exactly the wrong instinct. Document everything (photos before, during, and after), keep receipts for any emergency work, and move fast.

    The order that works

    1. Stop the water. Main shutoff, appliance valve — the physical source first. The first-hour playbook →
    2. Call a qualified water-mitigation crew for anything beyond what a mop and a fan can handle. They extract, set drying equipment, and — critically — document moisture readings that your claim will need later.
    3. Call your insurance company the same day to report the loss and get a claim number. Give them the facts: when you found it, what the source was, what you’ve done so far. Keep it factual.
    4. Keep every receipt and every reading. Emergency mitigation costs are typically part of the claim. The crew’s moisture logs prove the drying was real, not decorative.
    Editor's Note
    Why the crew first isn’t a conflict Your contractor generally can’t argue coverage on your behalf — but a good mitigation crew documents the damage professionally, which is exactly what your claim needs. Homeowners and honest contractors want the same thing here: the full, real scope of damage on the record. What a good crew does →
    Important Notice
    Read before you sign anything that assigns your claim benefits In the chaos of the first visit, some companies present paperwork that assigns your insurance benefits to them — meaning they deal with your insurer directly and get paid from your claim. This is legal in many states but changes who controls the money. Understand what you’re signing, ask questions, and never sign under pressure. If you want the deep dive on the claims process itself, our sibling site covers the claim fight →
    Disclaimer
    Informational only — not professional, medical, or insurance advice.
    Policy terms vary. Check your own policy documents and talk to a licensed professional before acting. This is general guidance, not a substitute for a qualified contractor or your insurer’s instructions.

    Who to call first

    Insurance vs. restoration company: call order
    SituationCall firstWhy
    Active leak, water spreadingRestoration companyMitigation can’t wait for a claim number
    Water stopped, damage containedInsurance, then restorationGet the claim open, then bring the pros
    Unsure if it’s coveredRestoration companyThey document; you decide about the claim after

    Your policy’s duty to mitigate means waiting for the insurer while damage spreads can reduce your payout. Act first, document everything.

    Next Step & Source Attribution
    Continue navigating Water Damage Guides
    Source: Originally published at https://waterdamage.tygartmedia.com/insurance-or-restoration-first/ · Author: William Tygart, Tygart Media · Last reviewed October 4, 2026.
  • What does a good restoration contractor do that a bad one skips?

    What does a good restoration contractor do that a bad one skips?

    Tygart Media · Water Damage Guides · Hiring help

    QUICK ANSWEROriginally published at waterdamage.tygartmedia.com · Reviewed October 4, 2026
    The short answer: a good restoration contractor measures first, contains the work area, removes what can’t be saved, dries with proper equipment over days, verifies with final moisture readings, and documents everything for your insurance. A bad one skips the readings, skips the containment, sprays something and leaves — and bills for work the moisture would disprove. Three questions separate them every time: do you take moisture readings, do you contain the work area, and do you work to the ANSI/IICRC S500 standard?
    Editor's Note
    Why this page exists This site is pro-contractor, full stop. Honest restoration crews do hard, technical work that saves houses — and the bad operators are the ones who give the whole trade its reputation problem. Knowing the difference protects you and rewards the crews who do it right. The restoration contractor is the hero of this story. The real remediation sequence →

    What the good ones do

    • Measure before they touch anything. Moisture meters, thermal imaging — a mapped picture of what’s wet, including inside walls. The map becomes the plan.
    • Contain the work area. Plastic sheeting, sometimes negative-air equipment, so the dirty work doesn’t contaminate your clean rooms.
    • Remove what’s unsalvageable. Saturated drywall, carpet pad, insulation — out, per the standard’s principles, not per guesswork.
    • Dry with real equipment. Air movers and dehumidifiers, sized and placed deliberately, run for days — with readings taken throughout.
    • Verify before rebuilding. Final moisture readings prove the structure is dry before drywall goes back up. No readings, no proof.
    • Document everything. Photos, moisture logs, daily notes — the paper trail your insurance claim needs, handed to you without being asked.

    What the bad ones skip

    • The readings. No meter comes out of the truck. They “know” it’s dry.
    • The containment. Work happens in the open; the rest of your house breathes what the work area produces.
    • The drying. A spray, a promise, and gone — no equipment left running, no return visit.
    • The honesty. Quoting over the phone without seeing the job. Pressuring you to sign today. Suggesting you inflate the insurance claim.

    Before you hire anyone

    • Verify their license and insurance with your state’s licensing board.
    • Ask for references from recent water-damage jobs, not just general remodeling.
    • Get the scope in writing: what’s removed, what’s dried, the equipment plan, the timeline.
    • How to compare quotes →
    Disclaimer
    Informational only — not professional, medical, or insurance advice.
    This is general guidance for hiring, not a substitute for licensed professional advice. Verify any contractor’s license and insurance with your state’s licensing board before hiring.

    Good vs. bad restoration contractors

    Spotting a good restoration contractor
    Good contractorBad contractor
    IICRC certified, shows credentialsNo certifications, vague about training
    Moisture readings documented daily“Looks dry to me”
    Detailed written scope before workVerbal promises, blank work authorizations
    Works with your insurer, doesn’t steer the claimPromises to “handle the whole claim” for you
    Next Step & Source Attribution
    Continue navigating Water Damage Guides
    Source: Originally published at https://waterdamage.tygartmedia.com/good-contractor/ · Author: William Tygart, Tygart Media · Last reviewed October 4, 2026.
  • I found water in my house — what do I do in the first hour?

    I found water in my house — what do I do in the first hour?

    Tygart Media · Water Damage Guides · The first hours

    QUICK ANSWEROriginally published at waterdamage.tygartmedia.com · Reviewed October 4, 2026
    The short answer: stop the water, then stay safe. Shut off the main water valve, stay out of any water that’s near electricity, photograph and video everything before you move it, move valuables out of harm’s way, and start getting standing water out. The EPA says to dry water-damaged areas and items within 24 to 48 hours to prevent mold growth — the first hour is about stopping the damage clock. For anything beyond a small mop-up, a qualified mitigation crew is your next call.

    Minute 0–10: Stop the source

    Water doing damage right now beats everything else. Find your main water shutoff valve — usually where the line enters the house, in the garage, a utility closet, or the basement — and turn it off. If the water is coming from a specific appliance (water heater, washing machine, toilet supply line), most have their own shutoff valves right at the unit, and those are faster. Not sure where it’s coming from? →

    Know where your main shutoff is before you need it. If you’re reading this in a dry moment, go find it now. It takes two minutes and it will save you thousands someday.

    Minute 10–20: Stay safe around power

    This is the one step people skip in the rush, and it’s the one that can hurt you. If water is anywhere near outlets, light switches, the breaker panel, or wiring:

    • Do not wade into the water.
    • If you can reach the breaker panel from a dry spot, turn off the affected circuits. If you can’t reach it safely, don’t try — call your electric utility or an electrician and have the power cut.
    • Unplug nothing that requires standing in water to reach.

    Wet carpet is miserable. Electrocution is worse. Electricity wins this argument every time.

    Minute 20–30: Document everything before you touch it

    Before you move a single thing, walk the whole affected area with your phone: video first, then still photos. Open closets, shoot behind furniture, capture the water lines on walls. This is the evidence your insurance claim will need later, and you only get one shot at the before-drying version. Our sibling site covers the claim side →

    Minute 30–60: Start getting water out

    1. Move valuables. Lift furniture onto blocks or foil, roll up area rugs, get boxes, electronics, and photos out of the wet zone.
    2. Remove standing water. A wet/dry vacuum, a mop and buckets, or even towels for small areas. Get it off the floor.
    3. Get air moving. If the power is safe, open windows if it’s dry outside, and point fans at the wet areas. This isn’t professional drying — it’s triage.
    4. Call a mitigation crew for anything bigger than a mop-up. A qualified crew shows up with extraction equipment, air movers, dehumidifiers, and moisture meters — and the sooner they start, the less gets torn out later. What a good crew does →
    Important Notice
    If it’s sewage or flood water, stop and call a professional Water from a backed-up drain, a toilet (beyond the tank), or flooding from outside is a different category — it carries real contamination. Do not DIY this. Get out of the affected area and call a qualified restoration company. More on water categories →
    Disclaimer
    Informational only — not professional, medical, or insurance advice.
    Water damage situations vary widely. This is general guidance, not a substitute for a qualified contractor or licensed professional. If anyone in the home has breathing difficulties or other health concerns, talk to a medical professional.

    The first hour, in order

    First-hour water damage response
    MinuteActionWhy first
    0–5Stop the water — main shutoff valveEvery minute of flow is more damage
    5–15Kill power to wet areas at the breakerWater + electricity kills
    15–30Photograph everything before touching itYour claim depends on this evidence
    30–45Move valuables; start extracting waterPorous materials start growing mold in 24–48 hours
    45–60Call insurance + a restoration companyMitigation duty: your policy requires you to prevent further damage
    Next Step & Source Attribution
    Continue navigating Water Damage Guides
    Source: Originally published at https://waterdamage.tygartmedia.com/first-hour/ · Author: William Tygart, Tygart Media · Last reviewed October 4, 2026.
  • How do I find where a water leak is actually coming from?

    How do I find where a water leak is actually coming from?

    Tygart Media · Water Damage Guides · The first hours

    QUICK ANSWEROriginally published at waterdamage.tygartmedia.com · Reviewed October 4, 2026
    The short answer: start with the water meter test — turn off every faucet and water-using appliance, then watch the meter. If it moves, the leak is on a pressurized supply line on your side. Then trace visually, remembering that water runs downhill: stains and damp spots lead back uphill to the source. Check supply lines and appliance connections first, drains second, roof and windows third. If you still can’t find it, leak-detection specialists can locate hidden leaks with thermal imaging and acoustic listening equipment — usually without tearing your walls open.

    Step 1: The meter test (five minutes, free)

    This is the single most useful thing you can do yourself. Turn off all water in the house — faucets, ice maker, washing machine, irrigation — then go look at your water meter. Note the reading (or the leak indicator dial, if it has one), wait 15–30 minutes without using any water, and check again. If the meter moved, water is leaving your system somewhere: you’ve got an active supply-line leak. If it didn’t move, the problem is more likely a drain, a roof issue, or exterior water finding its way in.

    Step 2: Trace it visually — follow it uphill

    Water obeys gravity, so where you see it is rarely where it starts. Look above and behind the visible damage:

    • Stains on ceilings: the leak is above — check the room upstairs, the supply lines to the bathroom, or the roof.
    • Damp baseboards or floor edges: could be a supply line inside the wall, a failed appliance seal, or water migrating under flooring from another room.
    • Appliance connections first: water heaters, washing machines, dishwashers, refrigerator ice-maker lines, and toilet supply lines are the usual suspects. Look for corrosion, wet spots, and hissing.
    • Drains second: a drain leak often shows up only while water is running — run each fixture and watch.
    • Roof and windows third: if the damage appears during or after rain, have someone watch the suspect area from inside while another person runs a hose over sections of roof or window trim from outside, one section at a time.

    Step 3: When you can’t find it, call a specialist — not a saw

    Hidden leaks inside walls and under slabs are exactly what leak-detection specialists exist for. They use thermal imaging cameras (wet areas hold temperature differently), acoustic listening devices (pressurized leaks make noise you can hear with the right equipment), and sometimes moisture meters to map the wet area. A good specialist pinpoints the leak so the repair opening is small instead of exploratory demolition. This is one of the best uses of a specialist in the whole water-damage world.

    Important Notice
    Don’t open walls blindly Cutting holes to hunt a leak risks hitting electrical wiring and pipes — and every exploratory hole is more damage to repair. Map it first, cut once.
    Disclaimer
    Informational only — not professional, medical, or insurance advice.
    This is general guidance for locating water sources, not a substitute for a qualified plumber or leak-detection professional. If water is near any electrical components, call a professional before investigating.

    Finding the leak

    Leak source by symptom
    SymptomLikely source
    Stain grows after rainRoof, flashing, or exterior penetration
    Constant damp regardless of weatherPlumbing supply or drain line
    Musty smell, no visible waterCondensation, poor ventilation, or slow hidden leak
    Water at the base of a wallFoundation seepage or grading problem
    Next Step & Source Attribution
    Continue navigating Water Damage Guides
    Source: Originally published at https://waterdamage.tygartmedia.com/find-the-leak/ · Author: William Tygart, Tygart Media · Last reviewed October 4, 2026.
  • How do I compare mold remediation quotes without getting ripped off?

    How do I compare mold remediation quotes without getting ripped off?

    Tygart Media · Water Damage Guides · Hiring help

    QUICK ANSWEROriginally published at waterdamage.tygartmedia.com · Reviewed October 4, 2026
    The short answer: compare quotes on scope, not price alone. Make every quote answer the same questions: what exactly gets removed and what stays, the drying equipment plan, whether they take moisture readings before and after, the containment plan, the timeline, and how they document the work for insurance. Red flags: a quote over the phone without seeing the job, no moisture readings, pressure to sign today, cash-only demands, no written scope. A qualified crew welcomes the comparison — they know what they’re selling.

    The questions every quote should answer

    1. What’s the scope? Which materials get removed and which get dried in place? “Remove the affected drywall and insulation, dry the framing, save the tile” is a scope. “Remediate the bathroom” is not.
    2. What’s the drying plan? What equipment, how many, for how long? Air movers and dehumidifiers sized to the space — not a box fan and a hope.
    3. Do you take moisture readings? Before, during, and after — with the numbers written down. This is the single biggest divider between professional and cosmetic work. The real sequence →
    4. What’s the containment plan? How do they keep mold and dust from spreading to clean areas during the work?
    5. Who fixes the moisture source? If the leak repair is separate from the remediation, who’s coordinating it? Mold cleaned without the source fixed comes back.
    6. How is the work documented? Photos, moisture logs, daily notes — this is what your insurance claim needs. A crew that documents professionally is doing you a favor twice.
    7. What’s the timeline and the price structure? Written scope, written price, written timeline. Verbal quotes evaporate.

    Red flags — walk away

    • A firm price quoted over the phone, sight unseen.
    • No moisture readings at any point.
    • Pressure to sign today (“this price expires if I leave”).
    • Cash-only or full payment up front.
    • No written scope of work.
    • Advice to file an insurance claim for damage that clearly isn’t there — or to inflate one that is. Honest contractors don’t do this, and it can come back on you.
    Editor's Note
    The cheapest quote is often the most expensive one A quote that’s half the others usually skipped something expensive: the containment, the drying equipment, the moisture verification, or the proper disposal. You pay for the skipped step later — in rework, in a denied insurance claim, or in mold that returns. What a good crew does that a bad one skips →
    Disclaimer
    Informational only — not professional, medical, or insurance advice.
    This is general guidance for evaluating contractor quotes, not a substitute for licensed professional advice. Verify any contractor’s license and insurance with your state’s licensing board before hiring.

    Comparing remediation quotes

    What to compare across mold remediation quotes
    Line itemRed flag if missing
    Containment + negative airYes — skipping this spreads spores
    HEPA filtration during workYes
    Post-remediation verificationYes — proof the job worked
    Moisture source fixThe biggest one — remediation without fixing the leak is theater
    Next Step & Source Attribution
    Continue navigating Water Damage Guides
    Source: Originally published at https://waterdamage.tygartmedia.com/compare-quotes/ · Author: William Tygart, Tygart Media · Last reviewed October 4, 2026.