Tag: Residential Restoration

  • Xactimate Sketch Workflows: Encircle vs DocuSketch Costs

    Xactimate Sketch Workflows: Encircle vs DocuSketch Costs

    Most restoration owners I know underestimate what their sketch workflow actually costs them. Not the per-claim app fee — the labor hour buried in every job where a tech spends 90 minutes measuring a flooded basement with a laser distance meter, then another 45 minutes back at the office rebuilding it in Xactimate Sketch. At a loaded labor rate of $45 an hour and ten water jobs a week, those 135 minutes per job add up to roughly $52,000 a year in tech hours tied up in measurement and sketch rebuild — a meaningful chunk of which is not directly billable. The sketch is the foundation of every line item Xactimate calculates — walls, floors, ceilings, missing wall openings, ceiling height multipliers — and if it’s wrong, the entire estimate inherits the error. So the question is not whether to invest in a sketch workflow. It’s which one.

    Why the sketch is the most expensive five minutes in restoration

    Four steps: phone capture, sketch in Xactimate, review, supplement
    Sketch is expensive when you redo it — capture once.

    Xactimate utilizes the sketch to drive line item quantities — square footage of drywall, linear feet of base trim, square footage of ceiling, paint surfaces, area for antimicrobial application. Get the ceiling height wrong by six inches in a 200-square-foot room and you’ve quietly undercut your paint and wall labor by roughly 100 surface square feet. Forget to draw a missing wall between a kitchen and a dining room and Xactimate treats them as two separate sealed rooms — doubling perimeter trim, ignoring shared dry-out airflow, and producing a scope that any seasoned adjuster will flag and ask you to redo.

    Common sketch errors compound: rushing through measurements without verification, failing to account for wall thickness, overlooking irregular features like soffits or knee walls, and using incorrect roof pitch on exterior sketches. The result is either lost revenue on your end (you underbilled) or a denial cycle on the carrier side (the adjuster sends it back and your cash conversion stretches). Either way, the sketch is where the money leaks out.

    The three sketch workflows actually used in the field
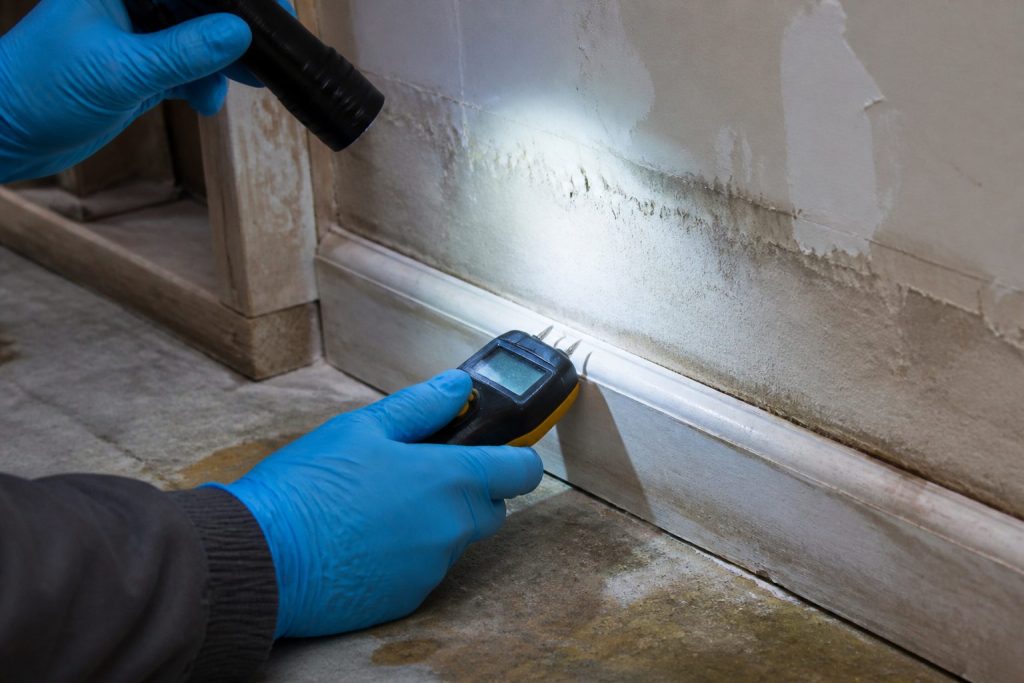
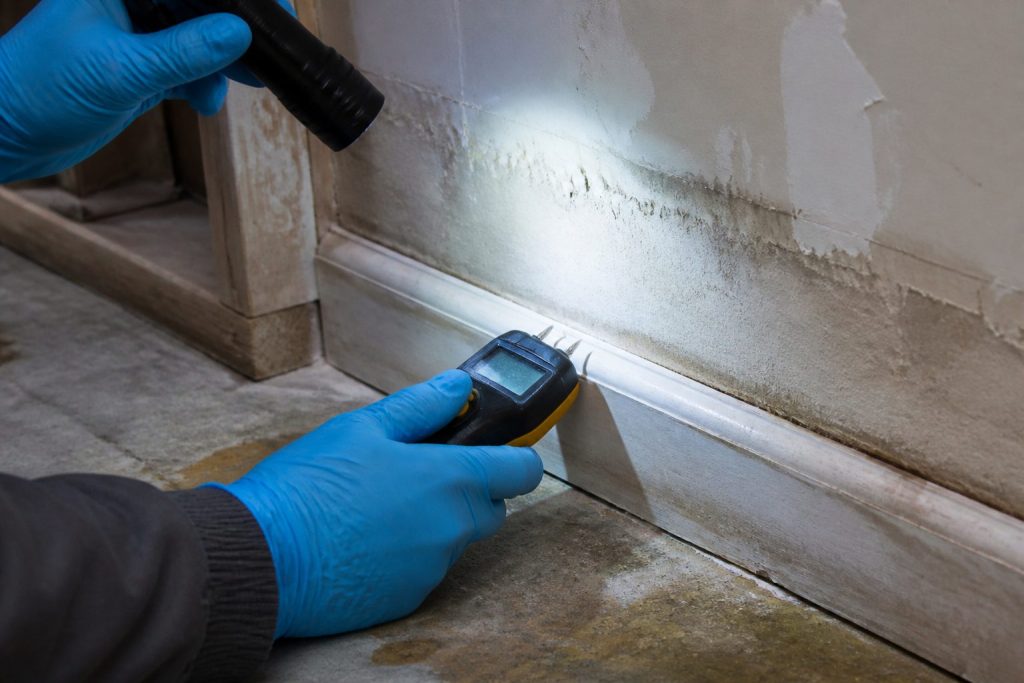
    Gloved hands using a pin-type moisture meter on wet drywall during inspection
    Three field workflows — pick one and train it.

    Despite a dozen marketing pitches, restoration contractors use one of three approaches. Each has a real cost and a real time profile.

    1. Manual Xactimate Sketch (laser distance meter + on-screen drawing)

    The default. A tech walks the loss with a Bosch or Leica laser, writes measurements on a clipboard or phone notes app, then either sketches on-site in the X1 mobile app or rebuilds it at the office. Cost is whatever you already pay for Xactimate (Professional runs around $185/month per user on subscription pricing as of early 2026, per Verisk’s published rates — verify on your own contract because Verisk negotiates).

    Realistic time for a competent tech on a 1,500-square-foot residential water loss: 45–60 minutes on-site for measurements and photos, plus 30–45 minutes back at the office to build the sketch in Xactimate. Call it 90 minutes total. The advantage: no extra software cost, full control. The disadvantage: every minute of that 90 is a minute a tech is not on another job, and your sketch accuracy depends entirely on how disciplined your tech is with a laser.

    2. Encircle Floor Plan

    Encircle’s floor plan product converts a smartphone video walkthrough into a Xactimate-ready ESX or FML import. Their published per-claim pricing is around $25 per claim as of 2026, with subscription bundles available — confirm current pricing with Encircle directly, as restoration software vendors revise tiered pricing frequently. Encircle’s marketing claims floor plans are delivered in under 6 hours, but in practice most users report same-day to next-morning turnaround.

    The actual workflow advantage is not the speed of delivery — it’s that your tech leaves the loss with a video, not a sketch. On-site time drops to roughly 15–25 minutes. The office labor for sketch rebuild drops to near zero because Encircle delivers an importable file. If you’re running 40 claims a month and trimming 60 minutes per claim, that’s 40 hours of tech labor recaptured — roughly $1,800 a month in labor against $1,000 in Encircle fees. The math works above about 25–30 claims a month.

    3. DocuSketch

    DocuSketch uses a 360 camera kit instead of a smartphone video. The contractor captures spherical photos at each room, uploads, and DocuSketch returns an ESX file. Per their public materials, ESX and FML files are typically delivered 1 to 3 days after capture. Per-claim cost at scale runs around $70 when amortizing the Express plan ($1,095/month), the $795 camera kit, and overnight delivery fees against 20 projects a month — based on DocuSketch’s published comparison materials.

    DocuSketch’s appeal is the 360 photo documentation that comes with the sketch — useful for supplement defense and for adjuster file packages. The disadvantage versus Encircle: slower turnaround (days, not hours), higher per-claim cost, and a camera kit your techs have to actually carry and use. For high-volume shops doing large losses and commercial work where 360 documentation has independent value, DocuSketch can earn its keep. For a typical residential water mitigation shop, the price-per-claim is hard to justify against Encircle.

    The bottom line for restoration owners
    White restoration work van with ladder rack parked at a suburban jobsite curb
    Bottom line: faster accurate sketches protect margin.

    If you’re under 20 claims a month, manual sketching is fine. Buy your techs better lasers and train them on Xactimate Sketch keyboard shortcuts (CTRL+click and drag to pull new rooms from existing ones is the single highest-leverage shortcut Xactimate ships). Sending a tech to one of the regular Xactimate fundamentals classes pays for itself the first month — it’s the cheapest sketch optimization you can buy.

    If you’re between 20 and 60 claims a month and most of your volume is residential water, Encircle Floor Plan is the obvious move. The labor recapture pays for the subscription several times over, and your techs spend less time at the office rebuilding sketches and more time at the next loss. Make sure your techs actually shoot the video correctly — Encircle’s output quality depends on input quality.

    If you’re north of 60 claims a month, running commercial losses, or losing supplements because your documentation packages are thin, evaluate DocuSketch alongside Encircle. The 360 documentation is a real defensible asset when you’re supplementing six months after the original scope. Some shops run both — Encircle for residential water mitigation, DocuSketch for commercial and large-loss reconstruction.

    One workflow truth nobody likes to say out loud: the sketch tool only matters if your techs use it consistently. The shops that get the most out of Encircle or DocuSketch are the ones where the office manager refuses to accept a claim file without a video or 360 capture. Without that enforcement, you’re paying for software and still rebuilding sketches at the office because half your techs forgot to use it.

    Pick the workflow that fits your claim volume, then enforce it. The sketch is the foundation of every line item Xactimate calculates. It’s worth more attention than most owners give it.

    Related on Tygart Media: Starlink on a water job · S500 in the van · local SEO for restoration.
  • Mitigation Reconstruction Handoff: Stop Losing Margin

    Mitigation Reconstruction Handoff: Stop Losing Margin

    This is the first cluster article in the Mitigation-to-Reconstruction Intelligence series, published under The Restoration Operator’s Playbook. If you haven’t read the pillar piece yet, start there.

    Email Me This Article

    The most expensive moment in restoration is invisible

    Walk a restoration job from the first call through the final walkthrough and ask an honest operator where the money is actually made or lost. The answers come back in different orders depending on who you ask, but one moment shows up on almost every list and almost never gets the attention it deserves.

    It is the moment the mitigation crew packs up the last air mover and the reconstruction estimator opens the file for the first time.

    Nothing dramatic happens in that moment. There is no signature. There is no transition meeting. On most jobs, the two teams never speak. The mitigation supervisor uploads the dryout report, the file moves into a different bucket in the operations system, and someone on the reconstruction side picks it up the next morning and starts trying to figure out what they are looking at.

    That moment, repeated across every loss the company touches in a year, determines more about whether the business runs at twelve percent net or twenty-two percent net than almost any other operational variable. And it is treated, in most companies, as a logistics problem.

    It is not a logistics problem. It is the most expensive economics problem in the industry.

    What the mitigation crew is actually doing — and why it costs the rebuild

    To see the economics clearly, watch the mitigation crew make the small decisions they make hour by hour on a Cat 3 water loss in a residential structure.

    The lead tech walks the affected area and decides what gets removed. Baseboards or no baseboards. Bottom two feet of drywall or full sheets. Carpet pad or carpet and pad. Cabinet kicks or cabinet boxes. Each of these decisions takes ninety seconds. Each of them is being made by a tech whose training, incentives, and tools are entirely oriented toward one thing: getting the structure dry as fast and as defensibly as possible.

    None of those decisions are being made with the reconstruction job in mind. The tech is not thinking about whether the homeowner has a continuous run of luxury vinyl plank that will need to be tied back into the unaffected area. The tech is not thinking about whether the cabinet line was a discontinued profile that the rebuild team is going to spend three weeks trying to source. The tech is not thinking about whether the drywall cut line they just made twenty-eight inches off the floor is going to look like a scar on a finished wall in a hallway with raked lighting. The tech is thinking about moisture content, about evaporation rates, about whether they have enough air movers staged. They are doing exactly the job they were trained and paid to do.

    Meanwhile, two days later, the reconstruction estimator opens the file and finds out what the tech decided. They find out that the cabinet kicks were removed but the boxes were left, which means the cabinets cannot be repaired in place and the homeowner is now looking at a full kitchen cabinet replacement instead of a partial one. They find out that drywall was cut at twenty-eight inches across three rooms with different ceiling heights, which means three different fix-up details and three different paint scopes instead of one. They find out that the LVP was removed from the affected area but not floated out to a natural transition line, which means a t-strip in a doorway the homeowner is going to notice every time they walk through it for the next ten years.

    None of these are mitigation mistakes. The crew did the mitigation correctly. They are reconstruction problems created by mitigation decisions made without reconstruction knowledge in the room.

    The estimator now has three choices. They can write the scope to do the job properly, which means a higher number than the carrier was expecting and a fight to get it approved. They can write the scope to fit what the carrier expects and absorb the difference internally, which means margin gets eaten on the reconstruction side. Or they can write a scope that cuts corners to hit the number, which means the homeowner ends up with a finished product that does not match what they had before, which means a complaint, a callback, or a one-star review.

    All three of those outcomes are the result of the same upstream cause: a mitigation decision made by someone who was not thinking about the rebuild.

    Why the industry has accepted this for so long

    The mitigation-to-reconstruction handoff problem is not new. Senior operators have known about it for decades. The reason the industry has lived with it is structural.

    For most of the industry’s history, mitigation and reconstruction were treated as two different businesses. Mitigation was the high-velocity, lower-margin response work. Reconstruction was the longer-cycle, higher-margin build-back work. Different skills, different equipment, different scheduling rhythms, often different licensing and insurance. A lot of companies chose to specialize in one or the other on purpose.

    That specialization made sense at the unit level. It still does, in many ways. But it also created an industry where the two halves of the same job evolved separately, with their own training pipelines, their own software, their own measurement systems. Mitigation companies got measured on dryout time and equipment efficiency. Reconstruction companies got measured on cycle time and gross margin. Almost no one got measured on whether the handoff between the two created or destroyed value.

    The handoff fell into a measurement gap. And anything that falls into a measurement gap in a service business eventually becomes the place where money quietly leaks.

    The other reason the industry has lived with this is that the leak is hard to see on a single job. A few extra hours of estimator time. A small upcharge that gets eaten somewhere. A homeowner who is mostly satisfied but writes a four-star review instead of a five-star. None of it is dramatic. None of it shows up as a single line item on a P&L. But across two thousand jobs a year, it adds up to a number that is large enough to be the difference between a company that is reinvesting in its operating system and a company that is treading water.

    What the best companies are actually doing

    The companies that have figured this out have made one of three structural moves. Each works. They are not the same move, and the choice depends on the company’s geography, capital position, and operational maturity.

    The first move is to bring both functions in-house. The same company does the mitigation and the reconstruction. The handoff becomes an internal handoff between two crews who answer to the same operations leader and whose incentives can be aligned by leadership choice. This is the cleanest solution and also the most expensive to set up. It requires the company to be good at two genuinely different operational disciplines instead of one. Companies that pull it off tend to dominate their markets, partly because of the operational integration and partly because the marketing story it produces — “the team that handed you back your home was the same team that responded the night of the loss” — is a strong story that resonates with homeowners who have been burned before.

    The second move is to keep mitigation and reconstruction separate but build deliberate handoff standards and train mitigation partners on them. This is the move that gets used by reconstruction-heavy companies who do not want to run a 24/7 mitigation operation but who depend on a network of mitigation partners. The reconstruction firm publishes a documented set of mitigation prep standards — how to cut, where to cut, what to remove, what to leave, how to document — and trains the mitigation companies they work with on those standards. The mitigation companies adopt the standards because the reconstruction firm is a reliable referral source for jobs they could not finish themselves. The reconstruction firm gets jobs that come in pre-prepped for the rebuild. Both sides benefit. The relationship is sticky.

    The third move is the inverse: a mitigation-heavy company builds the standards and trains its reconstruction partners on what kind of mitigation prep they have done so the rebuild side can take advantage of it. This is rarer because it requires the mitigation company to think like a reconstruction company, which most do not. But the few that do are differentiating themselves with reconstruction firms in their market who quickly learn that jobs prepped by this particular mitigation company are easier to estimate, easier to scope, and easier to close out. The mitigation company gets preferred status in the referral flow.

    All three moves reflect the same underlying insight. The handoff is too important to leave to chance. It has to be designed.

    What “designing the handoff” actually looks like

    The phrase “design the handoff” sounds abstract. In practice it is concrete and unglamorous. The companies doing it well have built their solution around five things.

    The first is a documented mitigation prep standard. Not a binder. A living document, version-controlled, that specifies how to make the cut decisions that have downstream reconstruction consequences. Where to cut drywall, how to handle baseboard removal, how to treat trim, how to manage flooring transitions, how to document existing conditions, how to handle cabinetry, how to handle ceiling textures, how to capture the small finish details that the rebuild team is going to need to match. The standard is written by someone who has done both sides of the job and updated whenever a recurring rebuild problem traces back to a mitigation decision.

    The second is photo and documentation discipline that is built around what the rebuild team needs to see, not just what the carrier needs to see. The mitigation crew is photographing for two audiences. The first is the adjuster who needs to validate the loss. The second is the estimator who needs to scope the rebuild. The photo set the rebuild team needs is different from the photo set the adjuster needs. Companies that have figured this out have a documented photo capture protocol that satisfies both. Companies that have not figured it out are still relying on whatever the mitigation tech happened to remember to shoot.

    The third is a structured handoff artifact. Some companies use a template form. Some use a software-driven handoff package. Some use a brief synchronous conversation between the mitigation supervisor and the reconstruction estimator at a defined point in the job lifecycle. The format matters less than the existence of the handoff. The point is that the rebuild team is not picking up a file and starting from a cold read.

    The fourth is a feedback loop. When the rebuild team encounters a problem that traces back to a mitigation decision, that information has to flow back to the mitigation team and into the standard. Without a feedback loop, the same mistakes get made on the next job. With a feedback loop, the standard gets sharper every quarter and the company’s effective handoff quality compounds over time.

    The fifth is shared metrics. The mitigation team and the reconstruction team need to share at least one number that they are both accountable for. The number that works in most companies is total job cycle time and total job margin, measured at the job level not the function level. Once both teams are sharing the same scoreboard, the conversations about the handoff stop being political and start being operational.

    None of these five things require new technology. They require operational seriousness. The technology, when it shows up, makes them faster and more consistent — but the underlying discipline has to exist first.

    Why this matters more in 2026 than it did in 2022

    The handoff problem is not new. The reason to address it now is that the consequences of ignoring it are getting more expensive every year.

    Carriers have been steadily tightening on scope discipline. The room a contractor used to have to absorb a couple of hours of estimator rework is shrinking as TPAs get more sophisticated about pattern detection across files. Homeowners have access to public reviews that travel further and faster than they did a decade ago, and a four-star review on a complex water loss tells the story of a handoff that did not quite work. Labor costs in both mitigation and reconstruction have continued to climb, which means every hour of avoidable rework is more expensive than it was. And the gap between the operationally serious companies and the operationally casual ones is becoming visible to the carriers in ways that translate into program placement and referral flow.

    The companies that fix the handoff in 2026 are going to compound the advantage for the rest of the decade. The companies that keep treating it as a logistics problem are going to wake up in 2028 and find that their margin profile has slowly drifted in the wrong direction without any single dramatic event they can point to.

    The honest place to start

    If you run a restoration company and you have read this far, the honest place to start is not a software purchase. It is a single afternoon spent walking the last ten completed reconstruction jobs with both the rebuild lead and the mitigation supervisor in the room.

    Pull the files. Walk the timelines. For each job, ask one question: was there a moment in the rebuild where we did extra work, made a concession, or had a homeowner complaint that traced back to a decision the mitigation team made — or didn’t make — at the front of the job?

    Most operators who run that exercise honestly come away with the same reaction. They knew the handoff was costing them. They did not know it was costing them this much. The afternoon turns into a working session on what a documented prep standard would actually look like, and the company starts the journey.

    It is one afternoon. It is the most valuable afternoon most restoration owners will spend this year.

    This is the first article in the Mitigation-to-Reconstruction Intelligence cluster under The Restoration Operator’s Playbook. The cluster goes deeper on the documented prep standard, photo protocols, the feedback loop architecture, and the carrier and TPA dynamics that reward companies who get this right.

    The Missed Line Items Pack — $19

    The estimating thread running through this article — scope items identified, line items defended, supplements that hold up with the carrier — is exactly what the pack is built for: Xactimate missed-line-item and supplement cheat sheets you can work straight from on your next water loss.

    Get the pack — $19
  • Re-Engage Past Homeowner Clients for Restoration Referrals

    Re-Engage Past Homeowner Clients for Restoration Referrals

    You spent somewhere between $150 and $500 to acquire them as a customer. They let your crew into their home during one of the worst weeks of their year. They watched how your company handled the stress, the communication, the insurance company, and the work. They paid the invoice and you never talked to them again.

    That’s the standard lifecycle for a residential restoration client. Job complete. File closed. Move on.

    It is also one of the most expensive mistakes in service business marketing.

    This guide is specifically for restoration company owners who want to re-engage their past homeowner client database — not to sell them anything, but to stay in the one place that generates the majority of residential restoration revenue: the mental file where people store companies they trust enough to recommend.

    The full strategy behind this is in Your CRM Is Not a Lead Database. This article focuses entirely on the homeowner — who they are after the job, how they think about your company, and exactly what to say to stay close to them without ever sending a sales email.


    What a Past Homeowner Client Actually Knows About You

    Before you decide what to say, understand what you’re working with.

    A past homeowner who had water damage, fire damage, or mold remediation knows things about your company that no amount of advertising can convey:

    • Whether your crew showed up when they said they would
    • Whether your project manager communicated clearly during a stressful situation
    • Whether you dealt with the insurance company honestly and professionally
    • Whether the final result matched what was promised
    • Whether they felt like a number or a person during the process

    If the job went well, that homeowner has a level of personal, experience-based trust in your company that no review, ad, or testimonial can manufacture for a stranger. They are your best possible referral source — and most restoration companies never contact them again after the final invoice.

    The homeowner who experienced a good restoration job doesn’t need to be sold on you. They need to be reminded you exist when the question comes up.


    The Referral Moment: When It Happens and How to Be Ready

    Referrals from past homeowner clients in restoration follow a predictable trigger pattern. Someone in their life — a neighbor, a family member, a coworker — experiences a property damage event and asks if they know a good company. Or they see water damage in a friend’s home at a dinner party. Or a Facebook group post asks “does anyone know a good restoration company in [city]?”

    In that moment, your company’s name either comes up or it doesn’t. The deciding factor is not the quality of your work — it’s whether your name is still accessible in their memory.

    Memory fades. The homeowner whose crawlspace you dried out two years ago has had two years of other companies, experiences, and information go through their head since then. Your name is still there, but it’s not on top. A single relevant, human email can move it back to the surface — and keep it there for the next six months.

    This is why the timing of your re-engagement touches matters. You want to be in their inbox in the six weeks before they’re most likely to get the referral question: pre-storm season, pre-winter freeze, late summer when people are finishing renovations and talking about their homes.


    The Homeowner Re-Engagement Framework: Four Touches That Work

    Side-by-side comparing a pitch dump with value-first contact habits
    The homeowner re-engagement framework — four touches.

    None of these emails ask for anything directly. They don’t include CTAs, offers, or discounts. They are human moments that remind the homeowner your company is real, active, and cares about the people it’s worked with.

    Touch 1: The Hiring Referral Ask

    This is the full template and strategy from The Hiring Email Guide. The key adaptation for homeowners: keep it personal, reference the job you did for them if you have the data, and make it clear you value their opinion specifically.

    Why it works for homeowners specifically: most people feel genuinely pleased when a company they liked asks for their help. It confirms that the relationship mattered, not just the transaction. And it gives them something concrete to do for you — which strengthens the connection in both directions.

    Touch 2: The Pre-Season Safety Resource

    A one-page checklist relevant to the season and your service area. Before winter freeze: pipes, outdoor faucets, sump pump, HVAC filters, emergency shutoff location. Before storm season: gutters, roof inspection, tree branches near the house, sump pump backup power. Before dry season in wildfire-prone areas: defensible space, ember-resistant vents, gutter debris.

    The email copy is simple: “As we head into [season], I wanted to send along a quick checklist for your home. This is the stuff our crews see preventable damage from every year. Hope it’s useful.” Link to a longer blog post if you have one. No offer. No CTA. Three sentences.

    Touch 3: The Neighbor / Community Check-In After a Local Event

    When a major weather event, storm, or flood affects your service area, email your homeowner database within 48 hours. Not to generate leads — to be human. “We had a lot of calls come in after the [event] this week. If you or anyone nearby had any water get in, don’t hesitate to reach out. We’re also happy to give a free look at anything you’re not sure about.”

    This email serves two purposes. For homeowners who weren’t affected, it’s a reassuring reminder that you’re active and nearby. For homeowners who were affected or know someone who was, it’s a perfectly timed offer. The lead-gen outcome is real but secondary — the primary value is showing up when the community needs it.

    Touch 4: The Annual Thank-You

    Once a year, send a short personal note. Company anniversary. Year-end. Start of a new year. Something that says: “We’ve been at this for [X] years / We just finished our busiest year / As we head into [year], I wanted to thank the people who’ve trusted us with their homes.” Short. Personal. From the owner.

    This is the email that gets forwarded. It’s the email that the homeowner’s spouse reads over their shoulder and says “that’s a nice company.” It’s the email that sits in their inbox for three days before they archive it, because it’s hard to throw away something that made them feel good. It doesn’t ask for anything. That’s why it works.


    The Data You Need and Where to Find It

    The homeowner re-engagement strategy requires three pieces of data per contact: name, email address, and job type. Everything else is bonus.

    In ServiceTitan: Navigate to Customers → Export. Filter by customer type (Residential) and job type (Water / Fire / Mold). Export includes name, email, job date, job type, and address. This is your homeowner segment.

    In Jobber: Go to Clients → Export. Filter by client tag or service type if you’ve been tagging jobs. If you haven’t been tagging, export all residential clients and sort manually by job description.

    In a spreadsheet-based system: Your completed job list is your database. Sort by date, filter to residential, and pull the contact info. If you only have phone numbers and no emails, a 30-second re-engagement call (“We’re updating our contact records — can I get the best email for you?”) adds significant long-term value. Make it part of your job closeout process going forward.

    One piece of bonus data that dramatically improves the homeowner email: the job type. “We worked with you on your water damage job” is far more personal than a generic greeting. Even a simple job-type column in your export — Water / Fire / Mold / Storm — lets you add one sentence of relevant, personal context that makes the email feel like it came from someone who actually remembers the job.


    The Copy: Homeowner Version Templates

    These are written for the owner to send directly. Plain text. Short. Human.

    The Water/Fire/Mold Job Acknowledgment (for when you have job data)

    Subject: Quick note from [Company Name]

    Hi [First Name],

    It’s [Your Name] from [Company Name]. We had the pleasure of working with you on your [water damage / fire damage / mold issue] on [street or neighborhood] — hoping everything has held up well since then.

    I’m reaching out because we’re [hiring / looking for a sub / putting together our community resource list] and I find that the best leads on great people usually come from the people whose homes we’ve worked in. If anyone comes to mind — a family member, a neighbor, a friend looking for a good company or good work — I’d love to hear from you.

    Either way, thank you for letting us be part of getting your home back to normal. It’s work we take seriously.

    [Your Name]
    [Phone]


    The Pre-Season Safety Version

    Subject: Before freeze season — quick home checklist from us

    Hi [First Name],

    As we head into winter, I wanted to send along a quick checklist — the stuff our crews see people wish they’d done before the cold hit.

    Three things worth checking this week:
    1. Know where your main water shutoff is (and test it)
    2. Disconnect garden hoses and drain outdoor faucets
    3. Check your sump pump — run a bucket of water through it

    We wrote up a longer version here if it’s useful: [link to blog post]

    Stay warm — and if you ever need anything, we’re always here.

    [Your Name]
    [Company Name]
    [Phone]


    The Post-Storm Check-In

    Subject: Checking in after the [storm/flooding/event] this week

    Hi [First Name],

    With everything that happened this week in [city/region], I wanted to reach out to the homeowners we’ve worked with in the past just to check in.

    If you had any water get in — or if someone you know did — we’re here. We can swing by for a free look at anything you’re not sure about. No obligation, just want to help if it’s useful.

    Hope you and yours came through it fine.

    [Your Name]
    [Company Name]
    [Phone]


    Using Claude to Personalize at Scale

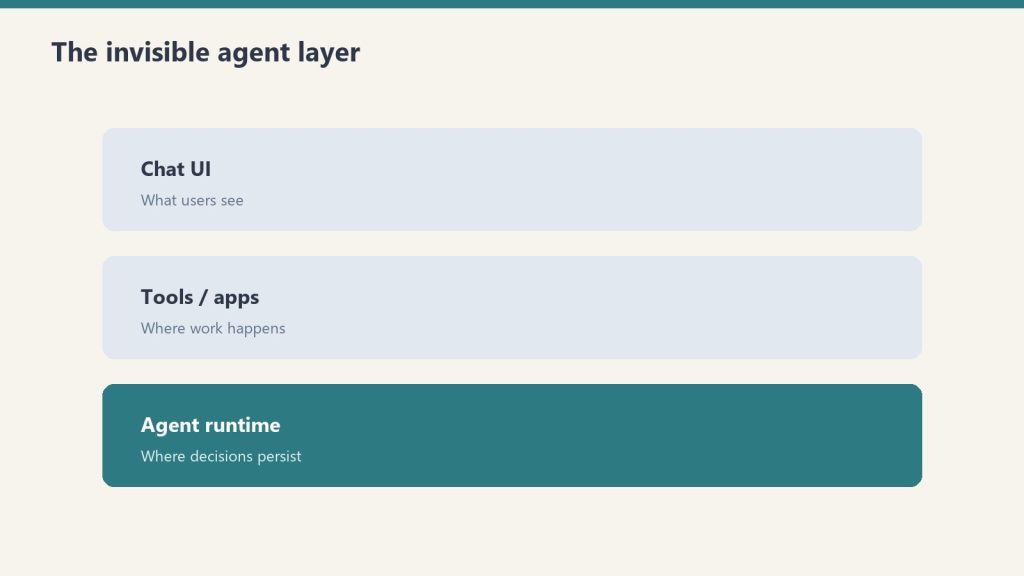
    Three stacked layers: chat UI, tools, agent runtime
    Using Claude to personalize at scale.

    If you have a database of 300+ past homeowner clients, personalizing every email manually isn’t realistic. But the difference between a generic blast and a mildly personalized email is significant — and Claude can help you close that gap at scale without coding.

    Here’s the practical workflow:

    1. Export your homeowner list with at minimum: First Name, Job Type, Neighborhood or Street (not full address), Completion Date
    2. Open Claude at claude.ai and paste the following prompt:

    “I’m going to give you a list of past restoration clients. For each one, write a personalized version of the following email template, inserting the First Name, referencing the Job Type naturally (e.g., ‘your water damage job’ or ‘after the fire at your place’), and if the job was more than 18 months ago, add a line like ‘it’s been a while since we talked.’ Keep each version under 150 words. Template: [paste template]. Client list: [paste CSV rows, 20 at a time].”

    1. Copy each personalized version into your email platform as a separate email, or use mail merge if your platform supports it
    2. Review 10% of outputs before sending — Claude’s personalization is reliable but not perfect, and a weird phrasing on a homeowner email is worse than no personalization at all

    This process adds 45–90 minutes to the campaign setup but meaningfully increases the human feel of the emails. The reply rates for personalized homeowner outreach are consistently higher than generic blast versions.


    Frequently Asked Questions

    Is it weird to contact a homeowner years after their job is done?

    Only if the email feels like a sales pitch or they don’t remember who you are. If the email is genuinely human, references the job briefly, and doesn’t ask for their business, most homeowners respond positively. People like hearing from companies they had a good experience with. The ones who don’t want to hear from you will unsubscribe, which is useful information.

    What if we don’t have email addresses for most past clients?

    Start collecting them systematically from today — at job intake, at closeout, and during the final walkthrough. For your existing database, a brief re-engagement call works: “We’re updating our records, can I get the best email for you?” Many homeowners will give it. Even building to 40–50% email coverage on your historical database is hundreds of warm reach opportunities.

    How do we handle homeowners who had a bad experience?

    Don’t filter them out manually at first — you may not remember every job. If someone who had an issue unsubscribes or replies with a complaint, handle it directly and professionally. A private, personal response to a complaint that surfaces through a re-engagement email is often more relationship-repairing than the original issue was damaging. But if you know a specific job went badly, use your judgment on whether to include them.

    Should we segment by job type (water vs. fire vs. mold)?

    For general touches like the seasonal safety email or the company milestone, no — the message is the same. For highly specific touches (e.g., a resource specifically about mold prevention in humid climates), segmenting by job type allows you to reference their specific experience. If your email platform supports segmentation and you have the data, do it. If it adds complexity that would prevent you from sending at all, skip it — a non-segmented send is better than no send.


  • Crawl Space Dehumidifier Cost: Unit & Install Prices

    Crawl Space Dehumidifier Cost: Unit & Install Prices

    The Distillery
    — Brew № 2 · Crawl Space

    Updated September 30, 2026.

    Direct answer: Crawl-space-rated dehumidifiers run about $567–$2,236 for the unit at verified September 2026 retail, plus $150–$600 for hang, drain, and a new 15A circuit when needed—typical 70-pint-class installs land near $1,650–$2,850. Plan on roughly $145–$330/year in power at the U.S. EIA 2025 residential average of 17.3¢/kWh, depending on wattage and run hours.

    Spec E070, E100, Santa Fe Compact70/Advance2, or AlorAir Sentinel on new work—legacy 1820/1850 lines are discontinued. Box-store portables lack crawl duty cycle, low-temp rating, and hard-plumbed drains.

    Unit Cost by Capacity and Brand

    AHAM = 80°F / 60% RH. Retail spans are from manufacturer or authorized dealers, not installed bids.

    Model Capacity Min Temp Unit Cost Best For
    Aprilaire E070 70 pint/day ~40°F $1,677–$1,799 Sealed crawls to ~2,200 sq ft
    Santa Fe Compact70 70 pint/day 38°F $1,299–$1,379 Tight height; R454B
    AlorAir Sentinel HDi65S 55 pint/day 33.8°F $567–$756 Low retail; built-in pump
    Aprilaire E100 100 pint/day ~50°F $1,878–$2,236 1850 replacement; heavy load
    Santa Fe Advance2 90 pint/day 49°F $1,380–$1,903 Mid-large crawls
    AlorAir Sentinel HDi90 90 pint/day 33.8°F $872–$975 Mid-large; pump included

    Installation Cost Components

    • Electrical ($0–$600): Dedicated 15A/115V circuit. Existing crawl outlet: $0 add-on. New homerun: $300–$600—still the biggest swing item; confirm before you budget.
    • Mounting ($100–$250): Hang from joists or frame a platform above the liner; never set the cabinet on the vapor barrier.
    • Condensate ($50–$200): Gravity to sump or drain when possible; add $80–$150 in pump hardware when the unit sits below the discharge point. Many Sentinel models include a pump.

    Total Installed Cost Summary

    Scenario Unit Electrical Mount + Drain Total
    Existing outlet, gravity drain $1,299–$1,716 $0 $150–$350 $1,450–$2,070
    New 15A circuit $1,299–$1,716 $300–$600 $150–$350 $1,750–$2,670
    New circuit + pump path $1,299–$1,716 $300–$600 $250–$500 $1,850–$2,820
    Aprilaire E100 + new circuit $1,878–$2,236 $300–$600 $150–$350 $2,330–$3,190

    Annual Operating Cost

    • 70-pint class (~580–650 W): About $145–$165/year at 4 hours/day run time, or $290–$330/year at 8 hours/day, at 17.3¢/kWh (EIA 2025 U.S. residential average).
    • 90-pint class (~800 W): About $200–$400/year at the same duty cycles.
    • High-rate states (25–35¢/kWh): Multiply by roughly 1.4–2.0.

    Log RH 30 days after commissioning—crawl space humidity monitor placement catches undersized units before mold does.

    Contractor vs. DIY

    Bids still bundle dehumidifiers at $1,500–$3,500 installed. DIY on the same SKU saves roughly $300–$700 when outlet and drain exist; you own code, hang, and warranty. See crawl space encapsulation cost.

    Frequently Asked Questions

    How much does a crawl space dehumidifier cost?

    Expect roughly $567–$2,236 for the unit alone at verified 2026 retail, depending on brand and capacity. Total installed cost with mounting, condensate routing, and a new 15A circuit when needed usually lands near $1,650–$2,850 for a standard 70-pint class system. Encapsulation contractors often quote $1,500–$3,500 for the dehumidifier line item, which may bundle electrical, commissioning, and service.

    What is the cheapest crawl space dehumidifier that actually works?

    The AlorAir Sentinel HDi65S is the lowest verified retail price in this class—about $567–$756 direct from AlorAir—with a built-in pump, auto defrost, and roughly 33.8°F minimum operating temperature. It is rated 55 pints/day at AHAM (80°F, 60% RH), not 70, so size it conservatively. Warranty and distributor support are thinner than AprilAire or Santa Fe; weigh that if you are far from a wholesaler.

    Is it cheaper to run an HVAC supply duct than a dehumidifier?

    Cheaper upfront: tying a small supply register from existing forced-air HVAC into the crawl often runs $300–$600 installed versus $1,650–$2,850 for a dedicated dehumidifier on typical retail plus labor. Operating cost stays lower too because you are piggybacking on the central system. In humid Southeast and Gulf climates, supply-only rarely holds RH below 60% year-round; verify with a logger before you skip mechanical dehumidification.

    Do I need a dedicated electrical circuit for a crawl space dehumidifier?

    Yes—a dedicated 15A, 115V circuit is standard. Many 70-pint class units draw about 5–6 amps running (roughly 580–650 watts). If a GFCI-protected outlet already exists in the crawl, electrical add-on cost is $0; pulling a new homerun from the panel typically adds $300–$600 in labor and materials in 2026 markets.

    How much does it cost to run a crawl space dehumidifier per year?

    At the U.S. EIA 2025 residential average of 17.3¢/kWh, a 580-watt unit running 8 hours/day averages about $290/year; 4 hours/day averages about $145/year. A 90-pint class unit near 800 watts at the same duty cycles runs about $200–$400/year. High-cost states at 25–35¢/kWh roughly double those figures.


  • Black Mold in Crawl Space: What It Is & How to Fix It

    Black Mold in Crawl Space: What It Is & How to Fix It

    The Distillery
    — Brew № 2 · Crawl Space

    “Black mold” is one of the most fear-inducing phrases in home ownership — and one of the most misused. When a home inspector, contractor, or alarmed homeowner reports “black mold” in a crawl space, it rarely means the Stachybotrys chartarum that has become synonymous with toxic mold in public consciousness. In the vast majority of cases, what appears as black growth on crawl space joists is Cladosporium, Aspergillus niger, or Trichoderma — common environmental molds that are black or dark-colored but are not Stachybotrys, do not produce the same mycotoxins, and are not classified as the highly toxic species that media coverage has made synonymous with “black mold.” Understanding the distinction — and the response — protects homeowners from both false alarm and genuine health risk.

    What “Black Mold” Actually Means

    The color of a mold does not identify its species. Dozens of common mold species produce dark — green-black, olive-black, or true black — pigmentation. The color results from melanin production in the mold’s outer spore layer, which serves as UV protection. Molds that are black in color include:

    • Cladosporium: One of the most common indoor and outdoor mold genera worldwide. Produces dark green to black colonies. Found on virtually every crawl space inspection with elevated humidity. Not classified as a high-risk toxin producer. Causes allergic responses in sensitive individuals but is not the “toxic black mold” of media coverage.
    • Aspergillus niger: Produces black-spored colonies. Common environmental mold. Some Aspergillus species produce aflatoxins and other mycotoxins at high concentrations but A. niger specifically is not among the highest-concern species.
    • Trichoderma: Dark green to black or white-green colonies. Very common in damp wood environments including crawl spaces. Not a significant mycotoxin producer in most species.
    • Stachybotrys chartarum: The actual “toxic black mold.” Black, slimy colonies. Grows specifically on chronically wet cellulose materials (paper, cardboard, ceiling tiles, wallboard) — not typically on wood surfaces, which is why it is less common in crawl spaces than in water-damaged drywall. Its growth requires sustained liquid water contact with cellulose over weeks to months — not just elevated humidity.

    Is Stachybotrys Actually Present in Crawl Spaces?

    Stachybotrys can appear in crawl spaces, but it is less common than in above-grade water damage scenarios because:

    • Structural wood (joists, sill plates, beams) is not the preferred substrate for Stachybotrys — it prefers cellulose-rich materials with lower lignin content (paper facing, cardboard, drywall)
    • The kraft paper facing on deteriorating fiberglass insulation in a wet crawl space is a more likely Stachybotrys substrate than the wood itself
    • Stachybotrys requires sustained liquid water contact to establish — not just elevated humidity. A crawl space with condensation and 80% RH may support abundant Cladosporium, Aspergillus, and Penicillium but not Stachybotrys unless there is direct water wetting of organic materials

    This does not mean Stachybotrys is impossible in crawl spaces — it appears on wet insulation backing, on stored cardboard, and occasionally on severely water-damaged wood. But the presence of black mold growth in a crawl space is not a reliable indicator of Stachybotrys specifically — visual inspection cannot distinguish between species.

    How to Identify Stachybotrys vs. Common Black Molds

    The only reliable way to distinguish mold species is laboratory analysis. Visual differentiation is not reliable — a trained mycologist can make educated guesses based on colony morphology, growth pattern, and substrate, but cannot definitively identify species by looking at them. Options for testing:

    • Surface sampling (tape lift or swab): A sample from the affected surface is analyzed by a certified laboratory using microscopy or culture. Cost: $30–$75 per sample from a DIY kit (Zefon, Pro-Lab), $150–$300 per sample from a professional industrial hygienist. Results identify genus and sometimes species.
    • Air sampling: An ImpingerAir or similar device draws a measured volume of air through a collection cassette that captures spores. Analysis identifies airborne species and concentrations. Cost: $200–$400 per air sample location from a professional. More informative for indoor air quality assessment than surface samples.
    • ERMI (Environmental Relative Moldiness Index): A standardized DNA-based dust sample analysis that identifies 36 mold species from a single dust sample. Cost: $200–$300 per home sample. Provides the most comprehensive species identification from a single collection.

    The Appropriate Response — Regardless of Species

    Here is the practical reality: the correct response to visible black mold growth in a crawl space is the same whether it is Cladosporium or Stachybotrys — address the moisture source, remediate the visible mold, and prevent recurrence through encapsulation. The urgency and the protection level used during remediation may differ (Stachybotrys warrants full respiratory protection and containment; Cladosporium warrants at minimum an N95 and protective clothing), but the fundamental response is identical.

    Testing for specific species before deciding whether to remediate is rarely necessary. The presence of any significant visible mold in a crawl space — regardless of color or species — is a moisture problem that requires the same treatment: address the humidity source, remediate the mold, prevent recurrence. The species identification is more relevant to health impact assessment for specific occupants (particularly immunocompromised individuals) than to the remediation decision itself.

    When Species Identification Matters

    Species testing is warranted in specific circumstances:

    • An occupant of the home has been experiencing unexplained neurological symptoms, chronic fatigue, or other symptoms consistent with mycotoxin exposure at high concentrations — a physician has requested specific mold species identification
    • Insurance claims where Stachybotrys confirmation affects coverage determination
    • Litigation or legal proceedings where species identification is relevant to causation assessment
    • A contractor is proposing significantly more expensive “toxic mold remediation” scope than standard mold remediation — verify whether Stachybotrys is actually present before accepting the premium scope

    Frequently Asked Questions

    How dangerous is black mold in a crawl space?

    Black-colored mold in a crawl space is most commonly Cladosporium, Aspergillus, or similar common environmental species — not Stachybotrys, the mycotoxin-producing species associated with “toxic mold.” All visible mold in a crawl space warrants remediation and moisture control because any significant mold load contributes to indoor air quality problems via the stack effect. The species-specific danger level varies, but the correct response is the same: remediate and address the moisture source.

    How do I test for black mold in my crawl space?

    A tape lift or swab surface sample analyzed by a certified laboratory identifies the mold species. DIY kits (Zefon, Pro-Lab) cost $30–$75 per sample; professional industrial hygienist testing costs $150–$300 per sample. Air sampling ($200–$400 per location) identifies airborne species concentrations. ERMI dust testing ($200–$300) provides the most comprehensive species profile from a single sample. Testing before remediation is not always necessary — the response is similar for most species.

    Can I remove black mold from a crawl space myself?

    For limited surface mold (under 25% of joist surfaces) without confirmed or suspected Stachybotrys: DIY remediation with proper PPE (N95 respirator, Tyvek coveralls, gloves, eye protection), HEPA vacuuming, borate treatment, and post-treatment encapsulation is reasonable. For extensive mold, confirmed Stachybotrys, or occupants with immune compromise or known mold sensitivity: professional remediation is strongly recommended. Any DIY remediation must be paired with addressing the moisture source — otherwise mold returns within months.


  • Crawl Space Floor Joist Repair: Costs & Sistering Guide

    Crawl Space Floor Joist Repair: Costs & Sistering Guide

    The Distillery
    — Brew № 2 · Crawl Space

    Floor joist damage in a crawl space — from moisture, pest activity, or structural overloading — is one of the most consequential findings a crawl space inspection can reveal. Unlike cosmetic issues, a compromised floor joist affects the structural integrity of the floor above and, if deterioration progresses, the safety of the occupants. Understanding when a joist needs sistering versus full replacement, what the work actually involves, and what it costs allows homeowners to evaluate contractor proposals from an informed position and prioritize repairs appropriately.

    When Joists Need Repair: The Assessment Framework

    The threshold for joist repair is determined by the extent of structural fiber loss, not by appearance alone. A joist that appears dark or discolored but passes the probe test (awl resistance is normal — the joist resists penetration) is structurally sound. A joist that allows easy awl penetration has lost structural fibers and requires repair regardless of surface appearance.

    • No probe failure, wood MC below 19%: Sound joist. Clean surface mold with appropriate treatment; address moisture source. No structural repair needed.
    • No probe failure, wood MC 19–25%: Elevated moisture creating conditions for future decay. Address moisture source immediately; treat with borate; monitor. No structural repair yet, but urgent moisture remediation.
    • Probe failure affecting less than 25% of joist depth at any cross-section: Partial structural loss. Sistering a full-length new joist alongside the damaged member is appropriate.
    • Probe failure affecting more than 25% of joist depth, or spanning more than 24″ along the joist length: Significant structural loss. Full replacement or sistering with upgraded member size may be needed. Structural engineer assessment recommended for severe cases.

    Sistering: How It Works

    Sistering is the process of attaching a full-length new structural member alongside a damaged or undersized existing joist. The new member is the same depth as the original and spans the full distance between bearing points (typically wall to wall or wall to beam). It is attached to the existing joist with structural nails or structural screws (16d ring shank nails at 12″ spacing, or equivalent structural screws) over the full length.

    The sister joist:

    • Must be the same nominal depth as the existing joist (a 2×10 sister alongside a 2×10 original)
    • Must span between the same bearing points as the original — a sister that does not reach the full span provides no structural benefit
    • Must be pressure-treated lumber (PT) if it will be in contact with concrete at either bearing end, or in a high-moisture environment
    • Should be pre-treated with borate (Tim-bor) before installation in crawl spaces with a history of moisture or pest activity

    Full Joist Replacement vs. Sistering

    Sistering is preferable to full replacement in most situations because it:

    • Can be accomplished without removing the subfloor above
    • Adds structural capacity rather than simply restoring it (the combined section is stronger than either member alone)
    • Is faster and less expensive than full replacement

    Full replacement is required when:

    • The existing joist has lost so much structural fiber that it cannot safely carry its load during the sistering process (collapse risk during construction)
    • The joist is in a location where access prevents installing a full-length sister (a plumbing stack or HVAC trunk running through the joist bay)
    • The damage pattern is so extensive that sistering would not provide adequate repair (complete hollow gallery from termite activity, for example)

    Cost Per Joist: What to Expect

    • Material cost per sister joist (2×10, 14′): $25–$45 for pressure-treated lumber
    • Labor to install one sister joist in a standard-height crawl space: $150–$350 per joist, including temporary shoring if needed, nailing/screwing, and cleanup
    • Total per-joist cost installed: $175–$400
    • Discount for volume: Contractors typically discount per-joist cost when multiple joists in the same section are being sistered — 8–10 joists in one area may run $100–$180 each rather than $175–$400 for single-joist work
    • Low-clearance premium: Crawl spaces under 24″ of clearance add 30–50% to labor cost per joist

    How to Evaluate a Joist Repair Proposal

    • Does the proposal specify the lumber grade and species? Structural joists must meet minimum bending strength — #2 Southern Yellow Pine or Douglas Fir are the standard; premium-grade lumber is not required but the grade should be specified
    • Is pressure-treated lumber specified for bearing ends or high-moisture applications? Standard framing lumber in contact with concrete or in a previously wet crawl space is inadequate
    • Does the sister span full length between bearing points? A sister that spans only 6 feet of a 12-foot joist provides no meaningful structural benefit — ask for the proposed sister length
    • What fastening method is specified? Hand-nailing 16d ring shank nails or structural screws at 12″ spacing is appropriate; pneumatic nails at wide spacing or staples are not
    • Is temporary shoring included? If the existing joist is significantly compromised, the floor above must be supported during sistering to prevent movement

    Frequently Asked Questions

    How do I know if my crawl space floor joists need repair?

    The most reliable test: push a sharp awl firmly into the bottom face of the joist. Sound wood resists penetration — you cannot push more than 1/16″–1/8″ with significant force. Wood with structural loss from decay allows easy penetration of 1/4″ or more. Also look for: floors that bounce or deflect noticeably when walked on, visible sagging in the floor structure when viewed from the crawl space, and wood moisture content above 19% (measured with a pin-type moisture meter).

    How much does it cost to sister a floor joist in a crawl space?

    Typically $175–$400 per joist installed, depending on crawl space clearance, joist length, and local labor rates. Volume discounts apply when multiple joists in the same area are being sistered. Low-clearance crawl spaces (under 24″) carry a 30–50% labor premium. A section of 8–10 joists all requiring sistering may cost $1,200–$3,500 as a packaged scope.

    Can sistered joists fix a bouncy floor?

    Yes, in most cases — sistering adds structural capacity that reduces mid-span deflection and eliminates the bouncy sensation. A floor that bounces because the joists are undersized for the span (common in older homes) can be significantly improved by sistering with same-size or larger lumber. A floor that bounces because the mid-span support beam has settled or the joists have lost structural integrity to decay responds well to sistering after the moisture source is addressed.


  • Crawl Space Humidity Monitor: Top Devices & Placement

    Crawl Space Humidity Monitor: Top Devices & Placement

    The Distillery
    — Brew № 2 · Crawl Space

    Updated September 30, 2026.

    Place a data-logging hygrometer at center-span height (12–24 inches above the floor) in your crawl space, target below 60% RH (below 50% for sealed encapsulation), and read trends over weeks—not a single visit—to verify whether vapor control, dehumidification, or bulk water is driving moisture.

    Logged RH over time separates summer condensation from rain-driven bulk water—the verification step after crawl space vapor barrier installation and dehumidifier commissioning. This guide covers device choice, placement, and how to read the curve.

    What to Look for in a Crawl Space Humidity Monitor

    Data logging capability

    Spot readings show conditions when you are standing there; logging shows what happens overnight and after weather events. Aim for at least 30 days of history for encapsulated performance checks. On vented crawls, logging separates condensation (summer RH tracks outdoor humidity) from liquid entry (RH jumps within a day or two of rain).

    Temperature range

    Cold crawls can sit below freezing. Many consumer units are rated to 32°F; the Onset HOBO MX1101 operates to -4°F per Onset specs. SensorPush HT.w and similar models claim -40°F—useful when LCDs go blank but logging continues.

    Wireless display and alerts

    Bluetooth sensors store data until a phone syncs—fine if someone passes within range regularly. Add a WiFi gateway (Govee gateway, SensorPush G1) for remote alerts. After a crawl space inspection checklist, a logger you download once may be enough.

    Recommended Device Types

    • Govee H5075 ($20–$35): ~20 days onboard storage; CSV export in Govee Home. Bluetooth only unless you add Govee’s WiFi gateway.
    • SensorPush HT.w ($55–$65 + optional G1): Water-resistant; ~45 days onboard per manufacturer; -40°F to 140°F rated.
    • Inkbird IBS-TH Plus ($18–$30): Compact Bluetooth loggers for tight crawls—confirm storage duration in the manual for your model.
    • Onset HOBO MX1101 ($95–$130): Research-grade accuracy; large memory; -4°F operating range per Onset.
    • ThermoPro TP49 / AcuRite ($10–$20): Spot display, little history—OK for peeks through the access door, not trend proof.

    Where to Place the Monitor

    • Primary sensor: Center of the crawl at 12–24 inches above the floor, suspended from a joist—ambient air, not floor surface or rim joist microclimate.
    • Wall diagnostic (optional): Within 6 inches of the foundation wall. Higher RH at the wall than center span flags wall moisture—review vapor barrier thickness and drainage if encapsulating.
    • Near HVAC: Confirms whether equipment zones see corrosion-driving RH when center span looks fine.
    • Away from: Supply air discharges, bare soil contact, condensate drips, sump splash, and open vents that create localized drafts or sun-heated pockets.

    Interpreting Readings

    • Below 50% RH: Strong performance for a sealed, dehumidified crawl. Document the log for your file and recheck seasonally.
    • 50–60% RH: Acceptable for many targets. Sustained time above 65% may mean dehumidifier setpoint, sizing, or leakage—tight sealing changes load (crawl space encapsulation energy savings).
    • 60–70% RH: Elevated—check dehumidifier, liner breaches, plumbing, sump before calling it normal summer.
    • Above 70% RH: Mold and decay risk. Encapsulated systems should not sit here; vented crawls need assessment (crawl space repair cost follows the mechanism, not the number on a chart).
    • RH spikes after rain: Bulk water—grading, gutters, drains, liner penetrations.
    • Summer peaks without rain: Vented-crawl condensation pattern in humid climates.

    Frequently Asked Questions

    What is a good humidity level for a crawl space?

    Below 60% relative humidity is the usual target for crawl spaces — it limits mold risk and keeps wood moisture content below decay thresholds. Below 50% is a common setpoint for a sealed, dehumidified crawl space after encapsulation. Above 70% means conditions can support mold growth and wood deterioration; treat that as a problem to investigate, not normal seasonal drift.

    How do I check the humidity in my crawl space?

    Hang a digital hygrometer in the center of the crawl space, 12–24 inches above the floor (breathing-zone height, not on dirt). Leave a data-logging sensor in place for at least two to four weeks so you capture daily cycles and weather swings. Bluetooth or WiFi models let you pull readings from the living space without crawling under the house every time.

    How often should I check my crawl space humidity?

    For an encapsulated crawl space with a dehumidifier on a setpoint, review a 30-day data log twice a year — once near peak summer humidity and once in winter. For a vented or unsealed crawl space you are watching for trouble, check logs monthly in humid months and less often in winter. If the sensor sends alerts when RH crosses a setpoint, you can rely on notifications instead of manual checks.

    Do I need a WiFi hygrometer or is Bluetooth enough?

    Bluetooth is enough if someone in the home passes within range of the sensor every few days so the app syncs stored readings. Choose WiFi or a Bluetooth gateway when you want alerts while traveling or when the crawl space is out of phone range from daily life — for example Govee sensors with a WiFi gateway, or SensorPush HT.w sensors with a G1 gateway.

    Where should I not place a crawl space humidity sensor?

    Keep the sensor out of the discharge path of supply ducts, off bare soil, and away from dripping plumbing or sump lines. Do not tuck it against foundation walls for your primary reading — use center-span height for baseline RH and a second sensor near the wall only when you are diagnosing wall moisture.


  • Crawl Space Condensation: Why It Happens and How to Stop It

    Crawl Space Condensation: Why It Happens and How to Stop It

    The Distillery
    — Brew № 2 · Crawl Space

    Condensation in a crawl space — liquid water that forms on structural wood, pipes, ductwork, and other surfaces without any rain or plumbing leak — is one of the most misunderstood moisture mechanisms in residential construction. Homeowners who find wet joists and assume they have a roof leak or plumbing problem spend money investigating phantom leaks while the actual cause — physics — continues unaddressed. Understanding why condensation happens in crawl spaces, how to confirm that condensation (rather than bulk water) is the problem, and what actually stops it is the foundation for effective moisture management.

    The Physics of Crawl Space Condensation

    Every cubic foot of air holds a specific maximum amount of water vapor — the maximum is called the saturation point, and it increases with temperature. When air is cooled below its saturation point, the excess moisture it can no longer hold is released as liquid water — condensation. The temperature at which a given air mass reaches its saturation point is the dewpoint temperature.

    In a vented crawl space in summer, the mechanism is straightforward:

    • Outdoor air in a humid climate (Southeast, Mid-Atlantic, Midwest in summer) has a high absolute humidity — the air contains large amounts of water vapor. A typical July afternoon in Charlotte, NC or Columbus, OH might have outdoor air at 90°F and 65% relative humidity, with a dewpoint of 76°F.
    • This warm, humid outdoor air enters the crawl space through foundation vents.
    • Inside the crawl space, the underside of the subfloor is cooled by the air-conditioned living space above — typically 10–20°F below outdoor temperature.
    • The crawl space surfaces (subfloor underside, floor joists, pipes, ductwork) may be at 65–75°F — below the outdoor dewpoint of 76°F.
    • When the 90°F outdoor air carrying its 76°F dewpoint contacts surfaces at 70°F, the air is cooled below its dewpoint. The excess moisture it can no longer hold condenses as liquid water on those surfaces.

    This is not a construction defect, a drainage problem, or a materials failure. It is thermodynamics operating on a vented crawl space in the wrong climate. The vented crawl space design assumes outdoor air is drier than the crawl space interior — which is true in cold, dry climates but completely backwards in humid summer climates.

    Diagnosing Condensation vs. Bulk Water

    The key diagnostic distinction is timing relative to weather events:

    • Condensation signature: Moisture on wood surfaces increases during warm, humid weather — particularly during sustained humidity events, summer months, and periods without rain. Moisture decreases in cool, dry weather or in winter. No correlation to rain events specifically.
    • Bulk water signature: Moisture or standing water appears within 24–72 hours of significant rain events. Watermarks on the foundation wall at consistent heights. Efflorescence (white mineral deposits) on foundation walls indicating past water contact.
    • Soil vapor diffusion signature: Moisture present year-round at moderate, consistent levels regardless of weather. Highest in low-lying areas where the water table is closest. No strong correlation to outdoor humidity or rain.

    The definitive diagnostic test: place a 12″ × 12″ piece of plastic sheeting on the bare soil in the crawl space and tape its edges with duct tape. Wait 24 hours. Condensation on the top of the plastic (facing the crawl space air) indicates atmospheric condensation. Moisture on the underside of the plastic (between plastic and soil) indicates soil vapor diffusion through the soil surface. Both can occur simultaneously.

    Why “More Ventilation” Makes Condensation Worse

    The intuitive response to a damp crawl space is often to add more ventilation — more foundation vents, a powered exhaust fan. In a humid climate in summer, this makes condensation significantly worse, not better. More ventilation means more humid outdoor air entering the crawl space, more air being cooled below the dewpoint, and more condensation on surfaces. The Advanced Energy Corporation’s field research in North Carolina found that homes with more foundation vents had higher wood moisture content in summer than homes with fewer vents — the opposite of the expected outcome from the traditional ventilation philosophy.

    The Only Proven Solution for Condensation

    For humid-climate crawl space condensation, the only proven solution is sealing the crawl space from outdoor air entry and adding active humidity control. This is precisely what encapsulation accomplishes:

    • Sealing foundation vents eliminates the pathway through which outdoor humid air enters the crawl space
    • The vapor barrier prevents soil vapor diffusion from adding to the crawl space air humidity
    • The dehumidifier or HVAC supply connection maintains relative humidity below the dewpoint threshold at which condensation occurs on the cooler surfaces in the space

    After encapsulation of a condensation-problem crawl space, wood surfaces that previously showed 22–25% moisture content in summer stabilize at 10–14% — below the threshold for mold growth and far below the threshold for wood decay fungi. The transformation is measurable and typically occurs within 60–90 days of encapsulation.

    Frequently Asked Questions

    Why is there condensation in my crawl space?

    In a vented crawl space in a humid climate: summer outdoor air enters through foundation vents with a dewpoint temperature that exceeds the temperature of the crawl space’s cooler surfaces (subfloor, joists, pipes cooled by the air-conditioned space above). When warm, humid air contacts these cooler surfaces, the air is chilled below its dewpoint and releases liquid water as condensation. This is thermodynamics, not a construction defect or drainage problem.

    Will adding more foundation vents stop crawl space condensation?

    No — in humid climates, adding foundation vents makes condensation worse, not better. More vents mean more humid outdoor air entering the crawl space and more condensation on cool surfaces. Building science research has documented that homes with more foundation vents have higher wood moisture content in summer than homes with fewer vents in humid climates. The correct solution is sealing the crawl space from outdoor air entry, not increasing ventilation.

    How do I stop condensation in my crawl space?

    Crawl space encapsulation — sealing foundation vents, installing a vapor barrier, and adding a dehumidifier or HVAC supply duct — is the only proven solution for condensation-problem crawl spaces in humid climates. This eliminates the pathway for humid outdoor air to enter (eliminating the condensation source), controls residual humidity from soil vapor diffusion, and maintains the sealed space below the dewpoint threshold at which condensation occurs on cooler surfaces.


  • Crawl Space Rim Joist Insulation: Spray vs. Rigid Foam

    Crawl Space Rim Joist Insulation: Spray vs. Rigid Foam

    The Distillery
    — Brew № 2 · Crawl Space

    The rim joist — the band of framing that sits on top of the foundation wall and closes the floor joist cavities at the perimeter — is consistently identified by building scientists and energy auditors as the largest single air leakage and heat loss site in most homes with crawl spaces. More heat escapes through an uninsulated, unsealed rim joist than through any other single component of the crawl space building envelope, and more crawl space air enters the home through the rim joist than through any other pathway. Addressing the rim joist is the highest-leverage action in any crawl space improvement project.

    Why the Rim Joist Is the Priority

    The rim joist area is a thermal and air sealing weak point for structural reasons: it is the intersection of multiple framing members (floor joist ends, blocking, the rim joist itself, the sill plate below, and the subfloor above), and these members rarely meet perfectly. Gaps at joist ends, misaligned blocking, gaps between the rim joist and the sill plate, and the inherently porous nature of lumber create a permeable air barrier. Hot-box blower door tests consistently find that the rim joist contributes disproportionately to total building air leakage — often 15–25% of total air infiltration in a home with an uninsulated crawl space rim joist.

    The thermal impact is equally significant. The rim joist is typically the coldest structural wood surface in a vented crawl space in winter — it is exposed on the exterior face to outdoor temperatures, has no insulation between it and the interior, and is the wood member most prone to condensation from warm interior air hitting the cold exterior-connected wood. Condensation on the rim joist is the leading cause of mold growth at the top of crawl space foundation walls.

    Option 1: Spray Foam (Best Performance)

    Professional two-component closed-cell spray polyurethane foam (ccSPF) applied to the rim joist area is the gold standard for rim joist insulation and air sealing. Closed-cell spray foam:

    • Adheres directly to wood, concrete, and masonry surfaces — filling all gaps, cracks, and voids in the rim joist framing assembly
    • Provides both insulation (R-6.5 to R-7 per inch) and complete air sealing simultaneously
    • At 2″ applied thickness: approximately R-13, and essentially complete air sealing across the entire rim joist area
    • Adds structural rigidity to the rim joist assembly — a secondary benefit particularly relevant in older homes where rim joist framing may be degraded
    • Is vapor semi-impermeable at 2″ thickness — in most climate zones, this provides appropriate vapor control at the rim joist without requiring a separate vapor barrier

    Professional closed-cell spray foam requires specialized equipment (a proportioner that heats and mixes the two-component foam at precise ratios), protective equipment (Tyvek suits, respirator with organic vapor cartridges, eye protection), and training to apply uniformly and safely. DIY two-component kits (available from Froth-Pak and similar) can handle small areas but are expensive per board-foot and not practical for a full rim joist treatment in a large crawl space.

    Professional spray foam cost for rim joist: $1.50–$3.00 per square foot of rim joist area, which typically means $600–$1,500 for a full perimeter treatment of a standard single-family home.

    Option 2: Rigid Foam Panels (DIY-Accessible)

    Rigid foam boards (EPS, XPS, or polyisocyanurate) cut to fit between the floor joists and sealed at all four edges with one-component spray foam is the DIY-accessible alternative to professional spray foam. This approach provides:

    • Thermal insulation from the foam board — 1″ XPS provides R-5; 2″ XPS provides R-10; 2″ polyiso provides R-12–13
    • Air sealing from the spray foam seal at the perimeter of each panel — not as complete as professional ccSPF but substantially better than no treatment
    • DIY-accessible — cutting foam board with a utility knife and applying spray foam perimeter seal requires only basic skills and inexpensive tools

    The installation process:

    • Measure each joist bay width (spacing varies in older homes)
    • Cut rigid foam panels to fit snugly in each bay — the panel should be cut 1/4″ smaller than the actual bay dimensions to allow spray foam to seal the perimeter
    • Apply construction adhesive to the back of the panel or use the spray foam itself as the adhesive
    • Press the panel firmly against the rim joist and hold until adhesion is achieved
    • Apply a continuous bead of one-component spray foam (Great Stuff or equivalent) around all four edges of each panel — this is the air sealing step and must be continuous without gaps

    DIY rigid foam + spray foam material cost: $0.50–$1.50 per square foot of rim joist area. For a 1,200 sq ft home with 150 LF of perimeter × 2 joist courses (approximately 250 sq ft of rim joist area): $125–$375 in materials. This is 3–5× less expensive than professional spray foam for equivalent coverage, though the air sealing performance is somewhat lower.

    Climate Zone Considerations

    The appropriate R-value target for rim joist insulation varies by climate zone, similar to wall insulation requirements:

    • Climate Zones 1–2 (Deep South): R-13 at the rim joist. 2″ ccSPF or 2″ rigid foam + spray foam seal meets this requirement.
    • Climate Zones 3–4 (Mid-Atlantic, Southeast transition, Pacific Coast): R-13–19. 2″ ccSPF provides R-13; adding rigid foam behind the spray foam or increasing thickness to 3″ achieves R-19.
    • Climate Zones 5–6 (Midwest, Northeast, Pacific Northwest): R-19–20. 3″ ccSPF provides approximately R-19–21; 2″ ccSPF + 2″ rigid foam achieves similar performance.
    • Climate Zones 7–8 (Northern climates): R-20+. Higher-thickness spray foam or layered spray foam + rigid foam is needed.

    Frequently Asked Questions

    Should I use spray foam or rigid foam for my crawl space rim joist?

    For the best air sealing performance: professional two-component closed-cell spray foam. For a DIY-accessible, lower-cost alternative that provides good (but not perfect) air sealing: rigid foam boards sealed at all four edges with one-component spray foam. The choice depends on budget and DIY capability — rigid foam is approximately 3–5× less expensive in material cost and requires no professional application.

    How much does rim joist spray foam cost?

    Professional closed-cell spray foam for the rim joist: $1.50–$3.00 per square foot of rim joist area. For a standard single-family home with approximately 250 sq ft of rim joist area: $375–$750 in material + labor. DIY rigid foam + one-component spray foam: $125–$375 in materials for the same area.

    Do I need to insulate the rim joist if my crawl space is vented?

    In a vented crawl space, the rim joist is part of the building thermal envelope — insulating it reduces heat loss between the conditioned living space and the vented, unconditioned crawl space. Rim joist insulation is valuable in both vented and sealed crawl spaces, though the approach differs slightly: in a vented space, the rim joist insulation must accommodate some moisture management; in a sealed space, the spray foam approach is fully appropriate without additional vapor barrier considerations in most climate zones.


  • Crawl Space Vapor Barrier Installation: Step-by-Step DIY

    Crawl Space Vapor Barrier Installation: Step-by-Step DIY

    The Distillery
    — Brew № 2 · Crawl Space

    Installing a crawl space vapor barrier is the most DIY-accessible component of a full encapsulation system — and the one that saves the most money if done correctly. Material cost for a 1,200 sq ft crawl space is $480–$2,400 depending on barrier quality; professional labor for barrier installation alone is $1,000–$2,500. The $1,000–$2,500 in potential savings is real, but only if the installation is done correctly. Improperly installed barriers — unsealed seams, missed penetrations, inadequate wall coverage — provide significantly less protection than a properly installed system. This guide covers the complete installation process step by step.

    Materials and Tools Needed

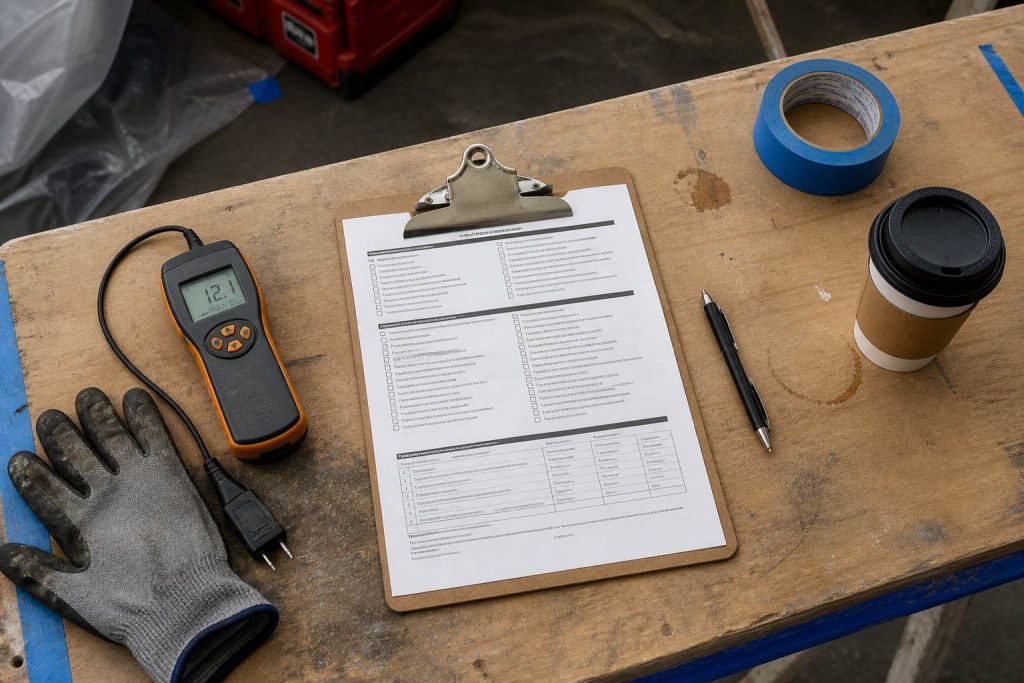
    Clipboard checklist on a restoration jobsite
    Inspection is a sequence, not a vibe.

    Materials

    • Vapor barrier: Minimum 12-mil reinforced polyethylene (for a full encapsulation; 6-mil is insufficient for most real-world crawl spaces). Calculate quantity: crawl space square footage × 1.35 to account for wall coverage and seam overlaps. For a 1,200 sq ft crawl space: 1,200 × 1.35 = 1,620 sq ft of barrier material needed.
    • Seam tape: Compatible reinforced polyethylene tape designed for vapor barrier seaming — not duct tape, not standard packing tape. Must be labeled as compatible with the barrier material. Budget: 4–6 rolls of 3″ × 180′ tape for a 1,200 sq ft crawl space.
    • Mechanical fasteners: Hammer-drive concrete anchors or Hilti pins (powder-actuated) for fastening the barrier to the foundation wall at the top edge. Alternatively, a construction adhesive compatible with polyethylene.
    • Wall termination strip: A plastic or aluminum channel that holds the top edge of the barrier against the wall and provides a clean termination line. Optional but provides a more professional finished appearance.
    • Pipe penetration seals or tape: Pre-cut penetration seals or compatible tape for sealing around pipes, conduit, and columns.
    • Backer rod: For sealing large gaps at the floor-wall joint before applying the barrier.

    Tools

    • Utility knife with extra blades (barrier material dulls blades quickly)
    • Tape measure and chalk line
    • Hammer drill with concrete bit (for mechanical fasteners)
    • Seam roller or J-roller (a wallpaper seam roller) for pressing seam tape firmly
    • Knee pads
    • Bright LED work light
    • N95 respirator, Tyvek coveralls, gloves, and eye protection

    Phase 1: Preparation (Day 1, 2–4 hours)

    Technician using a moisture meter on drywall during inspection
    Measure before you argue about mold.

    Clear the Crawl Space

    Remove everything from the crawl space floor that would create a puncture hazard or prevent full barrier coverage: old vapor barrier material, rocks and concrete rubble, construction debris, and any stored items. Knock down or smooth sharp concrete protrusions from footings and foundation walls. This preparation step is often skipped by quick-service installers but is essential — sharp debris beneath the barrier causes punctures that undermine the entire installation.

    Remove Old Insulation (If Present)

    Deteriorated fiberglass batt insulation between floor joists must be removed before installing a new vapor barrier. Old insulation harbors mold, pest material, and moisture — leaving it above the vapor barrier creates a micro-environment that defeats the moisture control the barrier is intended to achieve. Use heavy-duty contractor bags for removal; expect 4–8 bags for a 1,200 sq ft crawl space. This is unpleasant work but non-negotiable for a quality installation.

    Identify and Plan for All Penetrations

    Walk the crawl space and identify every penetration through the barrier that will be needed: foundation piers, support columns, plumbing pipes, and electrical conduit. Plan the barrier strips to minimize the number of cuts required around each penetration — in many cases, placing the barrier strip to approach a column from one direction allows a simpler cut than if the column is in the middle of a strip.

    Phase 2: Barrier Installation (Day 1–2, 4–8 hours)

    Start at the Back Wall

    Begin at the wall farthest from the access point. This allows the installation to progress toward the exit — you will not be crawling over freshly installed, untaped barrier material as you work. Unroll the first strip from the back wall across the crawl space toward the front.

    Wall Coverage

    The barrier must extend up the foundation wall — not just cover the floor. The minimum wall coverage is 6 inches above the visible soil or moisture line; 12 inches is better practice; the full height of the foundation wall is best practice for a complete encapsulation. At the back wall:

    • Unroll the barrier strip to extend up the back wall to your target height
    • Secure the top edge to the wall using hammer-drive anchors or construction adhesive, spaced every 12–18 inches
    • The barrier lies flat on the ground from the base of the wall toward the access end

    Seam Overlapping and Taping

    Each subsequent strip overlaps the previous strip by a minimum of 12 inches — 18–24 inches is better practice. The overlap seam is the most critical quality point in the installation. Apply seam tape as follows:

    • Ensure both surfaces at the seam are clean and dry before taping — dust and moisture prevent adhesion
    • Apply the tape centered on the overlap, pressing it firmly down the entire length of the seam
    • Use a seam roller or J-roller to apply firm pressure along the entire tape length — hand pressure alone is insufficient for long-term adhesion
    • Check every seam after taping by attempting to lift the tape at multiple points — it should be firmly adhered with no lifting edges

    Sealing Around Penetrations

    Every penetration through the barrier is a potential moisture pathway. For each penetration:

    • Round pipes and conduit: Cut an X or cross in the barrier, pull the flap up around the pipe, and seal with compatible tape wrapped around the pipe and adhered to the barrier surface. Pre-cut penetration seals (rubber pipe collars with adhesive flanges) provide cleaner results for round penetrations.
    • Square columns and piers: Cut the barrier to the perimeter of the pier base. Apply tape along all four sides where the barrier meets the pier surface — press firmly with the seam roller.
    • Odd-shaped penetrations: Use a combination of cuts, patches, and tape to achieve a continuous sealed barrier around the penetration. Take extra time on these — they are the most common point of future moisture intrusion.

    Completing the Side and Front Wall Coverage

    As each strip is laid, the side walls must also be covered. Cut barrier strips to run up the side walls and tape them to the edge of the floor strips. The barrier should cover all ground-contact surfaces — walls included — to create a true continuous envelope. The front wall (nearest the access) is done last, with the barrier running up and being secured at the top edge near the access opening.

    Phase 3: Quality Check Before Closing

    Mold containment with zipper door installed in a hallway during remediation
    Containment first — then removal.

    Before the access door is closed, conduct a final walkthrough:

    • Inspect every seam — no lifting tape edges, no gaps in the overlap
    • Inspect every penetration — tape fully adhered on all sides
    • Inspect wall attachment — barrier secured at top, no gaps at floor-wall junction
    • Photograph the completed installation from multiple angles and distances — this creates your baseline documentation for future inspections and any warranty claims

    Related on Tygart Media: full encapsulation process · access door sizing · inspection checklist.

    Frequently Asked Questions

    How long does it take to install a crawl space vapor barrier yourself?

    For a solo homeowner in a standard-height (36″+) crawl space: 2–3 full days for a 1,200 sq ft crawl space, including preparation and cleanup. Low-clearance crawl spaces (under 24″) are significantly slower — add 50–100% to time estimates. Working with one other person reduces time by approximately 30% and significantly reduces the difficulty of handling full barrier rolls in a confined space.

    How do I calculate how much vapor barrier I need?

    Measure the crawl space floor area. Multiply by 1.35 to account for seam overlaps and wall coverage (assuming 12″ of wall coverage on all sides). For a 1,200 sq ft crawl space: 1,200 × 1.35 = 1,620 sq ft of barrier material. Add 10% for waste from cuts around penetrations in complex crawl spaces. Most barrier products are sold in standard roll sizes (e.g., 10′ × 100′ = 1,000 sq ft per roll) — purchase in the next roll increment above your calculated need.

    What is the best tape for sealing crawl space vapor barrier seams?

    Use tape specifically designed and labeled for vapor barrier seaming — typically a reinforced polyethylene tape or a butyl rubber tape compatible with the barrier material. Do not use standard duct tape (it fails in temperature and humidity extremes), packing tape, or general-purpose seam tape. Products from companies like Nashua, Poly-America, and the barrier manufacturers themselves typically offer compatible seam tape. Confirm compatibility on the packaging — some premium barriers require manufacturer-specific tape to maintain the product warranty.