Tag: Residential Restoration

  • Crawl Space Encapsulation Cost: Complete Breakdown for 2026

    Crawl Space Encapsulation Cost: Complete Breakdown for 2026

    The Distillery
    — Brew № 2 · Crawl Space

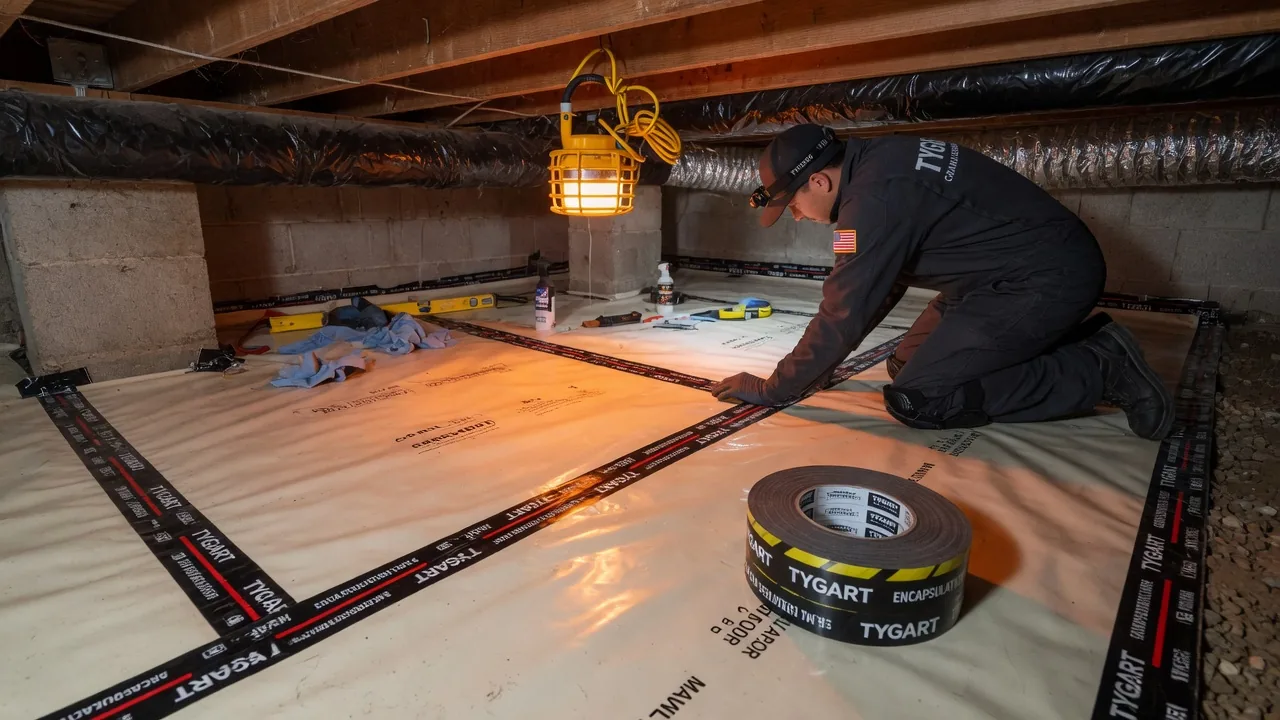
    Crawl space encapsulation quotes vary enormously — from $1,500 for a basic vapor barrier installation to $25,000 for a full system with drainage, dehumidification, and premium materials. Understanding why quotes vary so dramatically — and which components drive the cost — lets you evaluate contractor proposals on their merits rather than simply choosing the lowest number. This guide breaks down every cost element of a complete encapsulation project, explains the legitimate reasons for price variation, and gives you a framework for assessing whether a specific quote represents good value for what is being proposed.

    National Average Cost Range

    The national average cost for a complete crawl space encapsulation system — including vapor barrier, vent sealing, rim joist insulation, and basic humidity control — is $5,000–$15,000 for a typical single-family home with a 1,000–1,500 sq ft crawl space footprint. The full range of installed costs runs from $1,500 (partial system, vapor barrier only) to $30,000+ (full drainage + encapsulation + dehumidification in a challenging space).

    Per-square-foot pricing: $3–$7 per sq ft for basic vapor barrier installation; $7–$15 per sq ft for complete encapsulation with vent sealing and rim joist; $15–$25+ per sq ft when drainage and premium dehumidification are included.

    Cost by System Component

    Vapor Barrier: $1,500–$6,000

    The vapor barrier is the core material cost driver. Pricing varies by:

    • Material quality: 6-mil standard polyethylene: $0.10–$0.20/sq ft material cost. 12-mil reinforced: $0.30–$0.60/sq ft. 20-mil premium (CleanSpace, TerraShield): $0.80–$1.50/sq ft material cost.
    • Crawl space footprint: A 1,200 sq ft crawl space requires approximately 1,400–1,600 sq ft of material accounting for wall coverage and overlap.
    • Labor: Installation labor in a standard-height (36″+) crawl space runs $1.50–$3.00/sq ft of crawl space area. Low-clearance spaces (under 24″) command a 30–60% labor premium.
    • Substrate preparation: Leveling severe soil undulation, removing rocks and debris, or addressing standing water add $300–$1,000 before barrier installation can begin.

    Foundation Vent Sealing: $400–$1,200

    Sealing existing foundation vents with rigid foam cut-to-fit panels and spray foam perimeter seal. Cost is driven by the number of vents (average home has 6–12) and their size. Standard-size vents: $40–$80 per vent. Oversized or custom vents: $100–$200 each. Some contractors include vent sealing in the overall per-sq-ft price; others itemize it separately.

    Rim Joist Insulation and Air Sealing: $800–$2,500

    Spray foam applied to the rim joist (the band joist at the top of the foundation wall) provides both air sealing and insulation. Installed cost including spray foam materials and labor: $1.50–$3.00 per linear foot of perimeter × 2 for two-sided access, or approximately $3–$6 per sq ft of rim joist area. A 1,500 sq ft home with a 150-linear-foot perimeter has approximately 150 × 2 (two courses of blocking) = 300 sq ft of rim joist area.

    Drainage System: $3,000–$12,000

    If the crawl space has active water intrusion — seepage through walls or floor after rain — drainage must be installed before encapsulation. A perimeter interior drain tile system with sump pit and pump costs:

    • Drain tile installation: $25–$45 per linear foot of perimeter
    • Sump pit excavation and installation: $800–$1,500
    • Sump pump: $150–$500 (pedestal) to $300–$800 (submersible with battery backup)
    • Total for a 1,200 sq ft crawl space with ~140 linear feet of perimeter: $5,000–$8,000 drainage only, before encapsulation

    This is the single largest cost driver that separates $5,000 projects from $15,000+ projects. A contractor who quotes $3,500 for a crawl space that has active water intrusion is either not addressing the drainage issue or is setting up an encapsulation system that will fail.

    Dehumidifier: $1,200–$3,500

    A dedicated crawl space dehumidifier is required in most sealed crawl spaces that are not supplied with conditioned air from the home’s HVAC system. Crawl space-specific dehumidifiers (rated for lower temperatures than residential basement units) and their installed cost:

    • Aprilaire 1820 (70 pint/day): $900–$1,100 unit cost + $300–$600 installation including condensate drain
    • Santa Fe Compact70: $900–$1,100 unit + $300–$600 installation
    • Aprilaire 1850 (95 pint/day, for larger or wetter spaces): $1,200–$1,500 unit + $400–$700 installation

    Contractors who install their own branded dehumidifier as part of a systems package typically price the entire package at $2,500–$5,000 including the dehumidifier, installation, and one year of monitoring.

    Factors That Drive Cost Higher

    • Low crawl space clearance (under 24″): Crew works on their backs or elbows, reducing productivity and requiring more labor hours. Add 30–60% to standard labor rates.
    • Active water intrusion: Drainage system required before encapsulation — adds $3,000–$12,000 to baseline encapsulation cost.
    • Large footprint: Straightforward linear scaling above 1,500 sq ft — larger spaces cost more, though per-sq-ft unit cost may decrease slightly on very large projects.
    • Obstructions: HVAC ductwork, plumbing, electrical conduit, and storage debris all increase labor time for barrier installation.
    • Mold remediation: If visible mold is present on joists or blocking, remediation (HEPA vacuuming, treatment, encapsulation of surfaces) must precede encapsulation. Add $1,000–$4,000 depending on extent.
    • Old insulation removal: Deteriorated fiberglass batt insulation between joists must be removed before proper encapsulation — add $0.50–$1.50 per sq ft of crawl space area for removal and disposal.
    • High-cost-of-living markets: Labor rates in the Pacific Northwest, Northeast, and California run 30–60% above national averages.

    Factors That Drive Cost Lower

    • Dry crawl space, no drainage needed: Eliminates the largest potential cost component.
    • Adequate clearance (36″+): Standard labor rates apply; no cramped-space premium.
    • HVAC supply duct instead of dehumidifier: Running a small supply duct into the crawl space from the existing HVAC system costs $300–$600 total — far less than a dedicated dehumidifier — if the HVAC system has sufficient capacity to condition the additional space.
    • Rural or lower-cost-of-living markets: Southeast and Midwest labor rates are significantly below national averages. Full encapsulation quotes of $4,000–$7,000 for standard crawl spaces are common in these markets.
    • Competitive local market: Markets with multiple established encapsulation contractors produce more competitive pricing than monopoly or duopoly markets where one or two large companies dominate.

    How to Evaluate a Contractor Quote

    A legitimate quote for crawl space encapsulation should itemize:

    • Vapor barrier: material specification (mil rating, ASTM E1745 class, brand), square footage, and unit price
    • Vent sealing: number of vents, method, and cost
    • Rim joist treatment: method (spray foam vs. rigid foam), R-value, and cost
    • Drainage: whether drainage is included and what type (if applicable)
    • Humidity control: dehumidifier model or HVAC supply duct specification and cost
    • Warranty: workmanship warranty duration, manufacturer warranty on barrier material
    • Any remediation, debris removal, or prep work

    A quote that simply says “encapsulation: $8,500” without specifying what components are included cannot be compared against another quote. Ask for itemized breakdowns from all contractors — this reveals where the price difference comes from and allows apples-to-apples comparison.

    Frequently Asked Questions

    What is the average cost of crawl space encapsulation?

    The national average for a complete crawl space encapsulation system is $5,000–$15,000 installed, with a typical project (1,200 sq ft crawl space, no drainage needed, standard dehumidifier) running $7,000–$10,000. Per-square-foot pricing for complete systems runs $7–$15/sq ft. Projects requiring drainage installation can reach $15,000–$25,000.

    Why is crawl space encapsulation so expensive?

    Crawl space work is physically difficult — crews work in confined spaces in challenging conditions. Material costs for quality barrier products are substantial. And complete system installation requires multiple skilled trades: waterproofing, spray foam insulation, HVAC modification, and electrical for the dehumidifier. When drainage is needed, excavation and concrete work add significant cost. The price reflects both the labor difficulty and the system complexity.

    Is it cheaper to DIY crawl space encapsulation?

    DIY material cost for vapor barrier and vent sealing is typically $800–$2,500 for a standard crawl space — saving $3,000–$8,000 compared to professional installation. However, DIY encapsulation has significant limitations: spray foam rim joist application requires proper equipment and safety precautions; drainage installation is not DIY-accessible; dehumidifier installation requires electrical work; and quality issues (improperly sealed seams, missed penetrations) may not be apparent until moisture damage occurs. DIY is most appropriate for straightforward vapor barrier installation in a dry crawl space with no drainage issues.

    Does homeowners insurance cover crawl space encapsulation?

    Generally no — encapsulation is a preventive improvement, not a repair for a covered loss. If a covered water damage event (burst pipe, appliance failure) damaged the crawl space, some components of repair might be covered. Flooding from external sources is typically excluded from standard homeowners policies. Some policies may cover mold remediation that precedes encapsulation if the mold resulted from a covered event — check your specific policy and consult your insurer before assuming coverage.

  • Crawl Space Vapor Barrier Thickness: 6, 12, or 20-Mil?

    Crawl Space Vapor Barrier Thickness: 6, 12, or 20-Mil?

    The Distillery
    — Brew № 2 · Crawl Space

    The mil rating on a crawl space vapor barrier is one of the most misunderstood specifications in home improvement. Homeowners comparing contractor quotes find proposals ranging from “6-mil polyethylene” at one price point to “20-mil reinforced barrier” at triple the cost — and no clear explanation of what they are actually getting for the difference. This guide explains what the mil rating measures, what it does and does not predict about barrier performance, and how to match barrier selection to your specific crawl space conditions.

    What “Mil” Actually Means

    A mil is a unit of thickness equal to one-thousandth of an inch (0.001″). A 6-mil barrier is 0.006 inches thick — about the thickness of two or three sheets of standard copy paper. A 20-mil barrier is 0.020 inches thick — roughly the thickness of a credit card. This is a significant difference in physical robustness but a less significant difference in vapor transmission rate, which is where the marketing often misleads.

    Vapor Transmission: What Thickness Does and Does Not Control

    Vapor barriers work by slowing the diffusion of water vapor through the material. The rate of vapor diffusion through a polyethylene film is primarily a function of the film’s density and composition — not its thickness. A 6-mil virgin polyethylene film has a permeance of approximately 0.04–0.06 perms. A 20-mil virgin polyethylene film has a permeance of approximately 0.01–0.02 perms. Both are well below the 0.1 perm threshold for a Class I vapor retarder under most building codes.

    In practical terms: a 6-mil barrier and a 20-mil barrier made from the same polyethylene formulation both provide vapor control that exceeds what most crawl spaces require. The permeance difference between a properly installed 6-mil and 20-mil barrier is not the primary driver of system performance — permeance at seams, penetrations, and wall connections is far more important than the center-of-sheet permeance.

    What Thickness Does Control: Puncture and Tear Resistance

    Where mil rating matters significantly is puncture resistance, tear resistance, and durability during and after installation. Crawl spaces contain rocks, concrete aggregate, rebar ends, protruding pipe fittings, and other sharp objects that puncture thin barriers during installation and foot traffic. A punctured barrier loses its vapor control at that point and around it — and in a dark crawl space, punctures may not be visible or may be undetected for years.

    Puncture resistance testing (ASTM E154) shows significant differences between thickness levels:

    • 6-mil standard polyethylene: Low puncture resistance. Will puncture easily on sharp aggregate, rebar ends, or rock surfaces. Adequate only in very clean, smooth crawl spaces and where foot traffic after installation is minimal.
    • 12-mil polyethylene: Substantially better puncture resistance — the standard for full encapsulation systems per ASTM E1745 and per most contractor best-practice guides. Survives typical crawl space installation conditions and moderate foot traffic.
    • 16-mil and 20-mil reinforced barriers: Highest puncture resistance. The reinforcing mesh layer (typically woven polyester or fiberglass embedded in polyethylene layers) provides tear resistance that exceeds non-reinforced materials of the same overall thickness. Recommended for rough substrate conditions, crawl spaces with rocky soil, or applications where long service life between inspections is desired.

    The ASTM E1745 Standard

    ASTM E1745 is the relevant standard for plastic water vapor retarders used in contact with soil or granular fill under concrete slabs and in crawl spaces. It classifies barriers into three classes based on water vapor permeance, tensile strength, and puncture resistance:

    • Class A: ≤0.1 perm, tensile strength ≥45 lbf, puncture resistance ≥2200g — the highest performance class
    • Class B: ≤0.1 perm, tensile strength ≥30 lbf, puncture resistance ≥1700g
    • Class C: ≤0.1 perm, tensile strength ≥22.5 lbf, puncture resistance ≥1275g

    A 6-mil standard polyethylene may or may not meet Class C. A 12-mil barrier from a reputable manufacturer typically meets Class B or Class A. A 20-mil reinforced barrier from major encapsulation product lines (WarmBoard, CleanSpace, TerraShield) typically meets Class A. When evaluating contractor proposals, ask which ASTM E1745 class the proposed barrier meets — this is more informative than mil rating alone.

    Matching Barrier Selection to Crawl Space Conditions

    When 6-Mil Is Adequate

    A 6-mil standard polyethylene barrier is adequate in very limited circumstances: a crawl space with a smooth, level concrete floor with no sharp aggregate, no foot traffic after installation, low moisture load, and no history of pest intrusion. This is a minority of real-world crawl spaces. A 6-mil barrier in a typical dirt-floor crawl space with rough aggregate, rocks, and occasional pest inspection foot traffic will develop punctures within 1–3 years of installation, undermining the vapor control it was installed to provide.

    When 12-Mil Is the Right Standard

    12-mil reinforced polyethylene is the appropriate baseline for most full crawl space encapsulation projects. It provides adequate puncture resistance for typical rough substrate conditions, is thick enough to survive installation foot traffic and periodic inspections, and is available from multiple manufacturers at a cost that is substantially below 20-mil materials. Most building science authorities — including the Building Science Corporation — recommend 12-mil minimum for crawl space encapsulation.

    When 20-Mil Is Worth the Premium

    Premium 20-mil reinforced barriers are worth the additional cost in specific circumstances: crawl spaces with rocky or sharp aggregate substrate that will challenge even 12-mil materials; crawl spaces where the homeowner expects frequent access (storage use, mechanical equipment maintenance, HVAC servicing); high-value homes where a 25-year warranty on the barrier is a legitimate product differentiation; and crawl spaces in coastal or very high-humidity areas where every element of the system is being specified at the highest performance level.

    Brands and Product Lines

    Common crawl space vapor barrier products on the market:

    • CleanSpace (Basement Systems): 20-mil reinforced, white reflective surface, widely distributed through contractor networks. ASTM E1745 Class A.
    • TerraShield (SilverGlo): 16-mil reinforced with reflective layer. Class A.
    • WarmBoard Crawl Space Barrier: 20-mil Class A. Premium positioning.
    • Generic 12-mil contractor rolls: Available from encapsulation supply distributors. Performance varies by manufacturer — require ASTM E1745 Class B or A certification before specification.
    • Builder-grade 6-mil polyethylene: Widely available at home centers. Appropriate only for temporary moisture control or limited-application situations, not for full encapsulation systems.

    Frequently Asked Questions

    Is 6-mil vapor barrier good enough for a crawl space?

    For basic moisture reduction in a clean, smooth crawl space with no foot traffic: possibly. For a full encapsulation system that will provide durable vapor control over 10–20 years in a typical dirt-floor crawl space: no. 6-mil polyethylene has insufficient puncture resistance for rough substrate conditions and will develop tears and holes during installation and subsequent access. The encapsulation industry standard is 12-mil minimum.

    What is the best vapor barrier for a crawl space?

    For most applications: a 12-mil reinforced polyethylene barrier meeting ASTM E1745 Class A or B. For premium installations or challenging substrate conditions: a 20-mil reinforced barrier from a major manufacturer with a documented ASTM E1745 Class A rating and a 25-year warranty. The reflective facing on some premium products provides a modest thermal benefit and makes the crawl space easier to inspect visually.

    How thick should a crawl space vapor barrier be?

    Building science best practice recommends a minimum of 12 mil for full crawl space encapsulation. Most contractor best-practice guidelines and product specifications for complete encapsulation systems specify 12-mil to 20-mil. The IRC and most building codes specify a minimum of 6-mil for basic ground cover in vented crawl spaces, but this is the minimum code standard — not the performance standard for a complete sealed encapsulation system.


  • Radon High After Mitigation? 10 Causes & How to Fix Them

    Radon High After Mitigation? 10 Causes & How to Fix Them

    The Distillery
    — Brew № 1 · Radon Mitigation

    A post-mitigation radon test that comes back above 4.0 pCi/L — or even above 2.0 pCi/L when you expected 0.5 — is a frustrating result, but it is not uncommon. National data suggests 10–15% of initial residential radon mitigation installations do not achieve target radon levels on the first attempt and require a callback or additional work. Understanding why post-mitigation results disappoint — and which specific cause applies to your situation — is the foundation for an efficient fix. This guide covers the ten most common causes, in roughly the order of how often they occur.

    Before Diagnosing: Confirm the Test Was Valid

    Before assuming the system failed, confirm the post-mitigation test was conducted correctly. A surprising number of elevated post-mitigation results are caused by testing error rather than system failure.

    • Was the test placed at least 24 hours after the fan was activated? Testing before the system reaches equilibrium — especially in the first few hours — produces results that reflect the transition between un-mitigated and mitigated conditions, not steady-state performance.
    • Were closed-house conditions maintained? Open windows or whole-house fans during the test produce artificially low results — and ironically, a test run while a contractor is completing the installation (doors opening and closing repeatedly) may show different conditions than steady-state. If closed-house conditions were compromised, retest.
    • Was the device placed correctly? Test devices placed directly below the suction point, adjacent to the sump pit, or near an HVAC vent can produce atypical results. Retest with the device in the center of the lowest livable room, at breathing-zone height.
    • Was the result from a professional continuous monitor? If so, review the hourly data log — spikes during the test period may indicate a specific event (windows opened, HVAC change) rather than system failure.

    If the test was valid, proceed to diagnosing the system.

    Cause 1: Insufficient Suction Field Coverage

    How common: Very common — the most frequent cause of inadequate post-mitigation results.

    What it is: The sub-slab vacuum created by the single suction point does not extend far enough to depressurize the entire slab footprint. Radon continues to enter through portions of the slab that are outside the effective suction radius.

    How to diagnose: A mitigator can perform a post-installation suction field test: with the fan running, check for negative pressure at various points across the slab — at floor drains, near walls, at the far end of the basement from the suction point. If some areas show no negative pressure, the suction field is not covering the full footprint.

    Fix: Add one or more additional suction points in the uncovered areas, piped back to the same fan via manifold. Cost: $150–$400 per additional point plus any necessary pipe work.

    Cause 2: Unsealed Bypass Entry Pathways

    How common: Very common — often overlooked during initial installation or appearing after.

    What it is: Radon is entering the home through pathways that bypass the sub-slab vacuum entirely — directly through cracks, gaps, or penetrations in the slab, walls, or floor-wall joint that are not covered by the vacuum zone. A suction system creates negative pressure in the soil below the slab, but if radon can enter above the slab through an open pathway, the vacuum doesn’t help.

    How to diagnose: Inspect the slab surface carefully for visible cracks, especially wider cracks at expansion joints, control joints, or around floor drains. Check the floor-wall joint perimeter — a small gap around the entire perimeter is a common high-volume entry pathway. Check around plumbing penetrations. A smoke pencil or incense stick held near suspected entry points while the fan runs can reveal inward air draw at unmitigated pathways — if smoke is pulled toward the floor, that pathway is admitting outside air (and radon) to the interior above the vacuum zone.

    Fix: Seal all identified pathways. Expansion joints and control joints: polyurethane backer rod and caulk. Visible cracks: low-viscosity polyurethane caulk or epoxy injection. Floor-wall joint: polyurethane caulk run continuously around the perimeter. Plumbing penetrations: hydraulic cement. Cost: $50–$300 in materials for typical sealing work; more if a contractor is hired to do this systematically.

    Cause 3: Fan Undersized for Sub-Slab Conditions

    How common: Moderately common — particularly in homes where the pre-installation diagnostic was abbreviated or skipped.

    What it is: The installed fan does not generate sufficient airflow or static pressure to adequately depressurize the sub-slab zone. This is more likely in homes with dense sub-slab fill (clay, sand, or compacted earth rather than gravel aggregate) that resist airflow, or in large-footprint homes where one suction point must cover a very large area.

    How to diagnose: A mitigator can measure the static pressure at the suction point with the current fan running. If pressure is below the expected range for the aggregate conditions, the fan is undersized. Alternatively, if the fan is an RP145 or RP265 and the home has visibly poor aggregate conditions, upgrading to a higher-capacity fan is a reasonable diagnostic first step.

    Fix: Upgrade the fan to a higher-capacity model. The pipe network stays in place; only the fan changes. Cost: $180–$450 for a new fan and installation labor. This is covered under most workmanship warranties when the original post-mitigation result exceeds the target level.

    Cause 4: Block Wall Radon Entry (CMU Foundation)

    How common: Common in homes with concrete masonry unit (CMU) block foundation walls — prevalent in pre-1975 construction in many regions.

    What it is: CMU block foundation walls have hollow cores that communicate with the soil. Radon migrating through these cores enters the basement air directly from the wall, not from below the slab — so sub-slab depressurization alone does not address this pathway.

    How to diagnose: Hold a smoke pencil near the interior face of the block wall while the ASD system is running. If smoke is pulled toward the wall (rather than downward toward the floor), the wall is a primary radon entry source that the floor-based suction is not addressing.

    Fix: Block-wall depressurization — drill 2″–3″ holes through the interior face of the block wall just above the slab, and manifold them into the existing fan system or a dedicated second fan. Alternatively, applying a dense masonry sealer to the interior block wall face reduces the inward airflow from the hollow cores. Cost: $300–$600 for block-wall depressurization add-on.

    Cause 5: Sump Pit Contributing Uncontrolled Entry

    How common: Moderately common in homes with sump pits that are not integrated into the mitigation system.

    What it is: An open or loosely covered sump pit is connected to the drain tile system that runs around the foundation perimeter — creating a direct, low-resistance pathway for radon from the soil into the basement air. Even if the slab is under negative pressure, a sump pit that is open to the basement atmosphere allows radon from the drain tile to enter freely above the vacuum zone.

    Fix: Install an airtight sump pit lid with a pipe fitting connecting the pit to the ASD system. The sump pump continues to operate normally; the pit is now part of the vacuum network rather than a radon bypass. Cost: $100–$250 for the lid and connection work.

    Cause 6: Floor Drains as Bypass Pathways

    How common: Less common than sump pits but significant when present.

    What it is: Floor drains that connect directly to the drain tile system or to perforated drainage pipes in the sub-slab can allow radon to enter the home through the open drain grate. The sub-slab vacuum may not extend into this pathway effectively.

    Fix: Install a floor drain radon trap — a water-filled standpipe or a specialized radon-blocking floor drain insert that maintains a water seal preventing gas flow up the drain while still allowing water drainage. Cost: $30–$100 in materials, or a plumber for more complex situations.

    Cause 7: Air Leaks in the Pipe System

    How common: Uncommon with properly cemented PVC; more common in DIY installations or rushed professional work.

    What it is: An air leak in the pipe system — at a dry-fitted joint, a cracked fitting, or where the pipe penetrates the slab — allows air to enter the system between the fan and the suction point. This reduces the negative pressure the fan generates at the sub-slab, degrading system performance.

    How to diagnose: With the system running, hold a smoke pencil or incense stick near every pipe joint. Any inward smoke draw indicates an air leak at that location.

    Fix: Seal the leak — PVC cement on dry-fitted joints, replacement of cracked fittings, or caulk/sealant at the pipe-slab interface. Cost: minimal in materials; professional labor adds $100–$250 if a contractor is needed.

    Cause 8: Multiple Foundation Zones Not All Addressed

    How common: Common in homes with additions, combination basement/crawl space, or split-level foundations.

    What it is: The home has more than one foundation zone — perhaps a basement under the main house and a slab under an addition — and only one zone was mitigated. Radon from the unmitigated zone continues to enter the home.

    Fix: Add mitigation coverage to the unaddressed foundation zone. This may require additional suction points manifolded to the existing system, or a separate system for an isolated zone. Cost: $600–$2,000 depending on the extent of unaddressed foundation.

    Cause 9: Building Pressure Changes Since Installation

    How common: This cause explains elevated re-test results more often than elevated initial post-mitigation results.

    What it is: Changes to the building’s HVAC system, ventilation, or insulation since the mitigation system was designed have altered building pressure dynamics. A new whole-house fan, a high-efficiency furnace that creates more depressurization, or significant air sealing of the building envelope can change how the mitigation system performs relative to its original design.

    Fix: A mitigator assesses the current building pressure conditions and re-optimizes the system — typically by adjusting fan capacity or adding suction points. Sometimes simply sealing combustion appliance infiltration points resolves the issue.

    Cause 10: Elevated Seasonal or Weather Conditions During Testing

    How common: Most relevant as an explanation for one elevated result in a series of previously low results.

    What it is: A post-mitigation test conducted during a period of unusually low barometric pressure, strong winds, or other weather conditions that push the home’s natural radon level to a temporary peak. Even a well-functioning mitigation system cannot reduce the impact of a major barometric pressure drop to zero — it reduces it dramatically, but a 48-hour test during a significant weather event may show somewhat higher levels than the true long-term average.

    Fix: Retest under more neutral weather conditions. If the second test also shows elevated results, weather is not the explanation and system diagnosis is needed.

    Frequently Asked Questions

    What should I do if my radon is still high after mitigation?

    First, confirm the post-mitigation test was conducted correctly — proper placement, closed-house conditions, at least 24 hours after fan activation. If the test was valid and results are at or above 4.0 pCi/L, contact your installing contractor immediately. This is a workmanship warranty situation if the system is within the warranty period. The contractor should conduct a diagnostic visit to identify the specific cause and correct it at no charge under the warranty.

    How long should I wait after mitigation before testing?

    Place the post-mitigation test device at least 24 hours after the fan is activated, and run the test for a minimum of 48 hours under closed-house conditions. Testing in the first few hours of system operation captures the transition period, not steady-state performance. Most certified contractors include post-mitigation testing as part of their service — confirm whether this is in your contract.

    Is it covered under warranty if radon is still high after mitigation?

    Most certified radon mitigators provide a workmanship warranty covering callbacks when post-mitigation testing results exceed the target level (typically 4.0 pCi/L). Warranty duration ranges from 1 to 5 years depending on the contractor. The warranty should be specified in your original contract — review it before contacting the contractor so you understand what is and is not covered.

    Can I fix an underperforming radon system myself?

    Some fixes are DIY-accessible in states that permit owner-occupant radon work — particularly adding sealant to visible cracks, installing a sump pit lid, or cleaning a blocked floor drain. Others — adding suction points, upgrading the fan, adding block-wall depressurization — involve more significant construction work and are better suited to the installing contractor under warranty, or to a new certified mitigator if the original contractor is unresponsive or warranty has expired.


    Related Radon Resources


  • Is Radon Mitigation a Scam? Facts vs. Contractor Fraud

    Is Radon Mitigation a Scam? Facts vs. Contractor Fraud

    The Distillery
    — Brew № 1 · Radon Mitigation

    Search Reddit for “radon mitigation” and you will find a recurring pattern: a homeowner posts that they’ve been told they need a mitigation system, and a chorus of skeptics appears suggesting it’s a scam, the threshold is arbitrary, the contractors are fear-mongering, or the health risk is overblown. Some of these skeptical questions are legitimate and deserve honest answers. Some rest on misunderstandings. And some describe real patterns of contractor misconduct that do occur. This article addresses all of them directly.

    The Legitimate Skeptic Questions

    “Isn’t the 4.0 pCi/L threshold arbitrary?”

    Partly. The 4.0 pCi/L action level was established in the late 1980s based on risk modeling and technical feasibility at the time — it was chosen in part because mitigation technology reliably achieved below 4.0 pCi/L. It is a policy threshold, not a biological bright line between safe and dangerous. EPA itself acknowledges that radon between 2.0 and 4.0 pCi/L poses meaningful health risk and recommends considering mitigation in that range.

    But “the threshold is imprecise” does not mean “the health risk is not real.” The epidemiological evidence is unambiguous: radon causes approximately 21,000 lung cancer deaths annually in the U.S., making it the second leading cause of lung cancer after smoking. The argument that the specific threshold is a round number chosen for convenience does not challenge the underlying health burden. Radon at 6 pCi/L causes more lung cancer than radon at 2 pCi/L — that is not manufactured; it is quantified in epidemiological data and reflected in EPA’s published risk tables.

    “My house has been here for decades and no one has gotten lung cancer — does that mean it’s fine?”

    No, and this is a common and dangerous misunderstanding of how radiation-induced cancer works. Radon causes cancer stochastically — meaning it increases probability, not certainty. A home at 8 pCi/L does not guarantee lung cancer; it increases the lifetime probability of lung cancer by approximately 5–6 per 1,000 never-smokers. A family of four in that home for 30 years has a meaningful elevated probability — but probability below 1% for any individual. The absence of observed lung cancer in a specific household does not establish that the exposure is safe, any more than playing Russian roulette once without dying proves the gun is unloaded.

    Additionally, radon-induced lung cancer has a latency period of 15–40 years. People exposed to elevated radon in a home they moved out of 20 years ago may be developing lung cancer now from that historical exposure.

    “Can’t I just open my windows?”

    Opening windows does dilute indoor radon — temporarily. A home with 8 pCi/L might measure 2–3 pCi/L with windows open. But this is not a mitigation strategy:

    • You cannot practically keep windows open year-round in most U.S. climates
    • When you close windows (which is most of the time, especially in winter when radon levels are naturally highest), levels return to baseline within hours
    • Open windows can sometimes create pressure patterns that increase radon entry on the windward side of the home
    • Heating and cooling costs from open windows over years would dwarf the cost of a permanent mitigation system

    A properly installed ASD system runs continuously, uses 20–90 watts, costs $30–$75 per year in electricity, and maintains low radon levels 24 hours a day regardless of weather or season. This is categorically different from the temporary dilution effect of open windows.

    The Real Scams That Do Occur in the Radon Industry

    Skepticism about radon is not always unfounded — the radon industry, like any home services industry, contains bad actors who exploit homeowner anxiety. The specific patterns to watch for:

    Inflated Test Results

    Can radon test results be manipulated? In theory, yes. An unscrupulous contractor who conducts both the test and sells mitigation could place the test device near a specific point source (a sump pit, the bottom of a wall, under an HVAC vent) to produce an artificially elevated reading. Or they could test without maintaining closed-house conditions if they want results to look low (to sell a post-mitigation clean bill of health after their installation).

    Protection: use a certified measurement professional who is independent of any mitigation contractor you hire. In a real estate transaction, the buyer should conduct (or hire) the initial test independently. For DIY homeowners, a charcoal canister test from a certified lab is far harder to manipulate than a contractor’s professional continuous monitor, because you handle the test device yourself.

    AARST MAMF (Measurement and Mitigation Protocol) requires certified professionals to follow anti-tampering protocol — devices must be placed according to EPA protocol in the homeowner’s presence or with chain-of-custody documentation. Professional continuous monitors generate tamper-evident data logs that show if a device was moved or if closed-house conditions were violated.

    Unnecessary Multiple Suction Points

    A legitimate diagnostic test determines how many suction points a home needs. Most homes need one — possibly two for larger footprints or poor aggregate. Some contractors upsell additional suction points without conducting the diagnostic that would justify them, adding $150–$400 per unnecessary point.

    Protection: ask the contractor to show you the results of the sub-slab communication test. If they did not conduct one, ask why. If they are proposing three suction points for a 1,400 sq ft home with standard gravel aggregate, that warrants a second opinion.

    Substandard Installation Presented as Complete

    The most common low-grade contractor failure: a system that runs, generates some negative pressure, but was not properly designed or sealed — leaving the post-mitigation level at 3.5 pCi/L rather than 0.5 pCi/L. The contractor declares success; without a post-mitigation test, the homeowner has no way to verify otherwise.

    Protection: always conduct post-mitigation testing. Place a 48-hour charcoal canister test at least 24 hours after the fan is activated. If results are above 2.0–3.0 pCi/L, the system may need adjustment — contact the contractor under the workmanship warranty. If the contractor did not include a warranty and resists follow-up, you have identified a contractor who should not have been hired.

    Fear-Based Upselling

    A contractor who quotes a result of 4.2 pCi/L as a crisis requiring immediate remediation is not necessarily lying about the result — 4.2 pCi/L is at the EPA action level and does warrant mitigation. But the framing as an emergency that requires same-day installation, or claims that “you’ve probably already damaged your lungs,” is psychological manipulation rather than science.

    Radon at 4.2 pCi/L is worth mitigating. It is not a crisis. The risk it represents is cumulative and relatively small on a per-year basis — the harm from years of prior exposure is already done; acting in the next two weeks versus the next two months makes negligible difference to lifetime risk. Take the time to get multiple quotes from verified certified contractors.

    How to Distinguish Legitimate Concern from Manufactured Fear

    A legitimate radon professional:

    • Presents test results clearly and explains what they mean relative to EPA guidance — not relative to worst-case scenarios
    • Conducts a diagnostic before proposing a system design
    • Offers a written quote with itemized scope of work
    • Recommends independent post-mitigation testing and is comfortable with you using a third-party lab
    • Holds verifiable NRPP or NRSB certification
    • Is not pressuring you to sign today or lose the discounted price

    A contractor working from manufactured fear:

    • Presents results in alarming terms disproportionate to what the pCi/L number actually represents
    • Creates urgency that does not exist (radon is a long-term risk, not an emergency requiring same-day action)
    • Cannot or will not provide verifiable certification credentials
    • Proposes a complex, expensive multi-point system without demonstrating need through diagnostic testing
    • Resists your desire to get a second opinion or a second quote

    Frequently Asked Questions

    Is radon mitigation a scam?

    No — radon mitigation addresses a real, well-documented health hazard supported by decades of epidemiological research and multiple independent studies. Radon causes approximately 21,000 U.S. lung cancer deaths annually; active mitigation systems reduce indoor levels by 85–99% and are one of the most cost-effective health interventions available to homeowners. However, like any home services industry, the radon field contains unscrupulous contractors who may inflate results, oversell services, or provide substandard installations — which is why credential verification and independent post-mitigation testing are essential.

    Can radon test results be faked?

    In theory, device placement manipulation is possible, but professional continuous monitors generate tamper-evident data logs and must be placed per AARST MAMF protocol. The practical protection is using a certified measurement professional independent of any mitigation contractor, and following up with your own DIY charcoal canister confirmation if you have doubts about a professionally conducted test.

    My neighbor says radon is a government scare tactic — is that true?

    No. The evidence for radon-lung cancer causality comes from independent research by the National Academy of Sciences (BEIR VI), multiple national cancer research agencies in Europe and North America, the World Health Organization, and IARC — not from a single government agency. The epidemiological studies that established the residential risk were conducted by independent academic researchers at multiple institutions and replicated across different countries and populations. The evidence is consistent, peer-reviewed, and not dependent on any single institutional position.

    Should I get a second opinion on a radon test result?

    Absolutely, particularly if you are being pressured to act quickly or if the result seems inconsistent with what you know about your home and neighborhood. Run your own 48-hour charcoal canister test from a certified mail-in lab ($15–$30) under proper closed-house conditions. If the DIY result matches the professional result within ±30%, the original result is likely accurate. If there is a large discrepancy, investigate the conditions under which each test was conducted before making any decisions.


    Related Radon Resources


  • EPA Radon Zone Map: What Zones 1, 2 & 3 Mean for Your Home

    EPA Radon Zone Map: What Zones 1, 2 & 3 Mean for Your Home

    The Distillery
    — Brew № 1 · Radon Mitigation

    EPA’s Map of Radon Zones divides every U.S. county into one of three zones based on predicted average indoor radon levels. The map is widely cited in radon regulations, building codes, and HUD requirements — but it is frequently misunderstood. Zone designation does not tell you your home’s radon level. It tells you the predicted average for your county, which may have little bearing on the specific geology beneath your foundation.

    The Three Radon Zones

    Zone 1: Highest Potential (Predicted Average Above 4.0 pCi/L)

    Zone 1 counties have the highest predicted indoor radon potential. EPA’s methodology predicts that the average indoor radon level in Zone 1 counties exceeds the EPA action level of 4.0 pCi/L. Zone 1 counties are concentrated in the Northern Plains, Rocky Mountain states, Pennsylvania, Ohio, Iowa, and parts of the mid-Atlantic — regions with uranium-rich geology including granite formations, black shale, and glacial deposits.

    Zone 1 status triggers several regulatory consequences:

    • HUD requires radon testing for federally assisted multifamily housing in Zone 1 counties
    • Some states mandate RRNC (Radon-Resistant New Construction) for residential construction in Zone 1 counties
    • EPA recommends RRNC for all new construction in Zone 1 regardless of state requirements
    • Some states with school radon testing mandates prioritize Zone 1 districts

    Zone 2: Moderate Potential (Predicted Average 2.0–4.0 pCi/L)

    Zone 2 counties have predicted average indoor radon levels between the EPA “consider mitigating” level (2.0 pCi/L) and the action level (4.0 pCi/L). Zone 2 represents a substantial portion of U.S. counties. EPA still recommends testing in Zone 2 and recommends RRNC for new construction — the lower priority relative to Zone 1 reflects statistical averages, not safety.

    Zone 3: Lowest Potential (Predicted Average Below 2.0 pCi/L)

    Zone 3 counties have the lowest predicted radon potential. The average predicted indoor level is below 2.0 pCi/L. EPA still recommends testing in Zone 3 — individual homes in Zone 3 counties can and do have elevated radon due to local geology, soil conditions, and construction variations. “Low-radon zone” does not mean “radon-free zone.”

    How the Zone Map Was Developed

    EPA published the original Radon Zone Map in 1993 based on data from three sources:

    • Indoor radon surveys: State radon measurement data from the EPA/State Residential Radon Survey conducted in the late 1980s, providing actual indoor radon measurements from thousands of homes across the country
    • Aerial radiometric surveys: U.S. Geological Survey (USGS) airborne gamma-ray data measuring surface uranium, thorium, and potassium concentrations — proxies for radon-producing geology
    • Geology: USGS geologic map data identifying rock and soil types with known radon-producing potential

    These three data layers were combined at the county level to produce the zone assignments. The map has not been substantially revised since 1993, despite significant improvements in radon testing data availability. Some researchers have noted that the 1993 map may underpredict Zone 1 designation in certain geologic regions based on more recent measurement data.

    Critical Limitation: County Averages vs. Individual Homes

    The most important thing to understand about the radon zone map is what it cannot tell you: your home’s actual radon level. The map assigns zones based on county-level averages. Within any county — including Zone 3 counties — individual homes can vary from 0.2 pCi/L to 50+ pCi/L depending on:

    • Local soil type and permeability (sandy soils allow faster radon movement than clay)
    • Local bedrock uranium content (a single granitic intrusion can elevate radon in a small cluster of homes surrounded by low-radon geology)
    • Foundation type and construction quality (slab vs. basement vs. crawl space; sealed vs. cracked)
    • Building pressure dynamics (stack effect, HVAC, ventilation rate)
    • Proximity to the water table and seasonal moisture levels

    EPA’s own guidance explicitly states: “Any home can have a radon problem. This means new and old homes, well-sealed and drafty homes, and homes with or without basements.” Zone designation is a statistical predictor of regional risk, not a predictor of individual home risk.

    How to Find Your County’s Radon Zone

    EPA’s radon zone map is available at epa.gov/radon/find-information-about-local-radon-zones-and-state-contact-information. The map is searchable by state, and each state’s zone assignments are listed by county. The EPA also links to state-specific radon contact information, which often includes more detailed local radon data than the federal county-level map.

    Many state radon programs publish sub-county radon data — zip code level or census tract level — that provides more precise local risk information than the EPA’s county-level map. For the most accurate local picture, consult your state radon program’s data in addition to the EPA map.

    Frequently Asked Questions

    Does living in a Zone 3 county mean I don’t need to test for radon?

    No. Zone 3 means your county has the lowest predicted average radon potential nationally — it does not mean individual homes in your county are free of radon risk. EPA recommends testing in all zones. Significant local radon elevations occur in Zone 3 counties due to localized geology, soil conditions, and construction factors that the county-level map cannot capture.

    Is the EPA radon zone map accurate?

    The map is accurate as a statistical predictor of county-level averages based on 1993 data — which was the best available methodology at the time. It is not accurate as a predictor of individual home radon levels. The map’s limitations are well-documented in the literature: some counties are misclassified relative to more recent measurement data, and county-level averaging obscures significant within-county variation. Use it as context, not as a substitute for testing.

    What does Zone 1 mean for new construction?

    EPA recommends RRNC (Radon-Resistant New Construction) for all new homes in Zone 1 counties. Some states mandate RRNC for Zone 1 construction regardless of whether the specific site has been tested. HUD requires radon testing and mitigation for federally assisted multifamily projects in Zone 1. Even where not mandated, RRNC is strongly advisable in Zone 1 — the cost during construction ($350–$700) is a fraction of post-construction remediation ($800–$2,500).


  • Radon Test Placement: Where to Put Your Detector at Home

    Radon Test Placement: Where to Put Your Detector at Home

    The Distillery
    — Brew № 1 · Radon Mitigation

    Updated September 30, 2026.

    Direct answer: Put the radon test on the lowest level you use or could use as living space—in a bedroom, living room, or similar room, not a kitchen, bathroom, closet, crawl space, or furnace room. Keep the device at least 20 inches above the floor, at least 3 feet from exterior doors and windows, at least 1 foot from an exterior wall when there are no nearby openings, and at least 4 inches from other objects. Avoid HVAC vents, fans, heat, and sun; follow closed-house rules for short-term kits.

    Placement is the most controllable part of a home radon measurement. A good lab kit in the wrong spot produces a misleading number. EPA home-test guidance and AARST’s MAH protocol target breathing-zone air in lived-in space—not a mechanical closet or a draft under a supply vent.

    Which Floor to Test

    Test the lowest level that could be used regularly, finished or unfinished: basement, walkout lower level, or first floor when there is no below-grade living area. Do not stop at upper floors if a usable level exists below—radon concentrates low in the building envelope.

    Pick a room people actually occupy (bedroom, family room, den, home office). If crawl-space moisture sits under that level, a crawl space humidity monitor documents adjacent conditions; it does not replace a radon kit.

    Height and Clearances

    EPA’s measurement device protocol and AARST Table 3.3 agree on minimum clearances:

    • Floor: At least 20 inches (50 cm) above the floor.
    • Openings: At least 3 feet (90 cm) from exterior doors, windows, or other outdoor openings.
    • Exterior wall: At least 1 foot (30 cm) from the exterior wall when no nearby openings apply.
    • Objects: At least 4 inches (10 cm) from furniture, other detectors, or surfaces beside the kit.
    • Height: Table height is typical; suspended devices may sit about 6–8 feet high in the general breathing zone.

    Do not set the kit on the slab, in a sump pit, or tight to a foundation wall—those are entry pathways, not room-average air. Stay away from supply and return vents; EPA flags drafty locations near HVAC, not a single fixed inch count.

    Closed-House Rules (Short-Term Tests)

    EPA’s 2024 Home Buyer’s and Seller’s Guide still defines closed-house conditions for short-term work: windows stay closed, doors stay closed except normal entry and exit, and you do not run equipment that pulls in outdoor air (small brief exhaust fans and fans on an installed radon system are exceptions per EPA).

    • Close windows and outside doors at least 12 hours before starting.
    • Hold closed-house conditions for the full test when the kit requires it.
    • Skip starting a sub-four-day test during severe storms or high winds if instructions warn you.

    Rooms to Avoid

    Do not test in closets, stairways, hallways, crawl spaces, sumps, kitchens, bathrooms, laundry rooms, furnace rooms, or unheated garages. EPA lists these as non-representative or high-velocity, high-humidity zones. Follow manufacturer instructions when they are stricter.

    Multiple Tests and Mitigation Follow-Up

    One device on the lowest lived-in level is the usual first screen. Test each sleeping area on different levels if people sleep there. Do not average simultaneous room results—each reading stands alone. Address any room at or above EPA’s action level of 4.0 pCi/L. Before you spend on mitigation, check whether homeowners insurance covers radon mitigation on your policy.

    Post-mitigation verification uses the same placement rules; match the pre-test room when you can. Where soil air and wet crawl conditions overlap, radon work and drying are separate budgets—see crawl space dehumidifier cost for the moisture side. Operators who publish exact placement steps earn cleaner answers in AI search; an AI citation quick scan or tracking AI citation rate measures visibility, not dose.

    Frequently Asked Questions

    Should I test for radon in the basement or on the first floor?

    Test in the basement if it is the lowest level you use or could use regularly—that is where concentrations are usually highest. If you have no basement or crawl-space living area, test on the first floor. If people sleep on multiple levels, test each sleeping floor per EPA guidance, not only the lowest point.

    Can I put a radon test on my nightstand?

    Yes, if the nightstand is in a bedroom on the lowest sleeping level. That height is inside the breathing zone and reflects long nightly exposure. Confirm the kit is at least 3 feet from windows and exterior doors, at least 1 foot from an exterior wall when no openings are nearby, and at least 4 inches from lamps or clutter on the stand.

    My basement has multiple rooms—where should I put the test?

    Place the device in the basement room you occupy or plan to finish for living use—office, bedroom, or family space—not storage-only zones. If the whole level is unfinished storage, test in the most central lived-in candidate on that level, then retest after you convert space to regular use.

    How far from a window does the test need to be?

    Keep the detector at least 3 feet (90 cm) from exterior windows, doors, or other openings to outdoors. That distance reduces skew from outdoor air mixing during entry and exit. If the room has no exterior openings, stay at least 1 foot from the exterior wall instead.

    Can I run ceiling fans or the HVAC during the test?

    Follow your kit instructions and EPA closed-house rules. Short-term tests generally require closed windows and no fans that import outdoor air. Normal heating and cooling operation is usually acceptable, but do not point supply vents at the detector or run whole-house fans that change building pressure during a short-term exposure.

    What if my result is above 4 pCi/L?

    EPA’s action level for follow-up is 4.0 pCi/L. Confirm with a second test—often a long-term measurement or another short-term under closed-house conditions—before committing to mitigation. Fix placement errors before you treat a bad reading as a structural radon problem.


  • EPA Radon Testing Protocol: Official Guidelines Explained

    EPA Radon Testing Protocol: Official Guidelines Explained

    The Distillery
    — Brew № 1 · Radon Mitigation

    The EPA’s radon testing protocols are the foundation for nearly every state radon program, real estate testing standard, and measurement professional certification in the United States. Understanding what the EPA actually requires — not what a neighbor summarizes or a contractor implies — lets you evaluate whether your testing was conducted correctly and whether your results are defensible.

    EPA Radon Testing Guidance: Overview

    The EPA’s primary radon testing guidance documents for homeowners are the A Citizen’s Guide to Radon and the Home Buyer’s and Seller’s Guide to Radon. For measurement professionals, the EPA Radon Measurement Proficiency Program established the original certification framework that NRPP and NRSB now administer. AARST-ANSI measurement standards (MAMF, ANSI/AARST Series) build on EPA guidance and are the operative standards for professional measurement.

    Closed-House Conditions: The Core Protocol Requirement

    Closed-house conditions are the most important and most frequently violated component of EPA’s short-term testing protocol. Without closed-house conditions, short-term results are not comparable to the EPA action level and may significantly underestimate actual radon levels.

    What Closed-House Conditions Mean

    • Keep all windows and exterior doors closed during the test and for 12 hours before the test device is placed
    • Do not operate whole-house fans, attic fans, or similar ventilation during the test or the 12-hour pre-test period
    • Normal HVAC operation is permitted — heating and cooling systems that recirculate interior air (central HVAC) may run normally
    • Ceiling fans: permitted
    • Kitchen and bathroom exhaust fans: minimize use; brief operation for cooking or showering is acceptable, but extended operation creates pressure differential
    • Fireplace dampers: keep closed if not in use; do not operate fireplaces during the test

    Why Closed-House Conditions Matter

    Open windows introduce large volumes of outdoor air (~0.4 pCi/L radon) that dilute indoor radon levels to artificially low values. A home with actual indoor radon of 8.0 pCi/L may test at 3.0–4.0 pCi/L with windows routinely open — below the action level, creating a false impression of safety. This is why summer testing with open windows is unreliable and why EPA requires closed-house conditions for short-term tests.

    Device Placement Protocol

    EPA’s placement requirements for radon test devices:

    • Level: Lowest level that is used or could be used as living space — including unfinished basements if they could be finished, and basements where family members spend any time regularly
    • Height: At least 20 inches above the floor, within the breathing zone
    • Wall distance: At least 12 inches from any wall
    • Avoid: Drafts from windows, doors, HVAC supply/return vents, exterior walls; direct sunlight; humidity sources (sump pits, laundry, showers)
    • Do not place in: Kitchens, bathrooms, crawl spaces, or closets
    • Placement in room: Central to the room is ideal; near where occupants typically spend time is the goal — not in an uninhabited corner

    EPA’s Two-Test Decision Protocol

    For initial testing of a home, EPA’s protocol is designed to balance speed against accuracy:

    If Initial Short-Term Test is Below 4.0 pCi/L

    No immediate action required. Retest in 2 years. If the result was between 2.0 and 3.9 pCi/L, consider a long-term test to confirm the annual average. Levels in this range may be higher during different seasons or weather conditions.

    If Initial Short-Term Test is 4.0–7.9 pCi/L

    Follow up with either a second short-term test or a long-term test before making a mitigation decision. The rationale: a single 48-hour test in this range has sufficient measurement uncertainty that a confirmatory test substantially improves confidence in the true annual average level. If the confirmatory test also comes in at or above 4.0 pCi/L, mitigate. Average the two short-term results if using two short-term tests.

    If Initial Short-Term Test is 8.0 pCi/L or Higher

    EPA recommends proceeding to mitigation without waiting for a confirmatory test. At this concentration, the risk from continued exposure during a second test period is not justified by the additional certainty. Contact a certified radon mitigator and schedule installation.

    The 4.0 pCi/L Action Level: Context and Criticism

    EPA’s 4.0 pCi/L action level was established in the 1980s based on risk assessments available at the time and the practical cost of mitigation. It has not been formally revised since, despite significant advances in radon health research.

    Notable context:

    • The World Health Organization reference level is 2.7 pCi/L (100 Bq/m³) — lower than EPA’s threshold
    • EPA itself notes that “radon levels less than 4 pCi/L still pose a risk, and in many cases may be reduced” — the 4.0 level is an action threshold, not a safety threshold
    • EPA’s own long-term goal is to reduce indoor radon to outdoor air levels (0.4 pCi/L), acknowledging that any indoor radon above background carries some risk
    • Several European countries have adopted national reference levels of 1.4–2.7 pCi/L (50–100 Bq/m³)

    For practical purposes: the 4.0 pCi/L threshold determines when EPA recommends mandatory action. Below 4.0 pCi/L, mitigation is EPA-recommended for consideration between 2.0–3.9 pCi/L and is always a personal risk decision.

    EPA Guidance on Specific Testing Situations

    Real Estate Transactions

    EPA recommends testing in real estate transactions. When time is limited (common in transaction timelines), short-term tests are acceptable. EPA provides guidance that real estate tests should follow closed-house protocols strictly and that buyers should understand the limitations of a single 48-hour test relative to annual average exposure.

    Post-Mitigation Testing

    EPA recommends testing 24+ hours after system activation (if continuous monitor) or placing a charcoal canister at least 24 hours post-activation for a minimum 48-hour test. If results are still at or above 4.0 pCi/L, contact the mitigator — the system requires adjustment.

    New Construction (RRNC)

    EPA recommends testing new homes with RRNC passive systems after at least 60 days of occupancy, under normal living conditions (closed-house protocol not required for this application — the extended occupancy averages conditions sufficiently). If results are at or above 4.0 pCi/L, activate the passive system with a fan.

    Frequently Asked Questions

    What is EPA’s recommended radon action level?

    EPA’s action level is 4.0 pCi/L — the concentration at which EPA recommends mitigation. EPA also recommends considering mitigation at 2.0–3.9 pCi/L, acknowledging that radon at those levels still poses meaningful cumulative health risk, particularly for households with smokers or young children.

    Does EPA require professional radon testing?

    EPA does not federally mandate professional testing for homeowners conducting their own radon assessments. DIY test kits from NRPP- or NRSB-certified labs are EPA-endorsed for homeowner use. Professional certified testing is required for real estate transactions in some states, for regulatory compliance contexts, and when chain-of-custody documentation is needed.

    What is the difference between EPA and WHO radon action levels?

    EPA’s action level is 4.0 pCi/L (148 Bq/m³). The WHO reference level is 2.7 pCi/L (100 Bq/m³). The WHO level reflects more recent health evidence and is lower. In practice, both acknowledge significant risk below their respective thresholds — the difference is where each organization draws the line for recommended action.


  • Post-Mitigation Radon Testing: Timing & Expected Results

    Post-Mitigation Radon Testing: Timing & Expected Results

    The Distillery
    — Brew № 1 · Radon Mitigation

    Installing a radon mitigation system is not the final step — testing after installation is. A mitigation system without post-mitigation testing is a system with no verified outcome. You do not know it is working; you only know it is running. Post-mitigation testing is how you confirm the system achieved its purpose, satisfy warranty requirements, and establish a baseline for future monitoring.

    When to Conduct Post-Mitigation Testing

    EPA and AARST recommend testing within 24 hours of system activation if using a continuous electronic monitor, or placing a short-term charcoal canister at least 24 hours after the fan is turned on and running it for a minimum of 48 hours. The 24-hour delay allows the system to fully pressurize the sub-slab zone and reach equilibrium — results taken in the first few hours of operation may not represent steady-state performance.

    Do not wait weeks or months to test. The purpose of post-mitigation testing is to verify the system is performing as designed while any issues are still under the contractor’s workmanship warranty. Most warranties require the homeowner to conduct post-mitigation testing and notify the contractor of any elevated results within a defined window.

    What Test to Use for Post-Mitigation Verification

    A 48-hour charcoal canister is the standard post-mitigation test for residential applications. It provides a fast result (3–7 business days after mailing) and is the test type most commonly specified in contractor warranties and real estate disclosure contexts.

    Closed-house conditions are required during the 48-hour test period and for 12 hours prior to device placement. This is the same protocol used for any short-term test — windows closed, no whole-house fans, normal HVAC operation permitted.

    Some contractors conduct post-mitigation testing themselves using a professional continuous monitor, providing same-day or next-day results. This is faster but has a potential conflict of interest — a contractor confirming their own work. For independent verification, homeowners can place their own charcoal canister alongside the contractor’s device.

    Where to Place the Post-Mitigation Test Device

    Same placement protocol as any residential radon test:

    • Lowest livable level of the home — typically the same floor where the pre-mitigation test was conducted
    • Breathing zone: at least 20 inches above the floor, at least 12 inches from any wall
    • Away from drafts, HVAC vents, sump pits, and exterior walls
    • Undisturbed for the full 48-hour period

    Do not place the test directly under the suction point, adjacent to the riser pipe, or in the mechanical room where the fan vibration could affect the device. Place in the living area or bedroom where occupants actually spend time — the location most relevant to actual exposure.

    What Post-Mitigation Results to Expect

    A properly installed single-suction-point ASD system with good sub-slab aggregate and thorough slab sealing typically achieves:

    • 85–99% reduction from pre-mitigation levels
    • Final levels of 0.3–1.5 pCi/L for most homes
    • Homes that previously tested at 20+ pCi/L commonly achieve 0.5–2.0 pCi/L post-mitigation

    EPA’s target is below 4.0 pCi/L. Most certified mitigators target below 2.0 pCi/L as a workmanship standard, and well-executed installations on homes with good aggregate routinely achieve 0.5 pCi/L or lower.

    What If Post-Mitigation Results Are Still Elevated?

    A post-mitigation result at or above 4.0 pCi/L indicates the system is not achieving adequate reduction. This is not uncommon — national data suggests that 10–15% of initial installations require a callback before achieving target levels. The most common causes:

    • Insufficient suction field coverage: One suction point is not covering the full slab footprint — additional suction points needed
    • Unsealed bypass pathways: Gaps in the slab sealing — expansion joints, floor drains, sump pit, pipe penetrations — allow radon to enter the home directly without passing through the sub-slab vacuum zone
    • Fan undersized for aggregate conditions: Post-construction reveal that sub-slab fill is denser than the diagnostic suggested — a higher-capacity fan or additional suction point is needed
    • Block wall contribution: In CMU block basement homes, the block wall cores are a radon pathway that sub-slab depressurization alone does not address
    • Test conditions violated: Radon post-mitigation tests that are conducted with windows open or whole-house fans running produce unreliable results that may understate or overstate actual levels

    Contact your mitigator immediately when post-mitigation results are elevated. Most reputable contractors include workmanship warranties of 1–5 years that cover exactly this scenario — returning to add suction points, improve sealing, or upgrade fan capacity at no additional charge if results do not meet the contractual target.

    Ongoing Retesting After Mitigation

    EPA recommends retesting a mitigated home every 2 years. Reasons:

    • Fan performance can degrade over time — a failing fan that still runs may not generate adequate suction
    • Foundation settling creates new cracks and pathways that the existing system may not fully address
    • Remodeling work — finishing a basement, adding a room over a crawl space — changes the building’s pressure dynamics
    • Real estate transactions require current test results even in mitigated homes

    The U-tube manometer provides daily visual confirmation that the fan is generating suction, but it does not measure actual radon concentration. Monthly manometer checks plus biennial radon tests is the recommended maintenance protocol for a mitigated home.

    Frequently Asked Questions

    How soon after radon mitigation can I test?

    Place the test device at least 24 hours after the mitigation system is activated and run it for a minimum of 48 hours under closed-house conditions. Testing in the first few hours of system operation may not reflect steady-state performance. Most contractors recommend testing within the first 30 days of installation.

    What radon level should I expect after mitigation?

    Most properly installed ASD systems achieve 0.3–2.0 pCi/L regardless of the pre-mitigation starting level. EPA’s target is below 4.0 pCi/L; reputable contractors target below 2.0 pCi/L as a workmanship standard. If your post-mitigation result is at or above 4.0 pCi/L, contact your contractor immediately — a callback is almost always covered under the workmanship warranty.

    Do I need to retest after radon mitigation every year?

    EPA recommends retesting every 2 years in a mitigated home. Annual retesting is not required but provides more frequent confirmation of continued system performance. A long-term alpha track detector left in place for 90 days to a year provides the most accurate ongoing average.

    My post-mitigation test shows 3.5 pCi/L — is that acceptable?

    It is below EPA’s 4.0 pCi/L action level, but it is also not what a well-performing system typically achieves. Most single-point ASD installations in homes with standard aggregate conditions reach 0.5–2.0 pCi/L. A result of 3.5 pCi/L suggests the system may have room for improvement — additional sealing, a second suction point, or a fan upgrade. Discuss with your contractor whether a callback is warranted.


  • Short-Term Radon Test vs. Long-Term: Which Do You Need?

    Short-Term Radon Test vs. Long-Term: Which Do You Need?

    The Distillery
    — Brew № 1 · Radon Mitigation

    The difference between a short-term and long-term radon test is not just duration — it is what each result actually tells you. A 48-hour test gives you a snapshot of radon during specific conditions. A 90-day test gives you a seasonal average. A year-long test gives you the most accurate picture of your true annual exposure. Understanding when each applies prevents both under-reaction to real risk and over-reaction to a weather-influenced spike.

    Short-Term Tests: The Screening Tool

    Short-term radon tests run from a minimum of 48 hours up to 90 days. The most common residential short-term test is the activated charcoal canister, run for 48–96 hours under closed-house conditions.

    How Charcoal Canister Tests Work

    An activated charcoal canister absorbs radon gas from the surrounding air during the exposure period. At the end of the test, you seal the canister and mail it to a laboratory. The lab measures gamma radiation emitted by radon decay products that have accumulated in the charcoal, calculates the average radon concentration over the test period, and reports the result in picocuries per liter (pCi/L).

    Short-Term Test Accuracy and Limitations

    Short-term results are inherently variable because radon levels fluctuate by 30–50% day to day in many homes, driven by:

    • Barometric pressure: Low pressure pulls more soil gas into the home; high pressure suppresses it
    • Temperature differential: Greater indoor-outdoor temperature difference strengthens stack effect and increases radon draw
    • Wind: Wind pressure against the house affects sub-slab pressure dynamics
    • Precipitation: Rain saturates soil, reducing gas permeability and temporarily suppressing radon entry
    • HVAC operation: Forced-air systems can both dilute and redistribute radon within the home

    A single 48-hour test during an unusually high-pressure, warm, dry period may significantly underestimate actual levels. The same home tested during a cold snap with falling barometric pressure may read 30–50% higher than average. This variability is why EPA guidance does not recommend making final mitigation decisions solely on a single short-term result in the 4.0–8.0 pCi/L range.

    When Short-Term Tests Are the Right Choice

    • Initial screening: If you have never tested your home, a short-term test is the fastest way to identify whether a problem may exist
    • Real estate transactions: When time constraints (contract deadlines) prevent long-term testing, short-term tests are universally accepted with appropriate disclosure
    • Post-mitigation verification: After installing a radon system, a 48-hour charcoal test placed at least 24 hours post-installation verifies the system is working; EPA recommends this within 24 hours of system activation
    • Initial high-result screening: If the initial test returns 8.0 pCi/L or higher, EPA recommends proceeding to mitigation without waiting for a confirmatory long-term test — the risk is sufficient

    Long-Term Tests: The Accurate Baseline

    Long-term tests run for a minimum of 90 days; one-year tests are the gold standard. The standard device is an alpha track detector — a small card with a clear plastic film (CR-39 or similar) that records microscopic damage tracks from alpha particles emitted by radon decay products over the exposure period. At the end of the test, the lab chemically etches the film and counts the tracks under a microscope, calculating average radon concentration.

    Why Long-Term Tests Are More Accurate

    By averaging radon levels across multiple seasons — or ideally a full year — long-term tests smooth out the barometric, temperature, and weather-driven variability that makes short-term results uncertain. A 90-day winter test captures the highest-radon season and provides a reasonably conservative estimate of annual average. A full-year test captures all seasonal patterns.

    Studies comparing matched short-term and long-term measurements in the same homes consistently show that short-term tests, when compared to annual averages, overestimate the annual average in about half of cases and underestimate it in the other half — with individual test variance of ±40–50% common. Long-term tests reduce this uncertainty substantially.

    When Long-Term Tests Are the Right Choice

    • Confirming a short-term result in the 4.0–8.0 pCi/L range: Before investing $1,000–$2,500 in mitigation, a long-term confirmation test establishes that elevated levels are chronic rather than a test-period anomaly
    • Establishing a baseline in a new home: A one-year test after moving in provides the most accurate picture of actual exposure
    • Routine monitoring in a mitigated home: An annual alpha track detector run year-round provides ongoing confirmation of system performance
    • Research or legal purposes: Situations requiring the highest-accuracy radon measurements

    EPA Decision Protocol: Which Test When

    Situation Recommended Test Action if Elevated
    First-time testing, no rush Long-term (90+ days) Mitigate if annual avg ≥ 4.0 pCi/L
    First-time testing, want quick answer Short-term (48–96 hrs) Follow up with long-term if 4.0–8.0 pCi/L
    Short-term result ≥ 8.0 pCi/L Mitigate immediately No confirmatory test needed
    Short-term result 4.0–8.0 pCi/L Second short-term or long-term Mitigate if confirmed ≥ 4.0 pCi/L
    Real estate transaction Short-term (48–96 hrs) Negotiate mitigation in contract
    Post-mitigation verification Short-term (48–96 hrs), 24+ hrs after install Retest or callback if still ≥ 4.0 pCi/L
    Ongoing monitoring (mitigated home) Long-term (annual alpha track) Schedule callback if ≥ 4.0 pCi/L

    Continuous Radon Monitors: The Third Option

    Continuous electronic radon monitors (Airthings Wave, Corentium, RadonEye) provide real-time radon readings and running averages. They do not replace lab-analyzed test kits for official measurements but offer ongoing visibility into radon fluctuations that neither charcoal canisters nor alpha track detectors can provide.

    Continuous monitors are most valuable for:

    • Monitoring a mitigated home between formal retests
    • Understanding diurnal and seasonal radon patterns in your home
    • Detecting rapid changes that indicate fan failure or new entry pathways
    • Confirming that closed-house conditions during a short-term test are being maintained

    Consumer-grade continuous monitors have measurement uncertainty of ±10–20% at low radon levels and are not accepted as certified measurements for real estate transactions or regulatory compliance. They are monitoring tools, not certification tools.

    Frequently Asked Questions

    Which radon test is more accurate — short-term or long-term?

    Long-term tests are more accurate representations of actual annual average radon exposure because they average out the weather- and pressure-driven fluctuations that make short-term results variable. A 90-day or one-year alpha track test provides a more reliable basis for mitigation decisions than a single 48-hour charcoal test.

    Can I use a short-term test to decide whether to mitigate?

    Yes, with caveats. If your short-term result is 8.0 pCi/L or higher, EPA recommends mitigation without a confirmatory test. If it is between 4.0 and 8.0 pCi/L, a follow-up long-term or second short-term test is advisable before investing in mitigation, to confirm the result is not an anomalous spike.

    How long should I run a radon test?

    Minimum 48 hours for a charcoal short-term test under closed-house conditions. For the most accurate annual average, run an alpha track detector for 90 days to one year under normal living conditions. Longer is more accurate.

    Do I need closed-house conditions for a long-term radon test?

    No. Long-term tests (alpha track detectors, 90+ days) are designed to run under normal living conditions — windows open in summer, closed in winter, normal HVAC operation. The extended duration averages out all of these variations. Closed-house conditions are required only for short-term charcoal tests (48–96 hours).


  • How to Test for Radon in Your Home: Complete Guide

    How to Test for Radon in Your Home: Complete Guide

    The Distillery
    — Brew № 1 · Radon Mitigation

    Radon testing is the only way to know whether your home has elevated radon levels. You cannot smell it, see it, or detect it with any sense — and the homes with the highest radon levels often show no correlation with geography, age, or construction style. The EPA estimates that 1 in 15 U.S. homes has elevated radon. Testing takes as little as 48 hours and costs $15–$30 for a DIY kit.

    Why You Need to Test

    Radon is the second leading cause of lung cancer in the United States after cigarette smoking, responsible for approximately 21,000 deaths annually according to the EPA. The risk is cumulative — it is the product of concentration and time. A home at 4.0 pCi/L poses roughly the same lifetime lung cancer risk as smoking half a pack of cigarettes per day. A home at 20 pCi/L — not uncommon in high-radon zones — roughly equals smoking two packs per day.

    The only way to know your home’s radon level is to test it. No map, no neighborhood average, and no visual inspection can substitute for a measurement in your specific home.

    Short-Term vs. Long-Term Radon Tests

    Short-Term Tests (2–90 Days)

    Short-term tests are the most commonly used initial screening method. The standard residential short-term test is a charcoal canister test run for 48–96 hours. Results are available within 3–7 business days after mailing the device to a lab.

    • Duration: 48 hours minimum (EPA); 48–96 hours typical for charcoal devices
    • Device type: Activated charcoal canister or electret ion chamber
    • Conditions required: Closed-house conditions (see below)
    • Best for: Initial screening, pre-purchase testing, post-mitigation verification
    • Limitation: A single short-term test captures a snapshot — radon levels fluctuate with barometric pressure, temperature, and season. A short-term result may be higher or lower than the home’s true annual average.

    Long-Term Tests (90+ Days)

    Long-term tests provide a more accurate picture of the home’s actual annual average radon exposure. The standard device is an alpha track detector — a small card with a special plastic film that records radon decay particle tracks over time.

    • Duration: 90 days to 1 year (one year is ideal)
    • Device type: Alpha track detector
    • Conditions required: Normal living conditions (no closed-house protocol)
    • Best for: Confirming short-term results, annual monitoring, determining true annual average
    • Advantage: Averages out seasonal and pressure fluctuations — provides the most accurate basis for mitigation decisions

    EPA guidance: if a short-term test shows between 4.0 and 8.0 pCi/L, conduct a follow-up long-term test or a second short-term test before deciding on mitigation. If the initial short-term test shows 8.0 pCi/L or higher, proceed to mitigation without waiting for a confirmatory test — the risk is sufficient to act immediately.

    Where to Place the Radon Test Device

    Placement determines whether your result is meaningful. The EPA’s placement protocol:

    • Level: Test in the lowest level of the home that is currently used or could be used as living space — even if you do not currently occupy it. If you have an unfinished basement you plan to finish, test there.
    • Location within the room: Place the device in the breathing zone — at least 20 inches above the floor and at least 12 inches from any wall
    • Away from drafts: Do not place near windows, doors, HVAC vents, or exterior walls where air movement can dilute results
    • Away from humidity sources: Do not place near sump pits, laundry areas, or bathrooms — excessive humidity can affect charcoal canister performance
    • Accessible but undisturbed: The device should be able to sit undisturbed for the full test duration — not in a high-traffic area where it might be moved

    Closed-House Conditions

    Short-term tests require closed-house conditions during the test and for 12 hours before the test begins. Closed-house means:

    • All windows and exterior doors closed except for brief normal entry/exit
    • No whole-house fans or attic fans running
    • Normal HVAC operation is permitted (heating and cooling systems can run — they recirculate interior air)
    • Ceiling fans are permitted
    • Fireplace dampers closed (if not in use)

    Closed-house conditions prevent outdoor air from diluting indoor radon to artificially low levels during the test. When conditions are not maintained, short-term results systematically underestimate actual radon levels — exactly the wrong direction for a safety measurement.

    Interpreting Your Results

    • Below 2.0 pCi/L: Below EPA’s average indoor radon level of 1.3 pCi/L if the home is new. No action required; retest in 2 years.
    • 2.0–3.9 pCi/L: Between the national average and the EPA action level. Consider a long-term test to confirm. Some homeowners choose to mitigate at this level regardless, particularly if they have young children or smokers in the home.
    • 4.0–7.9 pCi/L: At or above EPA action level. EPA recommends mitigation. Conduct a confirmatory long-term or second short-term test if time allows, then mitigate.
    • 8.0 pCi/L or higher: Mitigate without waiting for confirmatory testing. At this level the health risk warrants immediate action.

    DIY vs. Professional Testing

    DIY test kits (charcoal canisters or alpha track detectors) purchased from hardware stores or online labs are the most cost-effective option for initial and ongoing screening. Cost: $15–$30 including lab analysis. Most state radon programs recommend purchasing from a lab certified by the National Radon Proficiency Program (NRPP) or National Radon Safety Board (NRSB).

    Professional testing uses the same device types but is conducted and placed by a certified radon measurement professional. Professional testing is required or preferred in specific situations:

    • Real estate transactions where the buyer requires a certified measurement
    • Post-mitigation verification where the mitigator or a warranty requires professional confirmation
    • Rental properties in states where landlord testing requirements specify professional measurement
    • Situations involving litigation or insurance where certified chain-of-custody testing is required

    How Often to Test

    • Initial test: If you have never tested, test now — regardless of when you moved in or how long you have lived there
    • After mitigation: Test within 24 hours of system installation (if using a continuous monitor) or place a short-term test 24+ hours post-installation; run for 48 hours minimum
    • Routine retesting: EPA recommends retesting every 2 years even in mitigated homes — to confirm continued performance and catch new entry pathways from foundation settling or renovation
    • After renovations: Any work that involves the foundation, basement, or significant changes to the HVAC system warrants a new test
    • When buying a home: Always test — or require a recent test result — before closing

    Frequently Asked Questions

    How accurate are DIY radon test kits?

    DIY charcoal canister kits analyzed by NRPP- or NRSB-certified labs are accurate to within ±10–15% under controlled conditions. This is sufficient precision for screening decisions. The larger source of variation is not the device itself but testing conditions — an improperly placed device or violated closed-house conditions introduce more error than the device’s inherent measurement uncertainty.

    What time of year is best to test for radon?

    Winter typically produces higher radon readings than summer — windows are kept closed, stack effect is stronger, and atmospheric pressure patterns tend to draw more soil gas into the home. Testing in winter gives a closer approximation of worst-case conditions. However, because any result at or above 4.0 pCi/L warrants mitigation regardless of season, the best time to test is simply now — not after waiting for an optimal season.

    Can I test for radon myself or do I need a professional?

    DIY testing is appropriate and recommended for the vast majority of homeowners. Purchase a certified short-term or long-term kit, follow the placement and closed-house instructions, and mail to the lab. Professional testing is required only for real estate transactions in some states, post-litigation measurements, or situations where certified chain-of-custody documentation is needed.

    My neighbor’s home tested low — does that mean mine will too?

    No. Radon levels vary dramatically between adjacent homes — sometimes between rooms in the same home. Differences in sub-slab aggregate, foundation type, construction methods, HVAC configuration, and soil permeability can produce completely different radon levels in homes built side by side. Your home must be tested independently.


    Related Radon Resources