Update: the Claude 4 family has since been superseded at the top of the lineup. As of June 10, 2026, Anthropic’s current lineup is Claude Fable 5 (the new top tier above Opus, $10 input / $50 output per MTok), Opus 4.8 ($5/$25), Sonnet 4.6 ($3/$15), and Haiku 4.5 ($1/$5). Full details: the Claude Fable 5 Complete Guide.
Last refreshed: May 15, 2026
Model Accuracy Note — Updated May 2026
Current flagship: Claude Opus 4.7 (claude-opus-4-7). Current models: Opus 4.7 · Sonnet 4.6 · Haiku 4.5. Claude Opus 4.7 referenced in this article has been superseded. See current model tracker →
Claude AI · Fitted Claude
Anthropic hasn’t announced a specific “Claude 4” as a distinct release — the current model generation is the Claude 4.x series, with Claude Opus 4.7 and Claude Sonnet 4.6 as the current flagship models. If you’re searching for Claude 4, you’re likely looking for the current generation. Here’s exactly what’s live, what the naming means, and what to watch for next.
Current status (April 2026): The Claude 4.x model family is live. Claude Opus 4.7 (claude-opus-4-7) and Claude Sonnet 4.6 (claude-sonnet-4-6) are Anthropic’s current production models. These are the “Claude 4” generation.
The Current Claude 4.x Lineup
The current Claude 4.x lineup.
Model
API String
Status
Position
Claude Opus 4.7
claude-opus-4-7
✅ Live
Flagship / maximum capability
Claude Sonnet 4.6
claude-sonnet-4-6
✅ Live
Production default / balanced
Claude Haiku 4.5
claude-haiku-4-5-20251001
✅ Live
Speed / cost efficiency
Claude Model Naming: How It Works
Claude model naming — how it works.
Anthropic uses a generation.version naming convention. The “4” in Claude 4.6 denotes the fourth major model generation. The “.6” is a version within that generation — a meaningful update that improves on the generation’s base capabilities without being an entirely new architecture.
This is why there’s no single “Claude 4 release date” to point to — the Claude 4.x family has been rolling out incrementally, with different model tiers (Haiku 4.5, Sonnet 4.6, Opus 4.7) shipping at different points within the generation. The generation is live; you’re using it now if you’re on current Claude models.
Claude 4 vs Claude 3: What Changed
Claude 4 vs Claude 3 — what changed.
The jump from Claude 3.x to Claude 4.x brought improvements across reasoning, coding accuracy, instruction-following, and agentic capability. Claude 3.5 Sonnet — released in mid-2024 — was the model that first clearly demonstrated Claude could compete with and often exceed GPT-4o on most professional benchmarks. The 4.x series extended those gains.
The most notable improvements in the 4.x generation: stronger performance on multi-step reasoning, better coherence in long agentic sessions, and improved accuracy on coding tasks including the SWE-bench benchmark for real-world software engineering.
What Comes After Claude 4.x
Anthropic hasn’t announced a Claude 5 release date or feature set. Based on the pace of releases — major generations arriving every several months, point releases more frequently — the next major generation will likely arrive within the year. When it does, the pattern will hold: the new mid-tier model (Sonnet) will likely outperform the current top-tier (Opus) on most tasks, at a fraction of the cost.
Claude 4 is already out — the current model generation is Claude 4.x. Claude Opus 4.7 and Claude Sonnet 4.6 are live and in production as of April 2026. There’s no separate “Claude 4” launch pending; you’re on it.
What is Claude 4?
Claude 4 refers to Anthropic’s fourth major model generation — currently the Claude 4.x series including Opus 4.6, Sonnet 4.6, and Haiku 4.5. The generation brought improvements in reasoning, coding, instruction-following, and agentic performance over Claude 3.
Is Claude 4 better than Claude 3?
Yes, across most benchmarks and practical tasks. The Claude 4.x generation improves on Claude 3 in reasoning accuracy, coding performance, long-context coherence, and agentic capability. Claude 3.5 Sonnet — the bridge between generations — was the model that first demonstrated Claude could consistently outperform GPT-4o on professional tasks.
There is no “Claude 4” as a standalone release. The current generation is the Claude 4.x series. The flagship model right now is Claude Opus 4.7 — released April 16, 2026.
If you’ve spent any time on Reddit trying to figure out whether Claude or ChatGPT is actually better, you’ve seen the debate play out across r/ChatGPT, r/ClaudeAI, r/artificial, and r/MachineLearning. Here’s what Reddit actually says — the real consensus that emerges from people using both tools daily, not marketing copy.
Reddit’s general consensus: Claude wins for writing quality, nuanced reasoning, and following complex instructions. ChatGPT wins for integrations, image generation, and ecosystem breadth. Power users often keep both. The Claude subreddit skews toward people who’ve already switched; ChatGPT subreddits have more defenders of the status quo.
What Reddit Says Claude Does Better
What Reddit says Claude does better.
“Claude doesn’t sound like an AI”
This is the most consistent thread in Claude discussions on Reddit. Users repeatedly describe Claude’s writing as more natural, less formulaic, less likely to fall into the bullet-point-heavy structure that ChatGPT defaults to. Threads asking “which is better for writing?” heavily favor Claude. The specific complaints about ChatGPT — sycophantic openers, generic structure, “certainly!” affirmations — get cited constantly as reasons people switched.
Instruction-following and context retention
Multi-part prompts with specific constraints are a recurring Reddit test. Users report Claude holds requirements more consistently through long responses — if you say “don’t use bullet points” or “write in first person” at the start, Claude is less likely to drift mid-response. ChatGPT gets called out frequently for “forgetting” constraints partway through.
Honesty about uncertainty
Reddit threads about AI hallucination tend to frame ChatGPT as more confidently wrong and Claude as more willing to express uncertainty. This matters for research and factual tasks — Claude saying “I’m not certain about this” is more useful than ChatGPT making something up with conviction.
Long documents and large context
Users uploading long PDFs, code files, or research papers consistently report better results from Claude. Claude’s 200K context window and coherence across long inputs gets cited as a practical advantage for document-heavy work.
What Reddit Says ChatGPT Does Better
What Reddit says ChatGPT does better.
Image generation
DALL-E integration is the most cited ChatGPT advantage. Reddit users who need image generation in their workflow find it more convenient to stay in ChatGPT than to use a separate tool. Claude doesn’t generate images natively in the web interface, which is a real gap for this use case.
Plugin and integration ecosystem
ChatGPT’s broader plugin and connection ecosystem gets cited often by users who rely on specific third-party integrations. Although Claude’s MCP integrations are expanding rapidly, ChatGPT has more established connections across consumer apps.
Code interpreter for data analysis
ChatGPT’s ability to run Python in-chat, generate charts, and work interactively with data files is repeatedly cited as a concrete advantage. Reddit users doing exploratory data analysis prefer ChatGPT’s sandbox for this specific workflow.
The Honest Reddit Meta-Conclusion
The honest Reddit meta-conclusion.
The most upvoted takes on Reddit tend to be: use Claude as your primary tool if you do writing, analysis, or complex reasoning work. Keep ChatGPT for image generation and integrations. The “I switched to Claude and never looked back” posts get more engagement than the reverse — but the “I use both and they serve different purposes” takes are probably the most accurate.
Reddit’s general consensus favors Claude for writing quality, instruction-following, and nuanced reasoning, while ChatGPT wins for image generation and integrations. Power users typically keep both. The Claude subreddit (r/ClaudeAI) skews heavily toward satisfied switchers.
Is Claude more popular than ChatGPT on Reddit?
ChatGPT has a larger subreddit by subscriber count. Claude’s subreddit (r/ClaudeAI) is smaller but highly engaged and skews toward daily professional users. The cross-subreddit sentiment on comparison threads consistently shows Claude gaining ground in preference, particularly for writing tasks.
Why do Reddit users prefer Claude for writing?
The most cited reasons: Claude produces more natural prose that doesn’t immediately read as AI-generated, it follows style instructions more precisely, and it’s less likely to default to formulaic structures. Reddit users specifically criticize ChatGPT’s tendency toward sycophantic openers and excessive bullet points — Claude avoids both more reliably.
By Will Tygart• Long-form Position
• Practitioner-grade
When Google launched the Universal Commerce Protocol at NRF in January 2026, the announcement was framed as an e-commerce story. Shopify, Walmart, Target, Visa — merchants and payment processors getting their systems ready for AI agents that shop, compare, and execute purchases without human intervention. That framing is correct but incomplete. UCP is not just a commerce standard. It is a template for how open protocols create movements.
The Restoration Carbon Protocol is a different kind of standard in a completely different industry. But when you understand what UCP actually does architecturally — and why it succeeded where dozens of previous e-commerce APIs failed — you start to see exactly how RCP gets from a 31-article framework on tygartmedia.com to an industry-wide adopted standard that BOMA, IFMA, and institutional ESG reporters actually depend on.
The mechanism is the same. The domain is different. And there is a version two of RCP that plugs directly into the UCP trust architecture — if the restoration industry moves in the next 18 months.
What UCP Actually Does That Previous Commerce APIs Didn’t
What UCP actually does that previous commerce APIs didn’t.
The history of e-commerce is littered with failed attempts at standardization. Every major platform — Amazon, eBay, Shopify, Magento — built its own API. Merchants implemented each one separately. Integrators spent years building custom connectors. The problem was not technical. The problem was trust and authentication. Every API required a bilateral relationship: the merchant trusted this specific buyer’s agent, that agent trusted this specific merchant’s data. Scaling to the open web required n² trust relationships. It never worked.
UCP solved this with a different architecture. Instead of bilateral trust, it established a protocol layer — a shared standard that any compliant agent and any compliant merchant can speak without a pre-existing relationship. An AI agent that implements UCP can query any UCP-compliant catalog, check any UCP-compliant inventory, and execute against any UCP-compliant checkout — not because it has a relationship with that merchant, but because both parties speak the same authenticated protocol.
The authentication is the product. UCP’s standardized interface means that a merchant’s decision to implement the protocol is simultaneously a decision to trust any UCP-authenticated agent. The trust is embedded in the standard, not in the bilateral relationship.
Google’s Agent Payments Protocol (AP2), which sits alongside UCP, formalized this with “mandates” — digitally signed statements that define exactly what an agent is authorized to do and spend. The mandate is the credential. Any merchant who accepts UCP mandates accepts a verifiable statement of agent authorization without knowing anything specific about the agent that issued it.
That architecture — open protocol, embedded authentication, mandate-based trust — is exactly what the restoration industry needs for Scope 3 emissions data. And RCP v1.0 has already built the content layer. The question for v2 is whether to build the authentication layer.
The RCP Authentication Problem (That UCP Already Solved)
The RCP authentication problem UCP already solved.
RCP v1.0 produces per-job emissions records — JSON-structured Job Carbon Reports that restoration contractors deliver to commercial property clients for their GRESB, SBTi, and SB 253 reporting. The framework is solid. The methodology is sourced and auditable. The schema is machine-readable.
But right now, there is no authentication layer. A property manager who receives an RCP Job Carbon Report from a contractor has no way to verify that the contractor actually follows the methodology, uses the current emission factors, or has gone through any validation process. They have to trust the contractor’s word — which is exactly the problem that makes Scope 3 data from supply chains unreliable for ESG auditors.
This is the bilateral trust problem all over again. The property manager trusts this specific contractor’s data. That contractor trusts this specific property manager’s reporting process. It does not scale to a portfolio of 200 contractors across 800 properties.
UCP solved the equivalent problem in commerce. The RCP organization — whoever formally governs the standard — can solve the same problem in ESG supply chain reporting with an analogous architecture.
What RCP Certification Could Look Like in a UCP-Style Architecture
Imagine a restoration contractor completes an RCP certification process. They demonstrate that they collect the 12 required data points, apply the current emission factors, produce Job Carbon Reports in the RCP-JCR-1.0 schema, and maintain source documents for seven years. The RCP organization validates this and issues a cryptographically signed certification credential — an RCP Mandate.
The RCP Mandate is the contractor’s credential. It is not issued to a specific property manager. It is not dependent on a bilateral relationship. It is a verifiable statement, signed by the RCP authority, that this contractor’s emissions data meets the methodology standard. Any property manager, ESG platform, or auditor who accepts RCP Mandates can trust the data from any RCP-certified contractor — not because they know that contractor, but because the standard’s authentication is embedded in the credential.
This is precisely how UCP mandates work in commerce. The signed statement creates protocol-level trust that does not require a pre-existing relationship.
The downstream effects are the same as in commerce:
For contractors: RCP certification becomes a competitive signal that travels with the data. An RCP Mandate delivered with a Job Carbon Report tells the property manager’s ESG team: this data does not need to be validated separately. It has already been validated by a recognized standard.
For property managers: They can accept RCP-certified contractor data directly into their ESG reporting workflows without manual review. The certification is the audit trail. Measurabl, Yardi Elevate, and Deepki — the ESG data management platforms most of them use — can be built to accept RCP Mandate credentials alongside RCP JSON records and flag them automatically as verified-methodology data.
For ESG auditors: A property portfolio where all restoration contractor data comes from RCP-certified vendors is auditable without going back to each contractor. The mandate chain is the evidence. Limited assurance under CSRD or SB 253 becomes a single check — are these vendors RCP-certified? — rather than a vendor-by-vendor methodology review.
For the industry: Certification creates a selection mechanism. Property managers who require RCP-certified vendors in their preferred contractor agreements are no longer asking for a one-off document. They are asking for protocol compliance — the same way a merchant asking for UCP compliance is not asking for a custom integration, they are asking for standards adoption.
The Protocol Stack for RCP v2
Following the UCP architecture model, a complete RCP v2 would have three layers — matching the commerce, payments, and infrastructure layers of the agentic commerce stack:
Layer 1: The Data Layer (Already Built — RCP v1.0)
The methodology, emission factors, JSON schema, five job type guides, audit readiness documentation, and public API. This is the equivalent of UCP’s catalog query and inventory check layer — the standardized interface for what data is produced and how it is structured. RCP v1.0 is complete at this layer.
Layer 2: The Authentication Layer (RCP v2 Target)
The certification program, the mandate credential, the verification mechanism. This is the equivalent of UCP’s trust and authentication architecture — the layer that makes data from one party trusted by another without a bilateral relationship. Key components:
RCP Contractor Certification: documented audit of data capture practices, schema compliance, emission factor vintage, and source document retention
RCP Mandate: cryptographically signed certification credential, issued per contractor, versioned to the RCP release used, with an expiration and renewal cycle
Mandate verification endpoint: a public API (building on the existing tygart/v1/rcp namespace) where any platform can POST a mandate token and receive a verified/not-verified response with credential metadata
Certified contractor registry: a public directory of RCP-certified organizations, queryable by name, state, and certification status
Layer 3: The Infrastructure Layer (RCP v2 Target)
The machine-to-machine data exchange infrastructure — the equivalent of MCP and A2A in the agentic commerce stack. A contractor’s job management system (Encircle, PSA, Dash, Xcelerate) that natively implements RCP can transmit certified Job Carbon Reports directly to a property manager’s ESG platform without human intermediation. The report travels with the mandate credential. The platform verifies the credential, ingests the data, and flags it as RCP-verified — automatically. No email, no manual upload, no data entry.
This is what makes it a movement rather than a document standard. The data flows automatically between authenticated parties. The human steps are eliminated. The protocol becomes infrastructure.
Why Open Protocol Architecture Enables Movements
UCP didn’t succeed because Google built good documentation. It succeeded because Google made it open — any merchant can implement it, any agent can speak it, no license fee, no bilateral negotiation, no approval required. Shopify and a regional boutique retailer are equal participants in the UCP ecosystem because the protocol is the credential, not the relationship with Google.
That openness is what creates network effects. Every new UCP-compliant merchant makes the protocol more valuable for every agent. Every new UCP-compliant agent makes the protocol more valuable for every merchant. The standard grows because participation is self-reinforcing.
RCP v1.0 is already open. The framework is CC BY 4.0 — free to use, implement, and build upon. The API is public. The emission factors are published with sources. Any restoration company can implement it today without permission.
What RCP v2 adds is the authentication layer that makes open participation verifiable. The difference between “any company claims to follow RCP” and “any company can prove they follow RCP” is the difference between a document standard and a protocol. And the difference between a protocol and a movement is whether the infrastructure layer — the machine-to-machine data exchange — gets built.
The agentic commerce stack took 18 months from UCP’s launch to meaningful adoption in production commerce systems. The RCP timeline is not 18 months from today — it’s 18 months from the moment RIA, IICRC, or a major industry insurer formally endorses the standard. That endorsement is the equivalent of Shopify and Walmart signing on to UCP at NRF. It’s the signal that tells the rest of the ecosystem: this is the standard, build to it.
The Restoration Industry’s Unique Position
The restoration industry’s unique position.
BOMA and IFMA are working the problem from the property owner side — how do we get our vendor supply chains to report Scope 3 data? They don’t have the answer because the answer requires contractor-side infrastructure that commercial real estate organizations cannot build. They can mandate data. They cannot build the methodology.
The restoration industry can. The 12 data points are already defined. The five job type methodologies are already published. The JSON schema is live. The API is running. The audit readiness guide exists. The only missing component is the formal certification program and the mandate credential that makes all of it protocol-grade rather than document-grade.
This is what positions restoration as the leading industry in commercial property Scope 3 compliance — not just a participant but the infrastructure provider. The industry that built the standard that the property management industry depends on. That is a fundamentally different value proposition than “we report our emissions.”
The parallel to UCP is exact: Google didn’t just participate in e-commerce. They built the protocol layer that made agentic commerce possible at scale. The restoration industry, through RCP, can build the protocol layer that makes supply chain Scope 3 compliance possible at scale for commercial real estate. And unlike Google, the restoration industry doesn’t need to be invited to the table. The table was already set at tygartmedia.com/rcp.
What RIA Savannah Should Start
The conversation at RIA Savannah on April 27 isn’t about persuading the industry to care about carbon. It’s about presenting the infrastructure that already exists and asking whether the industry wants to formally govern it. The RCP v1.0 framework, the public API, the certification roadmap — these are things that exist today. The question for RIA leadership is whether they want the restoration industry to own the protocol layer for commercial property Scope 3 compliance, or whether they want to watch a property management trade association or a Canadian software company build something proprietary in their place.
The window is real. ESG data platforms are making vendor integration decisions now. Property managers are establishing preferred contractor Scope 3 requirements now. California SB 253’s Scope 3 deadline is 2027. GRESB assessments with contractor data coverage scoring are active this year. The infrastructure moment is not coming. It is here.
A movement needs three things: an open standard, an authentication layer, and a network effect. RCP v1.0 is the standard. The authentication layer is the RCP v2 roadmap. The network effect starts the moment an industry organization formally endorses the protocol and restoration contractors have a reason to get certified rather than merely compliant.
That is what UCP teaches us about RCP. The protocol is not the product. The authenticated, machine-readable, verifiable data infrastructure that emerges from the protocol is the product. And the industry that builds that infrastructure owns the category.
A crawl space dehumidifier is the most expensive mechanical component in a typical encapsulation system — and the one with the most variation between the $200 box-store units that are inappropriate for crawl spaces and the $1,500–$3,500 installed systems that are. Understanding exactly what you are paying for, and what drives the difference between a $700 unit and a $1,500 installed system, allows informed comparison of contractor proposals and accurate budgeting for the full system cost.
Unit Cost by Capacity and Brand
Model
Capacity
Min Temp
Unit Cost
Best For
Aprilaire 1820
70 pint/day
33°F
$850–$1,050
Standard crawl spaces up to ~1,300 sq ft
Santa Fe Compact70
70 pint/day
38°F
$850–$1,050
Low-clearance crawl spaces (compact form)
Aprilaire 1850
95 pint/day
33°F
$1,150–$1,400
Larger crawl spaces or higher moisture load
Santa Fe Advance90
90 pint/day
38°F
$1,100–$1,350
Mid-large crawl spaces
AlorAir Sentinel HDi65
65 pint/day
26°F
$600–$800
Budget option; very cold climates
AlorAir Sentinel HDi90
90 pint/day
26°F
$750–$950
Budget mid-large; very cold climates
Santa Fe Max
120 pint/day
33°F
$1,400–$1,700
Very large or high-moisture crawl spaces
Installation Cost Components
The installed cost of a crawl space dehumidifier is substantially more than the unit cost alone. The full installation scope includes:
Electrical Circuit ($0–$600)
A dedicated 15A, 115V circuit is required. If an outlet already exists in the crawl space: $0 for electrical. If an electrician must run a new circuit from the electrical panel: $300–$600 for the circuit, including wire, conduit, and outlet. This is the most variable installation cost component — ask whether the crawl space has an existing electrical outlet before budgeting.
Mounting and Positioning ($100–$250)
The dehumidifier must be hung from floor joists or mounted on a stable platform — it cannot sit directly on the vapor barrier. Hanging brackets, threaded rod, and labor for positioning and securing: $100–$250 typically included in contractor installation quotes.
Condensate Drain Line ($50–$200)
The condensate line routes collected water to a sump pit or floor drain. Gravity drain to a nearby sump: $50–$100 in materials and minimal labor. If the dehumidifier is positioned where gravity drain is not possible (dehumidifier is lower than available drain points): a condensate pump ($80–$150 in materials) is installed to lift water to the drain point. Total condensate drain installation: $50–$200 depending on configuration.
Total Installed Cost Summary
Scenario
Unit Cost
Electrical
Mounting + Drain
Total Installed
Existing outlet, gravity drain
$850–$1,050
$0
$150–$350
$1,000–$1,400
New 15A circuit required, gravity drain
$850–$1,050
$300–$600
$150–$350
$1,300–$2,000
New circuit + condensate pump
$850–$1,050
$300–$600
$250–$500
$1,400–$2,150
Aprilaire 1850 with new circuit
$1,150–$1,400
$300–$600
$150–$350
$1,600–$2,350
Annual Operating Cost
Operating cost depends on run time (driven by climate and moisture load) and electricity rate:
Aprilaire 1820 / Santa Fe Compact70 (70 pint/day): Draws approximately 6.5–7 amps at 115V = 750–800 watts during operation. At 8 hours/day average run time (summer-heavy climates), 4 hours/day (drier climates): $130–$260/year at $0.13/kWh national average.
Aprilaire 1850 / Santa Fe Advance90 (90 pint/day): Draws approximately 7–9 amps = 800–1,050 watts. Same run time assumptions: $150–$310/year at national average rate.
High electricity cost markets (California, New York, New England): At $0.25–$0.35/kWh, annual operating cost doubles: $250–$550/year for a 70 pint/day unit.
Energy Star models: Some newer models use variable-speed compressors with 15–25% better efficiency than baseline — meaningful savings over the unit’s 7–10 year life.
Contractor vs. DIY Dehumidifier Purchase
Contractors who include a dehumidifier in an encapsulation package typically charge $1,500–$3,500 for the unit installed — which often includes a brand-specific unit at a slight premium over retail, plus installation labor and a service commitment. DIY purchase and installation (if you’re comfortable with basic electrical and HVAC connections) can save $300–$700 versus contractor pricing on the same unit — but requires either an existing outlet or hiring an electrician separately, and does not include the contractor’s monitoring or service relationship.
Frequently Asked Questions
How much does a crawl space dehumidifier cost?
The unit itself: $600–$1,700 depending on capacity and brand. Total installed cost including electrical circuit (if needed), mounting, and condensate drain: $1,000–$2,350 for most applications. Contractors who include a dehumidifier in an encapsulation package typically charge $1,500–$3,500 for the dehumidifier component — the higher end of this range typically includes the electrical circuit, monitoring, and multi-year service.
What is the cheapest crawl space dehumidifier that actually works?
The AlorAir Sentinel HDi65 ($600–$800) is the most affordable crawl space-rated dehumidifier on the market with a 26°F minimum operating temperature — the widest low-temperature range available. It has a shorter service track record than Aprilaire and Santa Fe but has gained significant market share among cost-conscious contractors and DIY encapsulators. The lower unit cost comes with a less established service network — factor this into the decision if warranty service accessibility is important for your application.
Is it cheaper to run an HVAC supply duct than a dehumidifier?
Significantly cheaper upfront: a supply duct from existing HVAC costs $300–$600 installed versus $1,000–$2,350 for a dehumidifier. Annual operating cost is also lower — an HVAC supply duct adds marginal cost to the existing HVAC system versus $130–$310/year for a dehumidifier in electricity. If your home has central forced-air HVAC and a moderate-humidity climate, the HVAC supply option is worth evaluating before defaulting to a dehumidifier.
“Black mold” is one of the most fear-inducing phrases in home ownership — and one of the most misused. When a home inspector, contractor, or alarmed homeowner reports “black mold” in a crawl space, it rarely means the Stachybotrys chartarum that has become synonymous with toxic mold in public consciousness. In the vast majority of cases, what appears as black growth on crawl space joists is Cladosporium, Aspergillus niger, or Trichoderma — common environmental molds that are black or dark-colored but are not Stachybotrys, do not produce the same mycotoxins, and are not classified as the highly toxic species that media coverage has made synonymous with “black mold.” Understanding the distinction — and the response — protects homeowners from both false alarm and genuine health risk.
What “Black Mold” Actually Means
The color of a mold does not identify its species. Dozens of common mold species produce dark — green-black, olive-black, or true black — pigmentation. The color results from melanin production in the mold’s outer spore layer, which serves as UV protection. Molds that are black in color include:
Cladosporium: One of the most common indoor and outdoor mold genera worldwide. Produces dark green to black colonies. Found on virtually every crawl space inspection with elevated humidity. Not classified as a high-risk toxin producer. Causes allergic responses in sensitive individuals but is not the “toxic black mold” of media coverage.
Aspergillus niger: Produces black-spored colonies. Common environmental mold. Some Aspergillus species produce aflatoxins and other mycotoxins at high concentrations but A. niger specifically is not among the highest-concern species.
Trichoderma: Dark green to black or white-green colonies. Very common in damp wood environments including crawl spaces. Not a significant mycotoxin producer in most species.
Stachybotrys chartarum: The actual “toxic black mold.” Black, slimy colonies. Grows specifically on chronically wet cellulose materials (paper, cardboard, ceiling tiles, wallboard) — not typically on wood surfaces, which is why it is less common in crawl spaces than in water-damaged drywall. Its growth requires sustained liquid water contact with cellulose over weeks to months — not just elevated humidity.
Is Stachybotrys Actually Present in Crawl Spaces?
Stachybotrys can appear in crawl spaces, but it is less common than in above-grade water damage scenarios because:
Structural wood (joists, sill plates, beams) is not the preferred substrate for Stachybotrys — it prefers cellulose-rich materials with lower lignin content (paper facing, cardboard, drywall)
The kraft paper facing on deteriorating fiberglass insulation in a wet crawl space is a more likely Stachybotrys substrate than the wood itself
Stachybotrys requires sustained liquid water contact to establish — not just elevated humidity. A crawl space with condensation and 80% RH may support abundant Cladosporium, Aspergillus, and Penicillium but not Stachybotrys unless there is direct water wetting of organic materials
This does not mean Stachybotrys is impossible in crawl spaces — it appears on wet insulation backing, on stored cardboard, and occasionally on severely water-damaged wood. But the presence of black mold growth in a crawl space is not a reliable indicator of Stachybotrys specifically — visual inspection cannot distinguish between species.
How to Identify Stachybotrys vs. Common Black Molds
The only reliable way to distinguish mold species is laboratory analysis. Visual differentiation is not reliable — a trained mycologist can make educated guesses based on colony morphology, growth pattern, and substrate, but cannot definitively identify species by looking at them. Options for testing:
Surface sampling (tape lift or swab): A sample from the affected surface is analyzed by a certified laboratory using microscopy or culture. Cost: $30–$75 per sample from a DIY kit (Zefon, Pro-Lab), $150–$300 per sample from a professional industrial hygienist. Results identify genus and sometimes species.
Air sampling: An ImpingerAir or similar device draws a measured volume of air through a collection cassette that captures spores. Analysis identifies airborne species and concentrations. Cost: $200–$400 per air sample location from a professional. More informative for indoor air quality assessment than surface samples.
ERMI (Environmental Relative Moldiness Index): A standardized DNA-based dust sample analysis that identifies 36 mold species from a single dust sample. Cost: $200–$300 per home sample. Provides the most comprehensive species identification from a single collection.
The Appropriate Response — Regardless of Species
Here is the practical reality: the correct response to visible black mold growth in a crawl space is the same whether it is Cladosporium or Stachybotrys — address the moisture source, remediate the visible mold, and prevent recurrence through encapsulation. The urgency and the protection level used during remediation may differ (Stachybotrys warrants full respiratory protection and containment; Cladosporium warrants at minimum an N95 and protective clothing), but the fundamental response is identical.
Testing for specific species before deciding whether to remediate is rarely necessary. The presence of any significant visible mold in a crawl space — regardless of color or species — is a moisture problem that requires the same treatment: address the humidity source, remediate the mold, prevent recurrence. The species identification is more relevant to health impact assessment for specific occupants (particularly immunocompromised individuals) than to the remediation decision itself.
When Species Identification Matters
Species testing is warranted in specific circumstances:
An occupant of the home has been experiencing unexplained neurological symptoms, chronic fatigue, or other symptoms consistent with mycotoxin exposure at high concentrations — a physician has requested specific mold species identification
Insurance claims where Stachybotrys confirmation affects coverage determination
Litigation or legal proceedings where species identification is relevant to causation assessment
A contractor is proposing significantly more expensive “toxic mold remediation” scope than standard mold remediation — verify whether Stachybotrys is actually present before accepting the premium scope
Frequently Asked Questions
How dangerous is black mold in a crawl space?
Black-colored mold in a crawl space is most commonly Cladosporium, Aspergillus, or similar common environmental species — not Stachybotrys, the mycotoxin-producing species associated with “toxic mold.” All visible mold in a crawl space warrants remediation and moisture control because any significant mold load contributes to indoor air quality problems via the stack effect. The species-specific danger level varies, but the correct response is the same: remediate and address the moisture source.
How do I test for black mold in my crawl space?
A tape lift or swab surface sample analyzed by a certified laboratory identifies the mold species. DIY kits (Zefon, Pro-Lab) cost $30–$75 per sample; professional industrial hygienist testing costs $150–$300 per sample. Air sampling ($200–$400 per location) identifies airborne species concentrations. ERMI dust testing ($200–$300) provides the most comprehensive species profile from a single sample. Testing before remediation is not always necessary — the response is similar for most species.
Can I remove black mold from a crawl space myself?
For limited surface mold (under 25% of joist surfaces) without confirmed or suspected Stachybotrys: DIY remediation with proper PPE (N95 respirator, Tyvek coveralls, gloves, eye protection), HEPA vacuuming, borate treatment, and post-treatment encapsulation is reasonable. For extensive mold, confirmed Stachybotrys, or occupants with immune compromise or known mold sensitivity: professional remediation is strongly recommended. Any DIY remediation must be paired with addressing the moisture source — otherwise mold returns within months.
Floor joist damage in a crawl space — from moisture, pest activity, or structural overloading — is one of the most consequential findings a crawl space inspection can reveal. Unlike cosmetic issues, a compromised floor joist affects the structural integrity of the floor above and, if deterioration progresses, the safety of the occupants. Understanding when a joist needs sistering versus full replacement, what the work actually involves, and what it costs allows homeowners to evaluate contractor proposals from an informed position and prioritize repairs appropriately.
When Joists Need Repair: The Assessment Framework
The threshold for joist repair is determined by the extent of structural fiber loss, not by appearance alone. A joist that appears dark or discolored but passes the probe test (awl resistance is normal — the joist resists penetration) is structurally sound. A joist that allows easy awl penetration has lost structural fibers and requires repair regardless of surface appearance.
No probe failure, wood MC below 19%: Sound joist. Clean surface mold with appropriate treatment; address moisture source. No structural repair needed.
No probe failure, wood MC 19–25%: Elevated moisture creating conditions for future decay. Address moisture source immediately; treat with borate; monitor. No structural repair yet, but urgent moisture remediation.
Probe failure affecting less than 25% of joist depth at any cross-section: Partial structural loss. Sistering a full-length new joist alongside the damaged member is appropriate.
Probe failure affecting more than 25% of joist depth, or spanning more than 24″ along the joist length: Significant structural loss. Full replacement or sistering with upgraded member size may be needed. Structural engineer assessment recommended for severe cases.
Sistering: How It Works
Sistering is the process of attaching a full-length new structural member alongside a damaged or undersized existing joist. The new member is the same depth as the original and spans the full distance between bearing points (typically wall to wall or wall to beam). It is attached to the existing joist with structural nails or structural screws (16d ring shank nails at 12″ spacing, or equivalent structural screws) over the full length.
The sister joist:
Must be the same nominal depth as the existing joist (a 2×10 sister alongside a 2×10 original)
Must span between the same bearing points as the original — a sister that does not reach the full span provides no structural benefit
Must be pressure-treated lumber (PT) if it will be in contact with concrete at either bearing end, or in a high-moisture environment
Should be pre-treated with borate (Tim-bor) before installation in crawl spaces with a history of moisture or pest activity
Full Joist Replacement vs. Sistering
Sistering is preferable to full replacement in most situations because it:
Can be accomplished without removing the subfloor above
Adds structural capacity rather than simply restoring it (the combined section is stronger than either member alone)
Is faster and less expensive than full replacement
Full replacement is required when:
The existing joist has lost so much structural fiber that it cannot safely carry its load during the sistering process (collapse risk during construction)
The joist is in a location where access prevents installing a full-length sister (a plumbing stack or HVAC trunk running through the joist bay)
The damage pattern is so extensive that sistering would not provide adequate repair (complete hollow gallery from termite activity, for example)
Cost Per Joist: What to Expect
Material cost per sister joist (2×10, 14′): $25–$45 for pressure-treated lumber
Labor to install one sister joist in a standard-height crawl space: $150–$350 per joist, including temporary shoring if needed, nailing/screwing, and cleanup
Total per-joist cost installed: $175–$400
Discount for volume: Contractors typically discount per-joist cost when multiple joists in the same section are being sistered — 8–10 joists in one area may run $100–$180 each rather than $175–$400 for single-joist work
Low-clearance premium: Crawl spaces under 24″ of clearance add 30–50% to labor cost per joist
How to Evaluate a Joist Repair Proposal
Does the proposal specify the lumber grade and species? Structural joists must meet minimum bending strength — #2 Southern Yellow Pine or Douglas Fir are the standard; premium-grade lumber is not required but the grade should be specified
Is pressure-treated lumber specified for bearing ends or high-moisture applications? Standard framing lumber in contact with concrete or in a previously wet crawl space is inadequate
Does the sister span full length between bearing points? A sister that spans only 6 feet of a 12-foot joist provides no meaningful structural benefit — ask for the proposed sister length
What fastening method is specified? Hand-nailing 16d ring shank nails or structural screws at 12″ spacing is appropriate; pneumatic nails at wide spacing or staples are not
Is temporary shoring included? If the existing joist is significantly compromised, the floor above must be supported during sistering to prevent movement
Frequently Asked Questions
How do I know if my crawl space floor joists need repair?
The most reliable test: push a sharp awl firmly into the bottom face of the joist. Sound wood resists penetration — you cannot push more than 1/16″–1/8″ with significant force. Wood with structural loss from decay allows easy penetration of 1/4″ or more. Also look for: floors that bounce or deflect noticeably when walked on, visible sagging in the floor structure when viewed from the crawl space, and wood moisture content above 19% (measured with a pin-type moisture meter).
How much does it cost to sister a floor joist in a crawl space?
Typically $175–$400 per joist installed, depending on crawl space clearance, joist length, and local labor rates. Volume discounts apply when multiple joists in the same area are being sistered. Low-clearance crawl spaces (under 24″) carry a 30–50% labor premium. A section of 8–10 joists all requiring sistering may cost $1,200–$3,500 as a packaged scope.
Can sistered joists fix a bouncy floor?
Yes, in most cases — sistering adds structural capacity that reduces mid-span deflection and eliminates the bouncy sensation. A floor that bounces because the joists are undersized for the span (common in older homes) can be significantly improved by sistering with same-size or larger lumber. A floor that bounces because the mid-span support beam has settled or the joists have lost structural integrity to decay responds well to sistering after the moisture source is addressed.
A humidity monitor in the crawl space is the only way to know whether your encapsulation system is actually working — or whether your unencapsulated crawl space is developing a moisture problem that has not yet become visible. A $25 digital hygrometer that logs data over time is more informative than any visual inspection, and for an encapsulated crawl space, it is the critical verification tool that confirms the system is performing to specification. This guide covers device selection, placement, and interpretation of readings.
What to Look for in a Crawl Space Humidity Monitor
Data Logging Capability
A single-point humidity reading tells you what the humidity is right now. A data logger records humidity over time — 30, 60, 90 days of hourly readings — revealing the full seasonal pattern, daily cycles, and whether the system is maintaining target humidity consistently or just during the times you happen to check. For encapsulated crawl space performance verification, data logging is essential. For unencapsulated crawl spaces being assessed for moisture problems, data logging distinguishes condensation (peaks correlate with summer humidity periods) from liquid water intrusion (peaks correlate with rain events).
Temperature Range
Crawl spaces in cold climates can drop below 32°F in winter. The monitor must be rated for the temperature range it will experience. Most consumer hygrometers are rated to 32°F minimum — adequate for most crawl spaces. For very cold climates (Minnesota, Wisconsin, Maine), look for units rated to 14°F or below.
Wireless or Wired Display
For ongoing monitoring, a wireless display system that shows current conditions in the living space — without requiring a crawl space visit — is more practical. Sensor in the crawl space, display on a kitchen counter. Some systems connect to smartphone apps for remote monitoring and alerts. For a one-time assessment, a standalone data-logging sensor that stores readings for download is sufficient.
Recommended Device Types
Govee, Inkbird, or SensorPush Bluetooth/WiFi hygrometers ($15–$45): Smartphone-connected sensors that log data and send alerts when humidity exceeds setpoints. Govee H5075 and similar models record 20+ days of readings downloadable via app. Most appropriate for ongoing encapsulation performance monitoring.
Onset HOBO MX1101 ($75–$110): The standard for building science field measurement — research-grade accuracy, 1-year battery, Bluetooth download, temperature rated to -4°F. Used by building scientists and weatherization contractors for definitive assessments. Overkill for most homeowners but appropriate for high-stakes assessments.
ThermoPro TP49, AcuRite 00613, or similar basic hygrometers ($12–$20): Basic temperature and humidity display without data logging. Useful for quick spot checks and for leaving in place and checking periodically, but cannot reveal the full pattern of humidity variation over time.
Inkbird IBS-TH2 with USB download ($18–$25): A good middle ground — data logging, 30 days of storage, Bluetooth download. Very small form factor for placement in confined spaces.
Where to Place the Monitor
Primary placement: Center of the crawl space at breathing-zone height (12–24 inches above the floor, hung from a floor joist) — this represents the ambient crawl space air, not the conditions immediately adjacent to the foundation walls or floor surface.
Near-wall placement (secondary): For diagnosis of whether block walls are contributing moisture: place a second sensor within 6″ of the foundation wall face. Consistently higher readings near the wall vs. the center indicate wall moisture contribution.
Near HVAC equipment (if present): A sensor near the air handler confirms whether the equipment location is experiencing extreme humidity that would accelerate corrosion.
Away from: Drainage pipes that might drip, direct soil contact (the sensor should be suspended in air, not resting on the ground), supply duct outlets (which would produce artificially low readings if the sensor is in the path of conditioned air), and direct sunlight if any windows or vents allow it.
Interpreting Readings
Below 50% RH: Excellent. Encapsulation system is performing well. Mold growth is not supported. Retest in 2 years.
50–60% RH: Good. Within acceptable range. Monitor seasonal variation — if summer peaks exceed 65%, consider dehumidifier setpoint adjustment or capacity increase.
60–70% RH: Elevated but not critical. Mold can initiate above 60–70% with sustained exposure. Investigate whether dehumidifier is undersized, setpoint is too high, or new moisture sources have developed (new crack, sump pump failure, foundation change).
Above 70% RH: Active mold risk. For encapsulated spaces: system is not performing adequately — investigate causes. For unencapsulated spaces: moisture problem present that warrants assessment and remediation.
Readings that spike with rain events: Bulk water intrusion is contributing to crawl space humidity. The pattern — RH jumps 15–20 points within 24–48 hours of significant rain — is diagnostic for liquid water entry, not just vapor diffusion.
Readings that peak in summer regardless of rain: Condensation from humid outdoor air is the primary mechanism. This is the pattern that indicates an unencapsulated vented crawl space in a humid climate is generating condensation on structural surfaces.
Frequently Asked Questions
What is a good humidity level for a crawl space?
Below 60% relative humidity is the standard target for crawl spaces — this level prevents mold growth and keeps wood moisture content below decay thresholds. Below 50% is the ideal target for a sealed, dehumidified crawl space. Above 70% indicates conditions that actively support mold growth and wood deterioration and require investigation and remediation.
How do I check the humidity in my crawl space?
Place a digital hygrometer (available for $15–$45) in the center of the crawl space suspended at 12–24″ above the floor level. A data-logging model that records readings over time is more informative than a single-point reading — leave it in place for at least 2–4 weeks to capture daily cycles and weather-related variation. Bluetooth models allow checking readings via smartphone without entering the crawl space.
How often should I check my crawl space humidity?
For an encapsulated crawl space with a functioning dehumidifier: a 30-day data log review twice per year (once in summer at peak humidity, once in winter) is sufficient for most homeowners. For an unencapsulated crawl space being monitored for developing moisture problems: monthly review of data logs in summer, less frequent in winter. If a data-logging device with smartphone alerts is installed, it provides continuous passive monitoring with notifications when readings exceed setpoints.
Condensation in a crawl space — liquid water that forms on structural wood, pipes, ductwork, and other surfaces without any rain or plumbing leak — is one of the most misunderstood moisture mechanisms in residential construction. Homeowners who find wet joists and assume they have a roof leak or plumbing problem spend money investigating phantom leaks while the actual cause — physics — continues unaddressed. Understanding why condensation happens in crawl spaces, how to confirm that condensation (rather than bulk water) is the problem, and what actually stops it is the foundation for effective moisture management.
The Physics of Crawl Space Condensation
Every cubic foot of air holds a specific maximum amount of water vapor — the maximum is called the saturation point, and it increases with temperature. When air is cooled below its saturation point, the excess moisture it can no longer hold is released as liquid water — condensation. The temperature at which a given air mass reaches its saturation point is the dewpoint temperature.
In a vented crawl space in summer, the mechanism is straightforward:
Outdoor air in a humid climate (Southeast, Mid-Atlantic, Midwest in summer) has a high absolute humidity — the air contains large amounts of water vapor. A typical July afternoon in Charlotte, NC or Columbus, OH might have outdoor air at 90°F and 65% relative humidity, with a dewpoint of 76°F.
This warm, humid outdoor air enters the crawl space through foundation vents.
Inside the crawl space, the underside of the subfloor is cooled by the air-conditioned living space above — typically 10–20°F below outdoor temperature.
The crawl space surfaces (subfloor underside, floor joists, pipes, ductwork) may be at 65–75°F — below the outdoor dewpoint of 76°F.
When the 90°F outdoor air carrying its 76°F dewpoint contacts surfaces at 70°F, the air is cooled below its dewpoint. The excess moisture it can no longer hold condenses as liquid water on those surfaces.
This is not a construction defect, a drainage problem, or a materials failure. It is thermodynamics operating on a vented crawl space in the wrong climate. The vented crawl space design assumes outdoor air is drier than the crawl space interior — which is true in cold, dry climates but completely backwards in humid summer climates.
Diagnosing Condensation vs. Bulk Water
The key diagnostic distinction is timing relative to weather events:
Condensation signature: Moisture on wood surfaces increases during warm, humid weather — particularly during sustained humidity events, summer months, and periods without rain. Moisture decreases in cool, dry weather or in winter. No correlation to rain events specifically.
Bulk water signature: Moisture or standing water appears within 24–72 hours of significant rain events. Watermarks on the foundation wall at consistent heights. Efflorescence (white mineral deposits) on foundation walls indicating past water contact.
Soil vapor diffusion signature: Moisture present year-round at moderate, consistent levels regardless of weather. Highest in low-lying areas where the water table is closest. No strong correlation to outdoor humidity or rain.
The definitive diagnostic test: place a 12″ × 12″ piece of plastic sheeting on the bare soil in the crawl space and tape its edges with duct tape. Wait 24 hours. Condensation on the top of the plastic (facing the crawl space air) indicates atmospheric condensation. Moisture on the underside of the plastic (between plastic and soil) indicates soil vapor diffusion through the soil surface. Both can occur simultaneously.
Why “More Ventilation” Makes Condensation Worse
The intuitive response to a damp crawl space is often to add more ventilation — more foundation vents, a powered exhaust fan. In a humid climate in summer, this makes condensation significantly worse, not better. More ventilation means more humid outdoor air entering the crawl space, more air being cooled below the dewpoint, and more condensation on surfaces. The Advanced Energy Corporation’s field research in North Carolina found that homes with more foundation vents had higher wood moisture content in summer than homes with fewer vents — the opposite of the expected outcome from the traditional ventilation philosophy.
The Only Proven Solution for Condensation
For humid-climate crawl space condensation, the only proven solution is sealing the crawl space from outdoor air entry and adding active humidity control. This is precisely what encapsulation accomplishes:
Sealing foundation vents eliminates the pathway through which outdoor humid air enters the crawl space
The vapor barrier prevents soil vapor diffusion from adding to the crawl space air humidity
The dehumidifier or HVAC supply connection maintains relative humidity below the dewpoint threshold at which condensation occurs on the cooler surfaces in the space
After encapsulation of a condensation-problem crawl space, wood surfaces that previously showed 22–25% moisture content in summer stabilize at 10–14% — below the threshold for mold growth and far below the threshold for wood decay fungi. The transformation is measurable and typically occurs within 60–90 days of encapsulation.
Frequently Asked Questions
Why is there condensation in my crawl space?
In a vented crawl space in a humid climate: summer outdoor air enters through foundation vents with a dewpoint temperature that exceeds the temperature of the crawl space’s cooler surfaces (subfloor, joists, pipes cooled by the air-conditioned space above). When warm, humid air contacts these cooler surfaces, the air is chilled below its dewpoint and releases liquid water as condensation. This is thermodynamics, not a construction defect or drainage problem.
Will adding more foundation vents stop crawl space condensation?
No — in humid climates, adding foundation vents makes condensation worse, not better. More vents mean more humid outdoor air entering the crawl space and more condensation on cool surfaces. Building science research has documented that homes with more foundation vents have higher wood moisture content in summer than homes with fewer vents in humid climates. The correct solution is sealing the crawl space from outdoor air entry, not increasing ventilation.
How do I stop condensation in my crawl space?
Crawl space encapsulation — sealing foundation vents, installing a vapor barrier, and adding a dehumidifier or HVAC supply duct — is the only proven solution for condensation-problem crawl spaces in humid climates. This eliminates the pathway for humid outdoor air to enter (eliminating the condensation source), controls residual humidity from soil vapor diffusion, and maintains the sealed space below the dewpoint threshold at which condensation occurs on cooler surfaces.
The rim joist — the band of framing that sits on top of the foundation wall and closes the floor joist cavities at the perimeter — is consistently identified by building scientists and energy auditors as the largest single air leakage and heat loss site in most homes with crawl spaces. More heat escapes through an uninsulated, unsealed rim joist than through any other single component of the crawl space building envelope, and more crawl space air enters the home through the rim joist than through any other pathway. Addressing the rim joist is the highest-leverage action in any crawl space improvement project.
Why the Rim Joist Is the Priority
The rim joist area is a thermal and air sealing weak point for structural reasons: it is the intersection of multiple framing members (floor joist ends, blocking, the rim joist itself, the sill plate below, and the subfloor above), and these members rarely meet perfectly. Gaps at joist ends, misaligned blocking, gaps between the rim joist and the sill plate, and the inherently porous nature of lumber create a permeable air barrier. Hot-box blower door tests consistently find that the rim joist contributes disproportionately to total building air leakage — often 15–25% of total air infiltration in a home with an uninsulated crawl space rim joist.
The thermal impact is equally significant. The rim joist is typically the coldest structural wood surface in a vented crawl space in winter — it is exposed on the exterior face to outdoor temperatures, has no insulation between it and the interior, and is the wood member most prone to condensation from warm interior air hitting the cold exterior-connected wood. Condensation on the rim joist is the leading cause of mold growth at the top of crawl space foundation walls.
Option 1: Spray Foam (Best Performance)
Professional two-component closed-cell spray polyurethane foam (ccSPF) applied to the rim joist area is the gold standard for rim joist insulation and air sealing. Closed-cell spray foam:
Adheres directly to wood, concrete, and masonry surfaces — filling all gaps, cracks, and voids in the rim joist framing assembly
Provides both insulation (R-6.5 to R-7 per inch) and complete air sealing simultaneously
At 2″ applied thickness: approximately R-13, and essentially complete air sealing across the entire rim joist area
Adds structural rigidity to the rim joist assembly — a secondary benefit particularly relevant in older homes where rim joist framing may be degraded
Is vapor semi-impermeable at 2″ thickness — in most climate zones, this provides appropriate vapor control at the rim joist without requiring a separate vapor barrier
Professional closed-cell spray foam requires specialized equipment (a proportioner that heats and mixes the two-component foam at precise ratios), protective equipment (Tyvek suits, respirator with organic vapor cartridges, eye protection), and training to apply uniformly and safely. DIY two-component kits (available from Froth-Pak and similar) can handle small areas but are expensive per board-foot and not practical for a full rim joist treatment in a large crawl space.
Professional spray foam cost for rim joist: $1.50–$3.00 per square foot of rim joist area, which typically means $600–$1,500 for a full perimeter treatment of a standard single-family home.
Option 2: Rigid Foam Panels (DIY-Accessible)
Rigid foam boards (EPS, XPS, or polyisocyanurate) cut to fit between the floor joists and sealed at all four edges with one-component spray foam is the DIY-accessible alternative to professional spray foam. This approach provides:
Thermal insulation from the foam board — 1″ XPS provides R-5; 2″ XPS provides R-10; 2″ polyiso provides R-12–13
Air sealing from the spray foam seal at the perimeter of each panel — not as complete as professional ccSPF but substantially better than no treatment
DIY-accessible — cutting foam board with a utility knife and applying spray foam perimeter seal requires only basic skills and inexpensive tools
The installation process:
Measure each joist bay width (spacing varies in older homes)
Cut rigid foam panels to fit snugly in each bay — the panel should be cut 1/4″ smaller than the actual bay dimensions to allow spray foam to seal the perimeter
Apply construction adhesive to the back of the panel or use the spray foam itself as the adhesive
Press the panel firmly against the rim joist and hold until adhesion is achieved
Apply a continuous bead of one-component spray foam (Great Stuff or equivalent) around all four edges of each panel — this is the air sealing step and must be continuous without gaps
DIY rigid foam + spray foam material cost: $0.50–$1.50 per square foot of rim joist area. For a 1,200 sq ft home with 150 LF of perimeter × 2 joist courses (approximately 250 sq ft of rim joist area): $125–$375 in materials. This is 3–5× less expensive than professional spray foam for equivalent coverage, though the air sealing performance is somewhat lower.
Climate Zone Considerations
The appropriate R-value target for rim joist insulation varies by climate zone, similar to wall insulation requirements:
Climate Zones 1–2 (Deep South): R-13 at the rim joist. 2″ ccSPF or 2″ rigid foam + spray foam seal meets this requirement.
Climate Zones 3–4 (Mid-Atlantic, Southeast transition, Pacific Coast): R-13–19. 2″ ccSPF provides R-13; adding rigid foam behind the spray foam or increasing thickness to 3″ achieves R-19.
Climate Zones 5–6 (Midwest, Northeast, Pacific Northwest): R-19–20. 3″ ccSPF provides approximately R-19–21; 2″ ccSPF + 2″ rigid foam achieves similar performance.
Climate Zones 7–8 (Northern climates): R-20+. Higher-thickness spray foam or layered spray foam + rigid foam is needed.
Frequently Asked Questions
Should I use spray foam or rigid foam for my crawl space rim joist?
For the best air sealing performance: professional two-component closed-cell spray foam. For a DIY-accessible, lower-cost alternative that provides good (but not perfect) air sealing: rigid foam boards sealed at all four edges with one-component spray foam. The choice depends on budget and DIY capability — rigid foam is approximately 3–5× less expensive in material cost and requires no professional application.
How much does rim joist spray foam cost?
Professional closed-cell spray foam for the rim joist: $1.50–$3.00 per square foot of rim joist area. For a standard single-family home with approximately 250 sq ft of rim joist area: $375–$750 in material + labor. DIY rigid foam + one-component spray foam: $125–$375 in materials for the same area.
Do I need to insulate the rim joist if my crawl space is vented?
In a vented crawl space, the rim joist is part of the building thermal envelope — insulating it reduces heat loss between the conditioned living space and the vented, unconditioned crawl space. Rim joist insulation is valuable in both vented and sealed crawl spaces, though the approach differs slightly: in a vented space, the rim joist insulation must accommodate some moisture management; in a sealed space, the spray foam approach is fully appropriate without additional vapor barrier considerations in most climate zones.
Installing a crawl space vapor barrier is the most DIY-accessible component of a full encapsulation system — and the one that saves the most money if done correctly. Material cost for a 1,200 sq ft crawl space is $480–$2,400 depending on barrier quality; professional labor for barrier installation alone is $1,000–$2,500. The $1,000–$2,500 in potential savings is real, but only if the installation is done correctly. Improperly installed barriers — unsealed seams, missed penetrations, inadequate wall coverage — provide significantly less protection than a properly installed system. This guide covers the complete installation process step by step.
Materials and Tools Needed
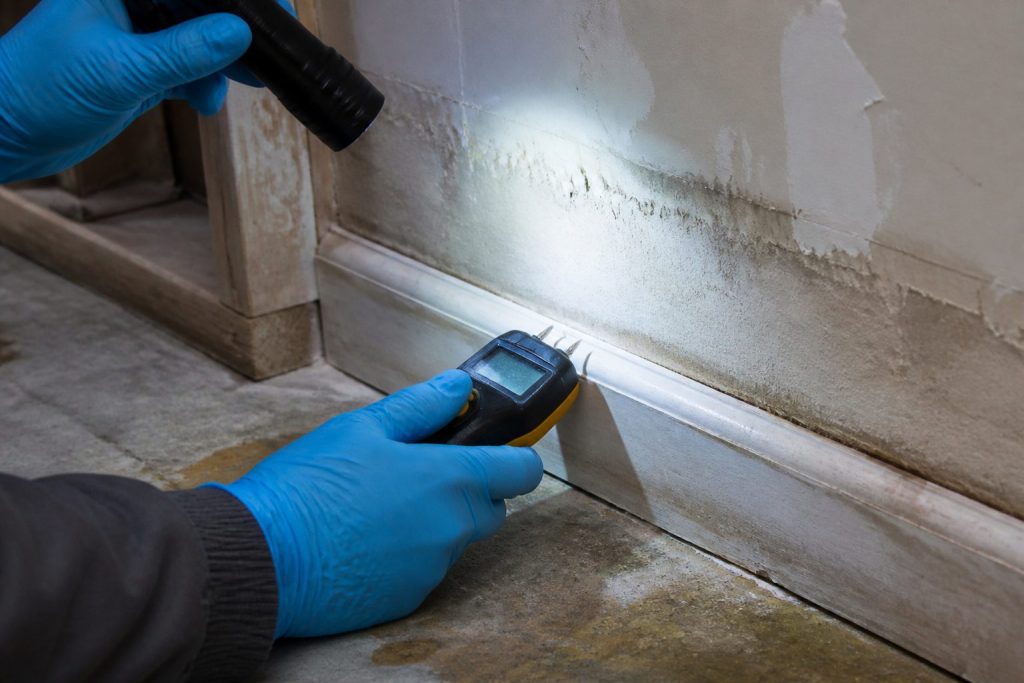
Inspection is a sequence, not a vibe.
Materials
Vapor barrier: Minimum 12-mil reinforced polyethylene (for a full encapsulation; 6-mil is insufficient for most real-world crawl spaces). Calculate quantity: crawl space square footage × 1.35 to account for wall coverage and seam overlaps. For a 1,200 sq ft crawl space: 1,200 × 1.35 = 1,620 sq ft of barrier material needed.
Seam tape: Compatible reinforced polyethylene tape designed for vapor barrier seaming — not duct tape, not standard packing tape. Must be labeled as compatible with the barrier material. Budget: 4–6 rolls of 3″ × 180′ tape for a 1,200 sq ft crawl space.
Mechanical fasteners: Hammer-drive concrete anchors or Hilti pins (powder-actuated) for fastening the barrier to the foundation wall at the top edge. Alternatively, a construction adhesive compatible with polyethylene.
Wall termination strip: A plastic or aluminum channel that holds the top edge of the barrier against the wall and provides a clean termination line. Optional but provides a more professional finished appearance.
Pipe penetration seals or tape: Pre-cut penetration seals or compatible tape for sealing around pipes, conduit, and columns.
Backer rod: For sealing large gaps at the floor-wall joint before applying the barrier.
Tools
Utility knife with extra blades (barrier material dulls blades quickly)
Tape measure and chalk line
Hammer drill with concrete bit (for mechanical fasteners)
Seam roller or J-roller (a wallpaper seam roller) for pressing seam tape firmly
Knee pads
Bright LED work light
N95 respirator, Tyvek coveralls, gloves, and eye protection
Phase 1: Preparation (Day 1, 2–4 hours)
Measure before you argue about mold.
Clear the Crawl Space
Remove everything from the crawl space floor that would create a puncture hazard or prevent full barrier coverage: old vapor barrier material, rocks and concrete rubble, construction debris, and any stored items. Knock down or smooth sharp concrete protrusions from footings and foundation walls. This preparation step is often skipped by quick-service installers but is essential — sharp debris beneath the barrier causes punctures that undermine the entire installation.
Remove Old Insulation (If Present)
Deteriorated fiberglass batt insulation between floor joists must be removed before installing a new vapor barrier. Old insulation harbors mold, pest material, and moisture — leaving it above the vapor barrier creates a micro-environment that defeats the moisture control the barrier is intended to achieve. Use heavy-duty contractor bags for removal; expect 4–8 bags for a 1,200 sq ft crawl space. This is unpleasant work but non-negotiable for a quality installation.
Identify and Plan for All Penetrations
Walk the crawl space and identify every penetration through the barrier that will be needed: foundation piers, support columns, plumbing pipes, and electrical conduit. Plan the barrier strips to minimize the number of cuts required around each penetration — in many cases, placing the barrier strip to approach a column from one direction allows a simpler cut than if the column is in the middle of a strip.
Begin at the wall farthest from the access point. This allows the installation to progress toward the exit — you will not be crawling over freshly installed, untaped barrier material as you work. Unroll the first strip from the back wall across the crawl space toward the front.
Wall Coverage
The barrier must extend up the foundation wall — not just cover the floor. The minimum wall coverage is 6 inches above the visible soil or moisture line; 12 inches is better practice; the full height of the foundation wall is best practice for a complete encapsulation. At the back wall:
Unroll the barrier strip to extend up the back wall to your target height
Secure the top edge to the wall using hammer-drive anchors or construction adhesive, spaced every 12–18 inches
The barrier lies flat on the ground from the base of the wall toward the access end
Seam Overlapping and Taping
Each subsequent strip overlaps the previous strip by a minimum of 12 inches — 18–24 inches is better practice. The overlap seam is the most critical quality point in the installation. Apply seam tape as follows:
Ensure both surfaces at the seam are clean and dry before taping — dust and moisture prevent adhesion
Apply the tape centered on the overlap, pressing it firmly down the entire length of the seam
Use a seam roller or J-roller to apply firm pressure along the entire tape length — hand pressure alone is insufficient for long-term adhesion
Check every seam after taping by attempting to lift the tape at multiple points — it should be firmly adhered with no lifting edges
Sealing Around Penetrations
Every penetration through the barrier is a potential moisture pathway. For each penetration:
Round pipes and conduit: Cut an X or cross in the barrier, pull the flap up around the pipe, and seal with compatible tape wrapped around the pipe and adhered to the barrier surface. Pre-cut penetration seals (rubber pipe collars with adhesive flanges) provide cleaner results for round penetrations.
Square columns and piers: Cut the barrier to the perimeter of the pier base. Apply tape along all four sides where the barrier meets the pier surface — press firmly with the seam roller.
Odd-shaped penetrations: Use a combination of cuts, patches, and tape to achieve a continuous sealed barrier around the penetration. Take extra time on these — they are the most common point of future moisture intrusion.
Completing the Side and Front Wall Coverage
As each strip is laid, the side walls must also be covered. Cut barrier strips to run up the side walls and tape them to the edge of the floor strips. The barrier should cover all ground-contact surfaces — walls included — to create a true continuous envelope. The front wall (nearest the access) is done last, with the barrier running up and being secured at the top edge near the access opening.
Phase 3: Quality Check Before Closing
Containment first — then removal.
Before the access door is closed, conduct a final walkthrough:
Inspect every seam — no lifting tape edges, no gaps in the overlap
Inspect every penetration — tape fully adhered on all sides
Inspect wall attachment — barrier secured at top, no gaps at floor-wall junction
Photograph the completed installation from multiple angles and distances — this creates your baseline documentation for future inspections and any warranty claims
How long does it take to install a crawl space vapor barrier yourself?
For a solo homeowner in a standard-height (36″+) crawl space: 2–3 full days for a 1,200 sq ft crawl space, including preparation and cleanup. Low-clearance crawl spaces (under 24″) are significantly slower — add 50–100% to time estimates. Working with one other person reduces time by approximately 30% and significantly reduces the difficulty of handling full barrier rolls in a confined space.
How do I calculate how much vapor barrier I need?
Measure the crawl space floor area. Multiply by 1.35 to account for seam overlaps and wall coverage (assuming 12″ of wall coverage on all sides). For a 1,200 sq ft crawl space: 1,200 × 1.35 = 1,620 sq ft of barrier material. Add 10% for waste from cuts around penetrations in complex crawl spaces. Most barrier products are sold in standard roll sizes (e.g., 10′ × 100′ = 1,000 sq ft per roll) — purchase in the next roll increment above your calculated need.
What is the best tape for sealing crawl space vapor barrier seams?
Use tape specifically designed and labeled for vapor barrier seaming — typically a reinforced polyethylene tape or a butyl rubber tape compatible with the barrier material. Do not use standard duct tape (it fails in temperature and humidity extremes), packing tape, or general-purpose seam tape. Products from companies like Nashua, Poly-America, and the barrier manufacturers themselves typically offer compatible seam tape. Confirm compatibility on the packaging — some premium barriers require manufacturer-specific tape to maintain the product warranty.