Tag: SEO

  • SiteBoost for Fine Art Galleries and Private Dealers

    SiteBoost for Fine Art Galleries and Private Dealers

    What SiteBoost for Fine Art Galleries Is: A structured SEO and content program built specifically for galleries, private dealers, and secondary market specialists. We write content that speaks the language of collectors and institutions — provenance, attribution, medium, period, and market — and structure it so search engines and AI systems surface your inventory and expertise when serious buyers are looking.

    The Problem With Art Dealer Websites

    Most gallery and dealer websites are beautiful and findable by no one. They were designed for the opening night crowd, not for the collector in London who searches “American Impressionist landscapes for sale” at 11pm on a Tuesday. The SEO is an afterthought. The content is vague. The structured data is nonexistent. And the gap between what your inventory deserves and what Google shows for it is enormous.

    Generic SEO agencies make this worse. They write blog posts about “the art market” without understanding the difference between a primary and secondary market transaction. They do not know what TEFAF is. They cannot write about attribution chains or condition reports without making you wince. And they certainly do not know how to structure content so that AI systems like ChatGPT and Perplexity recommend your gallery when someone asks where to buy a specific artist’s work.

    >
    The search reality for fine art dealers in 2026: Collectors increasingly begin acquisition searches on AI-powered platforms. If your site is not structured for machine readability — entities named, schema marked, provenance language present — you are invisible to the buyer who never opens Instagram.

    What We Actually Do

    We build what galleries rarely have: a content infrastructure that works while the gallery is closed. Artist profile pages written with the depth of a serious catalog essay but optimized for how collectors search. Category pages built around medium, period, and price point — not just your current show. FAQ content structured so Google surfaces your gallery when someone asks which galleries represent living painters working in a given tradition.

    The stack we deploy on gallery and dealer sites:

    • Artist and artwork entity optimization — Named artist entities with biography depth, auction record context, and market positioning language that search engines treat as authoritative
    • AEO content for collector queries — Direct answers to the questions serious buyers ask: how to authenticate, how to transport, how to insure, what to expect in the acquisition process
    • GEO visibility for AI search — Structured so that when a collector asks an AI assistant to recommend a dealer specializing in a given artist or period, your gallery is a named result
    • Schema markup for arts entities — VisualArtwork, LocalBusiness, and ItemList schema that communicates inventory structure to search engines
    • Category architecture — Organized by medium, period, geography, and price — because that is how collectors think, not how most dealer sites are organized

    The Comparison

    Dimension Generic Agency SiteBoost for Fine Art
    Content vocabulary Generic (“beautiful artwork”) Domain-accurate (medium, period, provenance, attribution)
    Structured data Basic or none VisualArtwork + LocalBusiness + ItemList schema
    AI search visibility Not considered Built-in GEO optimization for ChatGPT, Perplexity, Gemini
    Artist entity depth Name only Biography, market context, comparable sales language
    Collector search alignment Brand keywords only Medium + period + price + acquisition intent queries

    Who This Is For

    Galleries with an established inventory who have never had a serious SEO program. Private dealers who operate without a storefront but need digital authority. Secondary market specialists whose inventory moves through relationships but who want inbound acquisition leads. Auction specialists who need content depth around specific categories and periods.

    This is not for galleries that want to publish a monthly blog post and call it content marketing. This is structural work — the kind that takes three to six months to show in rankings but compounds for years.

    Ready to talk about your gallery?

    Send a brief note. Tell us what you sell, what you feel is missing, and whether you have ever had a real SEO program. We will tell you honestly what we think the opportunity is.

    will@tygartmedia.com

    Frequently Asked Questions

    Do you need to understand the art market to do this work?

    Yes, and we do. The difference between useful SEO content for a gallery and embarrassing SEO content is entirely in the vocabulary and the accuracy. We write about art in a way that does not make your curatorial team roll their eyes.

    How long before we see results?

    Organic SEO for competitive niches typically shows meaningful movement in three to six months. For less competitive long-tail queries — specific artists, specific periods, specific media — movement can happen within weeks. We prioritize the realistic wins first.

    Will this work for a gallery that does not sell online?

    Yes. Most serious gallery transactions happen off-site regardless. The goal is to be the gallery that serious collectors find when they are researching. The website earns the inquiry. The relationship closes the sale.

    What does the process look like?

    We start with a site audit, entity mapping, and category architecture review. Then we build the content calendar based on your inventory priorities and collector search behavior. Content goes to you for review before it publishes. Nothing goes live without your sign-off.

    Is this just SEO or does it include AI search optimization?

    Both. In 2026, separating SEO and AI search optimization is a false distinction. We optimize for traditional search rankings and for the AI-powered answer engines — ChatGPT, Perplexity, Google AI Overviews — that affluent collectors increasingly use to research acquisitions.

    What makes you different from an agency that claims arts specialization?

    Most agencies that claim arts specialization mean they have worked with a theater company or a music school. We mean vocabulary, schema, and entity architecture that is native to the art market. That distinction matters when the person reading the content is a serious collector.
  • B2B SaaS Content Strategy: Map Posts to Buyer Stages

    B2B SaaS Content Strategy: Map Posts to Buyer Stages


    Tygart Media — SaaS Content Strategy

    B2B SaaS Content Strategy: How to Map Every Blog Post to a Buyer Stage

    By Tygart Media Updated: April 12, 2026
    Why buyer stage mapping matters for SaaS: According to research from uSERP cited by ALM Corp, 66% of B2B buyers relied on search engines to find solutions before purchasing. That buying journey spans weeks or months and involves dozens of search touchpoints at different stages of awareness. A SaaS blog that only answers “what is [problem]” meets buyers at the beginning of the journey and then loses them. A SaaS blog that maps content to every stage — from problem awareness to solution comparison to vendor selection — creates a content path that can take a prospect from first search to demo request entirely through organic traffic.

    The Three Stages of the B2B SaaS Buying Search Journey

    Stage 1: Awareness — “I have a problem”

    Awareness searches are informational. The buyer has identified a problem but may not yet know that software exists to solve it. Search queries at this stage: “how to reduce manual data entry,” “why sales teams miss quota,” “challenges of remote team coordination.” Content for this stage should explain the problem, validate the pain, and introduce the category of solution — without pitching a specific product. Keywords: “how to,” “why,” “what causes,” “challenges of.”

    Stage 2: Consideration — “I’m evaluating solutions”

    Consideration searches are comparative. The buyer knows solutions exist and is evaluating options. This is where most SaaS blogs have the largest gap. Search queries: “best workflow automation tools for sales teams,” “how does [category] integrate with Salesforce,” “what to look for in [software type],” “[tool A] vs [tool B].” Content for this stage should explain your category’s criteria, reference integration ecosystem entities (Salesforce, HubSpot, Slack, Zapier), and provide comparison frameworks. Keywords: “best,” “how to choose,” “vs,” “integrates with,” “for [role/industry].”

    Stage 3: Decision — “I’m choosing a vendor”

    Decision searches have high commercial intent. The buyer has a shortlist and is finalizing. Search queries: “[your product] pricing,” “[your product] vs [competitor],” “[your product] implementation guide,” “[your product] reviews,” “[competitor] alternative.” Content for this stage should be conversion-focused: pricing clarity, migration guides, security and compliance information, ROI calculators. Keywords: “[product name],” “pricing,” “alternative to,” “reviews,” “implementation.”

    How should B2B SaaS companies map blog content to buyer stages?
    B2B SaaS companies should map blog content to three buyer stages: Awareness (informational — problem and category education, keywords “how to,” “why,” “challenges”), Consideration (comparative — solution evaluation, integration ecosystem content, use-case specificity, keywords “best,” “how to choose,” “vs,” “integrates with”), and Decision (transactional — vendor selection, pricing, migration, competitor comparison, keywords “[product name],” “pricing,” “alternative to,” “reviews”). The highest-leverage optimization is retrofitting high-traffic awareness posts with consideration-stage internal links and CTAs to move existing traffic toward conversion.

    The Content Audit Framework: Classifying Your Existing Library

    Before publishing new content, classify every existing post by buyer stage. The signals:

    • Awareness indicators: Title starts with “What is,” “How to,” “Why.” Keyword is a broad industry term with high search volume. No mention of specific product categories or vendor criteria.
    • Consideration indicators: Title includes “best,” “top,” “how to choose,” “vs,” or a specific integration name. Keyword includes a role (CTO, sales ops) or industry modifier. Content compares multiple approaches or solution types.
    • Decision indicators: Title includes a product or competitor name. Content addresses pricing, implementation, migration, or ROI. High conversion intent, typically lower search volume.

    Most SaaS blogs discover they have 60–80% awareness content after this audit. The recommended response is not to immediately publish consideration and decision content — it’s to retrofit the top 10 awareness posts with consideration-stage elements first, capturing conversion from existing traffic before investing in new content.

    The Retrofit Checklist for Awareness Posts

    1. Add a “Who this is for” section early — naming specific roles (VP of Sales, Head of Customer Success) turns generic traffic into qualified traffic
    2. Add an integration entity reference — “this applies whether your team uses Salesforce, HubSpot, or another CRM” signals consideration-stage relevance
    3. Add a FAQ section targeting consideration-stage questions: “How does [your category] compare to [alternative approach]?” “What should I look for when evaluating [category] software?”
    4. Add a CTA linking to your most relevant comparison or integration guide — not to a demo request directly
    5. Add FAQPage schema so consideration-stage questions appear in People Also Ask
    Buyer-stage retrofitting — role targeting, integration entity injection, consideration-stage FAQ schema — is part of WordPress content optimization for B2B SaaS companies through SiteBoost. Applied to your existing posts systematically, starting with your highest-traffic awareness content.

    Frequently Asked Questions

    How do I know which stage a keyword belongs to?

    The clearest signals are the keyword modifier and search intent. Informational modifiers (how, why, what, guide) indicate awareness. Comparative modifiers (best, top, vs, alternative, reviews, for [role]) indicate consideration. Brand and transactional modifiers (pricing, [product name], buy, demo, trial) indicate decision. When in doubt, Google the keyword and look at what type of pages rank — if results are primarily blog posts, it’s awareness; if results include listicles and comparison pages, it’s consideration; if results include product pages and G2/Capterra listings, it’s decision.

    Should SaaS companies create separate landing pages for each buyer stage?

    Blog posts and service/landing pages serve different functions in the buyer journey. Blog posts are best for awareness and consideration content — they rank for informational and comparative queries. Landing pages are best for decision-stage content — they’re conversion-optimized for buyers who already know what they want. The blog-to-landing-page internal link structure is critical: awareness blog posts should link to consideration blog posts, which should link to decision-stage landing pages. This is the content path that moves organic traffic through the funnel.

    How does buyer stage mapping affect SaaS content for AI search?

    AI systems respond to the stage of the question being asked. A buyer asking ChatGPT “what is workflow automation?” gets an awareness-stage answer. A buyer asking “what should I look for in workflow automation software for a sales team of 50?” is at the consideration stage — and AI systems surface content that directly answers those comparative, criteria-based questions. Consideration-stage content with FAQPage schema targeting “what should I look for in [category]” and “how does [category] integrate with [ecosystem tool]” earns AI citations at the exact decision-proximate moment that precedes a demo request.

    Sources: ALM Corp, “SaaS SEO Strategy Guide” (2026) citing uSERP 2024–2025 data; Growth.cx, “What Does a B2B SaaS SEO Agency Actually Do in 2026?”; Gravitate Design, “B2B SaaS SEO Strategies for Growth in 2026”; Kalungi, “SaaS SEO Simplified” (2026)
  • Law Firm WordPress Optimization: 8-Step SEO Checklist

    Law Firm WordPress Optimization: 8-Step SEO Checklist

    Tygart Media — Law Firm Content Strategy

    Law Firm WordPress Optimization: The Post-Publish Checklist Every Attorney Blog Needs

    By Tygart Media Updated: April 12, 2026
    The post-publish gap: Most law firm blog content goes through one optimization pass at the time of writing — keyword research, a readable draft, publication. The optimization steps that determine long-term ranking performance, PAA placement eligibility, and AI citation probability almost all happen after publication. This checklist covers the 8 post-publish steps that the majority of law firm WordPress blogs skip entirely.
    What is post-publish WordPress optimization for law firm blogs? Post-publish WordPress optimization for law firm blogs is the process of applying SEO, AEO, and GEO improvements to a blog post after it has been published — updating the title tag for search intent, writing a meta description, adding a FAQ section with FAQPage JSON-LD schema, injecting named legal entity references, adding a visible Last Updated date and dateModified schema, and ensuring internal links connect the article to relevant practice area pages. These steps determine whether a published post ranks, earns People Also Ask placements, and gets cited by AI systems.

    The 8-Step Post-Publish Optimization Checklist

    • 1
      Rewrite the title tag for search intent The published title is often the article headline — which may not match how a prospective client searches. Rewrite it to lead with the primary keyword in the first 3 words and stay within 50–60 characters. “What Is the Statute of Limitations for Personal Injury in Texas?” outperforms “Understanding Personal Injury Time Limits.”
    • 2
      Write a meta description from scratch Delete the auto-generated excerpt. Write a 140–155 character meta description that includes the primary keyword, states a clear value, and ends with an action signal. This is the copy that determines click-through rate from search results.
    • 3
      Add a FAQ section with 6–8 questions Add a visible FAQ section at the bottom of the post with questions written in client language — the actual queries a prospective client would type or ask an AI assistant. Each answer should be 40–60 words, direct, and specific to jurisdiction where applicable.
    • 4
      Inject FAQPage JSON-LD schema The visible FAQ section needs a corresponding FAQPage JSON-LD block in the post HTML. Without the schema, Google can read the FAQ but cannot extract it for People Also Ask placement. Both elements are required — the visible section and the machine-readable schema.
    • 5
      Inject named legal entity references Add 3–5 named legal entities relevant to the article: the applicable statute with its full citation, the relevant bar association rule, named legal doctrines, or regulatory body references. These entity anchors are what Google’s quality evaluators and AI systems use to verify legal expertise.
    • 6
      Add a definition box after the intro Insert a 40–60 word definition box immediately after the intro paragraph defining the primary topic. This is the highest-probability featured snippet target — a concise, factual definition that Google’s systems can extract for the position-zero definition box that appears before any organic result.
    • 7
      Set a visible Last Updated date and dateModified schema Add a visible “Last updated: [date]” near the byline. Update the dateModified field in the Article JSON-LD schema to match. For YMYL legal content, freshness signals matter — outdated content on time-sensitive legal topics (statute of limitations, filing deadlines) is evaluated negatively by quality raters.
    • 8
      Add internal links to and from practice area pages Link from the blog post to at least one relevant practice area service page using descriptive anchor text (“personal injury attorney services” not “click here”). Then update the practice area page to link back to the blog post. Bidirectional internal linking passes authority both directions and signals topical depth to Google’s crawlers.
    These 8 steps applied to 10 existing law firm blog posts is exactly the scope of SiteBoost’s WordPress content optimization pilot for law firms. Every step is applied programmatically via the WordPress REST API — no plugin required, no manual editing. Changes pushed live, before/after baseline recorded.

    Frequently Asked Questions

    Can these optimizations be applied to old blog posts, or only new ones?

    All 8 steps can be applied retroactively to existing published posts. WordPress’s REST API allows any post to be updated post-publication — title, excerpt (meta description), content (FAQ section, schema, entity references), and modified date. Retroactive optimization of your existing article library is typically higher-value than publishing new content because existing posts have index history, any existing backlinks, and are already known to Google’s crawlers.

    Which of the 8 steps has the highest impact for law firm WordPress blogs?

    Steps 3 and 4 — adding a FAQ section and FAQPage schema — consistently produce the fastest visible results for law firm content because they directly enable People Also Ask placement eligibility. Step 1 (title tag rewrite) has the highest impact on click-through rate from existing impressions. Step 5 (entity injection) has the highest long-term impact on AI citation probability. Implemented together, all 8 steps create compounding returns that no single step achieves alone.

    Do these steps require a specific WordPress plugin?

    No plugin is required for any of the 8 steps. The title tag, meta description, FAQ section, JSON-LD schema, and content additions can all be applied directly to post content via the WordPress REST API using an Application Password for authentication. SEO plugins like Rank Math or Yoast handle some of these fields through their own meta fields — if you use one, the title and meta description updates should be made through the plugin’s fields rather than the post title and excerpt fields to avoid conflicts.

    Sources: Google Rich Results Test Documentation; AttorneyWebsiteDesign.us, “Law Firm Website SEO: Complete Guide 2026”; inqnest, “Local SEO for Lawyers 2026”; ALM Corp, “SEO for Law Firms: Advanced Tactics for 2026”
  • Law Firm FAQ Schema: How to Win People Also Ask Placements

    Law Firm FAQ Schema: How to Win People Also Ask Placements

    Tygart Media — Law Firm Content Strategy

    How Law Firms Win People Also Ask Placements With FAQ Schema

    By Tygart Media Updated: April 12, 2026
    People Also Ask for legal searches: Google’s People Also Ask boxes appear above organic listings for the majority of legal queries — “how long do I have to file,” “what does this coverage actually include,” “do I need a lawyer for this.” These placements are visible before the first blue link, capturing prospect attention at peak intent. Winning them requires two things: a FAQ section with 40–60 word direct answers to specific questions, and FAQPage JSON-LD schema that tells Google’s systems exactly where those answers are. Most law firm blogs have neither.

    Why PAA Placements Matter More Than Position 1 for Legal Queries

    For legal searches, Google surfaces People Also Ask boxes before position 1 organic results on the majority of high-intent queries. A prospect searching “how long do I have to sue after a car accident in Texas” sees PAA answers before they see any firm’s website. If your content is in that box, you’ve captured attention before your competitors’ organic listings are even visible.

    PAA placements also feed directly into AI Overviews and AI assistants. When a prospect asks ChatGPT the same question, the AI draws from content with the same direct-answer structure that wins PAA placements — well-structured, entity-rich, 40–60 word direct answers with FAQPage schema. Optimizing for PAA and optimizing for AI citation are the same optimization.

    How do law firms win People Also Ask placements? Law firms win People Also Ask placements by adding a FAQ section to existing blog posts where each question-and-answer pair matches a specific legal query pattern — “How long do I have to file a personal injury claim in [state]?”, “What does comparative negligence mean?”, “Do I need a lawyer for a minor car accident?” — with a direct 40–60 word answer immediately following each question, and FAQPage JSON-LD schema injected into the post’s HTML so Google can identify and extract those answers for PAA display.

    The Anatomy of a PAA-Winning Legal FAQ

    Most law firm FAQ sections fail to win PAA placements because they answer the wrong questions in the wrong format. The difference:

    ❌ What doesn’t win PAA
    What is personal injury law?
    Too generic — Nolo, FindLaw, and Wikipedia already own this. No specificity, no jurisdictional context, no urgency signal. Google has better sources for this answer.
    ✅ What wins PAA
    How long do I have to file a personal injury claim in Texas?
    In Texas, the statute of limitations for personal injury claims is two years from the date of injury under Texas Civil Practice and Remedies Code § 16.003. Exceptions apply for minors, claims against government entities (which may require notice within 6 months), and cases where the injury was not immediately discoverable.

    The winning answer is: specific to a jurisdiction, names the relevant statute, acknowledges exceptions, and is 40–60 words. It’s the answer a practitioner would give — not the answer a content writer researching for an hour would produce. That specificity is exactly what Google’s systems evaluate.

    The 7 Legal FAQ Categories That Win PAA Consistently

    1. Statute of limitations questions — “How long do I have to [sue/file/claim] in [state]?”
    2. Cost and fee questions — “How much does a [type] lawyer cost?”, “Do I pay upfront?”
    3. Process questions — “What happens after I file [claim/complaint/petition]?”
    4. Fault and liability questions — “What if I was partially at fault?”, “Who is liable if…?”
    5. Documentation questions — “What evidence do I need for [claim type]?”
    6. Alternative questions — “Can I handle this without a lawyer?”, “What happens if I don’t get a lawyer?”
    7. Recovery questions — “What damages can I recover?”, “How much is my case worth?”

    Implementing FAQPage Schema in WordPress

    FAQPage schema is injected as a JSON-LD block in the post’s HTML. It does not require a plugin — it can be added directly to the post content. The schema structure tells Google’s systems exactly which HTML elements contain the question text and which contain the answer text, making the content machine-readable for PAA extraction and AI citation.

    The most common implementation error is creating a FAQ section in HTML without the corresponding JSON-LD schema — Google can see the questions but cannot parse them for PAA extraction. Both the visible FAQ section and the JSON-LD block are required.

    FAQPage schema injection is one of the four core optimization layers in SiteBoost’s WordPress content optimization for law firms. For each post, we generate 6–8 PAA-targeted questions, write direct answers, and inject both the visible FAQ section and the FAQPage JSON-LD schema — pushing everything live via the WordPress REST API.

    Frequently Asked Questions

    How long does it take for FAQPage schema to earn PAA placements?

    FAQPage schema can earn People Also Ask placements within 2–4 weeks of implementation for posts that are already ranking in positions 1–20. Google crawls and re-evaluates indexed content regularly, and FAQPage schema is one of the fastest-surfacing schema types in Google’s rich result system. Posts that are not yet indexed or ranking below position 20 will need to build ranking authority before PAA placements are achievable.

    Should every law firm blog post have a FAQ section?

    Every post that targets an informational query — which is most legal blog content — should have a FAQ section. Practice area service pages benefit from FAQs too, but they serve a slightly different function (addressing pre-hire objections rather than research questions). The posts with the highest PAA potential are those targeting process, cost, liability, and statute of limitations questions — the queries prospects ask during active research before contacting a firm.

    Does FAQPage schema work for all practice areas?

    Yes. FAQPage schema works across all legal practice areas because the underlying mechanism — direct answers to specific questions that Google can extract — is universal. Personal injury, family law, criminal defense, estate planning, business law, and immigration all have distinct question patterns that prospects search. The key is writing questions in the language clients use, not the language attorneys use, and providing direct jurisdictional answers rather than generic legal information.

    Sources: Google Rich Results Documentation — FAQPage; ALM Corp, “SEO for Law Firms: Advanced Tactics for 2026”; W3Era, “Law Firm SEO Guide 2026”; Grow Law, “SEO for Lawyers: How to Dominate the SERPs in 2026”
  • E-E-A-T for Law Firms: Trust Signals That Drive Rankings

    E-E-A-T for Law Firms: Trust Signals That Drive Rankings

    Tygart Media — Law Firm Content Strategy

    E-E-A-T for Law Firms: The Trust Signals That Actually Move Legal Content Rankings

    By Tygart Media Updated: October 5, 2026
    Why E-E-A-T hits law firms hardest: Google classifies legal content as YMYL — Your Money or Your Life — content that can directly affect a person’s financial situation, legal rights, or safety. This triggers the highest level of E-E-A-T scrutiny of any content category. Google says its ranking systems give even more weight to content that aligns with strong E-E-A-T on YMYL topics, and the September 11, 2025 edition of its Search Quality Rater Guidelines keeps that standard at the center of how raters judge page quality. The difference is specific and implementable.

    What E-E-A-T Actually Means for Legal Content

    E-E-A-T — Experience, Expertise, Authoritativeness, Trustworthiness — appears about 120 times in Google’s Search Quality Rater Guidelines. For law firms, each dimension has a specific, practical meaning that goes beyond the abstract framework.

    E

    Experience

    First-hand knowledge of the legal situation being discussed. An attorney who has handled 200 slip-and-fall cases brings experiential authority a content writer cannot replicate. This shows in specificity: real case dynamics, real objections, real procedural details.

    E

    Expertise

    Demonstrated legal knowledge through how content is structured. Named statutes, specific case law references, bar association standards, jurisdictional nuances. Expertise is not claimed in a bio — it’s demonstrated in the precision of the content itself.

    A

    Authoritativeness

    External recognition. Bar association memberships, Avvo and Martindale-Hubbell profiles, citations from legal directories, mentions in local legal news. Named credentials in author schema markup that Google’s systems can verify.

    T

    Trustworthiness

    The most weighted dimension. Accurate content, named sources for statistics, HTTPS, consistent NAP, ABA Model Rules compliance in content claims, regular content updates with visible dates. Trust is infrastructure, not tone.

    What E-E-A-T signals does Google evaluate for law firm content specifically? Google evaluates law firm content E-E-A-T across four dimensions: Experience (does the content reflect first-hand legal practice knowledge, including real case dynamics and procedural specifics?), Expertise (are named statutes, case law, and bar association standards correctly referenced?), Authoritativeness (does the named author have verifiable bar admission, named credentials, and external recognition on Avvo, Martindale-Hubbell, or FindLaw?), and Trustworthiness (are claims sourced, content updated with visible dates, and the site technically secure and ABA-compliant in its marketing claims?).

    The Three Highest-Impact E-E-A-T Implementations for Law Firm Blogs

    1. Named Attorney Authorship With Credentials in Schema

    Every blog post should be attributed to a named attorney with verifiable credentials — not “Staff Writer” or the firm name. The author byline should link to an author bio page that includes bar admission state(s), practice area specialties, years in practice, and any notable professional recognitions. This bio page should have Physician-equivalent Person schema markup (or Attorney schema) with those credentials as named properties. This is the single highest-impact E-E-A-T implementation for law firm content because it converts an anonymous article into verifiable expert content.

    2. Named Legal Entity References in Every Article

    Each article should contain at least 3–5 named legal entities relevant to the topic: the applicable statute with its citation, the relevant bar association rule, named legal doctrines (contributory negligence, res ipsa loquitur, piercing the corporate veil), and any relevant regulatory body or court. These entities are what Google’s quality evaluators use to assess whether the content represents genuine legal expertise or generic information anyone could write.

    3. Visible Update Dates With dateModified Schema

    Legal content goes stale. Statutes change. Court decisions create new precedents. An article about the statute of limitations for personal injury claims that was last updated in 2022 is a liability in 2026 — Google’s quality evaluators are specifically trained to flag outdated YMYL content. Every law firm blog post needs a visible “Last updated” date near the byline and a dateModified field in the Article JSON-LD schema. When the content is genuinely updated — not just date-stamped — this signals active editorial stewardship.

    All three E-E-A-T implementations — attorney credential schema, legal entity injection, and dateModified schema — are applied as part of SiteBoost’s WordPress content optimization for law firms. The optimization is structural; your attorneys’ actual legal content and clinical judgment remain unchanged.

    Frequently Asked Questions

    Is E-E-A-T a direct Google ranking factor?

    E-E-A-T is not a direct algorithmic ranking factor in the sense that there is no “E-E-A-T score” that Google outputs. It is a framework used by human quality raters whose evaluations inform algorithm development. Content that demonstrates strong E-E-A-T signals — verifiable authorship, named sources, accurate and updated information — performs better in rankings because those signals correlate with the content quality properties that Google’s algorithms directly measure: accuracy, depth, relevance, and trust.

    Can a law firm without a named attorney author still rank well?

    Increasingly difficult, especially post-2025 algorithm updates targeting YMYL content without verifiable expertise. Anonymous law firm content — attributed to “the firm” rather than a named attorney — is missing the Experience and Expertise signals that Google’s quality evaluators specifically look for in legal content. The practical fix is to attribute existing posts to named attorneys and create author bio pages with credential schema, which can be done retroactively without rewriting any content.

    How does E-E-A-T affect law firm content in AI search results?

    AI systems like ChatGPT, Perplexity, and Google AI Overviews use signals similar to E-E-A-T when evaluating which content to cite in synthesized answers. Named attorney credentials, specific legal entity references (named statutes, case law, bar association rules), and verifiable source citations make content machine-verifiable — which is the AI system equivalent of trustworthy. Legal content with strong E-E-A-T signals is significantly more likely to be cited by AI assistants when prospects research legal questions before contacting a firm.

    Sources: Google Search Quality Rater Guidelines (September 11, 2025 edition); Google Search Central, “Creating helpful, reliable, people-first content”; American Bar Association, Law Practice Magazine; BKND Development, “E-E-A-T in 2026: The Content Quality Signals That Actually Matter”; YMM Digital, “The Definitive Guide to Law Firm SEO in 2026”; Wellows, “E-E-A-T Checklist for SEO”
  • Law Firm Blog SEO: 4 Fixes for Posts That Don’t Rank

    Law Firm Blog SEO: 4 Fixes for Posts That Don’t Rank

    Tygart Media — Law Firm Content Strategy

    Why Law Firm Blog Posts Don’t Rank (And the 4 Fixes That Actually Work)

    By Tygart Media Updated: April 12, 2026
    The core problem: Most law firm blog posts are published correctly but optimized incorrectly — or not at all. They have no meta description, a title that doesn’t match search intent, no FAQ section, no schema markup, and no named entity references that signal domain expertise. Google can index them. It just has no reason to rank them. These four fixes address the most common gaps, in order of impact.

    The Publishing Trap: Why “Consistent Blogging” Isn’t Enough

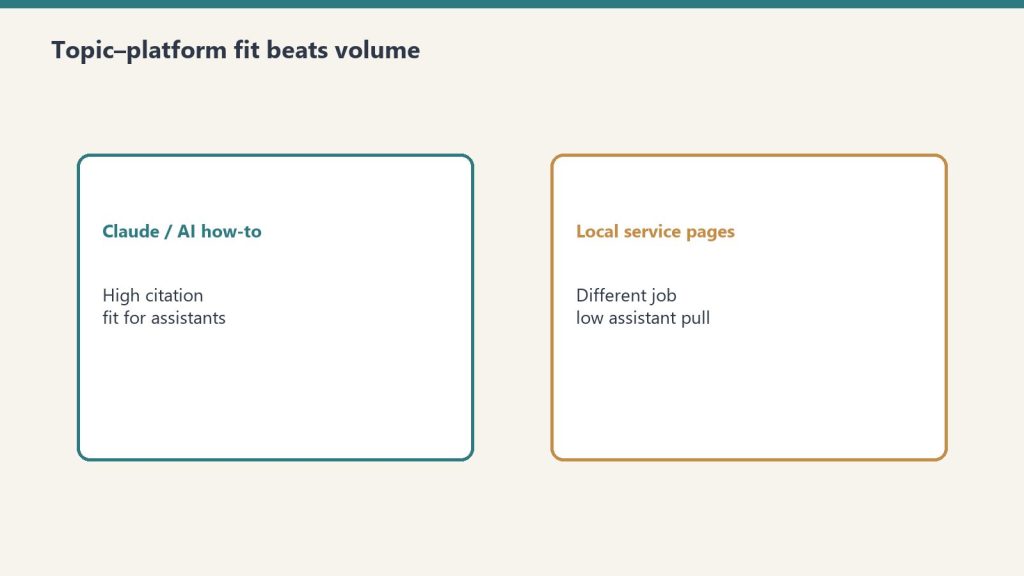
    Comparison of Claude how-to fit versus local service page fit for assistants
    The publishing trap: consistent blogging is not enough.

    Law firms are frequently advised to “publish consistently” as the foundation of their SEO strategy. The advice is correct in principle — content volume matters — but incomplete in practice. A blog post that is published without a keyword-optimized title, a written meta description, a FAQ section, and proper schema markup is not an SEO asset. It’s a page that exists. Existence and visibility are different things.

    According to research on legal search behavior, consumers increasingly use online resources — including AI assistants — to understand their legal situation before contacting a firm. That means a law firm article about personal injury claims needs to be structured to answer those research questions directly, not just exist as a published piece of content. The gap between “published” and “optimized” is exactly where most law firm blog investment is lost.

    Why don’t law firm blog posts rank despite consistent publishing? Law firm blog posts fail to rank despite consistent publishing when they lack the optimization signals Google uses to evaluate relevance and authority: keyword-specific title tags (not just the article topic), written meta descriptions (not auto-generated excerpts), FAQPage schema targeting People Also Ask queries, and named entity references — ABA, specific statutes, legal doctrines — that signal genuine legal expertise. Publishing frequency without optimization depth produces a large library of invisible content.

    Fix 1: Rewrite the Title Tag for Search Intent, Not Article Description

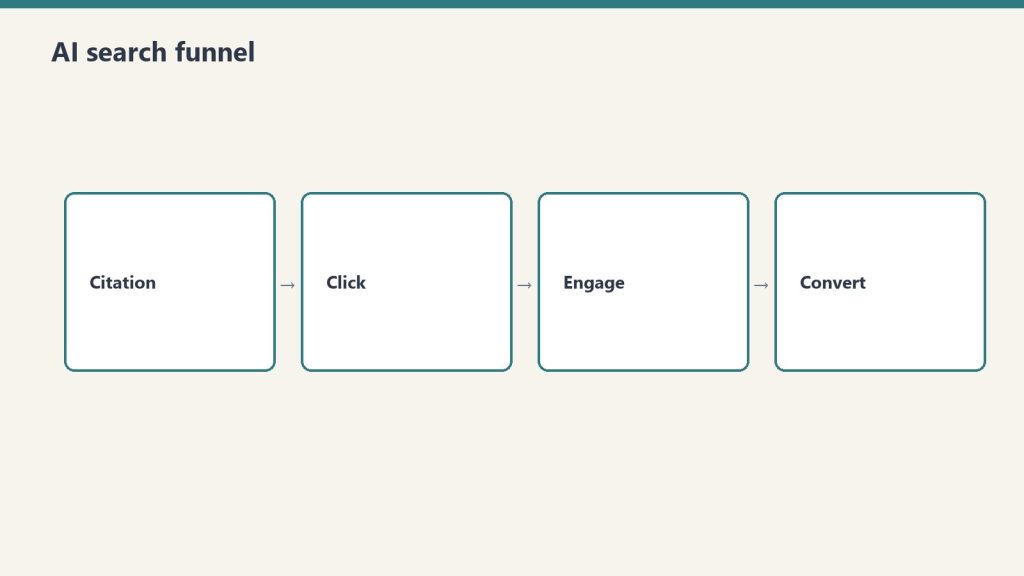
    Four-stage funnel: citation, click, engage, convert
    Fix 1: rewrite the title tag for search intent.

    The most common law firm blog title mistake is writing a title that describes the article rather than matching how a potential client searches. “Understanding Comparative Negligence in Personal Injury Cases” describes the article. “What Is Comparative Negligence and How Does It Affect My Case?” matches the actual search query.

    Title tags should be 50–60 characters, lead with the primary keyword, and reflect how the reader would phrase their question — not how a lawyer would title a legal memorandum. According to research on E-E-A-T and legal content, compelling, keyword-aligned title tags are among the highest-impact on-page signals for click-through rate from legal search results.

    Fix 2: Write Every Meta Description Manually

    WordPress auto-generates meta descriptions from the first paragraph of the post. Law firm posts almost universally have a scene-setting first paragraph that makes a poor meta description. “Personal injury law in Texas can be complex. If you’ve been injured in an accident, you may be wondering about your rights…” does not make a prospect click. A direct value statement does: “Injured in Texas? Learn how comparative negligence affects your case, what damages you can recover, and when you need to act. Free case review.”

    Meta descriptions should be 140–155 characters, include the primary keyword naturally, and end with a clear action signal. Every post needs one written from scratch — not auto-generated.

    Fix 3: Add a FAQ Section With FAQPage Schema

    People Also Ask placements in Google now appear for the majority of legal queries. These box placements appear above organic results and capture attention before the first blue link. Earning a PAA placement requires two things: a FAQ section with direct 40–60 word answers to specific questions, and FAQPage JSON-LD schema that tells Google’s systems exactly where those answers are.

    For a personal injury article, the FAQs that capture PAA placements are specific: “How long do I have to file a personal injury claim in Texas?”, “What does comparative negligence mean?”, “Do I pay a personal injury lawyer upfront?” — not generic “What is personal injury law?” questions that every directory already answers.

    Fix 4: Inject Named Legal Entities

    Desk with laptop, checklist notebook, and billing card ready before creating an Anthropic API key
    Fix 4: inject named legal entities into firm content.

    Google’s quality evaluators assess law firm content for Expertise and Authoritativeness by looking at entity signals — specific named references that demonstrate genuine legal knowledge. An article about personal injury law that references “the American Bar Association’s Model Rules of Professional Conduct,” cites “Texas Civil Practice and Remedies Code § 16.003” for the statute of limitations, and mentions “contributory negligence vs. modified comparative fault” as named legal doctrines signals legal expertise. The same article that says “you should contact a lawyer quickly because of time limits” signals nothing.

    This entity injection is also what determines whether your article gets cited by ChatGPT or Perplexity when a potential client asks an AI assistant about their legal situation.

    The four fixes above can be applied to your existing published posts without rewriting them. SiteBoost’s WordPress content optimization for law firms applies all four — title, meta, FAQ schema, and entity injection — systematically across your article library, with changes pushed live via the WordPress REST API.

    Related on Tygart Media: citing sources for E-E-A-T · information density · taxonomy architecture.

    Frequently Asked Questions

    How many blog posts does a law firm need to see SEO results?

    Volume matters less than optimization depth. Ten well-optimized posts — with intent-matched titles, written meta descriptions, FAQ schema, and entity injection — consistently outperform 50 unoptimized posts. The priority for most law firm blogs is not more content but better optimization of existing content. Start with your top 10 traffic-driving posts and apply all four fixes before publishing new content.

    Should law firm blog posts target practice area keywords or client question keywords?

    Both, but in different content types. Practice area keywords (“personal injury attorney Houston”) belong on service pages. Blog posts should target client question keywords — the long-tail informational queries people search when they’re researching their situation before hiring: “how long do I have to sue after a car accident in Texas”, “what happens if I’m partially at fault in an accident”, “can I sue if the accident was on private property.” These informational queries convert because they reach potential clients during active research.

    How often should a law firm blog be updated?

    Existing posts should be reviewed and updated whenever: a statute changes, a new case establishes relevant precedent, statistics are more than 12–18 months old, or the post is ranking on page 2 (positions 11–20) and could be pushed to page 1 with additional optimization. New posts should be published at a frequency the firm can sustain quality — one well-optimized post per month outperforms four thin posts per month in both rankings and E-E-A-T evaluation.

    Sources: Clio Legal Trends Report 2025; Google Search Quality Rater Guidelines; ALM Corp, “SEO for Law Firms: Advanced Tactics for 2026”; Grow Law, “SEO for Lawyers: How to Dominate the SERPs in 2026”
  • Crawl Space Dehumidifier Cost: Unit & Install Prices

    Crawl Space Dehumidifier Cost: Unit & Install Prices

    The Distillery
    — Brew № 2 · Crawl Space

    Updated September 30, 2026.

    Direct answer: Crawl-space-rated dehumidifiers run about $567–$2,236 for the unit at verified September 2026 retail, plus $150–$600 for hang, drain, and a new 15A circuit when needed—typical 70-pint-class installs land near $1,650–$2,850. Plan on roughly $145–$330/year in power at the U.S. EIA 2025 residential average of 17.3¢/kWh, depending on wattage and run hours.

    Spec E070, E100, Santa Fe Compact70/Advance2, or AlorAir Sentinel on new work—legacy 1820/1850 lines are discontinued. Box-store portables lack crawl duty cycle, low-temp rating, and hard-plumbed drains.

    Unit Cost by Capacity and Brand

    AHAM = 80°F / 60% RH. Retail spans are from manufacturer or authorized dealers, not installed bids.

    Model Capacity Min Temp Unit Cost Best For
    Aprilaire E070 70 pint/day ~40°F $1,677–$1,799 Sealed crawls to ~2,200 sq ft
    Santa Fe Compact70 70 pint/day 38°F $1,299–$1,379 Tight height; R454B
    AlorAir Sentinel HDi65S 55 pint/day 33.8°F $567–$756 Low retail; built-in pump
    Aprilaire E100 100 pint/day ~50°F $1,878–$2,236 1850 replacement; heavy load
    Santa Fe Advance2 90 pint/day 49°F $1,380–$1,903 Mid-large crawls
    AlorAir Sentinel HDi90 90 pint/day 33.8°F $872–$975 Mid-large; pump included

    Installation Cost Components

    • Electrical ($0–$600): Dedicated 15A/115V circuit. Existing crawl outlet: $0 add-on. New homerun: $300–$600—still the biggest swing item; confirm before you budget.
    • Mounting ($100–$250): Hang from joists or frame a platform above the liner; never set the cabinet on the vapor barrier.
    • Condensate ($50–$200): Gravity to sump or drain when possible; add $80–$150 in pump hardware when the unit sits below the discharge point. Many Sentinel models include a pump.

    Total Installed Cost Summary

    Scenario Unit Electrical Mount + Drain Total
    Existing outlet, gravity drain $1,299–$1,716 $0 $150–$350 $1,450–$2,070
    New 15A circuit $1,299–$1,716 $300–$600 $150–$350 $1,750–$2,670
    New circuit + pump path $1,299–$1,716 $300–$600 $250–$500 $1,850–$2,820
    Aprilaire E100 + new circuit $1,878–$2,236 $300–$600 $150–$350 $2,330–$3,190

    Annual Operating Cost

    • 70-pint class (~580–650 W): About $145–$165/year at 4 hours/day run time, or $290–$330/year at 8 hours/day, at 17.3¢/kWh (EIA 2025 U.S. residential average).
    • 90-pint class (~800 W): About $200–$400/year at the same duty cycles.
    • High-rate states (25–35¢/kWh): Multiply by roughly 1.4–2.0.

    Log RH 30 days after commissioning—crawl space humidity monitor placement catches undersized units before mold does.

    Contractor vs. DIY

    Bids still bundle dehumidifiers at $1,500–$3,500 installed. DIY on the same SKU saves roughly $300–$700 when outlet and drain exist; you own code, hang, and warranty. See crawl space encapsulation cost.

    Frequently Asked Questions

    How much does a crawl space dehumidifier cost?

    Expect roughly $567–$2,236 for the unit alone at verified 2026 retail, depending on brand and capacity. Total installed cost with mounting, condensate routing, and a new 15A circuit when needed usually lands near $1,650–$2,850 for a standard 70-pint class system. Encapsulation contractors often quote $1,500–$3,500 for the dehumidifier line item, which may bundle electrical, commissioning, and service.

    What is the cheapest crawl space dehumidifier that actually works?

    The AlorAir Sentinel HDi65S is the lowest verified retail price in this class—about $567–$756 direct from AlorAir—with a built-in pump, auto defrost, and roughly 33.8°F minimum operating temperature. It is rated 55 pints/day at AHAM (80°F, 60% RH), not 70, so size it conservatively. Warranty and distributor support are thinner than AprilAire or Santa Fe; weigh that if you are far from a wholesaler.

    Is it cheaper to run an HVAC supply duct than a dehumidifier?

    Cheaper upfront: tying a small supply register from existing forced-air HVAC into the crawl often runs $300–$600 installed versus $1,650–$2,850 for a dedicated dehumidifier on typical retail plus labor. Operating cost stays lower too because you are piggybacking on the central system. In humid Southeast and Gulf climates, supply-only rarely holds RH below 60% year-round; verify with a logger before you skip mechanical dehumidification.

    Do I need a dedicated electrical circuit for a crawl space dehumidifier?

    Yes—a dedicated 15A, 115V circuit is standard. Many 70-pint class units draw about 5–6 amps running (roughly 580–650 watts). If a GFCI-protected outlet already exists in the crawl, electrical add-on cost is $0; pulling a new homerun from the panel typically adds $300–$600 in labor and materials in 2026 markets.

    How much does it cost to run a crawl space dehumidifier per year?

    At the U.S. EIA 2025 residential average of 17.3¢/kWh, a 580-watt unit running 8 hours/day averages about $290/year; 4 hours/day averages about $145/year. A 90-pint class unit near 800 watts at the same duty cycles runs about $200–$400/year. High-cost states at 25–35¢/kWh roughly double those figures.


  • Crawl Space Floor Joist Repair: Costs & Sistering Guide

    Crawl Space Floor Joist Repair: Costs & Sistering Guide

    The Distillery
    — Brew № 2 · Crawl Space

    Floor joist damage in a crawl space — from moisture, pest activity, or structural overloading — is one of the most consequential findings a crawl space inspection can reveal. Unlike cosmetic issues, a compromised floor joist affects the structural integrity of the floor above and, if deterioration progresses, the safety of the occupants. Understanding when a joist needs sistering versus full replacement, what the work actually involves, and what it costs allows homeowners to evaluate contractor proposals from an informed position and prioritize repairs appropriately.

    When Joists Need Repair: The Assessment Framework

    The threshold for joist repair is determined by the extent of structural fiber loss, not by appearance alone. A joist that appears dark or discolored but passes the probe test (awl resistance is normal — the joist resists penetration) is structurally sound. A joist that allows easy awl penetration has lost structural fibers and requires repair regardless of surface appearance.

    • No probe failure, wood MC below 19%: Sound joist. Clean surface mold with appropriate treatment; address moisture source. No structural repair needed.
    • No probe failure, wood MC 19–25%: Elevated moisture creating conditions for future decay. Address moisture source immediately; treat with borate; monitor. No structural repair yet, but urgent moisture remediation.
    • Probe failure affecting less than 25% of joist depth at any cross-section: Partial structural loss. Sistering a full-length new joist alongside the damaged member is appropriate.
    • Probe failure affecting more than 25% of joist depth, or spanning more than 24″ along the joist length: Significant structural loss. Full replacement or sistering with upgraded member size may be needed. Structural engineer assessment recommended for severe cases.

    Sistering: How It Works

    Sistering is the process of attaching a full-length new structural member alongside a damaged or undersized existing joist. The new member is the same depth as the original and spans the full distance between bearing points (typically wall to wall or wall to beam). It is attached to the existing joist with structural nails or structural screws (16d ring shank nails at 12″ spacing, or equivalent structural screws) over the full length.

    The sister joist:

    • Must be the same nominal depth as the existing joist (a 2×10 sister alongside a 2×10 original)
    • Must span between the same bearing points as the original — a sister that does not reach the full span provides no structural benefit
    • Must be pressure-treated lumber (PT) if it will be in contact with concrete at either bearing end, or in a high-moisture environment
    • Should be pre-treated with borate (Tim-bor) before installation in crawl spaces with a history of moisture or pest activity

    Full Joist Replacement vs. Sistering

    Sistering is preferable to full replacement in most situations because it:

    • Can be accomplished without removing the subfloor above
    • Adds structural capacity rather than simply restoring it (the combined section is stronger than either member alone)
    • Is faster and less expensive than full replacement

    Full replacement is required when:

    • The existing joist has lost so much structural fiber that it cannot safely carry its load during the sistering process (collapse risk during construction)
    • The joist is in a location where access prevents installing a full-length sister (a plumbing stack or HVAC trunk running through the joist bay)
    • The damage pattern is so extensive that sistering would not provide adequate repair (complete hollow gallery from termite activity, for example)

    Cost Per Joist: What to Expect

    • Material cost per sister joist (2×10, 14′): $25–$45 for pressure-treated lumber
    • Labor to install one sister joist in a standard-height crawl space: $150–$350 per joist, including temporary shoring if needed, nailing/screwing, and cleanup
    • Total per-joist cost installed: $175–$400
    • Discount for volume: Contractors typically discount per-joist cost when multiple joists in the same section are being sistered — 8–10 joists in one area may run $100–$180 each rather than $175–$400 for single-joist work
    • Low-clearance premium: Crawl spaces under 24″ of clearance add 30–50% to labor cost per joist

    How to Evaluate a Joist Repair Proposal

    • Does the proposal specify the lumber grade and species? Structural joists must meet minimum bending strength — #2 Southern Yellow Pine or Douglas Fir are the standard; premium-grade lumber is not required but the grade should be specified
    • Is pressure-treated lumber specified for bearing ends or high-moisture applications? Standard framing lumber in contact with concrete or in a previously wet crawl space is inadequate
    • Does the sister span full length between bearing points? A sister that spans only 6 feet of a 12-foot joist provides no meaningful structural benefit — ask for the proposed sister length
    • What fastening method is specified? Hand-nailing 16d ring shank nails or structural screws at 12″ spacing is appropriate; pneumatic nails at wide spacing or staples are not
    • Is temporary shoring included? If the existing joist is significantly compromised, the floor above must be supported during sistering to prevent movement

    Frequently Asked Questions

    How do I know if my crawl space floor joists need repair?

    The most reliable test: push a sharp awl firmly into the bottom face of the joist. Sound wood resists penetration — you cannot push more than 1/16″–1/8″ with significant force. Wood with structural loss from decay allows easy penetration of 1/4″ or more. Also look for: floors that bounce or deflect noticeably when walked on, visible sagging in the floor structure when viewed from the crawl space, and wood moisture content above 19% (measured with a pin-type moisture meter).

    How much does it cost to sister a floor joist in a crawl space?

    Typically $175–$400 per joist installed, depending on crawl space clearance, joist length, and local labor rates. Volume discounts apply when multiple joists in the same area are being sistered. Low-clearance crawl spaces (under 24″) carry a 30–50% labor premium. A section of 8–10 joists all requiring sistering may cost $1,200–$3,500 as a packaged scope.

    Can sistered joists fix a bouncy floor?

    Yes, in most cases — sistering adds structural capacity that reduces mid-span deflection and eliminates the bouncy sensation. A floor that bounces because the joists are undersized for the span (common in older homes) can be significantly improved by sistering with same-size or larger lumber. A floor that bounces because the mid-span support beam has settled or the joists have lost structural integrity to decay responds well to sistering after the moisture source is addressed.


  • Crawl Space Condensation: Why It Happens and How to Stop It

    Crawl Space Condensation: Why It Happens and How to Stop It

    The Distillery
    — Brew № 2 · Crawl Space

    Condensation in a crawl space — liquid water that forms on structural wood, pipes, ductwork, and other surfaces without any rain or plumbing leak — is one of the most misunderstood moisture mechanisms in residential construction. Homeowners who find wet joists and assume they have a roof leak or plumbing problem spend money investigating phantom leaks while the actual cause — physics — continues unaddressed. Understanding why condensation happens in crawl spaces, how to confirm that condensation (rather than bulk water) is the problem, and what actually stops it is the foundation for effective moisture management.

    The Physics of Crawl Space Condensation

    Every cubic foot of air holds a specific maximum amount of water vapor — the maximum is called the saturation point, and it increases with temperature. When air is cooled below its saturation point, the excess moisture it can no longer hold is released as liquid water — condensation. The temperature at which a given air mass reaches its saturation point is the dewpoint temperature.

    In a vented crawl space in summer, the mechanism is straightforward:

    • Outdoor air in a humid climate (Southeast, Mid-Atlantic, Midwest in summer) has a high absolute humidity — the air contains large amounts of water vapor. A typical July afternoon in Charlotte, NC or Columbus, OH might have outdoor air at 90°F and 65% relative humidity, with a dewpoint of 76°F.
    • This warm, humid outdoor air enters the crawl space through foundation vents.
    • Inside the crawl space, the underside of the subfloor is cooled by the air-conditioned living space above — typically 10–20°F below outdoor temperature.
    • The crawl space surfaces (subfloor underside, floor joists, pipes, ductwork) may be at 65–75°F — below the outdoor dewpoint of 76°F.
    • When the 90°F outdoor air carrying its 76°F dewpoint contacts surfaces at 70°F, the air is cooled below its dewpoint. The excess moisture it can no longer hold condenses as liquid water on those surfaces.

    This is not a construction defect, a drainage problem, or a materials failure. It is thermodynamics operating on a vented crawl space in the wrong climate. The vented crawl space design assumes outdoor air is drier than the crawl space interior — which is true in cold, dry climates but completely backwards in humid summer climates.

    Diagnosing Condensation vs. Bulk Water

    The key diagnostic distinction is timing relative to weather events:

    • Condensation signature: Moisture on wood surfaces increases during warm, humid weather — particularly during sustained humidity events, summer months, and periods without rain. Moisture decreases in cool, dry weather or in winter. No correlation to rain events specifically.
    • Bulk water signature: Moisture or standing water appears within 24–72 hours of significant rain events. Watermarks on the foundation wall at consistent heights. Efflorescence (white mineral deposits) on foundation walls indicating past water contact.
    • Soil vapor diffusion signature: Moisture present year-round at moderate, consistent levels regardless of weather. Highest in low-lying areas where the water table is closest. No strong correlation to outdoor humidity or rain.

    The definitive diagnostic test: place a 12″ × 12″ piece of plastic sheeting on the bare soil in the crawl space and tape its edges with duct tape. Wait 24 hours. Condensation on the top of the plastic (facing the crawl space air) indicates atmospheric condensation. Moisture on the underside of the plastic (between plastic and soil) indicates soil vapor diffusion through the soil surface. Both can occur simultaneously.

    Why “More Ventilation” Makes Condensation Worse

    The intuitive response to a damp crawl space is often to add more ventilation — more foundation vents, a powered exhaust fan. In a humid climate in summer, this makes condensation significantly worse, not better. More ventilation means more humid outdoor air entering the crawl space, more air being cooled below the dewpoint, and more condensation on surfaces. The Advanced Energy Corporation’s field research in North Carolina found that homes with more foundation vents had higher wood moisture content in summer than homes with fewer vents — the opposite of the expected outcome from the traditional ventilation philosophy.

    The Only Proven Solution for Condensation

    For humid-climate crawl space condensation, the only proven solution is sealing the crawl space from outdoor air entry and adding active humidity control. This is precisely what encapsulation accomplishes:

    • Sealing foundation vents eliminates the pathway through which outdoor humid air enters the crawl space
    • The vapor barrier prevents soil vapor diffusion from adding to the crawl space air humidity
    • The dehumidifier or HVAC supply connection maintains relative humidity below the dewpoint threshold at which condensation occurs on the cooler surfaces in the space

    After encapsulation of a condensation-problem crawl space, wood surfaces that previously showed 22–25% moisture content in summer stabilize at 10–14% — below the threshold for mold growth and far below the threshold for wood decay fungi. The transformation is measurable and typically occurs within 60–90 days of encapsulation.

    Frequently Asked Questions

    Why is there condensation in my crawl space?

    In a vented crawl space in a humid climate: summer outdoor air enters through foundation vents with a dewpoint temperature that exceeds the temperature of the crawl space’s cooler surfaces (subfloor, joists, pipes cooled by the air-conditioned space above). When warm, humid air contacts these cooler surfaces, the air is chilled below its dewpoint and releases liquid water as condensation. This is thermodynamics, not a construction defect or drainage problem.

    Will adding more foundation vents stop crawl space condensation?

    No — in humid climates, adding foundation vents makes condensation worse, not better. More vents mean more humid outdoor air entering the crawl space and more condensation on cool surfaces. Building science research has documented that homes with more foundation vents have higher wood moisture content in summer than homes with fewer vents in humid climates. The correct solution is sealing the crawl space from outdoor air entry, not increasing ventilation.

    How do I stop condensation in my crawl space?

    Crawl space encapsulation — sealing foundation vents, installing a vapor barrier, and adding a dehumidifier or HVAC supply duct — is the only proven solution for condensation-problem crawl spaces in humid climates. This eliminates the pathway for humid outdoor air to enter (eliminating the condensation source), controls residual humidity from soil vapor diffusion, and maintains the sealed space below the dewpoint threshold at which condensation occurs on cooler surfaces.


  • Crawl Space Rim Joist Insulation: Spray vs. Rigid Foam

    Crawl Space Rim Joist Insulation: Spray vs. Rigid Foam

    The Distillery
    — Brew № 2 · Crawl Space

    The rim joist — the band of framing that sits on top of the foundation wall and closes the floor joist cavities at the perimeter — is consistently identified by building scientists and energy auditors as the largest single air leakage and heat loss site in most homes with crawl spaces. More heat escapes through an uninsulated, unsealed rim joist than through any other single component of the crawl space building envelope, and more crawl space air enters the home through the rim joist than through any other pathway. Addressing the rim joist is the highest-leverage action in any crawl space improvement project.

    Why the Rim Joist Is the Priority

    The rim joist area is a thermal and air sealing weak point for structural reasons: it is the intersection of multiple framing members (floor joist ends, blocking, the rim joist itself, the sill plate below, and the subfloor above), and these members rarely meet perfectly. Gaps at joist ends, misaligned blocking, gaps between the rim joist and the sill plate, and the inherently porous nature of lumber create a permeable air barrier. Hot-box blower door tests consistently find that the rim joist contributes disproportionately to total building air leakage — often 15–25% of total air infiltration in a home with an uninsulated crawl space rim joist.

    The thermal impact is equally significant. The rim joist is typically the coldest structural wood surface in a vented crawl space in winter — it is exposed on the exterior face to outdoor temperatures, has no insulation between it and the interior, and is the wood member most prone to condensation from warm interior air hitting the cold exterior-connected wood. Condensation on the rim joist is the leading cause of mold growth at the top of crawl space foundation walls.

    Option 1: Spray Foam (Best Performance)

    Professional two-component closed-cell spray polyurethane foam (ccSPF) applied to the rim joist area is the gold standard for rim joist insulation and air sealing. Closed-cell spray foam:

    • Adheres directly to wood, concrete, and masonry surfaces — filling all gaps, cracks, and voids in the rim joist framing assembly
    • Provides both insulation (R-6.5 to R-7 per inch) and complete air sealing simultaneously
    • At 2″ applied thickness: approximately R-13, and essentially complete air sealing across the entire rim joist area
    • Adds structural rigidity to the rim joist assembly — a secondary benefit particularly relevant in older homes where rim joist framing may be degraded
    • Is vapor semi-impermeable at 2″ thickness — in most climate zones, this provides appropriate vapor control at the rim joist without requiring a separate vapor barrier

    Professional closed-cell spray foam requires specialized equipment (a proportioner that heats and mixes the two-component foam at precise ratios), protective equipment (Tyvek suits, respirator with organic vapor cartridges, eye protection), and training to apply uniformly and safely. DIY two-component kits (available from Froth-Pak and similar) can handle small areas but are expensive per board-foot and not practical for a full rim joist treatment in a large crawl space.

    Professional spray foam cost for rim joist: $1.50–$3.00 per square foot of rim joist area, which typically means $600–$1,500 for a full perimeter treatment of a standard single-family home.

    Option 2: Rigid Foam Panels (DIY-Accessible)

    Rigid foam boards (EPS, XPS, or polyisocyanurate) cut to fit between the floor joists and sealed at all four edges with one-component spray foam is the DIY-accessible alternative to professional spray foam. This approach provides:

    • Thermal insulation from the foam board — 1″ XPS provides R-5; 2″ XPS provides R-10; 2″ polyiso provides R-12–13
    • Air sealing from the spray foam seal at the perimeter of each panel — not as complete as professional ccSPF but substantially better than no treatment
    • DIY-accessible — cutting foam board with a utility knife and applying spray foam perimeter seal requires only basic skills and inexpensive tools

    The installation process:

    • Measure each joist bay width (spacing varies in older homes)
    • Cut rigid foam panels to fit snugly in each bay — the panel should be cut 1/4″ smaller than the actual bay dimensions to allow spray foam to seal the perimeter
    • Apply construction adhesive to the back of the panel or use the spray foam itself as the adhesive
    • Press the panel firmly against the rim joist and hold until adhesion is achieved
    • Apply a continuous bead of one-component spray foam (Great Stuff or equivalent) around all four edges of each panel — this is the air sealing step and must be continuous without gaps

    DIY rigid foam + spray foam material cost: $0.50–$1.50 per square foot of rim joist area. For a 1,200 sq ft home with 150 LF of perimeter × 2 joist courses (approximately 250 sq ft of rim joist area): $125–$375 in materials. This is 3–5× less expensive than professional spray foam for equivalent coverage, though the air sealing performance is somewhat lower.

    Climate Zone Considerations

    The appropriate R-value target for rim joist insulation varies by climate zone, similar to wall insulation requirements:

    • Climate Zones 1–2 (Deep South): R-13 at the rim joist. 2″ ccSPF or 2″ rigid foam + spray foam seal meets this requirement.
    • Climate Zones 3–4 (Mid-Atlantic, Southeast transition, Pacific Coast): R-13–19. 2″ ccSPF provides R-13; adding rigid foam behind the spray foam or increasing thickness to 3″ achieves R-19.
    • Climate Zones 5–6 (Midwest, Northeast, Pacific Northwest): R-19–20. 3″ ccSPF provides approximately R-19–21; 2″ ccSPF + 2″ rigid foam achieves similar performance.
    • Climate Zones 7–8 (Northern climates): R-20+. Higher-thickness spray foam or layered spray foam + rigid foam is needed.

    Frequently Asked Questions

    Should I use spray foam or rigid foam for my crawl space rim joist?

    For the best air sealing performance: professional two-component closed-cell spray foam. For a DIY-accessible, lower-cost alternative that provides good (but not perfect) air sealing: rigid foam boards sealed at all four edges with one-component spray foam. The choice depends on budget and DIY capability — rigid foam is approximately 3–5× less expensive in material cost and requires no professional application.

    How much does rim joist spray foam cost?

    Professional closed-cell spray foam for the rim joist: $1.50–$3.00 per square foot of rim joist area. For a standard single-family home with approximately 250 sq ft of rim joist area: $375–$750 in material + labor. DIY rigid foam + one-component spray foam: $125–$375 in materials for the same area.

    Do I need to insulate the rim joist if my crawl space is vented?

    In a vented crawl space, the rim joist is part of the building thermal envelope — insulating it reduces heat loss between the conditioned living space and the vented, unconditioned crawl space. Rim joist insulation is valuable in both vented and sealed crawl spaces, though the approach differs slightly: in a vented space, the rim joist insulation must accommodate some moisture management; in a sealed space, the spray foam approach is fully appropriate without additional vapor barrier considerations in most climate zones.