Tag: Commercial Restoration

  • Xactimate Strategy for Restoration Contractors: 2026 Guide

    Xactimate Strategy for Restoration Contractors: 2026 Guide

    Xactimate is the operating system of insurance restoration in North America. Every major insurance carrier, almost every TPA, and the majority of preferred vendor programs require it. If you can’t write a defensible Xactimate estimate, you can’t run a serious insurance restoration business.

    This guide is the operator-level Xactimate strategy for 2026: how the pricing actually works, the sketch discipline that produces approvable estimates, the supplement workflow that captures the 5-15% of revenue most companies leave on the table, and how to defend your scope when carriers push back.

    What Xactimate actually is

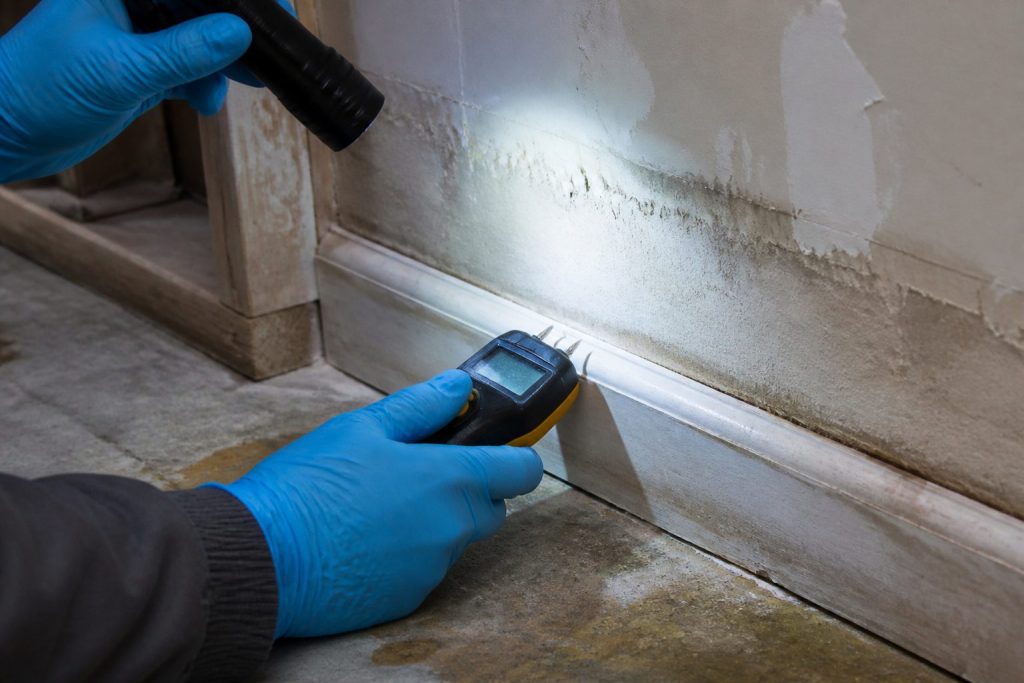
    Gloved hands using a pin-type moisture meter on wet drywall during inspection
    What Xactimate actually is in the claim workflow.

    Xactimate is a software platform owned by Verisk that combines a regional pricing database, a sketch-based scope builder, and an estimating workflow. The pricing database contains line items priced by metropolitan statistical area, updated quarterly based on labor and material cost surveys. Carriers, adjusters, contractors, and TPAs all use the same database, which means there’s no negotiation over rates — only over scope and applicability of line items.

    The product comes in three editions: Xactimate online (X1), the modern web-based version most contractors use today; Xactimate desktop (X28), the legacy desktop client still used in some workflows; and Xactimate mobile, for on-site sketching and photo capture. Most active restoration contractors today work primarily in X1 with mobile capture in the field.

    The Xactimate pricing logic

    Each Xactimate line item has three components: a labor component (the labor cost to perform the task), a material component (the material cost), and an equipment component (rental or use cost). Every line item is priced for a specific region using current local labor rates, material costs from supplier surveys, and equipment rental data. Because the carrier sees the same prices the contractor sees, the rates themselves aren’t disputed — disputes are about scope.

    On top of the line item subtotal, contractors add overhead and profit (typically 10% + 10%) when the job qualifies — historically defined as work involving three or more trades or meeting other complexity criteria. O&P is one of the most contested elements in restoration estimating. Carriers and TPAs frequently push back on it, especially on smaller jobs. Documenting the trade count, complexity, and supervisory burden is how restorers defend it.

    Sketch discipline: the foundation of approvable estimates

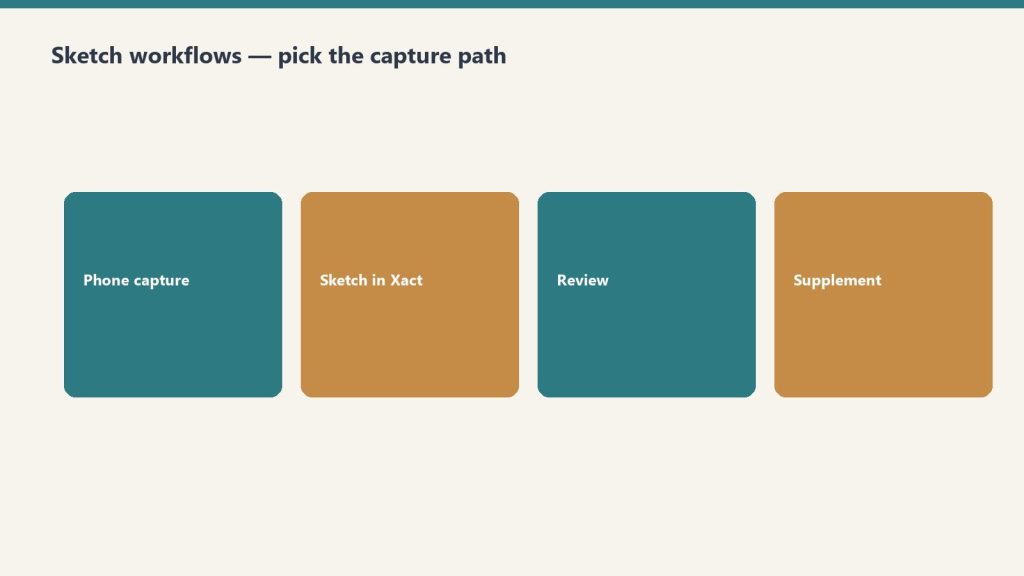
    Four steps: phone capture, sketch in Xactimate, review, supplement
    Sketch discipline — the foundation of approvable estimates.

    The single biggest predictor of estimate approval is sketch quality. A clean sketch with accurate room dimensions, properly labeled rooms, correct ceiling heights, openings (doors, windows, cased openings) drawn to scale, and labeled affected materials is approved with minimal questions. A messy sketch — wrong dimensions, missing rooms, unlabeled openings, no notes — generates rejection cycles and supplements.

    The sketch discipline that produces clean estimates: measure every room (laser measurer, then verify), draw to scale at the loss site (don’t sketch from memory back at the office), label every room with its purpose (kitchen, bathroom, master bedroom — not just “Room 1”), draw all openings with width and height, label affected materials room by room (drywall, flooring type, baseboards, ceiling), and capture matching photo documentation tied to each room.

    The estimating workflow that produces complete scope

    Most missed scope in restoration comes from a rushed initial estimate. The disciplined workflow: walk the entire affected area first (don’t start writing scope until you’ve seen everything), photograph every affected room from every corner, identify and document all hidden damage (pull baseboards, lift carpet corners, check behind cabinets, scope the floor structure), document moisture readings on a moisture map, write the scope room by room with photos referenced, then review the estimate against the photo set before submitting.

    This takes longer on the front end. It saves significant time and revenue on the back end because the supplement burden is dramatically lower.

    Supplements: the 5-15% revenue most companies leave on the table

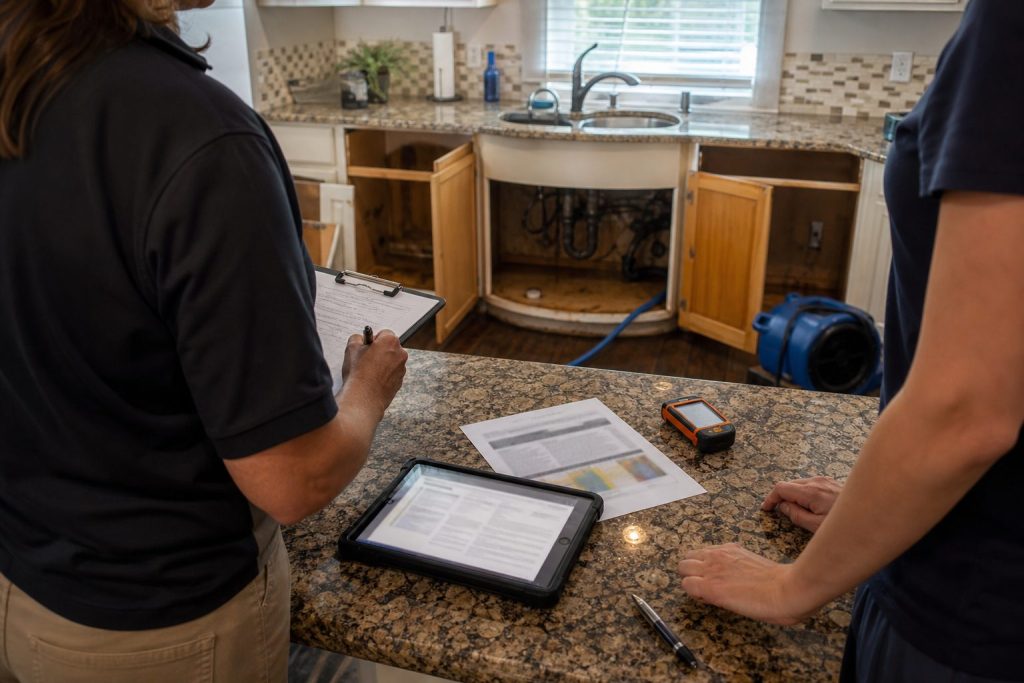
    Clipboard and tablet on a kitchen counter during an insurance adjuster walkthrough after water loss
    Supplements — revenue most companies leave on the table.

    Supplements are revisions to the original estimate when additional damage is discovered, scope changes, or items were missed. In legitimate restoration work, supplements are normal — almost every job will have at least one. Companies with weak supplement processes leave 5-15% of revenue on the table on every insurance job. Companies with disciplined supplement workflows capture every dollar of legitimate scope.

    The supplement workflow that works: document the additional damage with photos and notes immediately upon discovery, write the supplement in Xactimate within 48 hours, submit through the proper channel (carrier portal, adjuster email, TPA system), follow up on approval status weekly, and track every supplement to closure. Supplement revenue should appear on the job costing report alongside original revenue so you can measure the discipline.

    Defending scope against pushback

    Adjusters and TPAs push back on scope routinely — sometimes legitimately, sometimes reflexively. The defense is documentation. For each contested line item: photo evidence of the affected material, moisture readings or other measurable damage indicators, IICRC standard reference (S500 for water, S520 for mold, S700 for fire, S800 for HVAC), and clear notes about why the scope is necessary. A line item with photos and a standard reference is hard to dismiss. A line item with no documentation is dismissed routinely.

    The Xactimate certifications that matter

    Xactimate offers user certification at three levels: Level 1 (basic functionality), Level 2 (advanced sketch and estimating), and Level 3 (advanced supplements, complex scope, dispute resolution). Level 1 should be a minimum requirement for any estimator at a restoration company. Level 2 is appropriate for senior estimators and project managers. Level 3 is the standard for owners, lead estimators, and anyone who handles disputed scope.

    Common Xactimate mistakes that cost real money

    The most common margin-killing mistakes: using regional default rates instead of pulling current quarterly pricing, missing equipment days on water mitigation jobs, failing to add proper drying chamber configuration, forgetting matching where required by IICRC standard, missing demolition scope on Cat 3 losses, not adding cleaning of unaffected areas where smoke or odor migrated, missing contents pack-out and cleaning, and submitting estimates without overhead and profit when they qualify.

    Related on Tygart Media: Starlink on a water job · S500 in the van · local SEO for restoration.

    Frequently Asked Questions

    How does Xactimate pricing work?

    Xactimate pricing is built from a regional database of line items, each containing labor, material, and equipment cost components. Pricing updates quarterly based on local cost surveys. Both contractors and carriers use the same pricing database, so disputes are about scope (which line items apply) rather than rates (what each line item costs).

    How much does Xactimate cost?

    Xactimate online (X1) subscription costs vary based on tier and seat count, with most restoration contractors paying $200-$500/month per seat. Xactimate mobile is typically included or available as an add-on. Pricing changed significantly with the move to X1 — contractors should request a current quote directly from Verisk.

    What is overhead and profit in Xactimate?

    Overhead and profit (O&P) is typically a 10% + 10% addition applied on top of the line-item subtotal when a job involves three or more trades or meets other complexity criteria. The 10% overhead covers indirect costs like supervision and office burden; the 10% profit is the contractor’s profit on the work. O&P is frequently disputed by carriers and requires documentation to defend.

    How do you write a Xactimate supplement?

    The disciplined supplement workflow: document additional damage with photos and notes upon discovery, write the supplement in Xactimate within 48 hours, submit through the proper channel (carrier portal, adjuster email, TPA system), follow up on approval status weekly, and track every supplement to closure. Companies with disciplined supplement processes capture 5-15% more revenue per insurance job.

    Do I need Xactimate certification to be a restoration contractor?

    You don’t need certification to use Xactimate, but most TPAs and many carriers require certified users on the account, and certification is increasingly the norm for any serious estimating role. Level 1 is a baseline; Level 2 or 3 is appropriate for owners, lead estimators, and dispute handlers.

    How do I dispute a Xactimate estimate?

    Disputes are won with documentation: photo evidence of the affected material, moisture readings or measurable damage indicators, IICRC standard references (S500, S520, S700, S800), and clear notes explaining why the scope is necessary. The most common adjustment requests succeed when supported by IICRC standards and visual evidence; unsupported requests are dismissed routinely.

  • IICRC Certification: 2026 Restoration Training Guide

    IICRC Certification: 2026 Restoration Training Guide

    Certification matters more in restoration than in most trades. Insurance carriers, TPAs, commercial buyers, and many state regulators look for IICRC credentials as the baseline trust signal. A restoration company with no certifications can do residential cash work; a company with a credentialed team can win commercial accounts, qualify for preferred vendor programs, and defend scope against challenge.

    This is the complete guide to IICRC certifications and restoration training in 2026: which certifications actually matter for which roles, the realistic path for a new technician, what each course costs and covers, and how to build an in-house training program that turns new hires into productive technicians in 90 days instead of nine months.

    How to get IICRC certified: the exact steps

    IICRC certification is the industry’s credential for individual technicians and firms — earned by completing an approved course and passing a standardized exam. There are no formal prerequisites for entry-level courses: you register, take the course, and sit the exam.

    1. Pick your certification. WRT (Water Damage Restoration Technician) first if you touch water losses — it’s the baseline everything else stacks on.
    2. Take an IICRC-approved course. Most run three days. Two exceptions: ASD (Applied Structural Drying) and AMRT (Applied Microbial Remediation Technician) must be taken in person — the IICRC hasn’t approved them for online delivery because of the hands-on elements. Everything else is available in person or live-stream.
    3. Register for the exam and pass it. The exam is multiple-choice and closed book; question count and time limit vary by course. The passing score is 75%. The IICRC exam fee is $80 ($150 for AMRT and inspection exams), paid before you sit. If you take a live-stream course, you complete the exam online through the IICRC exam portal within 45 days of the class ending; in-person students take it on the last day of class. Fail it and you get two more attempts (each costs another exam fee) — fail three times total and you have to retake the course before testing again.
    4. Get your credentials. After you pass, the IICRC takes 4–6 weeks to process and issue the certification, then mails your certificate, wallet card, and patch (allow another 7–10 business days for delivery).
    5. Stay current. Certification stays valid as long as you maintain it: an annual renewal fee to the IICRC plus 14 Continuing Education Credits (CECs) every four years for technicians. (Inspectors and master-designation holders need 14 CECs every two years.) Renewal fees run roughly $46–$70/year depending on how many certifications you hold — AMRT is $72/year, a master designation adds $12/year, and certified firms pay $199/year. The IICRC sets these fees and adjusts them, so confirm current numbers at iicrc.org before you budget.

    What the IICRC actually is

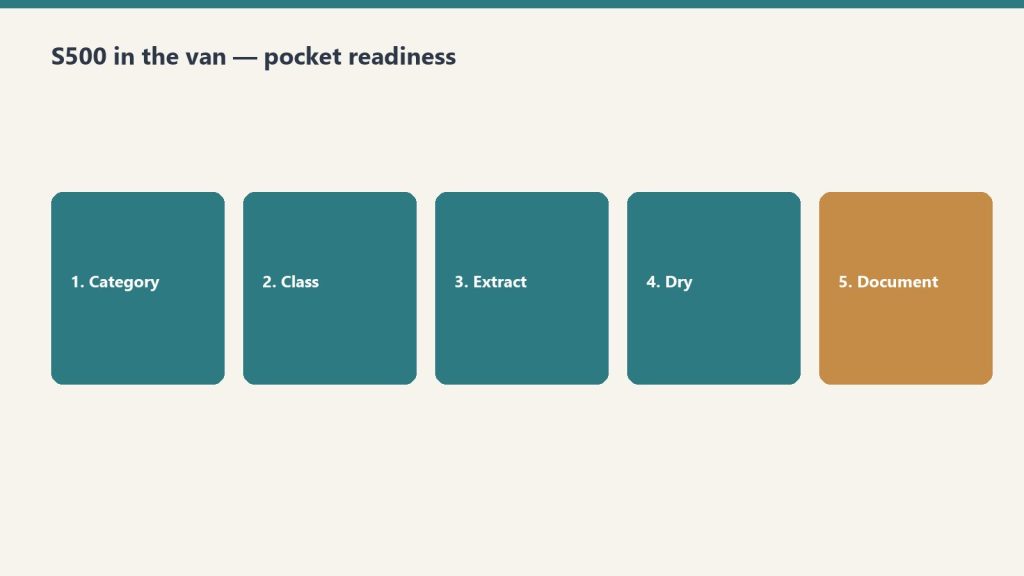
    Five-step van pocket flow: category, class, extract, dry, document
    What the IICRC actually is.

    The Institute of Inspection, Cleaning and Restoration Certification (IICRC) is the standards-setting and certification body for the cleaning, inspection, and restoration industry. Founded in 1972, it publishes the technical standards that govern the industry — most notably S500 (water damage), S520 (mold), S540 (trauma and crime scene), S700 (fire and smoke), and S800 (HVAC) — and certifies individuals and firms in specific competencies.

    IICRC certifies individual technicians through course completion and exam, and certifies firms through documentation of insurance, technician credentials, and adherence to standards. Firm certification is what most insurance carriers and commercial buyers actually look for on vendor applications.

    The IICRC certifications that matter for restoration

    The certifications that should be on every restoration company’s checklist:

    WRT (Water Damage Restoration Technician) — the foundational water mitigation certification. Three-day course covering water categories, drying science, equipment use, and the S500 standard. This is the absolute minimum for any technician handling water losses. Most companies require WRT within 60-90 days of hire.

    ASD (Applied Structural Drying) — the advanced drying certification. Builds on WRT with deeper coverage of psychrometry, drying chamber configuration, equipment sizing, and complex drying scenarios. Standard for lead technicians and project managers.

    AMRT (Applied Microbial Remediation Technician) — the mold remediation certification. Covers S520 standard, containment design, PPE, work practices, and post-remediation verification. Required for any contractor performing mold remediation work; often required by state regulators in mold-licensed states.

    FSRT (Fire and Smoke Restoration Technician) — fire and smoke damage certification. Covers smoke types, deodorization, contents cleaning, and structural restoration after fire losses. Important for any contractor handling fire work.

    OCT (Odor Control Technician) — focused certification on odor identification and removal techniques. Useful for technicians and project managers handling fire, sewage, biohazard, and HVAC remediation.

    HST (Health and Safety Technician) — covers OSHA compliance, PPE selection, hazard assessment, and crew safety practices. Recommended for project managers and crew leaders.

    UFT (Upholstery and Fabric Cleaning Technician) and CCT (Carpet Cleaning Technician) — for contents cleaning and carpet cleaning operations. Standard for contents departments.

    CCMT (Commercial Carpet Maintenance Technician) — relevant for commercial restoration operations with maintenance contract work.

    TCST (Trauma and Crime Scene Cleanup Technician) — for biohazard and trauma cleanup divisions. Required by some state regulators.

    WRT-Master, ASD-Master, AMRT-Master designations — the highest individual certifications, requiring multiple credentials, hours of field experience, and additional examination.

    The path from new hire to credentialed technician

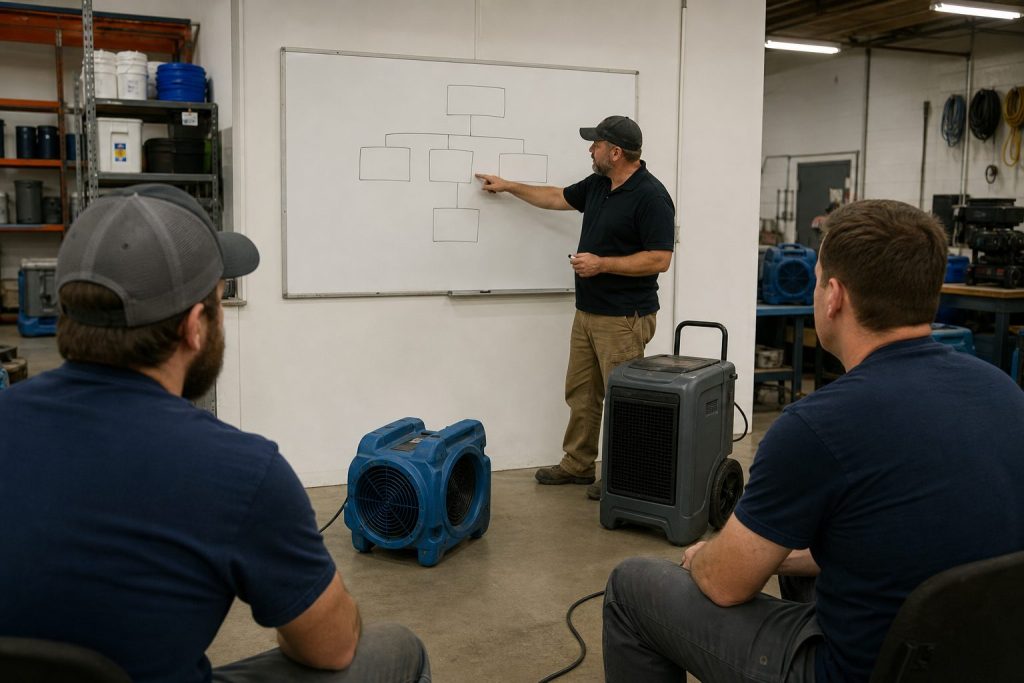
    Restoration technicians training in a shop bay with equipment demo and whiteboard
    Path from new hire to credentialed technician.

    A realistic 12-month path for a new restoration technician: Days 1-30 — shadow experienced technicians, complete OSHA 10 and basic safety orientation, learn equipment handling. Days 31-90 — complete IICRC WRT certification (three-day course plus exam), begin running mitigation jobs as second tech under supervision. Days 91-180 — complete ASD or FSRT depending on focus area, begin running smaller jobs as lead. Days 181-365 — complete AMRT (if mold work), additional specialty certifications based on role, eligibility for lead technician promotion.

    Companies that compress this timeline (six-month path to fully certified lead tech) usually do it by combining IICRC courses with rigorous in-house training, structured ride-alongs, and weekly skill assessments.

    In-house training programs: building beyond IICRC

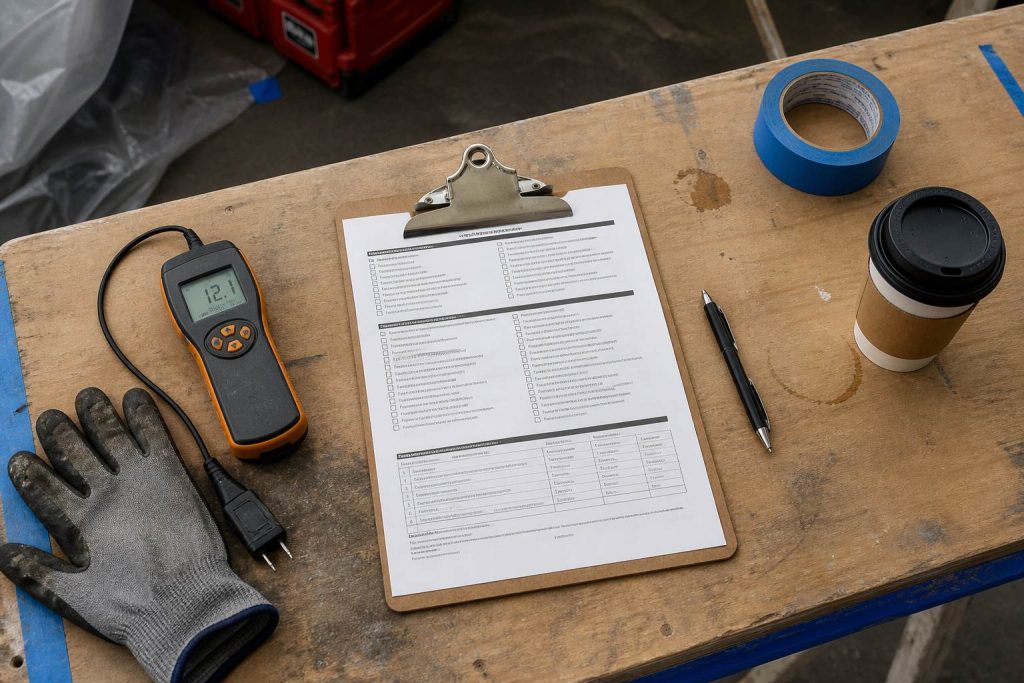
    Restoration SOP clipboard with checklist, moisture meter, and gloves on a jobsite table
    In-house training beyond IICRC.

    IICRC certification is the baseline. The companies that consistently outperform have in-house training programs that fill the gaps. The components of a real in-house program:

    Onboarding curriculum — week one orientation covering company processes, equipment handling, safety, and customer interaction expectations. Weekly skills training — 30-60 minute sessions on specific topics: drying chamber setup, content pack-out procedures, moisture mapping, customer communication scripts. Quarterly cross-training — rotating technicians across service lines so the team has bench depth. Annual recertification — refresher training on IICRC standards updates, new equipment, and procedural changes. Mentor pairing — every new technician paired with an experienced lead for the first 90 days.

    Training cost: what to budget

    Realistic 2026 cost per new restoration technician: WRT certification $700-$1,000 (course + exam + travel), ASD $700-$1,000, AMRT $800-$1,200, FSRT $700-$1,000, plus 40-80 hours of paid in-house training time. Total first-year investment per technician: $3,000-$8,000 depending on path. Companies often recoup this within a few months through improved productivity and reduced supervision burden.

    Training providers worth knowing

    Restoration training providers fall into three categories. IICRC-approved training schools deliver the certification courses themselves — Restoration Sciences Academy, IICRC-approved regional providers, and online options through providers like KEY Restoration. Industry consultants and coaches deliver advanced training in estimating, sales, operations, and leadership — Violand Management, GrowthWerks, Performance Restoration, and several others. Manufacturer training from equipment vendors like Phoenix Restoration Equipment, Drieaz, and chemical suppliers covers product-specific operations.

    Related on Tygart Media: Starlink on a water job · S500 in the van · local SEO for restoration.

    Frequently Asked Questions

    What is IICRC certification?

    IICRC (Institute of Inspection, Cleaning and Restoration Certification) is the industry standards-setting and certification body. It publishes the technical standards (S500 for water, S520 for mold, S700 for fire) and certifies both individual technicians and restoration firms in specific competencies. Insurance carriers, TPAs, and commercial buyers commonly require IICRC credentials.

    How much does IICRC certification cost?

    Individual IICRC certification courses typically run $700-$1,200 each, including course materials, the exam, and exam administration. Travel and lodging (when courses are in-person) add to the total. Online and hybrid options are increasingly available at lower cost. Annual maintenance fees apply to keep credentials active.

    What IICRC certifications do restoration technicians need?

    The baseline for any water mitigation technician is WRT (Water Damage Restoration Technician). Lead technicians typically add ASD (Applied Structural Drying). Companies handling mold work require AMRT (Applied Microbial Remediation Technician). Fire restoration adds FSRT (Fire and Smoke Restoration Technician). Specialty roles add OCT, HST, TCST, and others as needed.

    How long does IICRC certification take?

    Most individual IICRC courses are three days of in-class instruction followed by a written exam. Some courses are available in compressed two-day or hybrid formats. From start to certified takes one to four weeks depending on exam scheduling. The full certification path (multiple credentials) for a senior technician usually spans 6-18 months.

    What is the difference between IICRC certification for individuals and firms?

    Individual IICRC certification is earned by a single technician completing a course and exam. Firm certification is earned by a company that documents insurance coverage, employs a minimum number of certified technicians, agrees to abide by the IICRC code of ethics, and participates in customer complaint resolution. Firm certification is what most carriers and commercial buyers look for on vendor applications.

    Where can I take IICRC courses?

    IICRC courses are delivered by approved training schools across the US and internationally. Major providers include Restoration Sciences Academy and various regional IICRC-approved schools. Many manufacturers and equipment vendors also offer IICRC-approved training. The IICRC website maintains an updated list of approved providers.

    What is the passing score for the IICRC exam?

    75%. IICRC exams are multiple-choice and closed book. If you don’t pass, you can retake the exam up to two more times (each attempt costs another exam fee) — after three failed attempts you must retake the course before testing again.

    How do I keep my IICRC certification active?

    Pay the annual IICRC renewal fee and earn 14 Continuing Education Credits (CECs) every four years (technicians) or every two years (inspectors and master-designation holders). CECs come from IICRC-approved courses, industry events, or earning an additional certification. If your certification lapsed less than 24 months ago, contact IICRC renewals to reinstate it; beyond 24 months goes through a separate reinstatement process.

    How can I verify someone’s IICRC certification?

    Ask for their certification number and check it against the IICRC’s public “Locate a Certified Professional” directory. For firms, ask for proof of current Certified Firm status — that’s the credential carriers and commercial buyers actually check on vendor applications.

  • Water Damage Restoration Pricing: Maximize Job Margins

    Water Damage Restoration Pricing: Maximize Job Margins

    Water damage restoration pricing is where most operators bleed the most money — not because they charge too little on the headline number, but because they miss line items, mis-categorize equipment, and accept reductions they could have defended. This guide walks through the pricing framework profitable restoration companies use for both insurance and cash water jobs.

    If you have not worked through the full pricing playbook yet, start with our restoration pricing and estimating master guide to understand how water pricing fits into the larger estimating system.

    Why Water Damage Pricing Is Different

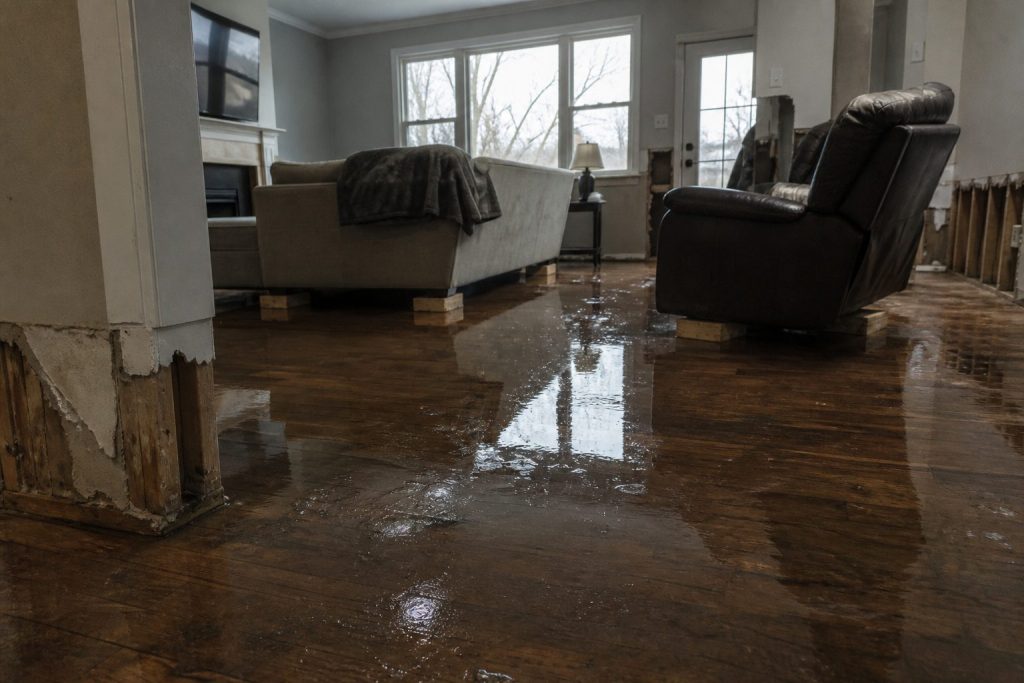
    Flooded residential living room with standing water on hardwood after a water loss
    Why water damage pricing is different.

    Water damage is the highest-volume and highest-frequency loss type for most restoration companies, which makes it the line where pricing discipline pays the biggest compounding return. Unlike fire or mold, water jobs are highly repeatable, which means small per-job pricing improvements multiply across hundreds of jobs per year.

    Three things make water pricing distinct: equipment scaling drives a meaningful portion of the invoice, the daily monitoring schedule has to be defensible, and TPA programs scrutinize water claims more aggressively than any other category. Get any one of those three wrong and you are giving away gross profit.

    The Core Water Damage Line Item Stack

    Gloved hands using a pin-type moisture meter on wet drywall during inspection
    Core water damage line-item stack.

    Every water damage estimate should be built from the same core stack so nothing gets missed:

    • Emergency service charge — after-hours response, mobilization, initial assessment
    • Water extraction — by category and class, with documented affected square footage
    • Content manipulation — pack-out, block-up, content cleaning where applicable
    • Demolition and removal — wet drywall, baseboard, flooring, insulation, debris haul
    • Antimicrobial application — by area and method (spray, fog, wipe-down)
    • Drying equipment — air movers, dehumidifiers, air scrubbers, with daily monitoring
    • Containment — poly barriers, negative air, zipper doors when warranted
    • Daily monitoring — moisture readings, equipment adjustment, documentation
    • Equipment removal — final demob and post-dry verification

    Operators who win on water pricing have a checklist that runs through this stack on every estimate. Operators who lose pick and choose, miss line items, and discover the gap on the back-end when the job is closed out.

    Equipment Pricing: The Single Biggest Margin Lever

    Four ascending service-line bars for mitigation, rebuild, contents, specialty
    Equipment pricing — the biggest margin lever.

    Drying equipment is where the largest pricing gap exists between operators who know the rules and operators who guess. Insurance pricing for air movers and dehumidifiers is daily, but the daily count must reflect actual on-site days, not contract days. Documenting equipment placement with photos, equipment counts on the daily monitoring sheet, and removal dates protects every dollar.

    The other equipment trap is dehumidifier sizing. Pricing matrices reimburse based on dehumidifier class (LGR, conventional, desiccant), so misidentifying equipment in the estimate creates either a write-off or an invoice dispute. Always document model numbers and class on the equipment log.

    Category and Class: The Foundation Most Estimates Skip

    Water loss category (1, 2, or 3) and water loss class (1 through 4) drive the pricing for almost every line item on the estimate. Operators who skip the category and class documentation in favor of “just running the numbers” leave money on every job because TPA reviewers will downgrade ambiguous loss types.

    The fix is operational: document category and class on the initial moisture map, photograph contamination evidence for Cat 2 and Cat 3 losses, and reference the IICRC S500 standard in the scope notes. This single practice closes the most common gap between estimated and approved invoices.

    Cash vs Insurance Water Pricing

    Cash water jobs let you price for value rather than against a matrix, but they also expose you to objections you do not get on insurance work. The right cash pricing strategy is a tiered estimate: a “complete dry-out” option, a “structural-only” option, and a “you handle the contents” option. This converts more leads at higher margin than a single take-it-or-leave-it number.

    For insurance work, the discipline is different: build to the matrix, document everything, and never accept a reduction without a written explanation referencing a specific line item. Most reductions are habit; they evaporate when challenged.

    Common Pricing Mistakes That Cost Real Money

    Across hundreds of restoration audits, the same mistakes appear repeatedly. Under-counting affected square footage on the moisture map. Forgetting antimicrobial on Cat 1 losses where it is still warranted. Missing the second floor when water migrated up. Pricing a single air scrubber for a multi-room job. Skipping the daily monitoring line on quick-dry jobs. Each of these costs $200 to $2,000 per job, and they happen on most estimates that are not built from a checklist.

    Related on Tygart Media: Starlink on a water job · S500 in the van · local SEO for restoration.

    Frequently Asked Questions

    What is the average price of a water damage restoration job?

    Average residential water damage jobs in the U.S. fall between $3,000 and $7,500 depending on category, class, and affected square footage. Commercial jobs average $8,000 to $40,000+. National averages are useful as a sanity check but should never be used as a pricing target — every estimate should be built line by line from the actual scope.

    Should I use Xactimate pricing for cash water jobs?

    You can use Xactimate pricing as a baseline reference for cash jobs, but cash work should be priced for value, not against a TPA matrix. Most operators find that using Xactimate as a floor and then layering in tiered options produces 20 to 35 percent higher gross margin on cash work than pure matrix pricing.

    How do I defend my water damage pricing to insurance adjusters?

    Defensible water pricing rests on three documents: a labeled moisture map, daily monitoring sheets with equipment counts and moisture readings, and category/class documentation tied to IICRC S500. With those three documents, almost every line item is defensible, and reductions are rare.

    What line items get cut most often on insurance water claims?

    The most commonly reduced items are equipment days (cut to “industry standard”), antimicrobial application (challenged on Cat 1), content manipulation (cut as overhead), and after-hours service charges. Each can be defended with documentation, and most reductions are reversed when the operator pushes back with specifics.

    How often should I update my water damage pricing?

    Pricing matrices update quarterly, so any operator pulling from Xactimate or Symbility should refresh their estimating templates four times a year. Cash pricing should be reviewed at least twice a year against local labor and material costs. Operators who do not update pricing routinely find themselves losing margin to inflation they never adjusted for.

  • Fire Restoration Pricing: Line-Item Guide for High Margins

    Fire Restoration Pricing: Line-Item Guide for High Margins

    Fire and smoke restoration jobs are the highest-margin work in residential restoration, but only when priced correctly. The estimating mistakes that cost a few hundred dollars on a water job will cost five figures on a fire job, because the scope is broader, the equipment is more specialized, and the deodorization process has more legitimate billable hours than most operators capture.

    This guide assumes you have read the restoration pricing master guide and understand the fundamentals of estimate construction. Here we focus on what makes fire pricing different.

    Structure, Contents, and Deodorization Are Three Separate Estimates

    Clean dry living room after water restoration dry-down, ready for rebuild
    Structure, contents, and deodorization are three estimates.

    The single biggest pricing improvement most restoration companies can make on fire jobs is treating structure cleanup, contents cleaning, and deodorization as three discrete scopes with three discrete estimates. Operators who roll everything into one estimate consistently under-price the contents and deodorization portions because the structure work feels like the visible deliverable.

    The right model is three sequential workstreams: structure cleaning and demolition, pack-out and contents processing at your facility, and final deodorization with verification testing. Each gets its own estimate, its own crew, and its own milestone billing.

    Structure Pricing for Fire Damage

    Structure pricing on fire jobs starts with smoke and soot category (light, medium, heavy, or “wet smoke” from synthetic combustion). Each category drives a different cleaning approach and a different price per square foot. Documenting the category with photos at intake protects pricing throughout the job.

    Core structure line items include: HEPA vacuuming, dry-sponge cleaning, wet cleaning with chemical sponges, drywall and texture removal, char removal, framing brushing, and seal-coating with shellac-based primer. Most fire estimates miss the seal-coating line, which alone is often a $1,500 to $5,000 omission on a residential job.

    Contents Pricing: The Highest-Margin Line on the Job

    Labeled contents pack-out boxes and bins stacked in a living room for inventory
    Contents pricing — often the highest-margin line.

    Contents cleaning is where the best restoration companies generate a disproportionate share of their fire job profit. The discipline is treating contents as a per-room or per-cubic-foot line, not a flat fee. Pack-out, transport, processing, storage, and pack-back each have their own unit pricing, and each must be on the estimate.

    Specialty contents — electronics, art, textiles, leather, soft goods — should always be flagged as separate line items priced at specialty rates. Operators who lump these into general contents cleaning consistently lose money on the highest-touch items in the home.

    Deodorization: Five Stages, Five Line Items

    Gloved hands using a pin-type moisture meter on wet drywall during inspection
    Deodorization — five stages, five line items.

    Deodorization is not “ozone for three days.” Proper fire deodorization is a five-stage process, and each stage is billable: source removal, surface cleaning, sealing of porous materials, atmospheric treatment (ozone, hydroxyl, thermal fogging), and verification with re-occupancy testing. An estimate that shows one line for “deodorization” is leaving 60 to 80 percent of the legitimate billable work off the document.

    Operators who break out the five stages typically see deodorization revenue per job double versus operators who roll it into a single line.

    Equipment-Heavy Line Items

    Fire jobs require more specialized equipment than water jobs: HEPA negative air machines, hydroxyl generators, ozone generators, ULV foggers, thermal foggers, and ultrasonic content cleaners. Each piece of equipment has its own daily rate, and each daily rate must be on the estimate when the equipment is on the job.

    Cash Fire Jobs vs Insurance Fire Jobs

    Cash fire jobs are rare but high-margin when they appear. The pricing strategy mirrors cash water work: tiered options, value framing, and walk-away discipline. Insurance fire jobs are about scope completeness and documentation. The largest fire job reductions come from missing scope items on the original estimate, not from line-item haggling.

    Related on Tygart Media: Starlink on a water job · S500 in the van · local SEO for restoration.

    Frequently Asked Questions

    What is the average price of a fire damage restoration job?

    Residential fire jobs average $12,000 to $50,000 for partial losses, with major fire losses ranging from $50,000 to $200,000+ when full structure cleanup is involved. Commercial fire jobs commonly exceed $100,000. The wide range reflects the variation in smoke category, contents value, and structural damage.

    Should fire damage estimates be itemized or lump-sum?

    Always itemized. Lump-sum fire estimates are nearly always under-priced because they hide line items the estimator forgot to include. Itemized estimates also defend better to TPA review and give the homeowner clarity on what they are paying for.

    How do I price contents pack-out for fire jobs?

    Contents pack-out should be priced per cubic foot with separate line items for transport, processing labor, storage time, and pack-back. The Xactimate pack-out matrix is a starting point; most operators find they need to layer specialty handling charges on top for electronics, art, and textiles.

    Is ozone treatment enough for smoke deodorization?

    No. Ozone is one of five legitimate deodorization stages. Source removal, surface cleaning, sealing of porous materials, atmospheric treatment, and verification testing are the full process. Operators relying only on ozone consistently see callbacks and re-treatment requests.

    What gets cut most often from fire damage estimates?

    The most commonly reduced fire line items are HEPA equipment days, seal-coating after demolition, contents specialty cleaning charges, and multi-stage deodorization beyond a single ozone treatment. Each can be defended with proper documentation of scope and method.

  • Mold Remediation Pricing: Line Items That Protect Margins

    Mold Remediation Pricing: Line Items That Protect Margins

    Mold remediation pricing differs from water and fire pricing in one crucial way: the work is governed by a written remediation protocol from a third-party assessor, which means every line item on the estimate has to map to a specific protocol requirement. Operators who price mold like a water job consistently under-bill, take on liability they did not price for, or get reductions because the protocol does not match the estimate.

    For broader pricing context, see our restoration pricing master guide. Here we focus on the specific line-item structure that wins on mold work.

    Start with the Protocol, Not the Estimate

    Mold remediation containment zipper door with plastic sheeting and negative-air hose in a hallway
    Start with the mold protocol, not the estimate.

    The remediation protocol from the Indoor Environmental Professional (IEP) is the source document for the entire estimate. Every line item — containment level, PPE class, antimicrobial type, equipment count, demolition extent, clearance criteria — must reference the protocol. Estimates that deviate from the protocol either lose work to a more compliant competitor or fail clearance and require costly re-work.

    The first thing to do with any mold job is read the protocol and build the estimate against it line by line.

    Containment Is the Largest Single Cost on Most Jobs

    Gloved hands using a pin-type moisture meter on wet drywall during inspection
    Containment is usually the largest single cost.

    Containment is where most mold estimates either succeed or fail. The IICRC S520 standard defines four containment levels: limited, source, full, and full with decontamination chamber. Each level has dramatically different labor and material costs, and each must be priced for the actual containment built, not the easiest one to install.

    Core containment line items include: poly sheeting (6-mil minimum), zipper doors, negative air machine setup, decontamination chamber framing, HVAC isolation, and signage. Each of these has its own labor and material line.

    PPE Is a Real Line Item, Not Overhead

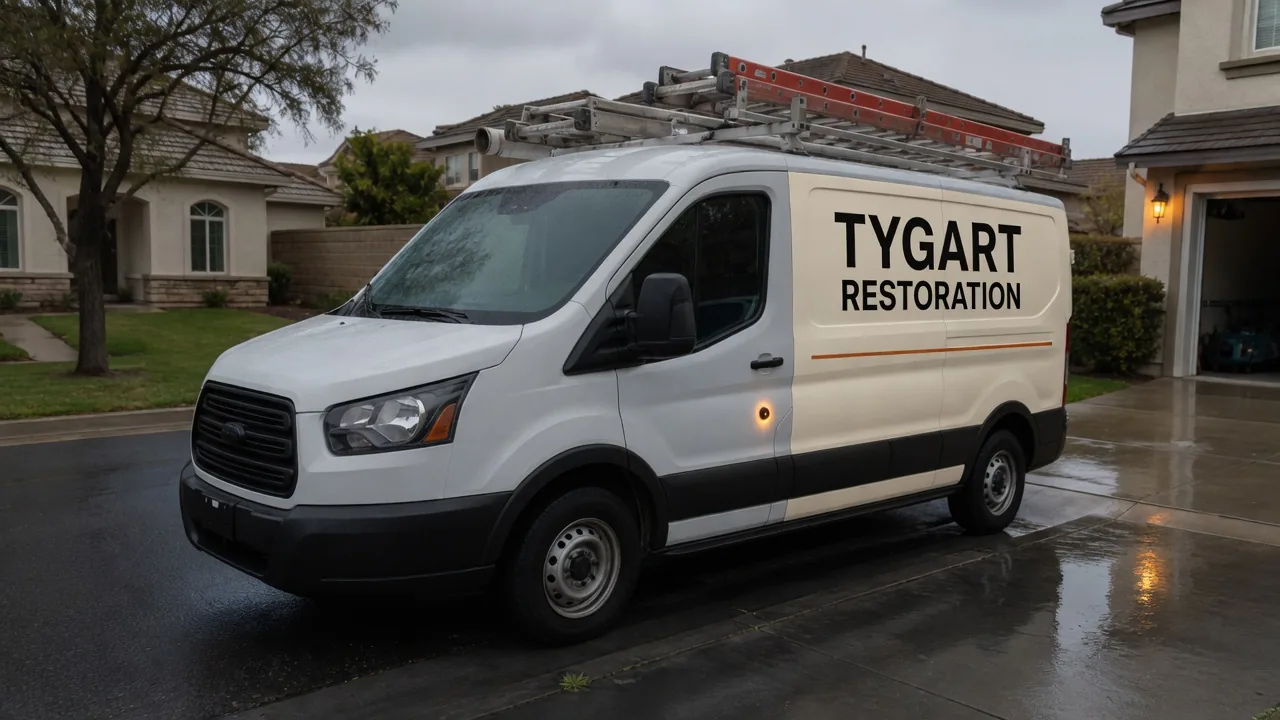
    White restoration work van with ladder rack parked at a suburban jobsite curb
    PPE is a real line item — not buried overhead.

    PPE for mold work is consumable, single-use, and required by protocol. Estimates that bury PPE in overhead lose 5 to 10 percent of the legitimate billable work per job. The right approach is per-technician, per-day PPE pricing for tyvek suits, full-face respirators with HEPA cartridges, gloves, and boot covers. Document the technician count and day count, and PPE flows naturally from the labor schedule.

    Antimicrobial and HEPA Vacuuming

    Antimicrobial application has three legitimate billable variants: spray-applied, fog-applied, and wipe-down. Each is a different rate per square foot. HEPA vacuuming of all surfaces in the affected area is a separate line, billed per square foot of surface area (not floor area, which is the most common pricing mistake).

    Demolition and Disposal

    Mold demolition is more aggressive than water demolition because the protocol typically requires removal of all visibly contaminated materials plus a buffer zone (often 12 to 24 inches beyond visible growth). Pricing must reflect the protocol’s demolition extent. Disposal is also more expensive: contaminated materials must be double-bagged in 6-mil poly and disposed of as Category III contamination.

    Equipment: HEPA Air Scrubbers and Negative Air

    HEPA air scrubbers run for the duration of containment plus typically 24 to 48 hours after demolition is complete. Negative air machines maintain pressure differential during containment. Both are billed daily, and both must be documented on the daily log to support invoicing.

    Clearance Testing and Re-Occupancy

    Clearance testing is performed by the IEP, not the remediator, but the remediator must price for re-cleaning if the initial clearance fails. Building this contingency into the estimate as a separate line item — “clearance failure re-cleaning, billable if required” — protects margin and sets expectations with the homeowner.

    Related on Tygart Media: Starlink on a water job · S500 in the van · local SEO for restoration.

    Frequently Asked Questions

    What is the average price of a mold remediation job?

    Residential mold jobs average $2,500 to $15,000 depending on containment level and affected area. Severe contamination involving HVAC systems or whole-home remediation can exceed $30,000. Commercial mold projects routinely run $10,000 to $100,000+.

    Why is mold remediation so much more expensive than water damage?

    Mold work requires full PPE, more aggressive demolition, full containment, HEPA equipment, third-party protocol compliance, and clearance testing — none of which are required on standard water damage. The labor and disposal costs are roughly 2 to 3 times higher per affected square foot than equivalent water work.

    Should mold pricing be tied to Xactimate?

    Mold work performed for insurance carriers typically uses Xactimate or Symbility pricing. Cash mold work should be priced for value with tiered options. Operators doing significant cash mold volume often build their own internal pricing matrix referenced against current Xactimate values.

    What gets reduced most often on mold estimates?

    The most commonly reduced items are containment labor (cut as overhead), PPE charges (rolled into labor), HEPA equipment days, and antimicrobial application area. Each is defensible when the estimate ties back to the protocol and the daily log documents the actual work performed.

    Do I need an Indoor Environmental Professional for every mold job?

    Not legally in every state, but the best practice — and the only way to avoid liability — is to require an IEP-written protocol for any mold job exceeding 10 square feet of contamination. The IEP also performs the clearance test, which protects the remediator from re-call disputes.

  • Restoration Pricing Strategy: Target 45% Gross Margins

    Restoration Pricing Strategy: Target 45% Gross Margins

    Most restoration owners think their pricing problem is the matrix. It is not. The pricing problem is strategy: choosing which jobs to take, which programs to participate in, which markets to compete in, and what gross margin target to defend. Operators who get strategy right consistently produce 35 to 45 percent gross margins. Operators who do not consistently produce 12 to 18 percent gross margins on the same matrix.

    This article complements our restoration pricing master guide by focusing on the strategic choices that surround the line-item work.

    The Three Restoration Pricing Models

    Four ascending service-line bars for mitigation, rebuild, contents, specialty
    Three restoration pricing models.

    Every restoration company runs on one of three pricing models, and the choice has more impact on profitability than any line-item decision:

    • Pure TPA / matrix pricing — high volume, lower margin, predictable referral flow, heavy paperwork burden
    • Hybrid TPA + cash — diversified revenue, higher blended margin, requires sales capability
    • Cash-only / direct-to-consumer — highest margin per job, requires marketing investment, more sensitive to local economy

    Each model has a different cost structure, a different sales motion, and a different capital requirement. The strategic mistake is trying to run all three with the same operations.

    Setting a Gross Margin Target

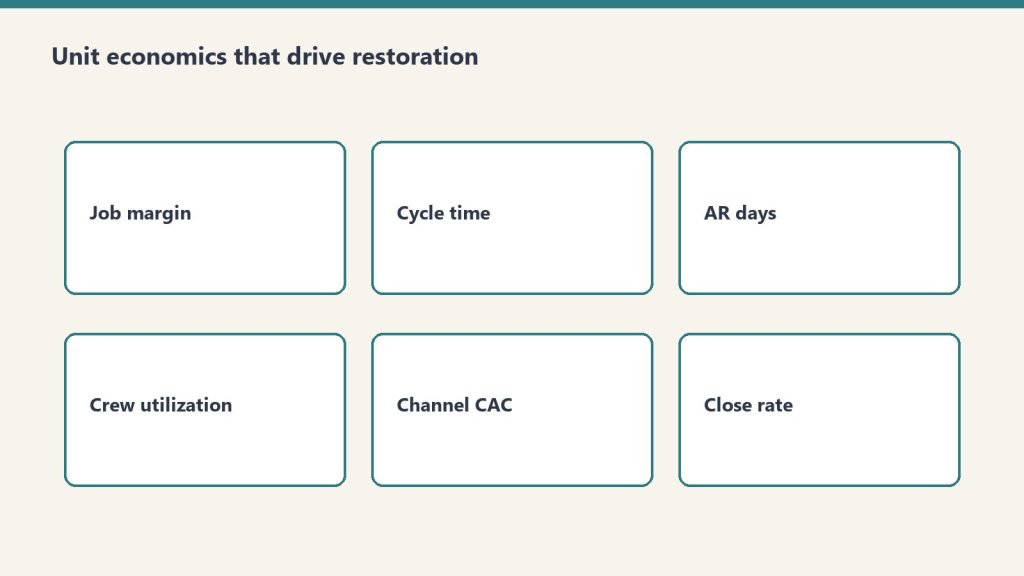
    Six cards covering job margin, cycle time, AR days, utilization, CAC, close rate
    Setting a gross margin target — no sticky percentages on the graphic.

    Healthy restoration companies target 35 to 45 percent gross margin on the blended business. TPA-only operators trend toward the lower end; cash-heavy operators trend toward the higher end. Setting a target margin and walking away from jobs that do not meet it is the single most important strategic discipline in the business.

    The math works like this: if your overhead absorption requires 35 percent gross margin to break even, every job below that target consumes capacity that should go to better work. Saying yes to those jobs feels like growth but is actually destruction.

    Pricing for Value, Not Cost

    The most expensive mistake in restoration pricing is the cost-plus mindset: figure out your cost, add a margin, send the estimate. Cost-plus pricing leaves money on the table on every cash job and ignores the value the customer is actually receiving (immediate response, displacement avoidance, professional handling of insurance).

    Value-based pricing on cash work uses tiered options, value-anchoring (presenting the most expensive option first), and outcome framing (“we save you the displacement, the insurance battle, and the risk of secondary damage”).

    Defending Pricing Without Discounting

    Restoration SOP clipboard with checklist, moisture meter, and gloves on a jobsite table
    Defending pricing without discounting.

    Discounting is the gateway drug of restoration pricing. Once an operator starts discounting to win jobs, the local market remembers, and every future job comes in at the discounted rate. The discipline is to defend price without discounting: re-scope the work, drop optional line items, offer payment terms, but never cut the unit prices.

    The reps who close at full price are the reps who can articulate why the work costs what it costs and what happens if it is not done correctly. Training the sales conversation matters more than the price itself.

    Programs to Avoid

    Some TPA programs are not worth participating in at any margin level. The signals that a program is destructive: required participation in third-party billing platforms with high transaction fees, mandatory upfront deductible collection, slow pay (90+ days), excessive audit reductions, or volume requirements that consume more capacity than the revenue justifies.

    Walking away from bad programs is harder than joining them — but it is what separates 35 percent margin operators from 12 percent margin operators.

    Related on Tygart Media: Starlink on a water job · S500 in the van · local SEO for restoration.

    Frequently Asked Questions

    What gross margin should a restoration company target?

    Healthy restoration companies target 35 to 45 percent gross margin. TPA-only operators commonly run 25 to 35 percent. Cash-only or premium-cash operators commonly run 45 to 60 percent. Below 25 percent gross margin, the business cannot absorb overhead and grow simultaneously.

    Should I price the same for cash and insurance jobs?

    No. Insurance jobs should be priced to the matrix with disciplined documentation. Cash jobs should be priced for value with tiered options. Pricing identically across both channels means under-charging on cash work or over-pricing insurance work that never gets approved.

    How do I compete with low-priced restoration companies in my market?

    You do not compete on price. You compete on response speed, scope clarity, communication, warranty, and outcome. Low-priced competitors win the customers who shop on price; you want the customers who shop on confidence. Marketing, sales training, and reputation are the real defenses against low pricing.

    When should I walk away from a TPA program?

    Walk away when the program requires capacity that would generate more gross profit elsewhere, when transaction fees and audit reductions push the effective margin below your target, or when payment terms exceed 60 days consistently. Calculate the true cost of participation, not just the headline volume.

    What is the right gross margin to target on cash jobs specifically?

    50 to 60 percent gross margin is the right target for cash work in most markets. Cash jobs carry more sales effort, more collection risk, and no TPA referral funnel — so the margin must compensate. Operators consistently producing 30 percent margin on cash work are leaving substantial profit on the table.

  • Restoration Pricing: Cash vs. Insurance Job Strategies

    Restoration Pricing: Cash vs. Insurance Job Strategies

    Cash and insurance restoration jobs look identical in the field but require completely different pricing strategies. Operators who use the same approach for both consistently under-price cash work and lose money to scope reductions on insurance work. The good news: separating the two pricing motions is one of the highest-impact changes a restoration company can make.

    This article builds on the foundation laid in our restoration pricing master guide.

    How to Tell the Difference at Intake

    Clipboard and tablet on a kitchen counter during an insurance adjuster walkthrough after water loss
    Tell cash vs insurance apart at intake.

    Every job intake should answer one question early: is this an insurance job, a cash job, or undetermined? The answer drives every subsequent decision — sales process, estimate format, scope of work, payment terms, and pricing.

    Signals that a job will be cash: customer has no intention of filing a claim, deductible is high relative to job size, damage is below deductible, customer is uninsured, customer is sensitive to claim impact on premium. Signals that a job will be insurance: claim is already filed, adjuster is already assigned, TPA program is involved, large loss requiring carrier coverage.

    Insurance Pricing Discipline

    Gloved hands using a pin-type moisture meter on wet drywall during inspection
    Insurance pricing discipline.

    Insurance jobs should be priced to the matrix with full scope documentation. The discipline is completeness: every line item that should be on the estimate must be on the estimate, and every line item must be defensible with on-site documentation.

    Insurance pricing is a documentation game, not a negotiation game. The reps who get paid in full are the reps who photograph everything, log moisture readings daily, document equipment placement, and reference IICRC standards in the scope notes.

    Cash Pricing Strategy: Tiered Options Win

    Four ascending service-line bars for mitigation, rebuild, contents, specialty
    Cash pricing — tiered options win.

    Cash pricing should never be a single number. The conversion-rate-winning approach is a three-tier estimate:

    • Premium tier — full-service, highest scope, white-glove handling, longest warranty
    • Standard tier — recommended scope, normal warranty, structure plus contents
    • Budget tier — minimum to address the immediate problem, structure-only or critical-area-only

    This works because most customers want to feel like they are making a choice, not accepting a price. Tiered pricing converts more leads, lifts average ticket, and surfaces the actual customer budget faster than a single-price approach.

    Value Anchoring on Cash Work

    The order in which options are presented matters as much as the options themselves. Always present the premium tier first. The standard tier then feels reasonable, and the budget tier feels like a compromise. Reverse the order and the standard tier feels expensive while the budget tier becomes the default choice.

    Value-anchoring is not manipulation; it is helping the customer understand the full scope of what good restoration work looks like before they pick the level they want.

    Converting Cash Leads That Hesitate

    Cash leads who hesitate after seeing the estimate are usually responding to one of three concerns: the price feels high (compared to what?), the scope feels excessive (do I really need all this?), or the payment timing feels difficult (can I afford this now?).

    The right responses, in order: re-frame the comparison (“here is what happens if it is not done correctly”), explain each line item (“this is required because of contamination class”), and offer payment terms (“we can split this into three payments tied to milestones”). Never respond with a discount.

    Hybrid Cash + Insurance Scenarios

    Some jobs are partially insurance-covered and partially out of pocket. The pricing approach: build one comprehensive estimate at insurance pricing for the covered portion, then a separate cash estimate for additional work the customer wants. Mixing the two in a single estimate creates billing chaos and lost margin.

    Related on Tygart Media: Starlink on a water job · S500 in the van · local SEO for restoration.

    Frequently Asked Questions

    Should I always recommend filing an insurance claim?

    No. For damage below or near the deductible, filing a claim costs the customer more than the cash estimate would. The right ethical position is to share the math and let the customer decide. Operators who push every job to claim status develop a reputation for opportunism that hurts long-term referrals.

    How much higher should cash pricing be than insurance pricing?

    Cash work typically prices 15 to 30 percent above the equivalent Xactimate estimate, reflecting the value of immediate response, no claim involvement, and the operator’s higher sales effort. The premium is justified by what the customer is actually buying — which is more than just the labor.

    What is the best way to present a cash estimate?

    In person, on a tablet, with three tiered options visible simultaneously. Walk through each option’s scope, warranty, and timeline. Let the customer ask questions. Never email a cash estimate cold and hope for a yes — that is the lowest-converting approach available.

    How do I handle a customer who says my cash price is higher than another quote?

    Ask to see the other quote. Most “lower” quotes are missing scope items, are quoting a different remediation level, or are from operators without IICRC credentials. Walking through the comparison line by line either justifies your pricing or surfaces a real scope gap to address.

    What payment terms should I offer on cash jobs?

    Standard terms: 50 percent deposit, 50 percent on substantial completion. For larger jobs: 25 percent deposit, 50 percent at midpoint, 25 percent on completion. Never start work without a deposit; collection becomes nearly impossible after the work is done.

  • Restoration Pricing Objections: How to Defend Your Margins

    Restoration Pricing Objections: How to Defend Your Margins

    Pricing objections are not a problem to solve; they are a normal part of the restoration sales conversation. The difference between reps who close at full price and reps who discount their way to a yes is not the words they use — it is the framework they use to think about objections in the first place.

    This article builds on the strategic foundation laid out in our restoration pricing master guide.

    The Three Objection Types

    Four ascending service-line bars for mitigation, rebuild, contents, specialty
    Three objection types — prepare for each.

    Every pricing objection in restoration falls into one of three categories, and each requires a different response:

    • “It feels expensive” — comparison-based objection (compared to what?)
    • “I cannot afford this” — capacity-based objection (timing or amount?)
    • “You are higher than the other quote” — competitive objection (apples-to-apples?)

    Mis-diagnosing the objection type is what causes reps to discount when they should re-frame, or re-frame when they should offer payment terms.

    Responding to “It Feels Expensive”

    The “expensive” objection is almost always a comparison problem. The customer has a frame of reference (a kitchen renovation, a service call, a previous loss) that does not match restoration work. The right response is to expand the frame.

    “Expensive compared to what? When you think about the cost of secondary damage if this is not addressed properly, or the cost of mold remediation if drying is incomplete, our estimate represents the lower-cost outcome — not the higher-cost one.”

    Responding to “I Cannot Afford This”

    This objection is about timing or amount, and the right response depends on which. If timing, offer milestone payments. If amount, re-scope to a tiered alternative — never discount the original scope. Discounting the full scope teaches the customer that your prices are negotiable, which destroys margin on every future job.

    “I hear you — let me show you a tiered approach. We can address the immediate critical issues now and phase the rest as your budget allows. Same per-line pricing, smaller scope at each step.”

    Responding to “Other Quote Was Lower”

    Six cards covering job margin, cycle time, AR days, utilization, CAC, close rate
    Responding when the other quote was lower.

    Always ask to see the competing estimate. The honest answer to “lower quotes” is that they are usually missing scope, missing equipment days, missing required line items, or being submitted by operators without proper credentials. Walking through the comparison line by line either justifies your price or reveals a real gap.

    “Can I take a look? I want to make sure we are comparing the same scope. If they are doing the same work for less, that is information I need. If their estimate is missing scope, that is information you need.”

    Walk-Away Discipline

    Restoration SOP clipboard with checklist, moisture meter, and gloves on a jobsite table
    Walk-away discipline protects the book.

    The single most powerful pricing tool a restoration rep has is the willingness to walk away. Customers can sense when a rep needs the deal, and they will negotiate harder. Customers can also sense when a rep is genuinely indifferent to whether the job closes at full price or does not close at all.

    The reps who project walk-away energy close more jobs at full price than the reps who chase every deal. The math is counterintuitive but durable.

    When Discounting Is Appropriate

    Discounting is appropriate in exactly three situations: military or first-responder discounts (predictable, advertised, capped), bundled multi-property work (volume justifies it), and end-of-month margin trades on jobs that fit a slow week. Every other discount is a habit, not a strategy.

    Scripts That Hold the Line

    The right scripts for holding the line do not feel adversarial. They feel like a problem-solving conversation:

    “I want to make sure we get this right for you. The pricing reflects the IICRC-standard work this loss requires. If we can adjust the scope to fit your situation better, let me know what is most important — but I cannot reduce the unit pricing on what we do agree to do, because that would mean cutting corners on the work itself.”

    Related on Tygart Media: Starlink on a water job · S500 in the van · local SEO for restoration.

    Frequently Asked Questions

    Should I ever discount restoration work?

    Rarely. Discounting on a single job teaches the local market that your pricing is negotiable. The better tools are tiered scope, payment terms, and walk-away discipline. Discount only when it fits a structured policy (military discount, multi-property volume, end-of-month margin trade).

    How do I respond when a customer says they will go with a cheaper competitor?

    Wish them well, leave the door open, and move on. “I understand — if their estimate covers the full scope, that is the right call for you. If you find later that something was missed, please call us. We are happy to come back out.” That response wins long-term reputation and frequently wins the job back when the cheaper estimate proves incomplete.

    What is the most common pricing objection in restoration?

    “It feels expensive” — almost always a comparison problem rather than a real budget issue. The customer is comparing the estimate to a frame of reference that does not match restoration work. Re-framing the comparison resolves most of these objections without any pricing change.

    How do I train new sales reps to defend pricing?

    Role-play the three objection types weekly. Train reps to ask diagnostic questions before responding. Audit closed-lost deals for the actual reason and feedback patterns. The reps who get good at defending pricing are the reps who get the most repetitions on the conversation.

    What is the right pricing posture during a slow market?

    Hold the line on unit pricing and adjust scope or payment terms as needed. Cutting unit pricing during a slow market makes the slow market permanent in the customer’s mind. The operators who emerge from slow markets strongest are the ones who held pricing through them.

  • Xactimate X1 Platform Guide for Restoration Operators

    Xactimate X1 Platform Guide for Restoration Operators

    Xactimate X1 is Verisk’s unified estimating platform for property claims work. It runs across desktop, online, and mobile with cloud-synced data, which means a field tech can start a sketch on a tablet at a loss site and a project manager can finish the estimate on a desktop in the office without re-keying anything. For restoration operators, that field-to-office continuity is the single biggest workflow advantage X1 brings to the business.

    This guide assumes you already understand how Xactimate fits into a restoration company’s pricing workflow. If not, start with our restoration pricing and estimating master guide for the full context.

    What Makes X1 Different

    Flow from estimate to photos to notes to payment emphasizing integration
    What makes Xactimate X1 different.

    X1 is the modern Xactimate experience Verisk has been moving the platform toward over the last several years. The defining capabilities are cross-device sync (desktop, online, mobile share the same estimate state), Sketch AR for mobile measurement, customizable rules that enforce estimating practices in real time, and the Line Item Advisor that suggests appropriate codes from the roughly 17,000-item Xactimate library.

    The practical impact is that X1 reduces the amount of post-claim review time required to catch missed line items, mismatched scopes, and inconsistent estimating practices across a team. For multi-rep restoration companies, this is where the platform pays for itself.

    The Field-to-Office Workflow

    Gloved hands using a pin-type moisture meter on wet drywall during inspection
    Field-to-office workflow on X1.

    The intended X1 workflow for a restoration job looks like this: field tech arrives on site, opens the mobile app, runs a Sketch AR measurement of the affected rooms, captures damage photos tied to specific rooms, adds preliminary line items, and syncs to the cloud before leaving the site. Back at the office, the estimator opens the same estimate on desktop, adds the rest of the scope (equipment, labor, content manipulation), runs the rules check, and prepares the estimate for submission.

    Companies that adopt this workflow consistently report 30 to 50 percent reductions in time from loss to estimate submission, which directly improves cash flow and TPA scoring.

    Customizable Rules: The Quiet Margin Lever

    X1’s customizable rules feature is one of the most under-used capabilities on the platform. Rules let you encode your estimating practices (always include this line item with that one, always default to this dehumidifier class on Cat 2 jobs, always flag estimates above a certain dollar amount for senior review) directly into the platform.

    The rules then enforce themselves in real time as the estimator builds the estimate. This is the difference between a company whose estimates are inconsistent across reps and a company whose estimates look like they all came from the same hand. For TPA programs and audit defensibility, that consistency is worth real money.

    Line Item Advisor and the 17,000-Item Library

    Xactimate’s line item library has roughly 17,000 items, which is more than any human estimator can hold in memory. The Line Item Advisor in X1 suggests appropriate codes based on the context of the estimate, which speeds up estimate construction and reduces the chance of using the wrong code for a specific scope item.

    For new estimators, this feature shortens the learning curve significantly. For experienced estimators, it surfaces line items they might otherwise default away from out of habit.

    X1 vs Legacy Xactimate

    If your team is still working primarily on the legacy Xactimate experience, the migration to X1 is worth planning intentionally. The cloud-sync model, the mobile capabilities, and the rules system all require a workflow shift, not just a software update. Plan two to three months of dual-running before retiring legacy workflows entirely.

    Getting Your Team on X1

    Four steps: phone capture, sketch in Xactimate, review, supplement
    Getting your team onto X1.

    Verisk offers an X1 training course covering the full platform, including importing and creating estimates, claim information setup, interior and roof Sketch diagrams, line item entry with localized pricing, and reporting. Third-party providers also offer X1-specific training. Whichever path you choose, formal training shortens onboarding time substantially compared to self-teaching.

    Related on Tygart Media: Starlink on a water job · S500 in the van · local SEO for restoration.

    Frequently Asked Questions

    What is the difference between Xactimate X1 and the legacy Xactimate experience?

    X1 is the unified, cloud-synced version of Xactimate that runs identically across desktop, online, and mobile. The legacy experience was device-specific with manual sync. X1 also adds Sketch AR for mobile measurement, customizable rules, and the Line Item Advisor. Functionality is broadly similar, but the workflow and collaboration model are substantially different.

    Do I need separate Xactimate licenses for desktop, mobile, and online?

    No. An X1 license covers desktop, online, and mobile use under the same account. A user can move between devices on the same estimate without re-licensing. License pricing depends on the seat type and contract; verify current pricing directly with Verisk.

    How accurate is Xactimate Sketch AR for restoration measurement?

    Sketch AR is accurate enough for most residential interior measurements when the device camera and lighting allow for clean tracking. For jobs requiring high-precision measurement (insurance disputes, large commercial losses), traditional measurement methods are still recommended as a verification step.

    Can I use Xactimate X1 offline?

    Yes, the mobile app supports offline work for sketching and basic line item entry. Estimates sync to the cloud when connectivity returns. For full pricing data and the complete line item library, an internet connection is required.

    Should restoration owners learn X1 themselves or hire an Xactimate professional?

    Both. Owners benefit from understanding the platform well enough to review estimates intelligently and spot scope gaps. For high-volume estimate production, hiring or contracting a dedicated Xactimate professional almost always pays for itself in faster estimate turnaround and fewer scope misses.

  • Xactimate Pricing Methodology: Verisk Research Explained

    Xactimate Pricing Methodology: Verisk Research Explained

    Xactimate is the most widely used estimating platform in property restoration, and the prices behind it are not invented in a back room. Verisk publishes a documented pricing research methodology that explains how every line item price is built, updated, and released. For restoration operators, understanding the methodology is the foundation of defending your estimates to TPAs, adjusters, and customers.

    If you have not read the broader pricing context first, start with our restoration pricing and estimating master guide.

    The Research Footprint

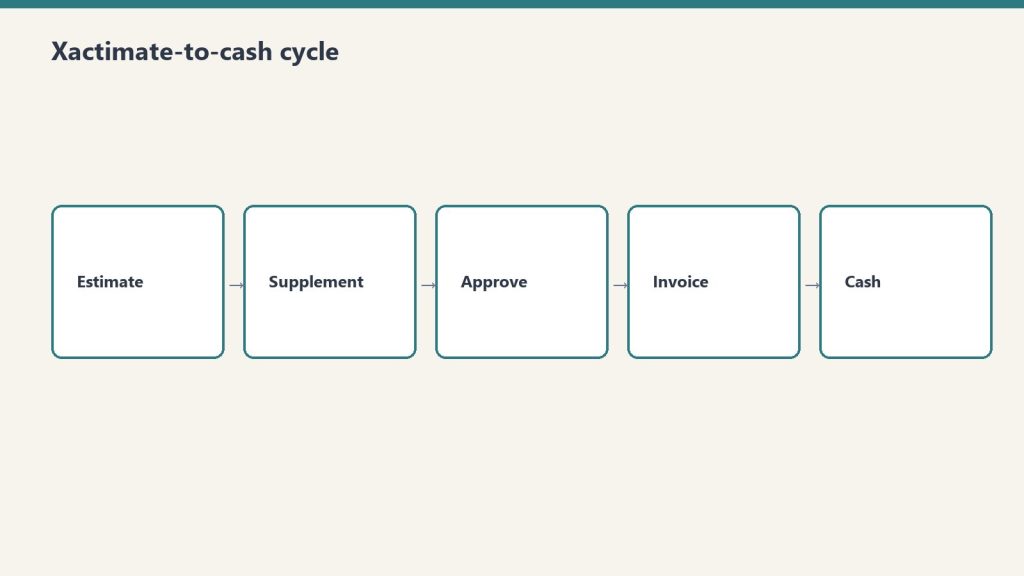
    Five-step flow from estimate to supplement, approve, invoice, cash
    The research footprint.

    Verisk’s pricing research covers 468 geographic regions across the United States and Canada. The data is gathered from a network of more than 50,000 providers of materials, equipment, and labor, generating over 345,000 survey points each year. That research footprint is what makes Xactimate pricing the reference standard for property claims work — no other estimating platform publishes data at that scope.

    The practical takeaway for restoration operators is that Xactimate is not “national” pricing dressed up as local — it is genuinely localized to your service area, which means defending your estimate to an out-of-area adjuster is a matter of pointing them to the documented research for your region.

    How Cluster Analysis Sets the Number

    For each line item in each region, Verisk performs cluster analysis on the submitted price points. The methodology identifies the largest cluster of prices and selects a point within the appropriate range. The published price reflects the most common recently submitted price for that item in that region.

    This matters because it explains a recurring estimator complaint: “the price feels low compared to what I would charge.” The Xactimate price is not the highest price or the lowest price — it is the most common price for the same scope of work in the same region. Operators charging meaningfully more than the published price are signaling either a different scope, higher-quality work, or a pricing strategy that needs to be defended on its own terms.

    The Update Cycle: What Updates When

    Verisk updates Xactimate price lists monthly. Within that monthly cycle, the work is layered:

    • Vendor-specific pricing updates nightly for items sourced from individual vendor catalogs
    • Hourly billable labor rates update monthly based on the most recent regional research
    • General quote prices update monthly with the new price list release
    • Material and equipment components update when market analysis indicates a change is warranted

    The “when warranted” language is important. Not every line item is freshly surveyed every month — that would not be feasible. Verisk’s methodology is closer to “update when the market moves” than “update on a fixed calendar.” This is why two adjacent monthly price lists can look almost identical for stable categories, then jump for categories where lumber, drywall, or other inputs have shifted.

    What This Means for Your Estimating Templates

    Desk with laptop, checklist notebook, and billing card ready before creating an Anthropic API key
    What this means for your estimating templates.

    Restoration companies pulling from Xactimate should refresh their internal estimating templates monthly when the new price list drops. Templates frozen at older pricing produce estimates that get reduced on submission because they are out of step with the current published research.

    The same applies to cash work where Xactimate pricing is used as a baseline reference. Cash estimates built off stale price lists give away margin to inflation that the published prices have already absorbed.

    How to Read a Verisk Methodology Document

    The Verisk pricing research methodology is publicly documented and worth reading at least once for anyone building estimates daily. The document explains how labor rates are weighted, how material prices are sourced, how equipment rentals are priced, and how the cluster analysis selects the published number. Knowing this language gives you a defensible vocabulary when an adjuster questions a line item.

    When Xactimate Pricing Is Not the Right Reference

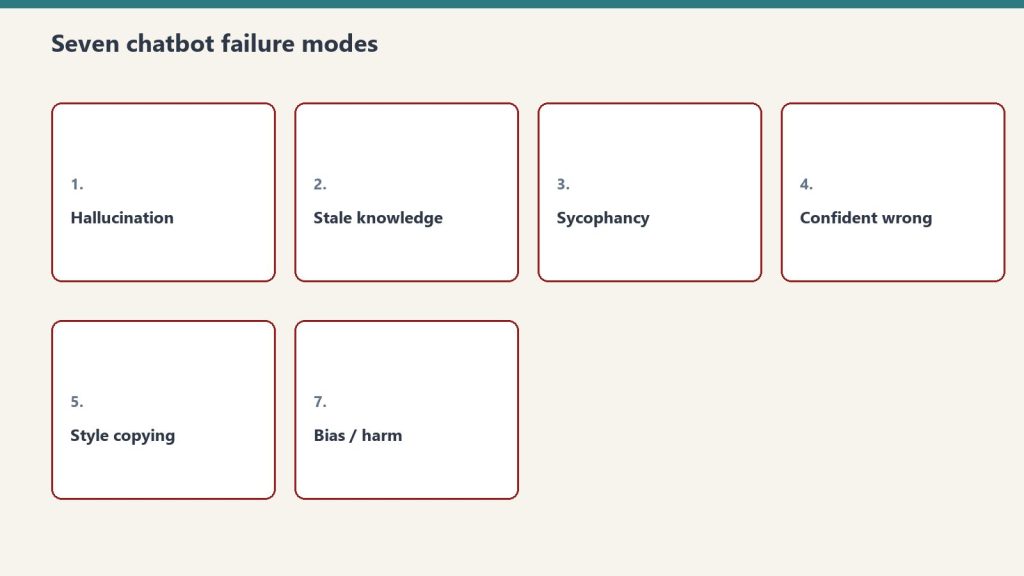
    Seven cards naming common AI chatbot failure modes
    When Xactimate pricing is not the right reference.

    Xactimate pricing is appropriate for the vast majority of standard restoration scope. It is not the right reference for: highly specialized work outside the line item library, custom installations with no comparable market data, art and high-value content cleaning, or unusual structural work where the cluster analysis has thin data. For those scopes, custom estimates or specialty contractor pricing is the correct approach.

    Related on Tygart Media: labor efficiency models · sketch/AR mobile workflow · scope drafter skill.

    Frequently Asked Questions

    How often does Verisk update Xactimate pricing?

    Verisk publishes price list updates monthly. Within that cycle, vendor-specific pricing updates nightly, hourly labor rates update monthly, and general line item prices update when market analysis warrants. The monthly release is the cadence operators should plan their template refreshes around.

    How many regions does Xactimate pricing cover?

    Xactimate covers 468 geographic regions across the United States and Canada, with pricing researched independently for each region. This is the reason the same line item can have meaningfully different prices in different markets — the published number is built from local research.

    How does Verisk decide what price to publish for a line item?

    Verisk uses cluster analysis on submitted price points across more than 50,000 providers and over 345,000 annual survey points. The methodology identifies the largest cluster of prices for a line item in a region and selects a representative point within that range. The published price reflects the most common recently submitted price.

    Why does my Xactimate price feel lower than my actual cost on some items?

    If the published price is consistently below your cost, you are likely either operating in a higher-cost niche than the cluster average, using a higher-quality material than the published reference, or carrying overhead that the published labor rate does not absorb. Each of these is a legitimate basis for a custom price modifier or a documented variance — not a reason to ignore the published price.

    Can I challenge a Verisk price if I think it is wrong for my market?

    Yes. Verisk accepts pricing feedback from contractors and uses contractor submissions as part of its survey input. Submitting documented evidence of a price discrepancy can influence the next monthly research cycle. Individual estimates can also include documented variances when the published price does not reflect the actual cost of the specific work.