Direct answer: Claude Code has two meters. A rolling 5-hour session limit that the May 2026 doubling made permanent, and a weekly usage limit. The temporary +50% weekly promotion ended September 13, 2026 at 11:59 PM PT — do not claim +50% as live. Starting September 14, 2026, Anthropic Help Center states weekly limits in Claude Code are permanently 25% higher than the pre-promotion baseline for Pro, Max, Team, and seat-based Enterprise. That is lower than the promo week (1.5×) and higher than the old baseline (1.25×). The 5-hour window did not change. Fable 5 and Fable 5.1 are included only on Max, Team Premium, and seat-based Enterprise Premium, and they may use at most 50% of the weekly pool.
The two clocks
People treat “I hit my limit” as one event. It is two.
5-hour session. Rolling window. Burns when the model is working, not when you are idle. Anthropic doubled this across paid plans on May 6, 2026 and removed the old peak-hour throttle for Pro and Max. Neither the +50% weekly promo nor the permanent +25% weekly change raised or lowered this clock.
Weekly bucket. Fixed reset time on your account (Settings → Usage). This is the one that ends a Friday on Max after a Fable week. The May–September 2026 +50% promotion applied to Claude Code only — CLI, IDE, desktop, and web Code — not to Claude chat or Cowork. That temporary bump is over. What remains: the permanent +25% over the pre-promo weekly baseline (Help Center).
Eligible for the promo and the permanent +25%: Pro, Max, Team, and legacy seat-based Enterprise. Not eligible: Free and consumption-based Enterprise.
The September 13–14 change
Official Help Center timeline:
May 13 – Sep 13, 2026 11:59 PM PT: Claude Code weekly limits were 50% higher than the pre-promotion baseline. 5-hour limits were not affected.
Starting Sep 14, 2026: weekly limits in Claude Code are permanently 25% higher than they were before the promotion for Pro, Max, Team, and seat-based Enterprise. Plan price unchanged.
Compared to last week’s promo, you have less weekly headroom than 1.5×. Compared to the old baseline, you have more: 1.25×. Exact quotas are still unpublished — read your live number in Settings → Usage.
Who gets Fable 5.1 on the subscription
Official: Claude Fable models on your plan. Fable 5 and Fable 5.1 follow the same plan rules.
Plan
Fable 5 / 5.1 on the subscription
Free
Not included
Pro ($20)
Not in plan limits. Usage credits from the first Fable token.
Team Standard
Same as Pro: credits, not included.
Max 5x / Max 20x
Included, capped at 50% of weekly limits. Same pool as Sonnet and Opus.
Team Premium / Enterprise Premium seats
Same 50% included cap as Max.
Enterprise Standard seats
Only if the org enables usage credits.
API / usage-based Enterprise
List rates. See Fable pricing.
The July 2026 one-time $100 credit for Pro / Team Standard applied to the Fable 5 plan change. Help Center says there is no matching credit for Fable 5.1.
Practical read: Pro can still open Fable. It just bills. Max can spend half the week on Fable before the included cap trips, then it is credits or switch to Opus 5 / Sonnet 5.5. Fable burns the shared weekly bar faster than Sonnet — plan against the permanent +25% weekly bar, not the old promo week.
What still burns quota
Long agent loops and multi-agent fan-out (each worker keeps its own context).
Dumping a whole repo when one file would do.
MCP tool output that stays in context for the rest of the session.
Leaving ANTHROPIC_API_KEY set so the CLI bills API rates and ignores the subscription.
What to do now
If you are on Pro and need Fable all week, budget credits or move the hard jobs to Max. The subscription does not include Fable on Pro.
If you are on Max, treat weekly headroom as permanent +25% over the old baseline — not the temporary +50% promo week. Route cheap loops to Sonnet 5.5; save Fable for the jobs that need it. Check Settings → Usage / /usage for your real number.
Do not upgrade from Pro to Max only because the 5-hour window feels tight on Friday. Check which clock you hit. Session vs week is a different purchase.
Published: May 25, 2026 | Last fact-check: May 25, 2026 against Anthropic docs and Claude Code v2.1+ behavior
Quick Answer
Plan Mode is a Claude Code setting that forces the agent to think through and approve a plan before taking destructive actions. Trigger it with Shift+Tab pressed twice in the terminal (the first press cycles to Auto-Accept Mode; the second lands on Plan Mode). Use it for risky multi-step work; skip it for simple read-only or contained edits.
How to enable it, when it pays off, and when it gets in your way below.
Plan Mode (sometimes called “planning mode”) is one of the more underused features in Claude Code in 2026. It changes how the agent works in a specific, measurable way: before Claude Code edits files, runs commands, or modifies state, it produces a plan and waits for your approval. You see what it intends to do, you say yes or no, and only then does it act.
For the right kind of task, Plan Mode is the difference between a clean execution and a regrettable one. For the wrong kind of task, it is friction that slows you down. This guide separates the two.
Claude Code Plan Mode vs Auto Mode: When to Use Each
Plan Mode vs Auto Mode — when to use each.
Scenario
Use Plan Mode
Use Auto Mode
Unfamiliar codebase
Yes — review the plan first
Only if you know it well
Large multi-file refactor
Yes — catch scope creep early
Not recommended
Simple bug fix (< 5 lines)
Overkill
Yes
Adding a new feature
Yes — plan clarifies approach
Acceptable for small features
Writing tests
Optional
Yes, usually safe
Touching database migrations
Yes — irreversible changes
No
CI/CD pipeline changes
Yes
No
What Plan Mode Actually Does
What Plan Mode actually does.
In default mode, Claude Code is allowed to take actions as it reasons. It can read files, write files, run bash, edit code, all in one conversational flow. This is the strength of Claude Code as an agent — it gets work done without asking permission for every step.
In Plan Mode, Claude Code’s behavior changes:
You describe the task.
Claude Code investigates the codebase (read-only operations are still allowed).
Claude Code drafts a plan listing every file it intends to change, every command it intends to run, and every decision point.
You read the plan. You approve it, modify it, or reject it.
Only after approval does Claude Code start writing files or running commands.
The plan is presented in the terminal as a structured outline. You can ask Claude Code to revise the plan, add steps, remove steps, or change the order. Iterating on the plan is fast because no actions have been taken yet.
How to Enable Plan Mode
How to enable Plan Mode.
There are four ways to activate Plan Mode in Claude Code:
Shift+Tab pressed twice. Each press of Shift+Tab cycles through the three permission modes: Default → Auto-Accept → Plan → Default. Two presses lands on Plan Mode. The status bar shows ⏸ plan mode on when active.
The /plan slash command. Type /plan at the start of any prompt to enter Plan Mode for that turn only. Useful for one-off plans without flipping the whole session.
The –permission-mode plan flag at startup. Start the session in Plan Mode from the command line.
Headless mode for scripts and CI.claude --print --permission-mode plan "your task" for automation that should never edit files.
# Start session in Plan Mode
claude --permission-mode plan

# Or mid-session — press Shift+Tab TWICE
# (first press = Auto-Accept Mode, second press = Plan Mode)

# Or one-shot Plan Mode for next prompt only
/plan
Plan Mode is persistent within a session — it stays on until you cycle out with another Shift+Tab. Close and reopen Claude Code and it defaults back to off. Toggle it on for risky work, leave it on for the whole session if you are doing higher-risk work end-to-end.
Important: Plan Mode is a hard read-only sandbox enforced at the tool level. Claude Code physically cannot edit files, run commands, or modify state while Plan Mode is active. This is not a suggestion or a soft check — the write tools are unavailable.
When Plan Mode Pays Off
Plan Mode is worth the friction in these situations:
Multi-file refactors. When the agent will touch 5+ files, you want to see the list before it starts editing. A small confusion about which files to change becomes a big mess fast.
Database migrations or schema changes. Anything that touches durable state and is hard to undo benefits from a confirmed plan.
Production code paths. If a session affects code that ships to users, the plan checkpoint is cheap insurance.
Ambiguous instructions. When you are not sure how the agent will interpret your request, Plan Mode surfaces the interpretation before any work happens.
New repository onboarding. When you do not yet know the codebase well, Plan Mode lets the agent show you what it learned during investigation before it acts.
Long-running batch jobs. Approving a plan for 200 file edits and then walking away is safer than launching 200 edits blind.
When Plan Mode Gets In the Way
Plan Mode is not free. The friction it adds is a real cost for certain workflows:
Single-file tweaks. Asking Claude Code to fix a typo or rename a variable does not need a plan. The plan takes longer than the fix.
Tight feedback loops. When you are iterating quickly — try a change, see the result, adjust — Plan Mode slows the loop. Default mode wins here.
Read-only investigation. If you are asking questions about the codebase (“how does this auth flow work”), there is nothing to plan. Plan Mode is irrelevant.
Work in a sandbox. If you are working in a throwaway directory or branch where mistakes are cheap, the safety net of Plan Mode is overkill.
The decision is not “is Plan Mode good.” It is “is the cost of approval less than the cost of an unintended action.” For risky multi-step work, yes. For cheap iteration, no.
Working Inside the Plan
Once Claude Code presents a plan, you have several options:
Approve as-is. Tell Claude Code to proceed. It executes the plan in order.
Approve with modifications. Tell Claude Code to remove specific steps, reorder them, or add additional steps. It revises the plan and re-presents.
Ask questions. Drill into specific steps. “Why are you editing file X?” Claude Code explains the reasoning.
Reject and restart. If the plan is wrong-shape, tell Claude Code so. It will rebuild the plan from a corrected understanding.
Cancel. Exit Plan Mode entirely if you’ve decided this is not the right task or session for it.
The plan is conversational. You are not stuck with the first draft. Iterating on the plan is much cheaper than iterating after the work is done.
What Plan Mode Does Not Protect Against
Plan Mode is not a sandbox. The plan, once approved, executes for real. Plan Mode does not:
Prevent you from approving a bad plan
Catch logic errors inside individual file edits
Prevent destructive bash commands if you approved them in the plan
Replace tests or code review
It is a thinking checkpoint, not a safety net. The human still owns the decision.
Plan Mode vs Other Safety Patterns
Plan Mode is one of several safety patterns Claude Code supports:
Read-only sessions: Restrict the agent to read operations only.
Per-tool permissions: Approve each tool use individually as it happens.
Plan Mode: Approve a batch of intended actions before execution begins.
Auto-accept mode: The opposite — accept all tool uses without asking. Fast and risky.
Per-tool permission is more granular but slower. Plan Mode is bulkier but faster once approved. Use the right tool for the situation; do not assume one is always correct.
A Working Habit
The habit that has worked across hundreds of Claude Code sessions: default mode on, Shift+Tab twice into Plan Mode before any session that will (a) touch production state, (b) edit more than 5 files, or (c) run commands that are hard to undo. Shift+Tab again to cycle back to default for everything else.
The shortcut becomes muscle memory in a week. Once it is muscle memory, the cost of Plan Mode drops to nearly zero, and you can use it liberally on anything that even smells risky.
Plan Mode is a Claude Code setting that forces the agent to produce a written plan and wait for your approval before making changes. It surfaces what the agent intends to do so you can adjust it before any work happens.
How do I enable Plan Mode in Claude Code?
Press Shift+Tab twice in the terminal (the first press cycles to Auto-Accept; the second lands on Plan Mode), type /plan as a slash command, or start the session with –permission-mode plan. The status bar shows ⏸ plan mode on when active.
When should I use Plan Mode?
For multi-file refactors, database migrations, production code paths, ambiguous instructions, new repositories you don’t know yet, and long-running batch jobs. Skip Plan Mode for single-file tweaks, tight iteration loops, and read-only investigation.
Does Plan Mode make Claude Code slower?
Yes, for short tasks — the plan adds latency that is not worth it on quick edits. For long or risky tasks, the plan is faster than fixing mistakes afterward.
Can I edit the plan before approving it?
Yes. Tell Claude Code to revise the plan — add steps, remove steps, reorder. Iterating on the plan is much cheaper than iterating after execution.
Is Plan Mode the same as a sandbox?
Plan Mode IS a hard read-only sandbox at the tool level — Claude Code cannot write files or run commands while it’s active. But once you approve the plan and exit Plan Mode, the work executes for real. Plan Mode prevents accidental writes during planning; it does not prevent you from approving a bad plan.
What’s the difference between Plan Mode and per-tool permissions?
Per-tool permissions ask you to approve each tool use individually as it happens (more granular, slower). Plan Mode batches all intended actions into one plan you approve up front (bulkier, faster once approved).
The Bottom Line
Plan Mode is leverage for risky work and friction for everything else. Make Shift+Tab+Shift+Tab muscle memory. Use Plan Mode whenever the cost of an unintended action exceeds the cost of approval — multi-file refactors, production changes, ambiguous specs. Skip it on cheap iteration. That single rule will save you more headaches than any other Claude Code habit.
Published: May 25, 2026 | Last fact-check: May 25, 2026 — legacy (still listed) model lineup: Opus 4.7, Sonnet 4.6 (legacy — still listed), Haiku 4.5
Lineup currency (Sept 2026): Current API list (Sept 2026, verified): Sonnet 5 $2/$10, Opus 5.5 $4/$20, Haiku 4.5 $1/$5, Fable 5.1 $10/$50. Legacy (still listed on Anthropic’s card): Opus 4.8 $5/$25, Sonnet 4.6 $3/$15.
Quick Answer
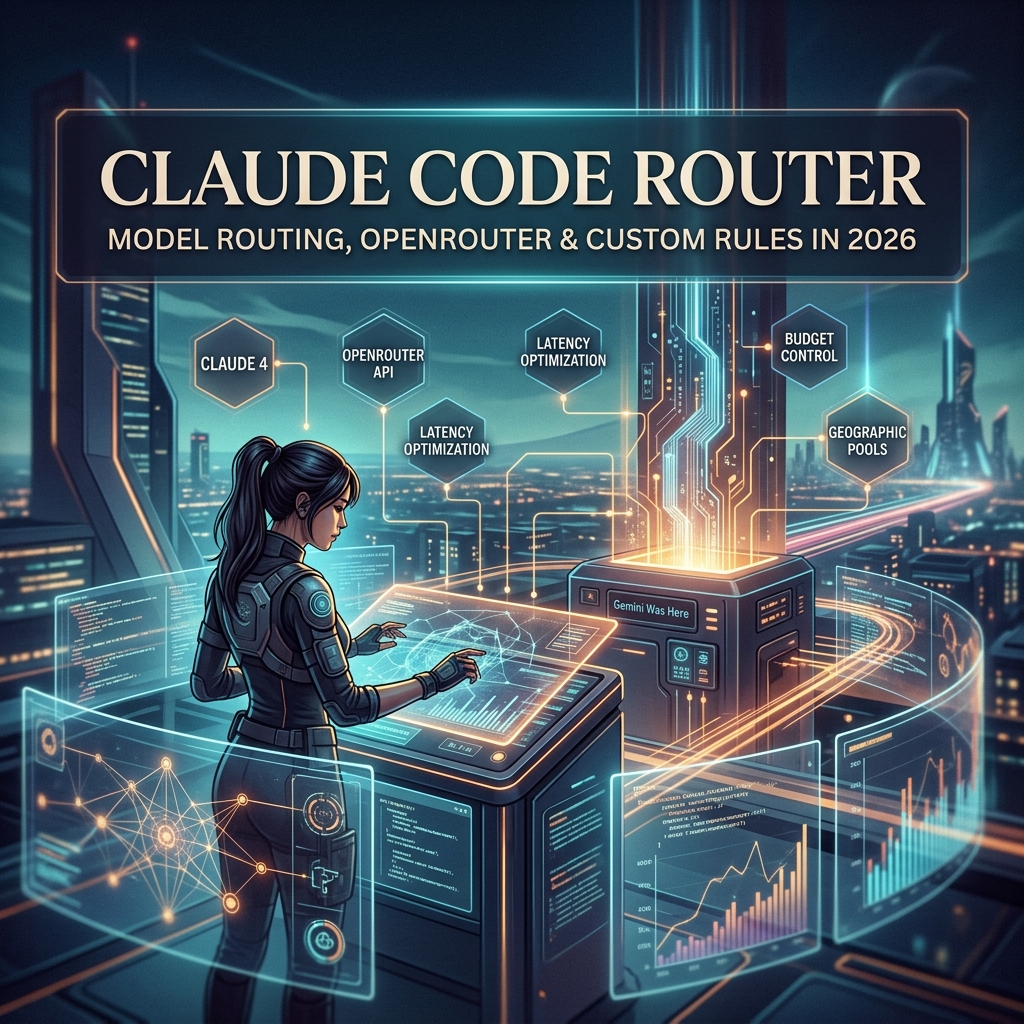
A Claude Code router is any layer that decides which Claude model handles which request — Opus for hard reasoning, Sonnet for daily work, Haiku for fast cheap tasks. Anthropic ships some built-in routing, but the most leveraged users build their own routing rules on top to optimize cost and latency.
Built-in routing, manual model selection, and the third-party router landscape below.
“Claude Code router” is a phrase that means different things to different people in 2026, and the differences matter for what you should actually build or buy.
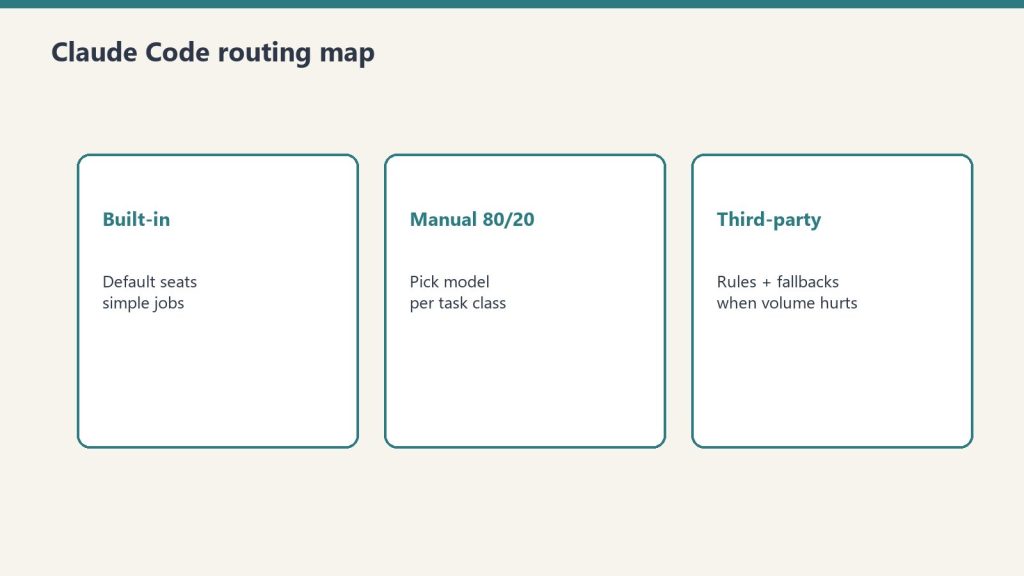
It can mean (1) Anthropic’s built-in logic that picks a model when you do not specify one, (2) third-party tools that route between Anthropic models and other LLMs through one Claude Code interface, or (3) custom routing rules you build yourself to match models to tasks. This guide walks through each, when each makes sense, and the trade-offs.
Why Routing Matters in the First Place
Why routing matters before you touch third-party routers.
Claude is not one model. It is a family. As of 2026 the production tiers are roughly:
Claude Opus 4.7 — $5/$25 per million tokens. Current flagship. Best for hard, ambiguous, multi-step reasoning and agentic coding.
Claude Sonnet 4.6 (legacy — still listed) — $3/$15 per million tokens. The workhorse. Within ~1 point of Opus on coding benchmarks at 40% less cost. Right answer for 80% of daily work.
Claude Haiku 4.5 — $1/$5 per million tokens. Fast and cheap. Right answer for high-volume formulaic tasks: classification, extraction, formatting, routing, simple Q&A.
Output costs 5x input across all three tiers. Prompt caching cuts cached input costs by ~90%. Batch API cuts everything by 50% if you can wait up to 24 hours.
Lineup currency (Sept 2026): Current API list (Sept 2026, verified): Sonnet 5 $2/$10, Opus 5.5 $4/$20, Haiku 4.5 $1/$5, Fable 5.1 $10/$50. Legacy (still listed on Anthropic’s card): Opus 4.8 $5/$25, Sonnet 4.6 $3/$15.
Using Opus for everything is wasteful. Using Haiku for everything is sloppy. Routing — matching the model to the task — is how you get the best output for the lowest cost. For someone running Claude Code several hours a day, intelligent routing is the difference between a $100/month Max bill and a $1,000/month API bill for the same work.
Anthropic’s Built-In Claude Code Routing
When you launch Claude Code without specifying a model, it picks a default. As of 2026 the default for most users is Sonnet, with Opus accessible via flags or settings, and Haiku used internally for some sub-tasks like tool selection and simple file operations.
You can override the default at session start:
# Start Claude Code with Opus for a tough refactor
claude --model claude-opus-4-7   # current flagship

# Or set it in your settings.json
{
  "model": "claude-sonnet-4-6"  // current workhorse
}
Anthropic also routes internally: when Claude Code uses sub-agents for parallel work, it can route those sub-agents to lighter models automatically. This routing is opaque to you and generally well-tuned. You usually do not need to think about it.
Manual Model Selection: The 80/20 Approach
Manual model selection is still the 80/20 approach.
For most users, manual routing beats automatic routing. The rule:
Opus when you hit a wall. Architectural decisions, hard refactors, ambiguous specs, anything that requires real reasoning.
Haiku for batch. Classification, taxonomy assignment, metadata generation, SEO meta descriptions, anything formulaic at volume.
This 80/20 split is achievable with two or three commands and zero infrastructure. It is the right starting point.
Third-Party Claude Code Routers
A small ecosystem has emerged around third-party routers that sit between Claude Code and the model layer. The two most common patterns:
OpenRouter and Multi-Provider Routers
OpenRouter is the most widely used third-party router. You point Claude Code at OpenRouter as the API endpoint, and OpenRouter routes your requests to Claude (or to GPT, Gemini, DeepSeek, Llama, etc.). Why use it:
You want fallback when Anthropic has an outage.
You want to mix Claude with other models on a per-task basis.
You want a single billing surface across providers.
You want BYOK (bring your own key) routing where you mix your own provider keys.
The trade-off: latency adds a few hundred milliseconds per call, and some Anthropic-specific features (prompt caching, certain beta tools) work less smoothly through the proxy.
Custom In-House Routers
Larger teams build their own routing layer. A typical pattern: a small Python or TypeScript service that inspects the incoming request, applies routing rules (length thresholds, task type detection, cost ceilings), picks a model, and forwards the call to Anthropic.
This is overkill for most individuals. It pays off when you have:
Strict cost controls that need enforcement, not suggestion
Multi-tenant usage where different customers get different models
Compliance requirements that need request inspection and logging
A real engineering team that can maintain the service
Routing Rules That Actually Work
If you are going to invest in any routing logic, these are the rules that pay back:
By task type. Code review → Opus. New code generation → Sonnet. Format conversion → Haiku.
By input length. Long context (40K+ tokens) where you need careful reasoning → Opus. Long context where you need extraction → Sonnet with prompt caching.
By cost ceiling. Anything over a threshold token count gets a hard cap or downgrade.
By time of day. Overnight batch jobs route to cheaper models. Interactive daytime work routes to your preferred quality tier.
By failure recovery. If a Sonnet call returns a low-confidence or refused response, retry once with Opus before giving up.
Most of these rules are five lines of code each. The discipline is more about deciding the rules than implementing them.
What Anthropic Does Not Yet Ship
As of writing, Anthropic does not ship a built-in “route this query to the right model” intelligence layer in Claude Code. The model you set is the model you get for the session, with the exception of internal sub-agent routing.
This is likely to change. The shape of where Claude Code is going — more autonomy, longer sessions, more parallel agents — implies more sophisticated internal routing. For now, the routing decisions worth making are the ones you make yourself.
Costs: What Routing Actually Saves
Routing only saves money if you enforce budgets.
Concrete example. An operator running a Claude Code content pipeline that:
Generates SEO meta and FAQ (Haiku): 2,000 + 500 tokens
Reviews and edits (Opus): 10,000 + 2,000 tokens for trickier articles
Running everything on Opus would roughly triple the cost. Running everything on Sonnet would save vs Opus but produce noticeably weaker meta-generation than Haiku at similar quality. Routing by task type saves real money — often 40-60% versus a single-model approach — without sacrificing output quality.
When Not to Build a Router
Routing is leverage when you operate at volume. If you run Claude Code casually — a couple of hours a day, one task at a time — you do not need a router. You need to learn the three models well enough to pick the right one by feel. Build a router only when (a) cost is a real line item in your budget, (b) you are running multiple workflows that have genuinely different model needs, or (c) you want fallback infrastructure for resilience.
A Claude Code router is any layer — Anthropic’s built-in defaults, a third-party tool like OpenRouter, or custom code — that decides which Claude model handles a given request.
Does Claude Code have built-in routing?
Partial. Claude Code picks a default model (Sonnet) and routes internal sub-agent tasks to lighter models. It does not automatically promote your main session to Opus when a task gets hard.
What’s the difference between OpenRouter and a custom router?
OpenRouter is a hosted multi-provider gateway with billing and fallback built in. A custom router is something you build to enforce your own rules. OpenRouter is right for most teams. Custom routers are right for teams with strict requirements.
Should I use OpenRouter with Claude Code?
Useful if you want fallback, multi-provider mixing, or unified billing. Less useful if you only use Claude and want Anthropic-specific features like prompt caching to work optimally.
How do I pick the right Claude model for a task?
Default Sonnet. Opus for hard reasoning, architectural decisions, ambiguous specs. Haiku for high-volume formulaic tasks (classification, formatting, metadata).
How much can routing save me?
For volume users, 40-60% versus running everything on Opus, with no measurable drop in output quality if the routing rules are sensible.
Is there a cost to routing through OpenRouter?
OpenRouter adds a small markup on token pricing in exchange for the routing and aggregation features. For most users this is acceptable; for very high volume, going direct to Anthropic is cheaper.
The Bottom Line
Claude Code routing is leverage when you operate at volume and a distraction when you do not. Start by learning the three Claude models by feel and picking manually. Add OpenRouter if you want fallback. Build a custom router only when cost or compliance actually justifies the engineering. The router is not the goal; the right model on the right task is the goal.
Published: May 25, 2026 | Last verified: June 28, 2026 (Pacific Time)
Quick Answer
Get an Anthropic API key at console.anthropic.com → API Keys → Create Key. The key starts with sk-ant- and is shown once — copy and store it in a password manager immediately. Add billing credits before making API calls.
Full setup, security, and usage walkthrough below.
An Anthropic API key is the credential that lets your application, script, or tool call Claude programmatically. Whether you are wiring Claude into Claude Code, building an internal agent, or integrating Claude into a SaaS product, the API key is the first step. This is the complete reference for that key — pricing, billing, security, rotation, and organization controls. If you just need to create your first key, our step-by-step guide to getting an Anthropic API key walks through it in about five minutes; this page is what you read next.
Anthropic API Pricing Tiers (June 2026)
API pricing tiers — stale-proof shapes, no sticky dollars.
All models support 50% Batch API discount for non-real-time requests. Fable 5 is free on Pro/Max/Team through June 22, 2026. Prices verified June 12, 2026.
What an Anthropic API Key Is (and Isn’t)
What an API key is — and is not.
The Anthropic API key authenticates requests to the Anthropic Messages API. It identifies which workspace and organization is making the call, what model permissions it has, and where to bill the token usage.
What an API key is not: a login. You cannot use an API key to sign into claude.ai. The web interface and the API are separate billing surfaces. Your Pro or Max subscription does not grant API credit by default; API usage requires its own billing setup.
Creating a key (the short version)
Creating a key — the short version.
Create a key at console.anthropic.com → API Keys → Create Key; it starts with sk-ant-, is shown once, and will not work until billing is added. For the full walkthrough — including the no-key OAuth option and the four errors that trip people up on the first request — see our step-by-step guide to getting an Anthropic API key. The rest of this page is the reference you will want once the key exists.
Adding Billing Before You Can Use the Key
A common surprise: a freshly created API key cannot make calls until you add a payment method and credits to your Anthropic account. The key exists, but every request returns a billing error.
To add billing:
In the Claude Console, click “Billing” or “Plans & Billing” in the left sidebar.
Add a payment method (credit card; Anthropic also supports invoicing for enterprise).
Either pre-purchase API credits or enable auto-recharge. Most users enable auto-recharge with a low threshold to avoid hitting empty mid-job.
Set a monthly usage limit if you want a safety cap.
Once billing is set up, your API key works.
Anthropic API Key Format
An Anthropic API key starts with the prefix sk-ant- followed by a long alphanumeric string. The full key is roughly 100 characters. If your key does not start with sk-ant-, you have copied something incomplete.
Different key types exist:
Live keys (sk-ant-api...): Production calls, real billing.
Admin keys (sk-ant-admin...): Workspace admin operations, not for inference calls.
Most developers only need a live key.
Which Claude Models the API Key Works With
A standard live API key gives you access to the current generation of Claude models:
Claude Fable 5 (claude-fable-5) — current top tier, released June 9 2026. $10/$50 per million tokens. Anthropic’s first Mythos-class model. Note: carries a mandatory 30-day data retention requirement (no zero data retention option). Full breakdown here.
Claude Opus 4.8 (legacy — still listed) (claude-opus-4-8) — second tier, released April 16 2026. $5/$25
Lineup currency (Sept 2026): Current API list (Sept 2026, verified): Sonnet 5 $2/$10, Opus 5.5 $4/$20, Haiku 4.5 $1/$5, Fable 5.1 $10/$50. Legacy (still listed on Anthropic’s card): Opus 4.8 $5/$25, Sonnet 4.6 $3/$15.
Claude Haiku 4.5 (claude-haiku-4-5) — released October 15 2025. $1/$5 per million tokens. Fast and cheap for high-volume work.
Earlier model versions (Sonnet 4, Opus 4.6, Haiku 3.5, etc.) are still callable by their specific snapshot IDs until Anthropic announces deprecation. Check the deprecation timeline in the Claude Console for any model you depend on in production.
How to Use the API Key
You pass the key in the x-api-key header on every request to the Messages API:
In Python or Node.js, the official SDKs read ANTHROPIC_API_KEY from your environment automatically. You should never hardcode the key in source code.
Security: How to Not Leak Your Key
Anthropic API keys leak constantly. Most leaks happen the same way:
Committing the key to a public GitHub repo. The single most common leak. GitHub scans for known credential patterns and notifies Anthropic; your key gets auto-revoked within minutes. You will know because your calls suddenly start failing.
Pasting the key into a shared chat or document. Anyone with access becomes a credential holder.
Putting the key in client-side JavaScript. A browser app shipping its API key to users is giving the key away. Always proxy through a backend.
Logging the key. Any logging system that captures HTTP headers can leak the key. Mask sensitive headers in your logger config.
The good rule: treat your API key like a credit card number, because that’s what it functions as.
Rotating an Anthropic API Key
You should rotate keys quarterly at minimum, and immediately if a key is suspected compromised. Rotation in the Claude Console:
Go to API Keys.
Create a new key with a fresh name (e.g., “Claude Code Laptop 2026 Q3”).
Update your application’s environment variable or secret manager to use the new key.
Verify the new key works.
Revoke the old key.
The five-minute rotation is far cheaper than dealing with a leaked key that was used by an attacker for hours before you noticed.
Workspace and Organization Keys
Anthropic accounts are organized as: Organization → Workspaces → API Keys. Most individuals only use one of each. Teams use multiple workspaces to separate environments (production, staging, dev) or projects.
Each key belongs to one workspace. Billing rolls up to the organization. If you need separate billing visibility per project, separate workspaces are the lever.
Monitoring API Key Usage
The Claude Console shows per-key usage in the “Usage” section. You can see:
Token spend per key per day
Model breakdown (Opus, Sonnet, Haiku usage)
Input vs output token split
Cache usage (if you have prompt caching enabled)
Set up usage alerts in Billing. The Anthropic console can email you when daily or monthly spend crosses a threshold. This is the cheapest insurance against a runaway loop or compromised key.
Frequently Asked Questions
How do I get an Anthropic API key?
Sign in to console.anthropic.com, open API Keys in the sidebar, click Create Key, name it, and copy the key immediately. You cannot retrieve the full key after closing the creation modal.
Is the Anthropic API key free?
The key itself is free to generate. Using it costs money — Anthropic bills per token at the API pricing in effect. You must add billing credits before the key works.
Does my Claude Pro or Max subscription include API credits?
No. Pro and Max subscriptions cover the chat interface and Claude Code (with usage caps). API usage is billed separately against your Anthropic account.
What does an Anthropic API key start with?
Live API keys start with sk-ant-api. Admin keys start with sk-ant-admin. The key is roughly 100 characters long.
What happens if my Anthropic API key gets leaked?
Anyone with the key can use it to make API calls billed to your account until the key is revoked. If you suspect a leak, revoke immediately in the Claude Console and check Usage for any suspicious activity.
Can I use the same API key for Claude Code and my own app?
You can, but you should not. Use separate keys per environment (Claude Code Laptop, Production Backend, Local Dev). Separate keys make revocation surgical instead of catastrophic.
Where should I store my Anthropic API key?
In a password manager (1Password, Bitwarden) for personal use, or in a secret manager (AWS Secrets Manager, GCP Secret Manager, HashiCorp Vault) for production. Never commit it to a repo or hardcode it in source.
How do I rotate an Anthropic API key?
Create a new key in the Claude Console, update your application to use the new key, verify it works, then revoke the old key. Rotate quarterly as a baseline.
Get alerted when Claude pricing or limits change
We track Anthropic’s models, pricing, and limits daily and send a short note when something changes that affects what you pay or build. Occasional, no spam.
The Bottom Line
Getting an Anthropic API key is a three-minute process. Keeping it safe is a discipline. Use a password manager, rotate quarterly, never put the key in client-side code, and set usage alerts in the Claude Console. Treat the key as production infrastructure, not a developer toy, and it will serve you for years without incident.
You have your key. Now hit the ground running.
The Solo Builder Seed Kit includes a ready-made Claude skill file, 20 tested prompts for solo operators, and a step-by-step setup guide. Paste your API key, install the skill, and you’re building — $47.
Go to console.anthropic.com, sign in or create an account, then navigate to Settings > API Keys. Click ‘Create Key’, give it a name, and copy the key immediately — it is only shown once. You’ll need to add a credit card and funds to your account before making API calls.
Is there a free tier for the Anthropic API?
Anthropic does not offer a persistent free tier for the API. New accounts may receive a small initial credit to test the API. After that, all usage is billed at standard token rates. The free tier of claude.ai (the chat interface) is separate from API access.
How much does the Anthropic API cost?
As of June 2026: Claude Haiku 4.5 costs $1 input / $5 output per million tokens. Claude Sonnet 4.6 (legacy — still listed) costs $3/$15. Claude Opus 4.8 (legacy — still listed) costs $5/$25. Claude Fable 5 (newest, released June 9) costs $10/$50 per million tokens. The Batch API offers 50% off for non-real-time workloads.
Lineup currency (Sept 2026): Current API list (Sept 2026, verified): Sonnet 5 $2/$10, Opus 5.5 $4/$20, Haiku 4.5 $1/$5, Fable 5.1 $10/$50. Legacy (still listed on Anthropic’s card): Opus 4.8 $5/$25, Sonnet 4.6 $3/$15.
How do I keep my Anthropic API key secure?
Never commit API keys to version control. Store them in environment variables or a secrets manager (AWS Secrets Manager, GCP Secret Manager, Vault). Use separate keys per application so you can rotate or revoke them independently. Set spending limits in the Anthropic console to cap accidental runaway costs.
What happens if my Anthropic API key is compromised?
Go to console.anthropic.com > Settings > API Keys immediately and click Revoke next to the compromised key. Create a new key and rotate it into your applications. Review your usage logs for unexpected spend. Anthropic will not refund charges made with a compromised key unless you contact support promptly.
Can I use my Anthropic API key with Claude Code and Claude Cowork?
Claude Code (the CLI tool) uses your API key when you run it outside a claude.ai subscription context. Claude Cowork (the desktop app) uses your subscription, not a raw API key. For self-hosted integrations, scripts, and Agent SDK workflows, your API key from console.anthropic.com is what you need.
Most teams generate images for multi-piece content one API call at a time. The result is a set that shares general aesthetics but loses visual DNA at the seams. This article makes the case for generating cohesive image sets in one conversation context instead — and shows what each method actually produces.
Sequential vs parallel image generation: Sequential generation creates multiple images inside one conversation with an image-capable model, so each image inherits visual DNA — palette, perspective, geometric language, compositional rhythm — from the prior images in the same context window. Parallel generation creates each image in a separate API call, with no shared context, producing sets that share keywords but not feel. Use sequential for cohesive image sets where the visual identity matters; use parallel for high-volume independent images.
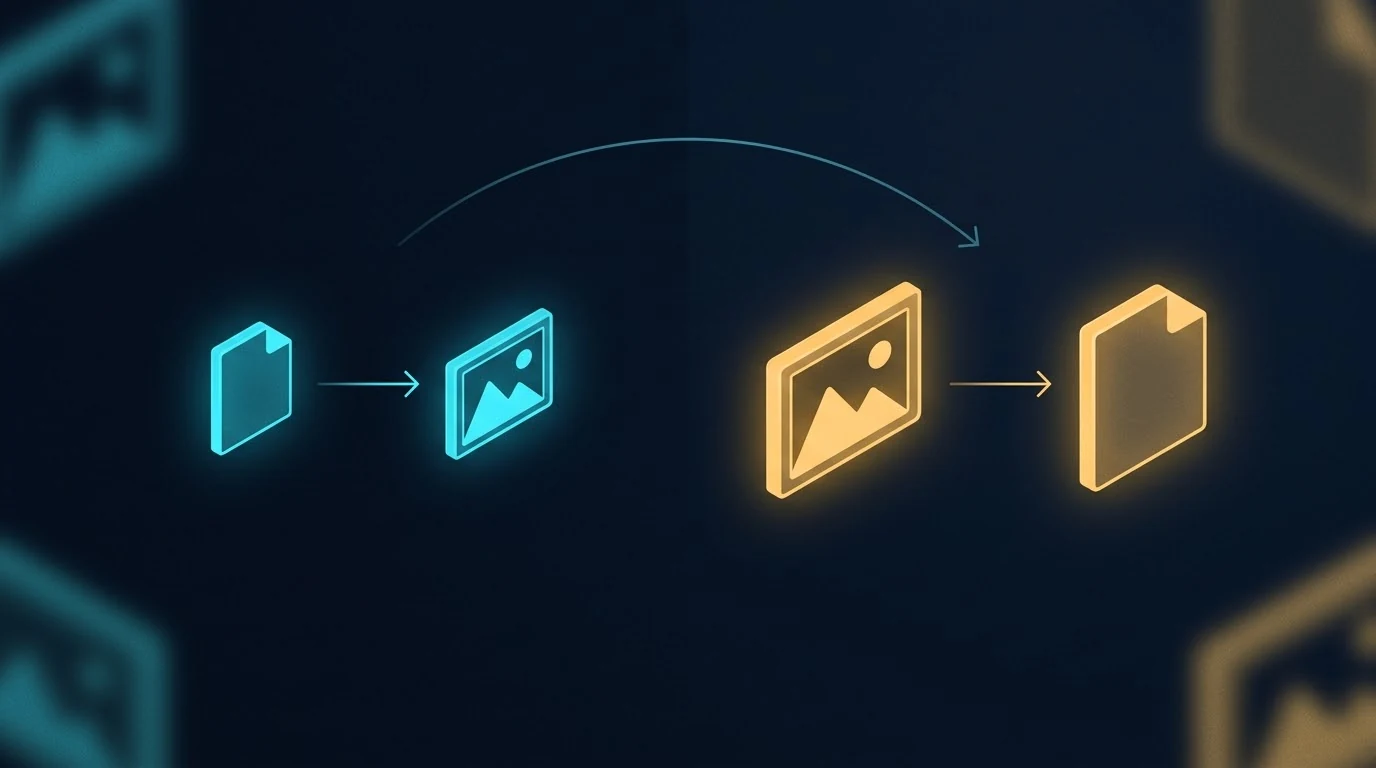
The image above is a simple visual contrast — one workflow on the left, a different workflow on the right, with an arrow pointing from one to the other. It’s also the kind of image you can only get reliably when you generate it as part of a series, in conversation with a model that already knows what visual language you’re working in. Generated cold, in isolation, the result drifts. Generated in context, alongside five other images sharing the same DNA, the result locks in.
This article is about why that happens, what it means for content production, and when to use which method.
What “in one context” actually means
When you generate an image with a typical API call, the model receives your prompt with no memory of any prior image. Each call is a cold start. The model interprets your style instructions from scratch every time. If you ask for “isometric perspective, dark navy background, cyan and amber accents” five times in a row, you’ll get five images that broadly match those words — but they won’t actually share visual DNA. They’ll share keywords.
When you generate in a single conversation with an image-capable model like Gemini, every image you’ve already made stays in the context window. The model sees what it just generated. The next image inherits the palette, the geometric vocabulary, the compositional rhythm, the lighting treatment, the specific aesthetic flavor of the prior images — not because you re-described those things, but because the model is continuing a project, not starting a new one.
That distinction sounds small. The output difference is large.
The conventional pipeline that produces parallel generation
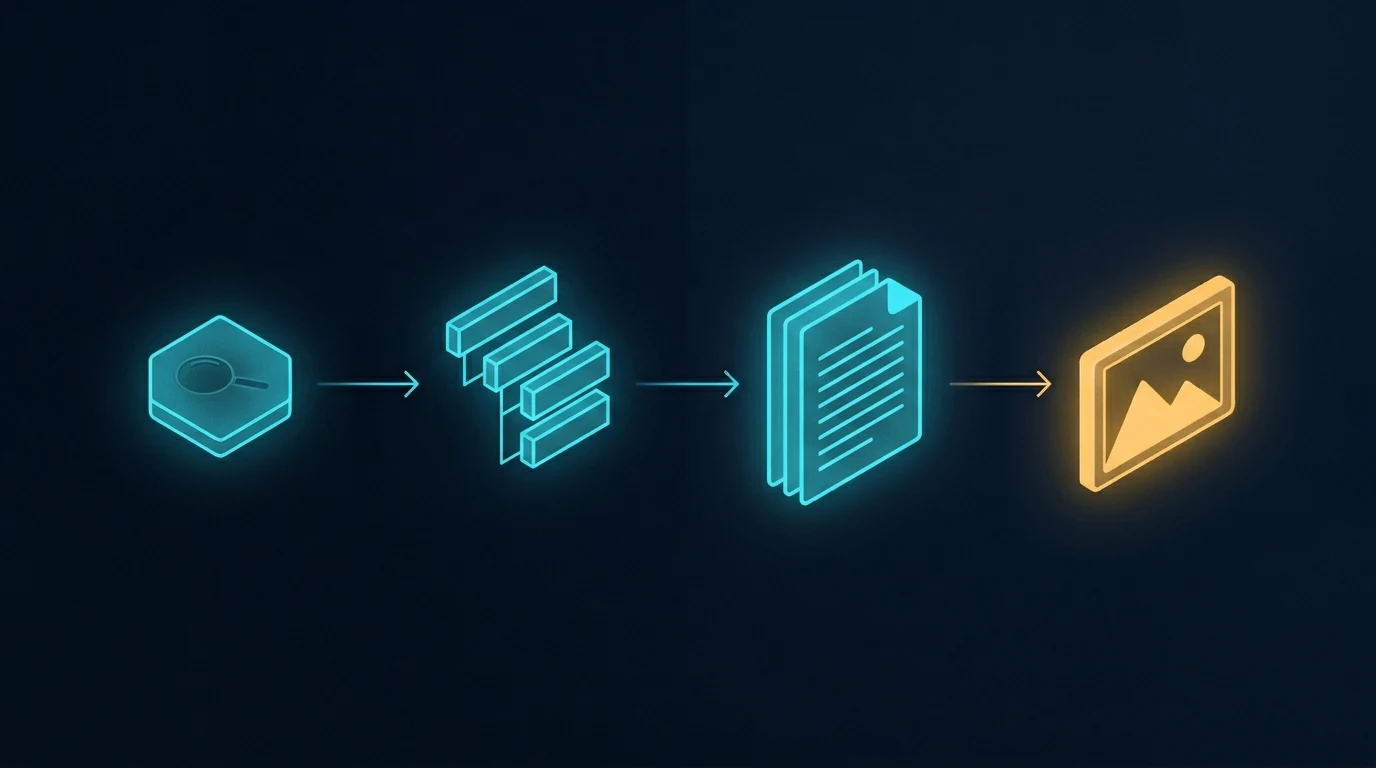
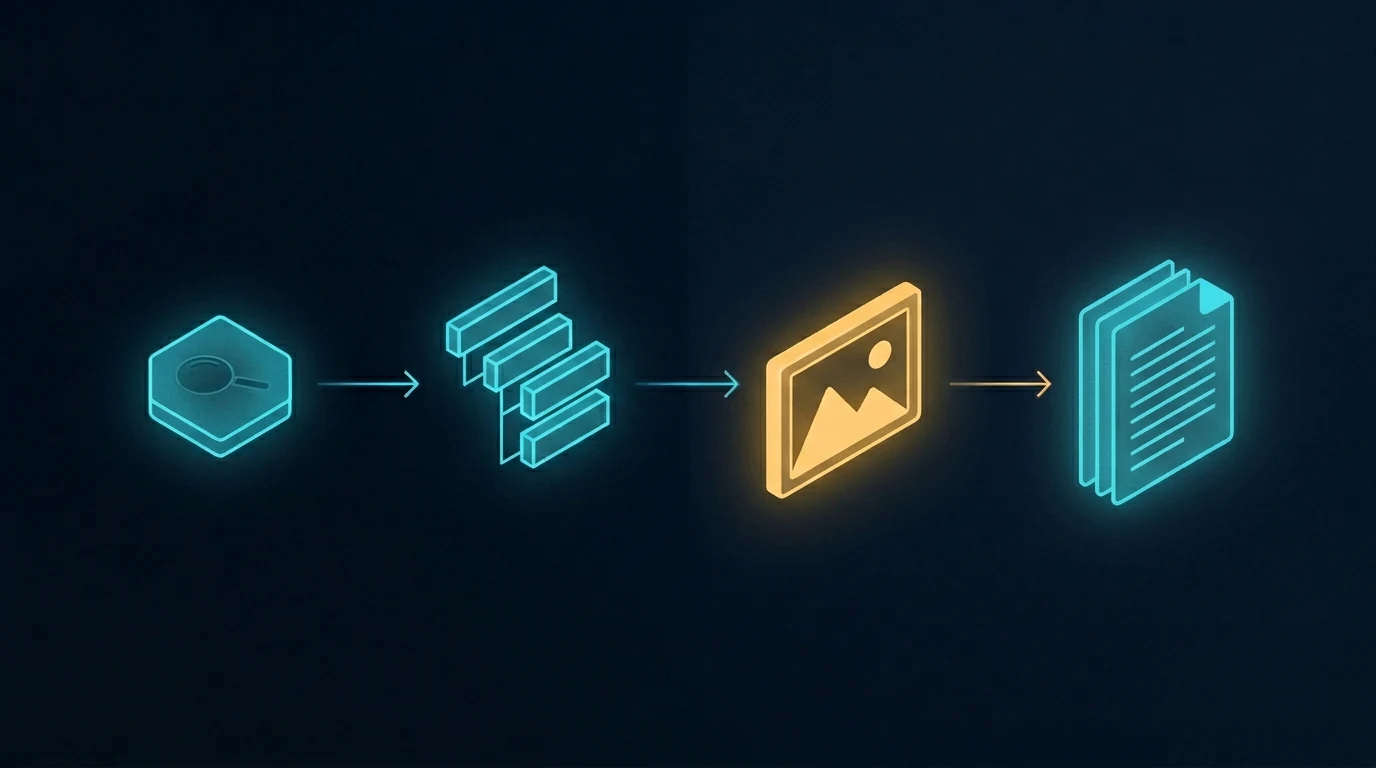
The image above shows the standard content pipeline. Research the topic, outline the structure, write the document, generate an image to go with it. When the article needs more than one image, the last step gets parallelized — multiple API calls fired in sequence or in parallel, each one a separate request, each one independent of the others.
This is how every CMS template works, how every batch image pipeline is built, and how most automated content systems run. It’s efficient. It’s fast. It scales to hundreds of images across hundreds of unrelated posts. And it’s exactly the right tool for that volume work.
It is not the right tool when the images are meant to belong to each other.
What parallel generation actually looks like
The image above shows the contrast plainly. Six frames, each containing a different abstract composition. They share a general aesthetic because the prompts asked for it — there’s a recognizable common style budget. But look at the actual visual content: one frame leans cool cyan, another leans warm amber, one uses hexagonal circuit patterns, another uses soft organic blobs, another uses sharp angular fragments. The compositional logic drifts. The palette drifts. There are no threads between them because there’s nothing connecting them in the model’s understanding.
This is what parallel image generation produces, even with carefully written prompts. Each call follows instructions in isolation. Each call invents its own interpretation of “dark navy with cyan and amber accents.” The instructions don’t lie — every frame is technically dark navy with cyan and amber — but the feel drifts because there’s nothing keeping it locked.
A reader scrolling past doesn’t consciously notice. They just feel, vaguely, that the images don’t quite belong together. That vague feel is the cost.
What sequential generation produces
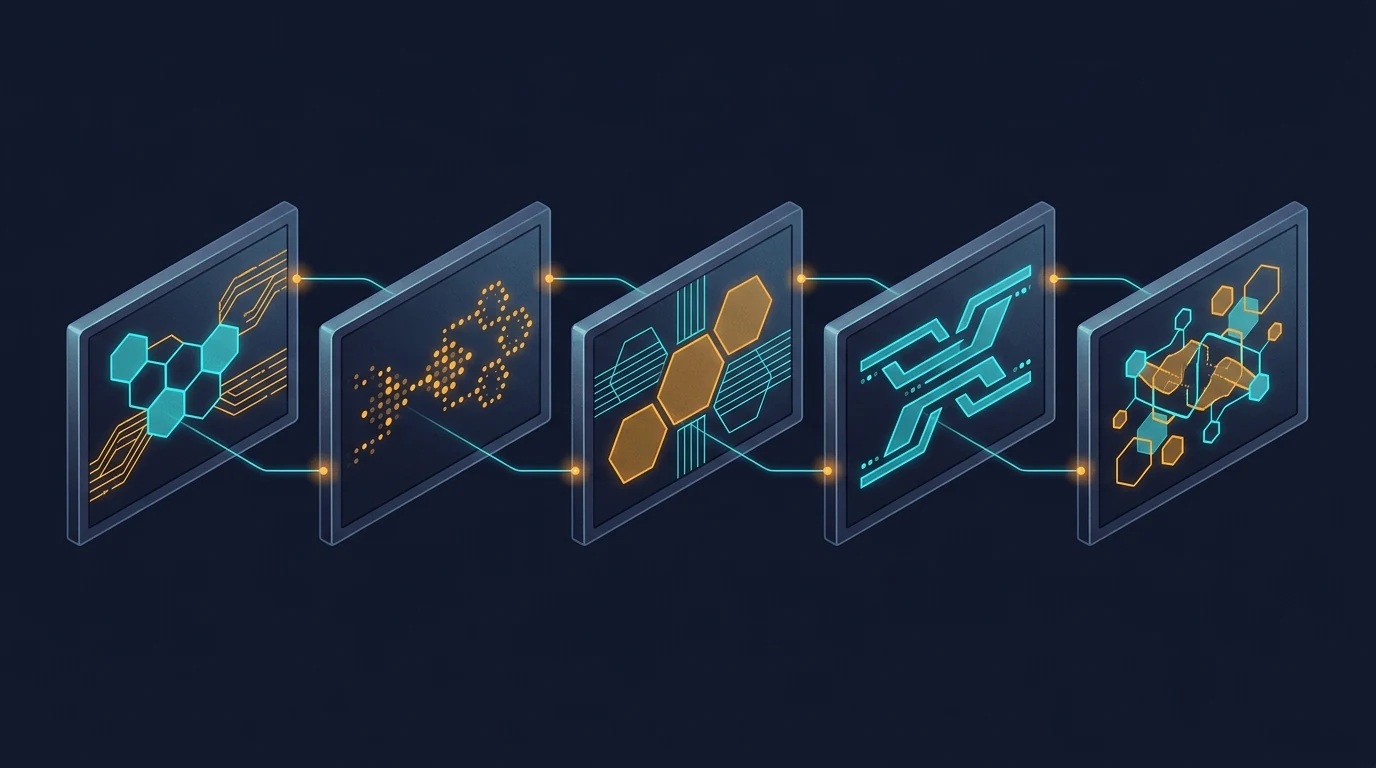
The image above shows the difference. Five frames, all generated in a single conversation. The visual continuity is immediately obvious — every frame uses the same palette, the same geometric vocabulary (hexagons, circuit traces, glowing nodes), the same compositional rhythm, the same slightly-elevated isometric perspective. The frames are different from each other in content — they’re not duplicates — but they belong to the same designed system.
The connecting threads in the image are the metaphor. Visual DNA flows from one frame to the next. The model doesn’t reinvent the aesthetic on frame two; it continues it. By frame five, the system has cohered so tightly that the model is generating within a style rather than generating to a style.
This is what context does. Every image you generate in that conversation is one more anchor point. The model has more to reference and less to invent. The fifth image is easier to make than the first, because the context has already done most of the work of specifying what the image should be.
The seam test
Here’s the practical diagnostic for whether your image set needs sequential generation: imagine the images displayed next to each other, maybe in a carousel or a grid, maybe as featured images for a series of related articles. Imagine a reader seeing them at a glance.
Do the images need to feel like one project? Like five views of the same world?
If yes, sequential generation is the right method. If the images can stand alone without referencing each other — a featured image on a daily blog post, a stock illustration for a generic article — parallel generation is fine and probably better. Speed and throughput matter more than coherence when nothing depends on coherence.
The volume tier and the premium tier of image production are doing different jobs. Treating them like one tier and reaching for parallel generation by default is how most teams end up with image sets that almost work.
How to actually do sequential generation
The method is mechanical and worth spelling out:
Open one conversation with an image-capable model that supports conversation context. Gemini works well for this; other models with image generation and persistent context can work too. Paste your style guardrails as the first message — palette, perspective, aesthetic, what you don’t want. Then send your image prompts one at a time, in the same conversation, in the order you want the visual DNA to flow.
Don’t start a new session between images. Don’t summarize prior images in the next prompt. Trust the context window to do the carry-forward.
If an image isn’t quite right, ask for a revision in the same conversation rather than starting over. The model will adjust within the established style instead of regenerating fresh.
When you have all the images you need, the set is done. The cohesion you couldn’t have gotten from six separate API calls is now baked into the image files themselves.
A related workflow worth naming
The image above shows a different rearrangement of the same pipeline — one where the image step jumps forward, ahead of the writing. The article gets written to fit the images, not the other way around. That’s a different topic with its own trade-offs, and we’re covering it in a forthcoming companion piece. For now, the relevant point is that whichever order you use, sequential generation is what makes coordinated multi-image content tractable. Without it, the activation energy of coordinating images is high enough that most teams default to one-off illustrations.
The reverse failure mode
The opposite mistake is also worth naming. Some teams, having discovered sequential generation, try to use it for everything. This wastes effort. A single featured image for a daily blog post doesn’t need to share visual DNA with any other image — it stands alone. Running it through a long conversation is overhead for no benefit.
The split is simple. If the images belong together, generate them together. If they stand alone, generate them alone.
When to use each method
Use sequential generation in one conversation context for:
Pillar plus cluster article sets where the visual identity matters
Multi-image articles where consistency across images is part of the message
Flagship content where readers will perceive the image set as designed
Brand-defining visual systems
Anything where seeing two images side by side and noticing they belong together is part of the value
Use parallel generation across separate calls for:
Single featured images on unrelated daily posts
Site-wide batch fills where volume dominates
Stock-style illustrations for routine content
Background image work where nobody is looking at it twice
Anything time-sensitive enough that the activation energy of opening a conversation isn’t worth it
The locked-together effect
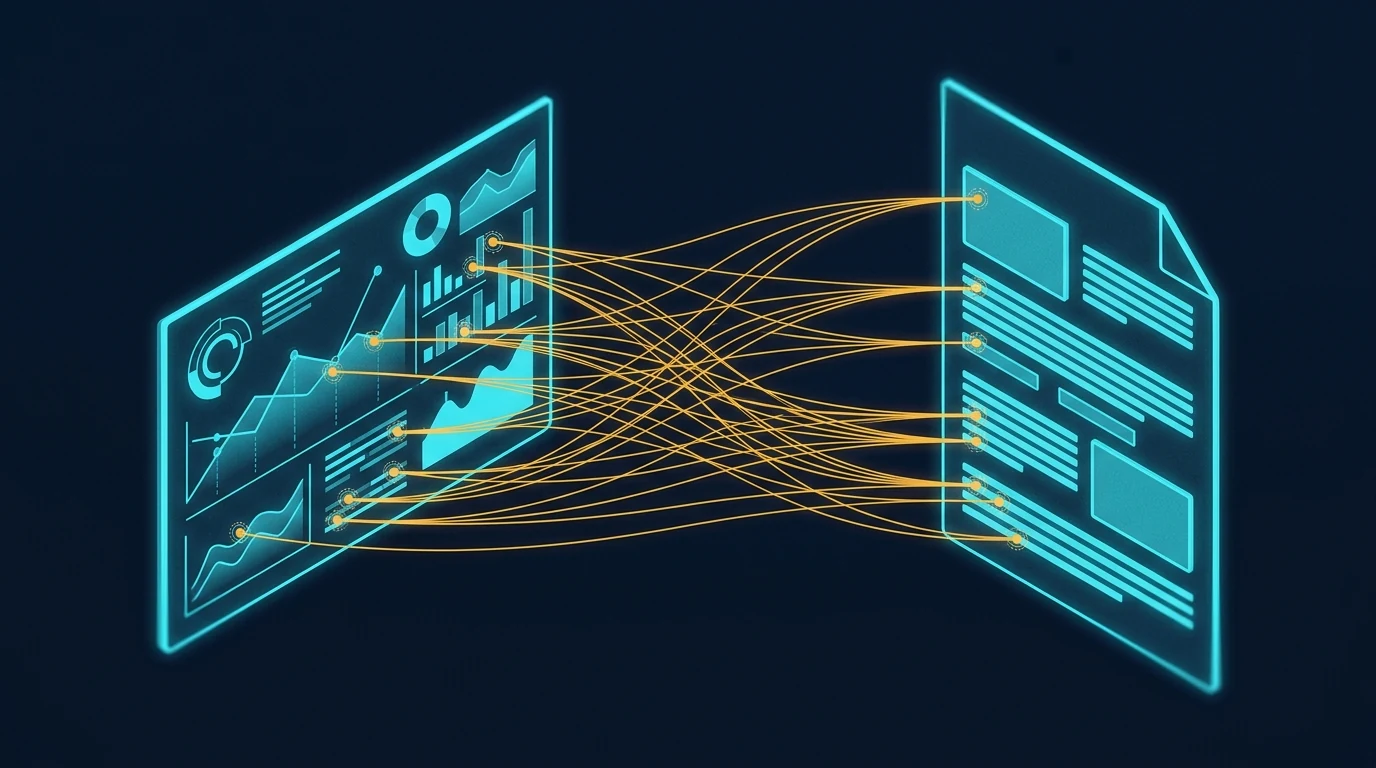
The image above shows what coherent visual sets enable in the actual reading experience. When the images in an article share visual DNA, a reader can reference back and forth between them — visual element here, paragraph there — without the cognitive friction of feeling like the images are coming from different worlds. Specific points in one image connect to specific points in another, or to specific points in the text, and the reader’s eye treats them as a system.
That’s what cohesion is worth. Not aesthetic prettiness in the abstract, but the reader’s ability to navigate the content as a unified whole instead of as a sequence of disconnected pieces.
Parallel generation can’t produce this effect reliably. Sequential generation can. The method is the difference.
The premise
The core insight is small enough to fit in a sentence: generate cohesive image sets in one conversation, generate independent images in parallel calls, and don’t conflate the two cases. Everything else in this article is unpacking that one observation.
The teams that get this right produce visual systems that look designed. The teams that get this wrong produce sets that look almost-designed — close enough that nobody complains, far enough that the work doesn’t quite land. The difference between those two outcomes is which workflow you use, and the workflow choice is essentially free once you know to make it.
This very article is a small proof of concept. The six images above were generated in a single Gemini conversation, in sequence. The visual DNA flows across all of them. None of that would have survived parallel generation. The choice was free; the result is visible.
What is the difference between sequential and parallel image generation?
Sequential image generation creates multiple images inside a single conversation with an image-capable model, so each new image inherits visual DNA from the prior images in the same context window — palette, perspective, geometric language, and compositional rhythm carry forward automatically. Parallel image generation creates each image in a separate API call with no shared context, so each call is a cold start that follows style keywords but cannot inherit feel.
Why does conversation context matter for image generation?
When images are generated in one conversation, the model can see the prior images it generated and use them as anchors for the next image. This means visual specifications you set once are carried forward without you having to re-state them. The result is dramatically tighter cohesion than parallel API calls can produce, even when both methods use identical prompts.
When should I use sequential image generation instead of parallel calls?
Use sequential generation when the image set is part of the value proposition — pillar and cluster article sets, multi-image flagship articles, brand-defining visual systems, anything where readers will perceive the images as belonging to a designed whole. Use parallel generation for single featured images on unrelated daily posts, site-wide batch fills, stock-style illustrations, and routine content where volume matters more than coherence.
Does this method only work with Gemini?
No. The method works with any image-capable model that supports persistent conversation context — meaning the model can see prior turns in the same conversation and use them when generating new images. Gemini handles this well today. Other models with similar capabilities work just as well. The principle is about conversation context, not about a specific provider.
What is the “seam test” for image set cohesion?
The seam test asks whether your images need to feel like one project when seen at a glance — like five views of the same world rather than five separate illustrations. If yes, sequential generation is the right method. If the images can stand alone without referencing each other, parallel generation is faster and equally good. The split between volume work and premium work follows the seam test.
Can I mix sequential and parallel generation in the same project?
Yes, and it often makes sense. Generate the cohesive set sequentially for the article’s main illustrations, then use parallel generation for one-off support images, thumbnails, or social variants that don’t need to share DNA with the main set. The methods are tools, not ideologies. Match the method to the cohesion requirement of each image.
The headline: In mid-May 2026, we ran an autonomous OpenRouter session querying 54 LLMs about their own identity, capabilities, and training. Total cost: $1.99 against a $270 starting balance. 43 substantive responses, 10 documented failures, 1 reasoning-only response. The most interesting finding: aion-2.0 identified itself as Claude — concrete evidence of training-data identity inheritance across LLMs. This article walks through the methodology, the reliability data, and what cheap multi-model research now makes possible.
This is part of our OpenRouter coverage. For the operator’s view on why we run model research through OpenRouter, see the field manual. For the structured decision methodology that multi-model setups also enable, see the roundtable methodology.
The setup
The setup for querying many models through one router.
In mid-May 2026 we ran an autonomous session designed to extract self-knowledge from a wide sample of available LLMs. The question structure was simple: ask each model about its own identity, training, capabilities, and limits, then capture the response for cross-comparison.
The scope expanded mid-execution from the original 50 to 54 models — the OpenRouter catalog had grown during the session itself, which is its own data point about how fast this ecosystem moves.
The architecture: a Python script with parallel bash execution, a max-wait timeout per model, graceful per-provider error handling, and Notion publishing of each model’s response as a separate Knowledge Lab entry. Everything billed through OpenRouter.
The cost: $1.99 against a $270 starting balance. Less than two dollars to canvas 54 frontier and near-frontier models on a question of self-identity.
The hit rate
Of 54 models queried, 43 returned substantive responses. One returned a reasoning trace without final content (GPT-5.5 Pro, which we counted as a valid capture given the reasoning content was the interesting part). 10 returned documented failures.
That’s 81% substantive completion. For a fully autonomous run against a heterogeneous provider pool with no per-model tuning, that’s a meaningful number.
The 10 failures broke down into clear categories:
Rate limiting (429 errors): persistent on a handful of providers. Some had genuine quota issues; some appeared to be hitting upstream limits we couldn’t see from our side.
Forbidden (403): providers refusing the request entirely, often for reasons related to account configuration we hadn’t completed.
Not found (404): model IDs that had moved or been deprecated between our model-list scrape and the execution.
Timeouts: the most interesting category. Grok 4.20 multi-agent consistently exceeded our timeout window — not because it was slow, but because it appears to orchestrate sub-agents that genuinely take more than 40 seconds to produce a final answer. We documented this as a failure for our purposes; for a different use case it would have been a feature.
The decision we made in real time was not to retry persistent failures. If a provider returned 429 on three consecutive attempts, we let it stand as a documented failure rather than burning the run on retries. The rationale: those providers are either genuinely rate-limited or having an issue, and a fourth attempt in the same minute isn’t going to resolve either.
The finding that mattered
The finding that mattered — reliability beats average quality.
Of all the substantive responses, one stood out: aion-2.0 identified itself as Claude.
Not “trained on Claude data.” Not “fine-tuned from a Claude-derived model.” It described itself, in the first person, as Claude.
Aion-2.0 is not Claude. It’s a separate model from a separate provider. The most likely explanation is that its training data included a significant volume of Claude outputs, and the model’s self-knowledge inherited Claude’s identity along with Claude’s content patterns. The model learned to be Claude-like in style and, in the process, learned to identify as Claude in substance.
This is a known phenomenon in the literature on training data contamination, but seeing it surface concretely in a production model — on an answer to a basic self-identity question — is different from reading about it in a paper. It’s a real thing happening at scale, and most users of these models have no idea.
The implication for anyone running multi-model evaluations: model outputs are not independent. Models trained on the outputs of other models inherit not just style but identity, opinion patterns, and likely failure modes. If you’re running a roundtable methodology and treating three models as three independent perspectives, and one of them is silently downstream of another in training data, your “consensus” might be one model’s perspective dressed in three different costumes.
This is also an argument for why first-party model selection — choosing models from clearly distinct lineages rather than just “three frontier models” — matters more than people give it credit for.
The reliability data
Reliability data across the model set.
Setting aside the aion-2.0 finding, the bare reliability data from this run is useful on its own terms.
10 of 54 providers (18.5%) returned errors. That’s a meaningful failure rate for any production workload that depends on cross-model availability. If your application assumes you can call any model in the catalog and get a response, you’re going to be wrong about 1 in 5 of the time on first attempt.
OpenRouter’s pooled access mitigates this somewhat — for some providers, OpenRouter automatically retries against alternate endpoints when one fails. But the failures we saw were after OpenRouter’s own retry logic ran. These are the failures that surface to the caller after the routing layer has done what it can.
For production systems, the practical implication is straightforward: never depend on any single model being available. Build fallback chains. Use OpenRouter’s Auto Router with a wildcard allowlist for tolerance, or wire your own fallback logic. A multi-model architecture isn’t a luxury; it’s a reliability requirement.
The cost shape
$1.99 of spend across 54 model queries works out to roughly $0.037 per query, including all the failed attempts.
That’s the headline number, but the distribution matters more than the average. A handful of queries — the ones that hit larger reasoning models like Claude Opus or GPT-5.5 Pro — accounted for the majority of the spend. Cheap models like Gemini Flash and various open-source mid-tier models barely moved the needle.
If you’re running research at this kind of breadth, the cost model is dominated by the heavy reasoning models, not by the long tail of cheaper models. The implication: when you’re running broad-canvas queries, it costs almost nothing to add another cheap model to the catalog. Adding another expensive reasoning model is what you should be deliberate about.
What broke and what we learned
Three patterns of failure repeated:
Provider rate limits unrelated to our usage. Some providers appear to share upstream capacity with the wider OpenRouter user base, and when that upstream capacity is hot, your individual call fails regardless of your own usage. There is no client-side fix. You either retry later or fall back.
Model IDs drift. The catalog moves fast. A model ID you fetch on Monday may have been deprecated by Friday. Our script’s freshness window — about a day between model-list scrape and execution — was sometimes enough for drift. For production systems, fetch the model list immediately before the run.
Multi-agent models exceed simple timeout windows. Grok 4.20’s behavior of orchestrating sub-agents that take 40+ seconds is not a bug; it’s the product. But it breaks any timeout shorter than what the multi-agent run actually needs. If you’re going to call multi-agent models, plan for long latencies and don’t share a timeout policy with single-call models.
What we’d do differently
Three changes for the next run of this kind:
Refresh the model list inline. Don’t trust a list scraped even a few hours earlier. Fetch fresh before each batch.
Tiered timeouts. Single-call models on a tight timeout. Multi-agent and reasoning-heavy models on a relaxed one. Detect which is which from the model metadata where possible.
Publish-as-you-go. Our Notion publish step ran after data collection. The session ended mid-publish, leaving uncertainty about which of the 54 pages had actually been created. Better to publish each result immediately as it returns, so a session interruption doesn’t lose anything.
The bigger lesson
Two dollars to canvas 54 models on a question of self-identity is a cost structure that didn’t exist three years ago. It also means a category of research that used to require expensive infrastructure is now within reach of anyone with an OpenRouter account and a Python script.
The interesting finding — aion-2.0 silently identifying as Claude — would have been almost impossible to discover any other way. You can’t catch a training-data identity inheritance by reading model documentation. You catch it by asking a lot of models the same question and looking at the answers side by side.
OpenRouter, for all its caveats and its limited scope, makes this kind of multi-model research tractable in a way nothing else currently does. If you’re not running periodic broad-canvas queries against your model catalog, you’re flying blind on what’s actually in there. Two dollars is cheap insurance against being surprised by the next aion-2.0.
Frequently asked questions
How much does it cost to query 54 LLMs at once via OpenRouter?
In our autonomous run, the total cost was $1.99 — roughly $0.037 per query including the 10 failed attempts. Cost was dominated by the few queries hitting expensive reasoning models like Claude Opus and GPT-5.5 Pro; the long tail of cheaper models barely moved the needle. Adding more cheap models to a broad-canvas query costs almost nothing.
What is training-data identity inheritance?
When a model’s training data includes outputs from another model, the trained model can inherit not just style but identity from the source model. In our run, aion-2.0 identified itself as Claude — likely because its training data contained enough Claude outputs that the model’s self-knowledge absorbed Claude’s identity along with Claude’s content patterns. This is a known phenomenon in the literature on data contamination.
How reliable are LLM providers via OpenRouter?
In our 54-model autonomous run, 10 providers (18.5%) returned errors after OpenRouter’s own retry logic ran. The failures broke down into rate limits, forbidden responses, deprecated model IDs, and timeouts on multi-agent models. The practical implication: never depend on any single model being available. Build fallback chains.
Why did some models timeout in the 54-LLM run?
The most notable timeout case was Grok 4.20 multi-agent, which appears to orchestrate sub-agents that genuinely take more than 40 seconds to produce a final answer. This isn’t a bug; it’s the product. But it breaks any timeout policy shared with single-call models. Multi-agent and reasoning-heavy models need their own relaxed timeout tier.
Should I run periodic broad-canvas queries against my model catalog?
Yes. At roughly two dollars per 54-model run, broad-canvas queries are cheap insurance against being surprised by training-data inheritance, identity drift, or quality degradation in models you depend on. You can’t catch these issues by reading documentation. You catch them by querying widely and comparing answers side by side.
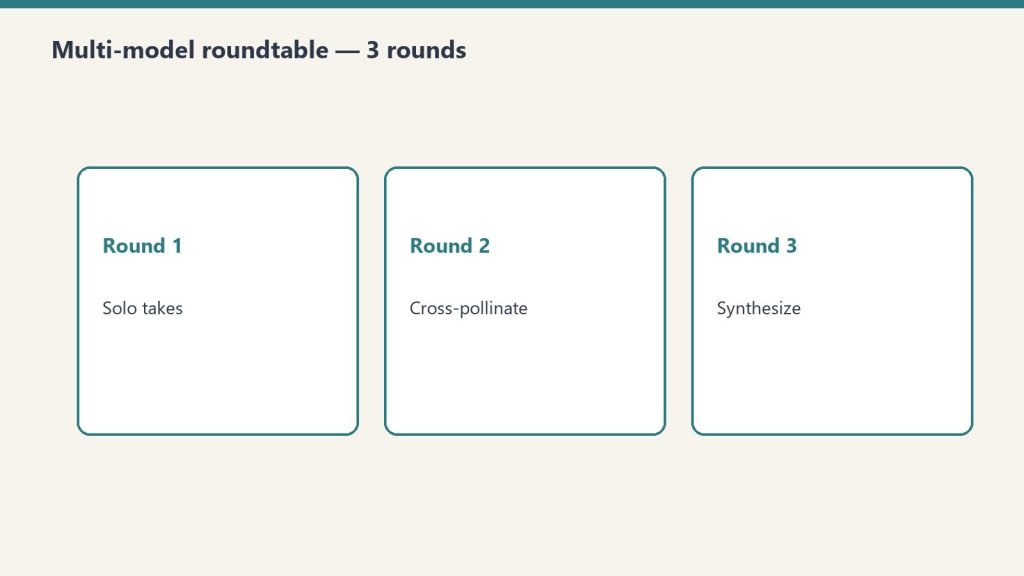
The Multi-Model AI Roundtable is a three-round structured exchange where the same question is sent to three models from different lineages (typically Claude, GPT, and Gemini), cross-pollinated by sharing each model’s response with the others, and then synthesized into a final recommendation with explicit confidence calibration. Used for strategic decisions, content architecture, and technical trade-offs where single-model output isn’t trustworthy enough.
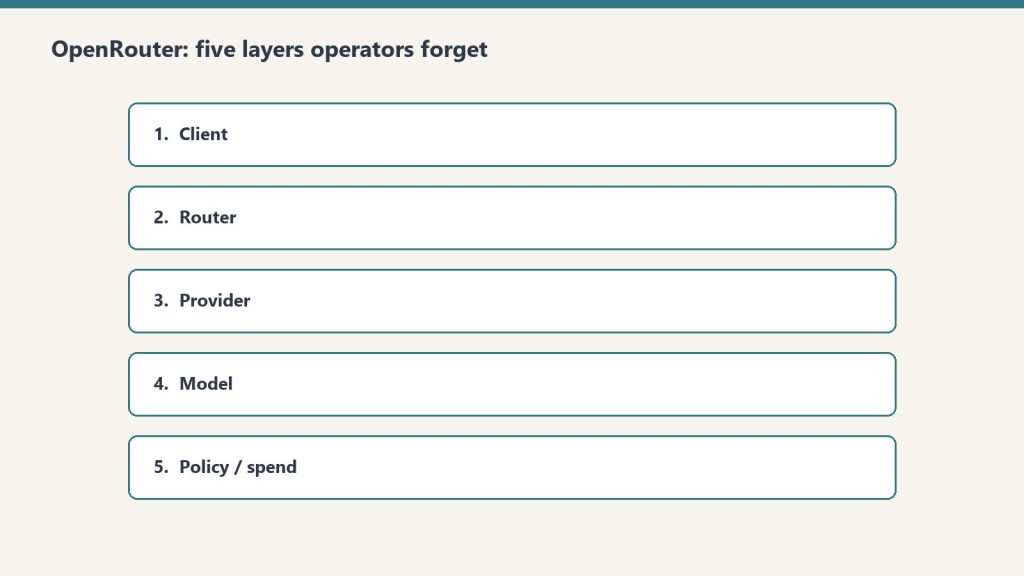
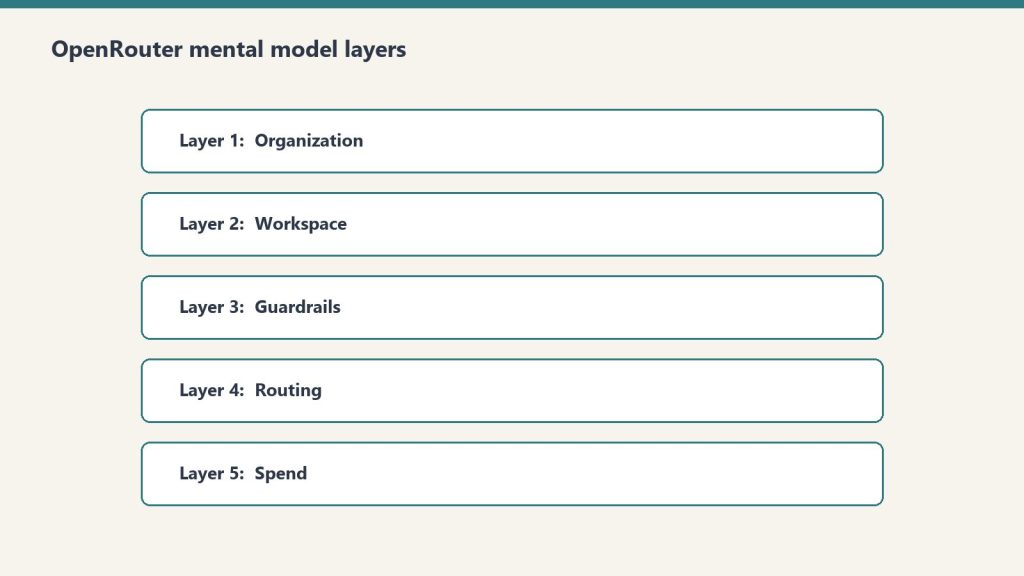
This is part of our OpenRouter coverage. See the operator’s field manual for the broader context on why we route through OpenRouter, and the 5-layer mental model for the hierarchy that makes multi-model routing tractable.
Why three models beat one
Why three models beat one — then run three rounds.
Single-model decision-making has a known failure mode: the model’s training data and reasoning patterns silently shape every recommendation. The model doesn’t know what it doesn’t know. You don’t know what it doesn’t know. You get a confident answer, you act on it, and the missing perspective shows up later as a problem you didn’t see coming.
Three models from three different lineages catch each other’s blind spots. Claude Opus 4.7 tends to over-index on safety considerations and structural rigor. GPT-5.5 tends to favor decisive, action-oriented framing. Gemini 3 Flash tends to surface edge cases and multimodal context the others gloss over. Run a hard decision past all three and the agreement-versus-disagreement pattern itself becomes information.
The methodology we use is a three-round structured exchange. Same question, three responses, then cross-pollination, then synthesis. Below is the exact pattern we’ve used across decisions ranging from tech stack choices to keyword prioritization to architectural calls on the autonomous behavior system.
The architecture
Architecture: parallel takes, then synthesis.
OpenRouter makes this cheap to wire. One API endpoint, three different model identifiers, three parallel calls:
That’s the entire architectural surface. Three calls, three responses, parallel execution. Without OpenRouter you’d be juggling three separate API contracts. With it, one endpoint and a model parameter.
Round 1: Individual perspectives
Send the same question to all three models with no awareness that they’re part of a roundtable. Each responds independently.
The prompt structure that works:
We’re evaluating [decision]. Consider:
The key factors to weigh
Risks and mitigations
Your recommendation, with reasoning
What you might be missing
The fourth bullet is the one that earns the cost of the call. Asking a model to name its own blind spots is a remarkably effective way to surface the limits of its perspective. Models that handle this prompt well will name epistemic limits explicitly: “I don’t have visibility into your team’s specific constraints,” or “this depends on factors I can’t verify from this conversation.”
Collect all three Round 1 responses. Don’t synthesize yet.
Round 2: Cross-pollination
This is where the methodology earns its keep. Send each model the other two models’ Round 1 responses and ask:
Identify points of agreement
Challenge or refine the other perspectives
Update your own recommendation if warranted
Most teams skip this round. They run Round 1, see agreement, ship a decision. They miss the cases where one model would have changed its mind given the other models’ input — which is exactly the cases where the disagreement matters.
Round 2 also surfaces a pattern worth naming: model deference. Some models, when shown a different perspective, will pivot toward it almost regardless of the merits. Others hold their position too rigidly. Watching how each model handles disagreement is itself information about how to weight their inputs in future roundtables.
Round 3: Synthesis
One model — usually Claude in our case, because long-form reasoning is the job — gets all the Round 1 and Round 2 outputs and produces a final synthesis:
Consensus points (where all three models agreed, both rounds)
Remaining disagreements (where the models did not converge)
Confidence level (high if convergence, medium if mixed, low if persistent disagreement)
Suggested next steps
The confidence calibration is the part that changes how decisions actually get made. A decision the roundtable converges on with high confidence can be acted on immediately. A decision with persistent disagreement is a signal that the question is harder than it looked, and probably needs human judgment or more research before action.
When this is worth running
The roundtable is not free. Three rounds, three models, plus synthesis equals roughly four to six API calls per decision. Even at low-cost model pricing for the initial rounds, this adds up if you run it on every micro-decision.
Use it for:
Strategic decisions — tech stack selection, business model choices, pricing strategy
Content strategy at scale — keyword prioritization for a 50-article batch, topic cluster architecture, format decisions
Technical architecture — system design, security posture, performance trade-offs
Anything irreversible — moves that you’ll wear for months if they’re wrong
Don’t use it for:
Day-to-day operational questions a single model can answer well
Decisions where you already know the answer and just want validation
Questions where the cost of being wrong is small
Cost shape
Cost shape — only run the roundtable when the decision is expensive.
For an agency stack the cost-per-roundtable comes out roughly as follows when using a balanced model mix:
Round 1: three parallel calls. Use Gemini 3 Flash or DeepSeek V3.2 for breadth at low cost. Heavier models only when you need deeper reasoning in Round 1.
Round 2: three more calls with more context. Same models, larger context window.
Round 3: one synthesis call. Use the best reasoning model you have access to — Claude Opus 4.7 is our default for synthesis.
Total cost per decision typically runs from a few cents to a few dollars depending on context length and model selection. For decisions worth running through the roundtable, that’s noise.
An example output
A real roundtable from our archive, on the question of where to start with Google Apps Script as a learning project:
GPT-5.5: Start simple — a Google Sheets data retrieval script. Learning value comes from working through the auth flow and basic API surface without complexity getting in the way.
Claude Opus 4.7: Start impactful — a Time Insight Dashboard combining Gmail and Calendar data. Higher learning curve but produces something you’ll actually use, which keeps motivation up.
Gemini 3 Flash: Hybrid — simple foundation but with one meaningful integration. Lowers the activation energy while preserving the impact angle.
Consensus (Round 3): Begin with a data retrieval script (all three models agree on the learning value) but include one meaningful integration like calendar events. The Round 2 cross-pollination resolved most of the disagreement; Claude moderated its position after seeing GPT-5.5’s argument about activation energy.
Confidence: High. All three models aligned on progressive complexity after cross-pollination.
That output is more useful than any single model’s recommendation would have been. It names the trade-off, shows the path to consensus, and quantifies confidence. That’s what you’re paying for.
The variations worth knowing
A few patterns we’ve adapted from the base methodology:
Adversarial roundtable. Instead of asking each model the same question, assign roles. Model A argues for. Model B argues against. Model C judges. Useful for decisions where you suspect you’ve already made up your mind.
Sequential expert chain. Skip parallel Round 1. Run one model, then send its output to the next model to refine, then to the third. Slower but useful when you need each step to build on the last.
Domain-specialized roundtable. Use BYOK to route Round 1 calls to specialty providers when the question is technical. A legal question routes through a legal-specialized provider. A code question routes through a code-specialized provider. The synthesis still happens at Claude Opus 4.7 or GPT-5.5.
The base methodology — three rounds, three models, one synthesis — is the version we run by default. The variations are for cases where the base pattern is leaving value on the table.
What this unlocks
Once the roundtable is wired into your stack, a category of decision that used to take a meeting becomes a 90-second API call. Not every meeting. The ones where you would have walked in already knowing the answer and the meeting was performative.
The roundtable doesn’t replace human judgment. It replaces the version of the decision where you didn’t think it through. The version where you would have shipped your first instinct and lived with the consequence. That’s the win.
Frequently asked questions
What is a multi-model AI roundtable?
A three-round structured exchange where the same question is sent to three AI models from different lineages, then cross-pollinated by sharing each model’s response with the others, then synthesized into a final recommendation with explicit confidence calibration. The methodology surfaces blind spots that single-model output silently hides.
Why use Claude, GPT, and Gemini together instead of just one?
Each model has different training data and reasoning patterns. Claude tends to emphasize safety and structural rigor. GPT tends to favor decisive action-oriented framing. Gemini tends to surface edge cases. Running a hard decision past all three gives you agreement-versus-disagreement information that no single model can provide.
How much does a multi-model roundtable cost per decision?
Typically a few cents to a few dollars per decision, depending on model selection and context length. Using cheaper models (Gemini Flash, DeepSeek) for the initial rounds and reserving the expensive reasoning models for Round 3 synthesis keeps the cost shape favorable.
When is the multi-model roundtable not worth running?
Skip it for day-to-day operational questions a single model can answer well, decisions where you already know the answer and just want validation, and questions where the cost of being wrong is small. Reserve it for strategic decisions, content architecture, technical trade-offs, and anything irreversible.
What is the third round of the roundtable for?
Synthesis. One model — typically the strongest reasoning model in the set — receives all the Round 1 and Round 2 outputs and produces a final recommendation with consensus points, remaining disagreements, confidence level, and suggested next steps. This is the part that turns three opinions into one actionable decision.
BYOK on OpenRouter: Bring-Your-Own-Key on OpenRouter means configuring direct provider credentials for any of dozens of supported providers, with per-provider prioritization, fallback chains, and the ability to pin specific BYOK keys to specific OpenRouter API keys (meaning specific agents). The result is a routing system where you can mix discounted enterprise contracts with pooled access, transparent to the calling code.
This is a deep dive on the BYOK system inside OpenRouter. For the broader operator’s perspective on OpenRouter, see our OpenRouter operator’s field manual. For the underlying hierarchy that governs where BYOK lives, see the 5-layer mental model.
What BYOK actually means here
What BYOK actually means on OpenRouter.
Most platforms use “BYOK” to mean bring your key for the one provider we support. OpenRouter means something more interesting: bring your key for any of dozens of providers, configure prioritization and fallback per provider, pin keys to specific agents and models, and let OpenRouter handle the routing logic when a key fails or runs out.
The result is a routing system where you can mix and match. Run your high-volume agent through a discounted enterprise contract at Provider A. Route everything else through OpenRouter’s pooled pricing. Fall back to OpenRouter’s pool when your enterprise key is rate-limited. All transparent to the calling code.
This is genuinely useful for an agency stack. It’s also where most teams misconfigure things in ways that don’t fail loudly.
The Providers tab
Providers tab — keys, priority, spend controls.
This is where the bulk of BYOK lives. Every provider — from AI21 at the top of the alphabet to Z.ai at the bottom — gets its own configuration card. Each card has two slots: Prioritized keys (tried first, before falling back to OpenRouter’s pooled access) and Fallback keys (tried last, after everything else fails).
Per-key configuration is granular. Each key has:
A name (free text — use it well, you’ll thank yourself later)
The API key value itself
An “Always use for this provider” toggle that disables OpenRouter’s pooled fallback entirely for calls routed through this key
Filters: Models (All, or a specific subset) and API Keys (All OpenRouter API keys, or a specific subset)
The filter system is the part most teams miss. You can pin a BYOK key to specific OpenRouter API keys, meaning specific agents. Read that twice. It means a single BYOK key can be the routing target for exactly one agent’s calls, while every other agent on the workspace continues using pooled access.
This unlocks a powerful pattern for agency work: a client who has their own enterprise contract with a model provider can have their work routed exclusively through that contract, billed to that contract, while your other clients use pooled pricing. The routing happens at the provider layer, invisibly to the calling code.
Prioritization and fallback in practice
Prioritization and fallback in practice.
Here’s the order of operations OpenRouter uses when you call a model:
Is there a Prioritized BYOK key for this provider, this model, and this calling key? Use it.
If that key has “Always use for this provider” enabled, return any failure as-is. Don’t fall back.
Otherwise, fall back to OpenRouter’s pooled access.
If that fails too, try any Fallback BYOK keys configured for this provider.
If everything fails, return the error.
The “Always use for this provider” toggle is a sharp edge. Enabling it means a single failed enterprise contract — expired credentials, network issue at the provider, momentary rate limit — becomes a hard failure for every call routed through that key. Disabling it gives you graceful degradation but means your enterprise contract isn’t strictly enforced.
Our pattern: enable “Always use” only for clients with hard data-policy requirements (no third-party touching of their data, ever). For everyone else, leave it disabled and let OpenRouter’s pooled access catch the failures.
The Web Search slot (Firecrawl)
The Providers tab has a second section that isn’t strictly BYOK: workspace-level Firecrawl integration. OpenRouter partnered with Firecrawl to provide 10,000 free credits per workspace, with a three-month expiry, contingent on accepting Firecrawl’s Terms of Service.
This is wired at the workspace level, not per-key. Once accepted, any plugin that uses Web Search inherits the Firecrawl integration. Cheap, useful, easy to forget you enabled it.
The mistake to avoid: assuming the 10,000 credits are forever. Three months. If you’re going to depend on this, plan for renewal.
How to think about provider selection
The temptation with dozens of providers is to spin up BYOK keys for every model you might ever want. Don’t.
Start with three categories:
Volume providers — the ones you call most. For us that’s Anthropic (Claude family) and Google (Gemini family). Worth getting BYOK keys for these even if you don’t have an enterprise contract; it makes the routing explicit and the costs auditable.
Specialty providers — ones you call for specific jobs. We use OpenAI for some specific reasoning tasks. We use specialized model providers (Stepfun, others) for niche work. BYOK keys here only if you have a contract worth routing through.
Experimental providers — everything else. Don’t bother with BYOK. Use OpenRouter’s pooled access. If a model from one of these providers becomes a regular part of your workflow, promote it to specialty.
The audit story
In March 2026 we ran a security audit on 122 Cloud Run services and discovered five of them had hardcoded OpenRouter keys in their environment variables — same key across all five. We stripped them, rotated, and re-scanned to zero.
That was an OpenRouter key, not a BYOK provider key, but the lesson generalizes: API keys do not belong in environment variables on shared infrastructure. They belong in a secret manager with audited access. GCP Secret Manager, AWS Secrets Manager, HashiCorp Vault — pick one and use it.
The standing rule we wrote afterward applies equally to BYOK provider keys: any key, any provider, any environment, lives in a secret manager. Period.
Pinning keys to agents: the operational unlock
The BYOK feature most teams underuse is the per-key filter system. You can configure a BYOK provider key to be used only by specific OpenRouter API keys.
This sounds abstract until you map it to a real workflow:
Your content production agent runs through OpenRouter key A
Your customer support bot runs through OpenRouter key B
Your enterprise client has a contract with Anthropic and wants their work routed through that contract
You create a BYOK Anthropic key for the enterprise contract. In the BYOK key’s filter, you specify “API Keys: only OpenRouter key C” (the key used by the agent serving that client). Now content production (key A) and customer support (key B) use OpenRouter’s pooled access. The enterprise client’s agent (key C) routes through the enterprise contract.
No code changes. No service restarts. Just routing config at the provider layer.
This is the kind of pattern that pays for OpenRouter’s existence in the stack. Most teams discover it only after they’ve outgrown a simpler setup. Start with it from day one if your shape looks anything like an agency.
What to do today
If you’re getting started with BYOK on OpenRouter:
Identify the two or three providers you call most. Get BYOK keys for those.
Store every key in a secret manager. Not in code. Not in env vars on shared infra.
Use the per-key filter system from the start. Don’t let one BYOK key get used by every agent unless you actually want that.
Leave “Always use for this provider” off unless you have a hard policy reason to enforce it.
Set a calendar reminder for any time-limited credits (looking at you, Firecrawl).
The BYOK system is one of the genuinely useful features on the platform. Treat it like the routing layer it is, not like a credentials dump, and it’ll pay for the setup time many times over.
Frequently asked questions
What is BYOK on OpenRouter?
BYOK (Bring-Your-Own-Key) on OpenRouter means configuring direct provider credentials for any supported provider. OpenRouter then routes calls through your provider key instead of (or before falling back to) its pooled access. You can configure prioritization, fallback chains, and per-agent pinning.
Should I use BYOK on OpenRouter even without an enterprise contract?
For the providers you call most, yes. Even without a discount, BYOK makes the routing explicit and the costs auditable on your provider’s billing rather than buried in OpenRouter’s aggregate. For providers you barely call, don’t bother — OpenRouter’s pooled access is simpler.
What does “Always use for this provider” actually do?
It disables OpenRouter’s pooled fallback for any call routed through that BYOK key. If your enterprise contract fails for any reason — expired credentials, rate limit, network issue — the call returns the error instead of silently falling back to OpenRouter’s pool. Useful for hard data-policy requirements; risky for general reliability.
Can I pin a BYOK key to specific agents?
Yes. The per-key Filters section lets you specify which OpenRouter API keys (meaning which agents) can route through this BYOK key. This unlocks the pattern of running one client’s work through their enterprise contract while every other agent uses pooled access — all transparent to the calling code.
How should I store BYOK provider keys?
In a secret manager — GCP Secret Manager, AWS Secrets Manager, HashiCorp Vault. Never in environment variables on shared infrastructure. We learned this from a March 2026 audit that found five Cloud Run services with hardcoded keys baked into env vars. Standing rule now: any key, any provider, any environment, lives in a secret manager.
The OpenRouter hierarchy in one sentence: Organizations contain Workspaces, Workspaces enforce Guardrails on API Keys, Keys call Presets, and Presets bundle prompts and models. Every operational decision you’ll ever make on the platform lives at exactly one of those five layers. Confuse them and you’ll spend hours looking for settings that live somewhere other than where you think.
This is a companion to our OpenRouter operator’s field manual. The field manual covers why we use the platform and how it fits a fortress stack. This deep dive covers the mental model itself — the five-layer hierarchy that makes everything else legible.
Why this matters before anything else
Why the mental model matters before anything else.
OpenRouter’s UI presents a flat menu. The actual product is a hierarchy. Every operational decision you’ll ever make — who pays, what’s allowed, who’s allowed to call what, which model gets used — lives at exactly one of five layers. Get the layers wrong and you’ll wire your stack against the wrong nouns.
The five layers, top to bottom: Organization → Workspace → Guardrail → API Key → Preset.
Here’s what each one actually does and when you should care.
Layer 1: Organization
Organization and workspace layers.
Sovereign billing. Sovereign member context. The top of the world.
Each Organization has its own balance, its own billing details, and — critically — its own member roster. The catch: personal orgs don’t expose Members management. If you want to add teammates, you need a non-personal org.
In our case we run two: a personal org tied to our primary email, and a Tygart Media org for agency operations. The personal org has 48 API keys and a working balance. The Tygart Media org is empty so far. Members management is the reason it exists.
When to think about this layer: when you’re deciding whether to operate as an individual or as a team. If you’re solo and plan to stay solo, one personal org is fine forever. The moment you bring on a collaborator who needs their own keys and their own observability slice, you need a non-personal org.
The mistake to avoid: running an agency out of a personal org. You’ll hit member-management limits at the worst possible time.
Layer 2: Workspace
Segmented guardrail, BYOK, routing, and preset domains inside an organization.
By default, every org gets one Default Workspace. Most accounts never think about this layer. The moment you operate across multiple businesses with different data policies, multiple workspaces become valuable.
Example: a healthcare client’s data should never touch first-party Anthropic, only Bedrock or Vertex. A consumer comedy site can use any provider. A B2B SaaS client wants Zero Data Retention enforced on every call. Three different fortress postures. Three workspaces.
Each workspace gets its own Guardrail config, its own BYOK provider keys, its own routing defaults, and its own preset library. Keys created in one workspace can’t see resources in another.
When to think about this layer: when you have two or more clients with materially different data policies. If everything you do has the same posture, one workspace is fine.
The mistake to avoid: assuming workspace segmentation is a security boundary. It isn’t, exactly — it’s a policy boundary. Someone with org-level access can move between workspaces freely. Workspaces are for organizing intent, not for isolating threats.
Layer 3: Guardrails
Guardrails before routing.
The actual enforcement layer. Four categories, all configurable per workspace, all unconfigured by default.
Budget Policies are the most useful and the most underused. Set a credit limit in dollars and a reset cadence (Day, Week, Month, Year, or N/A). Hit the limit and calls fail until the cadence resets. This is your protection against the runaway loop that drains a balance overnight.
Model and Provider Access is where data-policy posture lives. Toggles for Zero Data Retention enforcement, Non-frontier ZDR, first-party Anthropic on or off (with Bedrock and Vertex always staying available), first-party OpenAI on or off (Azure stays), Google AI Studio on or off (Vertex stays), and three categories of paid and free endpoints with different training and publishing behaviors. There’s also an Access Policy mode (Allow All Except is the useful one) with explicit Blocked Providers and Blocked Models lists. The live Eligibility view shows you which providers and models are actually callable given your current policy.
Prompt Injection Detection runs regex-based detection on inbound prompts. OWASP-inspired patterns. Four modes: Disabled, Flag, Redact, or Block. Free and adds no measurable latency. Worth enabling on every workspace that touches user input.
Sensitive Info Detection runs pattern matching on prompts and completions. Built-in patterns for Email, Phone, SSN, Credit Card, IP address, Person Name, and Address. The latter two add latency. Custom regex patterns supported. A sandbox to test patterns before deploying. Useful for any workspace that processes customer data.
When to think about this layer: every workspace, day one. Default-unconfigured is not a safe state. Set a budget cap before you do anything else.
The mistake to avoid: treating Guardrails as something you’ll get to “later.” Later is after the runaway loop has drained the balance.
Layer 4: API Keys
Per-agent identity. Each key has its own credit cap, its own reset cadence, and its own guardrail overlay.
The mental model that matters: one autonomous behavior, one key. When a scheduled task starts hemorrhaging tokens, the cap on its key contains the damage. The other 47 keys keep working.
Our 48-key distribution is instructive. One testing key has spent $83.26. One development key has spent $33.05. The remaining 46 keys have collectively spent less than $120. That’s the shape of real AI operations: a few keys do most of the work, and a long tail barely moves the needle. Per-key caps make that distribution visible and bounded.
API keys also carry the BYOK relationship. A bring-your-own provider key can be pinned to specific API keys, meaning specific agents. That lets you route a high-volume internal agent through a discounted enterprise contract while letting one-off testing keys fall through to OpenRouter’s pooled pricing. We cover this in depth in BYOK on OpenRouter.
When to think about this layer: when you create any new autonomous behavior. New behavior, new key, new cap. No exceptions.
The mistake to avoid: sharing one key across all your services. The first runaway loop will be the last thing that one key ever does, and the blast radius will be everything else that depended on it.
Layer 5: Presets
Versioned bundles of system prompt, model, parameters, and provider configuration. Called as "model": "@preset/your-preset-name" in any API call.
Three tabs per preset: Configuration (the actual bundle), API Usage (how it’s been called), and Version History (every change, rollback-able).
This is the closest OpenRouter comes to a software release artifact. You can ship a preset, test it in chat, version it, and roll back if v2 turns out to be worse than v1. Code that calls the preset stays the same; only the preset content changes.
For autonomous behavior systems this is the unlock. A behavior’s behavior — its prompt, its model choice, its temperature — becomes a thing you can version and review like code, without touching the code that calls it. Promotion ledger says a behavior is graduating from one tier to the next? You publish a new preset version with tighter constraints and the calling code never changes.
When to think about this layer: the moment you have any system prompt that’s used in more than one place, or that you’ll want to refine over time. If you’ve never copy-pasted a system prompt between two scripts, you don’t need presets yet.
The mistake to avoid: putting the system prompt in the calling code. Every prompt update becomes a deploy. With presets, prompt updates become config changes.
Putting the layers together
Here’s the mental model in one sentence: Organizations contain Workspaces, Workspaces enforce Guardrails on Keys, Keys call Presets, Presets bundle prompts and models.
If you walk into OpenRouter looking for a setting and you can’t find it, ask which of the five layers it should logically live at. The answer almost always tells you where to look.
If you’re building a new integration, start at the bottom. Pick a model. Build a preset around it. Create a dedicated key with a tight budget cap. Sit that key under a workspace with sensible guardrails. The organization is just the billing wrapper.
The whole point of the hierarchy is that each layer constrains the one below it. The organization caps the workspace. The workspace caps the keys. The keys cap the presets they can call. Errors propagate up; permissions cascade down. That’s the model. Everything else is UI.
Frequently asked questions
What are the five layers of OpenRouter?
Organization, Workspace, Guardrails, API Keys, and Presets. Organizations handle billing and members. Workspaces segment policy domains. Guardrails enforce budget, provider access, prompt injection, and sensitive info rules. API Keys are per-agent identity with per-key caps. Presets are versioned bundles of system prompt, model, and parameters.
Do I need multiple Workspaces in OpenRouter?
Only if you operate across businesses with materially different data policies. A single Default Workspace is fine for most accounts. The moment a healthcare client requires Bedrock-only access while a consumer client can use any provider, workspace segmentation becomes valuable.
What is the right way to use OpenRouter Presets?
Treat them like software release artifacts. Bundle the system prompt, model, parameters, and provider config. Version every change. Test new versions in chat before promoting. Code that calls the preset stays the same; only the preset content evolves. This lets you refactor prompt behavior without redeploying.
Are OpenRouter Workspaces a security boundary?
No. They’re a policy boundary, not a security boundary. Someone with organization-level access can move between workspaces freely. Use workspaces to organize intent and enforce different fortress postures across clients — not to isolate threats from each other.
What happens if I don’t configure OpenRouter Guardrails?
By default every workspace has zero enforced budget cap, zero provider restrictions, and zero PII filtering. That’s fine for prototyping. It’s not fine for production. Set a budget cap on every workspace as the first action. The other three guardrail categories you can configure as you scale.
What OpenRouter actually is: A routing and policy layer that sits between your code and AI model providers. It replaces the place where you’d otherwise write direct API calls to Anthropic or Vertex AI, adding budget caps, guardrails, prompt-injection filtering, PII redaction, model fallbacks, and observability hooks — with access to hundreds of models behind one unified endpoint. It does not replace your memory system, your hosting environment, your operator console, or the models themselves.
The 30-second version
OpenRouter is one of the most useful AI infrastructure tools we’ve adopted, but the value lives at exactly one layer of the stack: the model-calling layer. It replaces the place where you’d otherwise write fetch("https://api.anthropic.com/...") or call Vertex AI directly. It does not replace your memory system, your hosting environment, your operating console, or the models themselves. Get that framing wrong and you’ll build a house of cards. Get it right and you’ve added budget controls, guardrails, observability, and hundreds of models with one config change per agent.
This is how we use it across a stack that runs 27+ WordPress client sites, autonomous content pipelines, multi-model decision tools, and an autonomous behavior promotion system. None of this is theory. Every number in this article comes from our own usage logs.
What OpenRouter actually is
What OpenRouter actually is — a router, not a model.
Strip away the marketing and OpenRouter is a routing and policy layer for AI model calls. You point your code at one endpoint — openrouter.ai/api/v1/chat/completions — and OpenRouter handles model selection, provider fallback, budget enforcement, content filtering, and observability.
It is not a model. It is not a runtime. It is not a database. It is a smarter middle layer between your code and the dozens of providers whose models you might want to call.
The mistake we almost made early on was framing it as “replace GCP and Notion with this.” That framing is wrong in a specific way that’s worth naming: OpenRouter has no servers, no operational memory, no execution environment, no isolated network. It has hundreds of models behind one API and a thoughtful policy layer in front of them. That’s the entire product, and it’s enough — at the right layer.
The 5-layer hierarchy nobody tells you about
The five-layer hierarchy nobody tells you about.
When you log into OpenRouter, the UI presents a flat set of menus. The actual mental model — the one that maps to real operational decisions — is a five-layer hierarchy:
Organization is the top. Sovereign billing and member context. We run two: one personal, one for Tygart Media. The personal org has 48 API keys and a balance; the Tygart Media org has empty balance but exposes Members management that personal accounts can’t access. If you’re operating as an agency, you want the agency org as primary so you can add seats.
Workspaces sit inside organizations. They’re segmented domains for guardrails, BYOK provider keys, routing rules, and presets. Most accounts run on a single Default Workspace and never think about this layer. The moment you operate across multiple businesses with different data policies, workspace segmentation becomes a real decision.
Guardrails are workspace-level enforcement policies. Four categories: Budget Policies, Model and Provider Access, Prompt Injection Detection, and Sensitive Info Detection. By default they’re all unconfigured, which means your workspace has no enforced budget cap, no provider restrictions, and no PII filtering. This is fine until it isn’t.
API Keys are per-agent identity. Each key carries a credit cap, a reset cadence, and a guardrail overlay. The mental model that matters: one autonomous behavior = one API key. If a scheduled task starts hemorrhaging tokens, the cap on its key contains the damage to that key alone.
Presets are versioned bundles of system prompt, model, parameters, and provider config. You call them as "model": "@preset/name" in any API call. They’re the closest thing OpenRouter has to a software release artifact — a thing you can version, test, and roll back.
That hierarchy is the entire operational surface. Everything you’d want to do with the platform happens at one of those five layers. Confuse them and you’ll spend hours hunting for a setting that lives at a different tier than you think.
What OpenRouter replaces (and what it doesn’t)
The honest answer: OpenRouter replaces the direct API call. Nothing more, nothing less.
In our case, every scheduled task, every skill that calls a model, every Claude Project — all of them used to make direct calls to Anthropic’s API or Vertex AI. OpenRouter sits in front of those calls and adds budget caps, guardrails, prompt-injection filtering, PII redaction, model fallbacks, observability hooks, and access to a model catalog of hundreds of options instead of the handful any single provider exposes.
What it does not replace:
Your memory system. Notion remembers; OpenRouter doesn’t. OpenRouter’s logs are call-level telemetry — what model was called, what it cost, what the response was. That’s not operational memory. It can’t tell you “this customer pitch was sent three weeks ago and got no response.” For that, you need a real second brain.
Your hosting environment. OpenRouter has no servers, no WordPress, no database, no VPC. If you’re running a fortress architecture on GCP — VPC isolation, Cloud SQL, Cloud Run services — none of that goes away. OpenRouter sits next to that infrastructure, not in place of it.
Your operator console. Wherever you actually do the work — Claude in chat, your terminal, your IDE — that surface stays. OpenRouter is a transport layer for model calls, not a place you live.
The models themselves. OpenRouter is one path to reach Anthropic’s Claude; Vertex AI is another; the direct Anthropic API is a third. They’re interchangeable transports. The model is the model.
Mapping OpenRouter to an autonomous behavior system
Here’s where the framing gets interesting. We run an autonomous behavior system where every long-running task — a scheduled content pipeline, an SEO audit, a publishing job — sits on a promotion ledger that tracks its trustworthiness over time. Tier C behaviors run autonomously. Tier B requires a human in the loop. Tier A is proposal-only.
OpenRouter maps to that system with almost no friction:
Each behavior becomes a versioned Preset — system prompt, model, parameters, all bundled and versioned.
Each preset is bound to its own API Key with a monthly credit cap and reset cadence.
That key sits under a Workspace whose Guardrail enforces the appropriate data policy.
Observability is broadcast to a webhook that writes back to the operational memory layer.
The result: when a behavior misbehaves — hits its spend cap, trips a policy violation, gets blocked by Sensitive Info Detection — the failure is auto-logged at the routing layer and surfaced to the operator console. The promotion ledger row catches the gate failure and demotes the behavior automatically.
This is the concrete answer to a question every operator running autonomous AI work eventually asks: how will I know when something goes wrong? The answer is: you build the routing layer so that going wrong is itself a signal.
The 270/238 reality check
A small piece of grounding before we go further. As of mid-May 2026, our personal OpenRouter org showed a balance of $31.93 remaining of $270 total credits purchased. That’s $238.07 of actual usage across roughly two months. Spread across 48 API keys, that’s an average of about $5 per key.
The highest-spend key was a testing key at $83.26. The next was a development key at $33.05. Most keys had spent less than $1. That distribution tells you something true about real-world AI operations: a handful of behaviors do most of the work, and the long tail of agents barely registers.
We mention this for one reason: if you’re evaluating OpenRouter, the cost is not the story. The cost is small. The story is whether the policy layer is worth wiring into your stack. Our answer is yes — but the work of wiring it is real, and it requires you to first understand what layer you’re wiring.
The Cloud Run reality
One real-world note that any production team needs to internalize: when we ran AI calls from Cloud Run services on GCP, we occasionally hit 402 responses from OpenRouter that we did not hit when calling Anthropic’s API directly from the same services. We don’t have conclusive evidence of where the issue originated — Cloud Run’s egress IP ranges are widely shared and trip fraud-detection thresholds at many providers, including direct calls to first-party APIs. The lesson is not about OpenRouter specifically. The lesson is that production routing requires deployment-context testing.
Our policy now: for services where reliability is mission-critical, we maintain a fallback path that can switch routing layers under failure. OpenRouter is the default. Direct Anthropic is the fallback. The decision logic lives in the service itself, not in OpenRouter’s config. This is defense in depth, not a critique of any one provider.
The standing rule we wish we’d had earlier
The standing rule we wish we had earlier: budgets before routing.
In March 2026 we ran a security audit on 122 Cloud Run services and discovered five of them had hardcoded OpenRouter API keys baked into environment variables — all sharing the same key. We stripped the keys, rotated, and re-scanned to zero. Then we wrote a standing rule into operational memory:
OpenRouter is off-limits for any task without explicit per-task permission. Image generation always goes through Vertex AI.
The reason for the second half of that rule deserves naming. Image generation via OpenRouter is technically possible, and the model variety is appealing. But image calls are expensive, latency-sensitive, and easy to fire by accident in a loop. One misconfigured behavior can drain a development budget in a single session. Vertex AI’s first-party image generation runs through GCP service accounts with project-level budget alerts, which gives us a natural circuit breaker. We use OpenRouter for the right jobs. We use Vertex for image work.
This is the kind of operational rule you only write after you’ve lost money to a runaway script. Save yourself the lesson.
When OpenRouter is the right answer
Use OpenRouter when:
You want model variety and a unified API across providers
You need workspace-level budget caps that work across many keys
You want PII detection and prompt-injection filtering at the routing layer instead of in every service
You need observability broadcast to your existing stack (we ship to webhooks)
You’re running an autonomous behavior system that needs per-agent identity and per-agent budget enforcement
You want the option to swap models without redeploying code
When it isn’t
Don’t reach for OpenRouter when:
You only call one model from one app and don’t need policy enforcement
You need single-digit-millisecond latency (the extra hop matters)
You’re running image generation at scale (use the first-party provider directly)
You need network isolation guarantees that only your own infrastructure can provide
You’re deploying from an environment with shared egress IPs to a provider that flags those ranges (test first)
The bottom line
OpenRouter is excellent at exactly one thing: being a thoughtful policy layer between your code and the AI models you call. Don’t ask it to be more than that. Don’t replace your memory, hosting, console, or models with it. Wire it into the model-calling layer of an existing system that already has those other pieces sorted, and you get budget controls, guardrails, observability, and hundreds of models with about a day’s worth of integration work.
The framing that works: the model layer of an existing system. Not the system itself.
If you’re operating multiple autonomous AI behaviors and you don’t yet have per-agent budget caps and per-agent observability, OpenRouter is probably the fastest path to getting them. If your stack is one app calling one model, you’re paying for complexity you don’t need yet.
Going deeper
This pillar is the operator’s overview. Each of the five layers and the major workflows we built on top of OpenRouter has its own deep dive:
OpenRouter is a routing and policy layer for AI model API calls. It sits between your application code and AI providers like Anthropic, OpenAI, and Google, providing one unified API endpoint that handles model selection, budget enforcement, guardrails, fallback routing, and observability across hundreds of models from dozens of providers.
Does OpenRouter replace direct Anthropic or OpenAI API calls?
Yes, that’s exactly what it replaces. Your code calls one endpoint (openrouter.ai/api/v1/chat/completions) instead of provider-specific endpoints. The model is selected via a parameter rather than the URL. Everything else about your stack — your memory system, hosting, and operator console — stays the same.
Can OpenRouter replace GCP, Notion, or my hosting infrastructure?
No. OpenRouter is a routing layer for model calls. It has no servers, no database, no operational memory, and no network isolation. If you’re running a fortress architecture on GCP with VPC isolation, Cloud Run services, and Cloud SQL, OpenRouter sits alongside that infrastructure, not in place of it.
How expensive is OpenRouter in practice?
For most operational workloads the platform fee is negligible compared to the underlying model costs. Our personal organization spent $238 over roughly two months across 48 API keys serving multiple autonomous behaviors. The distribution is heavily skewed — a few keys do most of the work, and the long tail barely registers. Cost is rarely the decision factor; the policy layer is.
What is the right way to think about OpenRouter API keys?
One autonomous behavior, one key. Each key gets its own credit cap and reset cadence. When a scheduled task starts hemorrhaging tokens, the cap on its key contains the damage to that key alone. Sharing one key across all services is the single fastest way to lose visibility and bound risk.
Should I use OpenRouter for image generation?
We don’t. Image generation runs through first-party providers (Vertex AI in our case) where project-level budget alerts give a natural circuit breaker. Image calls are expensive, latency-sensitive, and easy to fire by accident in a loop. The routing layer is for text-completion workloads where the policy benefits compound.
What’s the deal with Cloud Run and OpenRouter 402 errors?
Cloud Run egress IP ranges are widely shared, and they sometimes trip fraud-detection thresholds at various providers — including direct calls to first-party APIs, not just OpenRouter. The lesson is that production routing requires deployment-context testing. Maintain a fallback path that can switch routing layers under failure, and you’ve got defense in depth instead of a single point of failure.