Tag: AI Tools

  • AI Release Timeline: Why We Built an Interactive Tracker

    AI Release Timeline: Why We Built an Interactive Tracker

    The Failure of the Spreadsheet

    For the first two years of the “model wars,” a shared Google Sheet was enough. We tracked parameters, context window sizes, and pricing updates for GPT-4, Claude 2, and the early Gemini iterations. It was a manual process, but it worked. One of our engineers would spend thirty minutes on a Friday morning updating rows, and the team would have a stable reference for the week’s client strategy sessions.

    Then came April 2026. In the span of four weeks, the spreadsheet didn’t just become outdated; it became a liability. When Anthropic dropped Claude Opus 4.7 on April 16, followed immediately by OpenAI’s GPT-5.5 release, and then the surprise “Claude Mythos Preview” teaser, the logic of our rows and columns collapsed. By the time Google announced Gemini 3.5 Flash on May 19 at I/O, we realized we were spending more time formatting cells than analyzing the actual implications of the models.

    The pace of the ai release timeline has moved beyond manual curation. We didn’t need a prettier document; we needed a functional piece of infrastructure. This is why we stopped updating the sheet and started building a custom, interactive AI release timeline directly into the Tygart Media site using Antigravity and React.

    The April/May 2026 Compression

    To understand why a static tracker fails, you have to look at the density of releases in the second quarter of 2026. We are no longer in a “once every six months” cycle. We are in a “twice a week” cycle. The technical debt of staying current is mounting for every digital agency and AI operator.

    • April 16, 2026: Anthropic releases Claude Opus 4.7. This wasn’t just a performance bump; it introduced a native “Artifacts 2.0” layer that changed how we architected frontend deployments.
    • April 2026 (Late): OpenAI responds with GPT-5.5. The reasoning capabilities jumped, but the latency made it unusable for real-time agentic workflows.
    • May 5, 2026: OpenAI follows up with GPT-5.5 Instant. This corrected the latency issues of the previous month, effectively deprecating the “standard” 5.5 for most of our production use cases within 15 days.
    • May 19, 2026: Google releases Gemini 3.5 Flash. This model optimized the “long context” utility that we rely on for codebase analysis, offering a 2M token window at a fraction of the previous cost.

    When you have tracking ai models as a core part of your operations, you can’t rely on a tool that requires a human to “decide” where a release fits. You need a system that visualizes the overlap, the deprecation cycles, and the specific utility of each branch.

    Why a Custom Tool?

    We looked at off-the-shelf timeline plugins and SaaS “roadmap” tools. Most of them are built for marketing—they prioritize “clean” visuals over data density. For an AI strategy firm, “clean” is often the enemy of “useful.” We needed to see the tygart media ai timeline as a heat map of capability jumps, not just a list of dates.

    We chose to build a custom tool for three reasons:

    1. Component Integration: We wanted the timeline to pull directly from our internal Antigravity component library, ensuring that the UI matched our existing dashboard architecture.
    2. Programmatic Ingestion: We needed a way to feed the timeline via CLI tools rather than a CMS backend.
    3. State Management: In the heat of May 2026, we needed to filter by “multimodal,” “latency-optimized,” and “reasoning-heavy” models. Most third-party tools don’t support that level of granular state.

    The Stack: React, Framer Motion, and Antigravity

    The technical core of the timeline is a React application wrapped in Framer Motion for the layout transitions. We chose Framer Motion not for flashy animations, but for its layout projection capabilities. When a user filters the timeline from “All Models” to just “Claude 4.7 release” and its related iterations, the remaining nodes need to reorganize themselves without losing the user’s temporal context.

    The design system is powered by Antigravity, our internal framework for building high-density utility tools. Antigravity allows us to define “tokens” for different model families (Anthropic, OpenAI, Google, Meta). This ensures that as the ai release timeline grows, the visual language remains consistent. A “Preview” release like Claude Mythos has a specific dashed-border treatment defined in the system, while a “Stable” release like Gemini 3.5 Flash uses a solid high-contrast fill.

    
    // A simplified look at the release node structure
    const ReleaseNode = ({ model, date, type }) => {
      return (
        <motion.div 
          layout
          className={`node-${type}`}
          initial={{ opacity: 0 }}
          animate={{ opacity: 1 }}
        >
          <Tag color={getBrandColor(model.brand)}>{model.name}</Tag>
          <h4>{model.version}</h4>
          <p>{model.summary}</p>
        </motion.div>
      );
    };
    

    Data Ingestion: From Scraping to Structured JSON

    One of the biggest failures of our initial spreadsheet was the “copy-paste” error rate. Reading a 4,000-word release note from Google I/O and trying to summarize it into a cell is a recipe for hallucination or omission. To solve this, we moved to an automated ingestion pipeline using Claude Code and the Gemini CLI.

    When a new model drops, we pipe the official announcement text through a Gemini CLI script. The script is prompted to identify specific keys: Release Date, Model Name, Context Window, Pricing per 1M tokens, and “Primary Capability Change.” The output is a structured JSON object that we commit directly to the repository. The React frontend then consumes this JSON to render the timeline.

    This “Operator Mindset” approach means that the person “updating” the timeline isn’t writing marketing copy. They are validating data that has been extracted directly from the source. It removes the “hype” and leaves us with the specs.

    Technical Challenges: Performance and Overlap

    Building an interactive timeline sounds straightforward until you hit a “Hot Week.” The week of May 4, 2026, was a nightmare for our layout engine. We had GPT-5.5 Instant, a mid-cycle update from Mistral, and the first leaks of the Mythos preview all hitting within 72 hours.

    In a standard vertical timeline, these nodes stack on top of each other, creating a “scroll-hole.” We had to implement a collision detection algorithm in the React component. If two releases occur within the same 48-hour window, the timeline branches horizontally. This allows the user to see the “clash” of models visually. It reflects the reality of the market: these models are competing for the same headspace at the same time.

    We also struggled with SVG performance. We initially tried to draw connecting lines between “parent” and “child” models (e.g., GPT-5.5 to GPT-5.5 Instant). As the timeline grew to over 50 nodes, the browser’s paint time started to lag. We eventually moved to a canvas-based background for the connecting lines, keeping the nodes as interactive DOM elements. It’s a bit more complex to maintain, but it keeps the interaction at 60fps.

    Design Decisions: Usefulness Over Aesthetics

    In the Pacific Northwest, we tend to favor restraint. We applied this to the UI. We stripped out the brand logos and replaced them with high-contrast color codes. We removed the “hero images” that usually accompany these releases. If you are an architect looking at our timeline, you don’t need to see a picture of a glowing brain; you need to see the context window and the date.

    One of the most debated features was the “Impact Score.” We originally wanted to rank models on a scale of 1-10. We killed that idea in the second week of development. “Impact” is subjective. Instead, we added a “Primary Use Case” filter. If you’re building a coding agent, the “Impact” of Gemini 3.5 Flash’s 2M context window is much higher than a reasoning-heavy model with a 128k window. Our design allows the user to define what matters to them.

    Failures in Automation

    We aren’t afraid to show where we tripped. Our first attempt at the timeline was 100% automated. We had a CRON job that searched for “new model release” and tried to update the JSON automatically. It was a disaster.

    On May 5, the bot picked up a parody post on X (formerly Twitter) about a “GPT-6 Super-Intelligence” and added it to the timeline. It took us six hours to notice and remove it. We learned that while extraction should be automated, verification must remain human. We now use a “Human-in-the-loop” (HITL) system. The Gemini CLI generates the draft JSON, but it requires a git commit by an engineer to actually go live. This balance is what keeps the tool reliable.

    The Result: An Operator’s View

    The interactive timeline has changed how we talk to clients. Instead of saying, “Things are moving fast,” we can show them the exact density of the claude 4.7 release cycle compared to the previous version. We can show them why we shifted their infrastructure from GPT-5.5 to GPT-5.5 Instant in a matter of days. It provides a visual justification for the agility we build into our systems.

    It’s no longer a “project.” It’s a living part of the Tygart Media stack. It serves as a reminder that in the AI era, your documentation tools must be as scalable and automated as the models themselves.

    What You Should Do Tomorrow

    If you are still tracking AI updates in a spreadsheet or a Notion gallery, you are already behind. You don’t necessarily need to build a custom React app, but you do need to change your process.

    • Step 1: Stop writing manual summaries. Use a CLI tool (Gemini or Claude) to extract the technical specifications from release notes. Create a structured format (JSON or CSV) that remains consistent.
    • Step 2: Define your “Production Stack.” Don’t track every model; track the ones that actually affect your operations. If you aren’t using Llama 3 on-prem, don’t let it clutter your primary view.
    • Step 3: Visualize the overlap. Whether you use a simple Mermaid.js chart in your internal wiki or a custom tool, you need to see when models are released in parallel. It helps you understand which “generation” of technology you are currently building on.

    The chaos isn’t going away. The only variable is how much of it you choose to automate.

    Related on Tygart Media: Claude 4.6 vs GPT-5 · Anthropic agent layer · AI operator’s stack.

  • AI Orchestration Tools: Claude Code vs Antigravity

    AI Orchestration Tools: Claude Code vs Antigravity

    The Shift from Solitary Agents to Orchestrated Systems

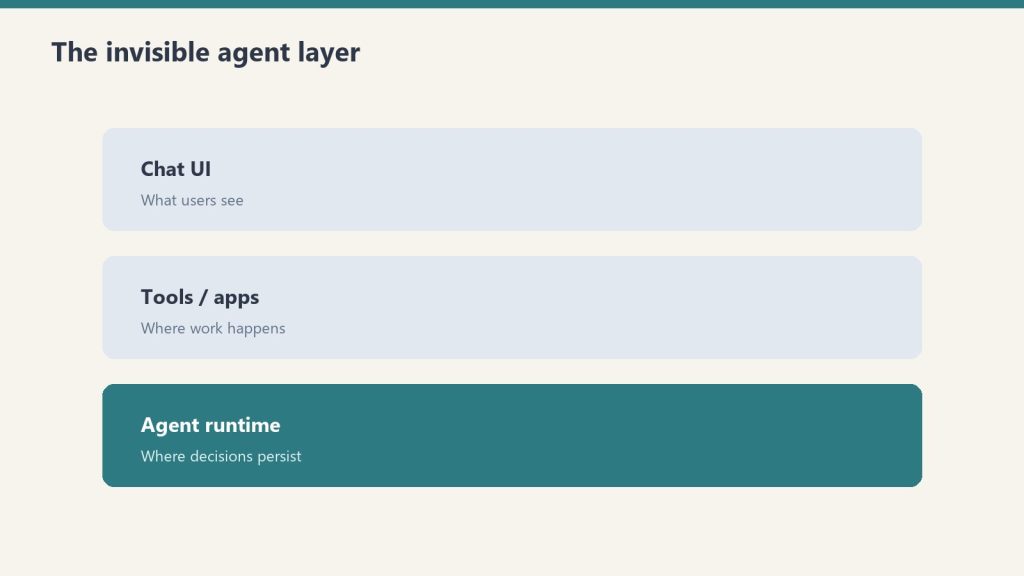
    Three stacked layers: chat UI, tools, agent runtime
    From solitary agents to orchestrated systems.

    By May 2026, the novelty of “chatting” with an AI has vanished. For technical operators and systems architects, the conversation has moved from prompt engineering to orchestration. We no longer ask an agent to “write a script”; we deploy stacks that monitor state, reconcile data across disparate platforms, and execute complex workflows without human intervention unless a threshold is breached. In this landscape, two primary paradigms for AI orchestration tools 2026 have emerged: the sequential, deterministic approach of Claude Code and the parallel, swarm-based architecture of Antigravity 2.0.

    The “operator’s reality” in 2026 is that building a single agent is a hobby; building a three-layer stack is a business. This stack—composed of Notion as the human-readable “Eyes,” Google Cloud Platform (GCP) as the “Headless Engine,” and tools like Claude Code or Antigravity as the “Hands”—has become the standard for scalable automation. The challenge isn’t getting the AI to do the work; it’s the reconciliation. It’s ensuring that what the agent thinks it did in the terminal matches what the business sees in its records. This is the breakdown of how these tools operate in the field.

    Claude Code: The Sequential Conductor

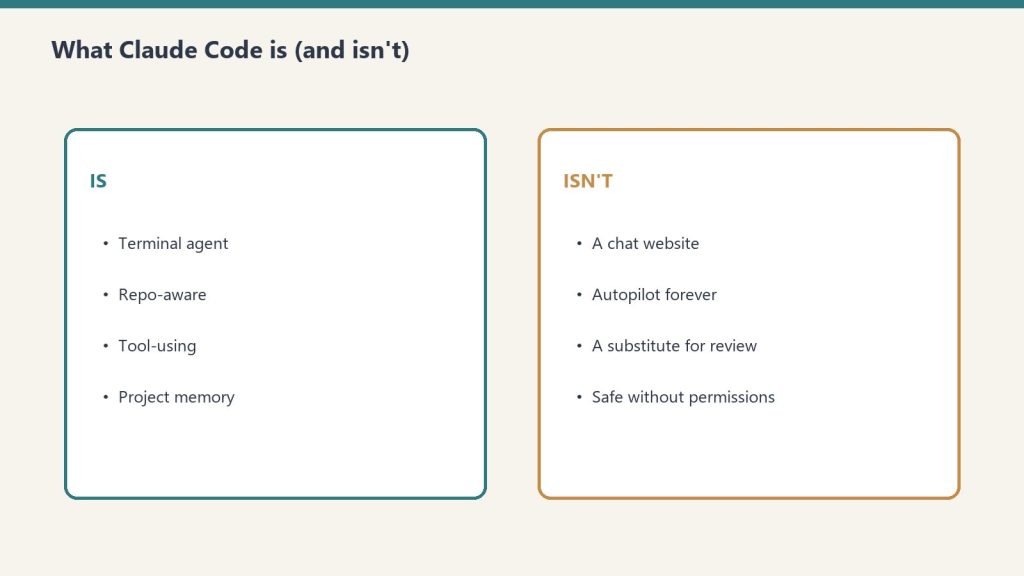
    Side-by-side cards defining what Claude Code is and is not
    Claude Code — the sequential conductor.

    Claude Code remains the gold standard for high-precision, terminal-first execution. It operates as a “Senior Engineer” archetype. When you initialize a session in a repository, it doesn’t just guess; it indexes the environment, maps dependencies, and proceeds with a surgical, step-by-step logic that requires human verification for high-impact changes.

    In our tests, Claude Code’s primary strength is its determinism. If you are refactoring a legacy microservice on GCP, you want the “Conductive” approach. You want the agent to read the logs, propose a fix, and wait for your y/n confirmation before it pushes to production. It is a tool of restraint. Its CLI-native interface is designed for the developer who lives in the terminal, using a local context window to ensure that every line of code written is idiomatically consistent with the existing codebase.

    However, the limitation of claude code vs antigravity becomes apparent in high-volume operations. Claude Code is sequential. It is one agent, one terminal, one task. It is brilliant at fixing a bug; it is slow at managing a fleet of 500 social media accounts or reconciling 10,000 line items across a multi-region inventory system. For that, you need a different architecture.

    Antigravity 2.0: The Parallel Swarm

    Antigravity 2.0, released earlier this year, takes the opposite approach. It is built on “Swarm Intelligence.” Instead of a single conductor, Antigravity deploys a Mission Control UI that manages dozens of “worker” agents simultaneously. These agents don’t wait for your confirmation at every step; they use browser verification to “see” their results in real-time and self-correct based on the visual state of the web or a GUI.

    If Claude Code is the surgeon, Antigravity is the construction crew. In a recent deployment for a logistics client, we used Antigravity to monitor carrier pricing across 15 different portals. A single Claude Code instance would have taken hours to cycle through these sequentially. Antigravity spun up 15 parallel swarms, each with its own browser instance, scraped the data, verified the pricing against the contract terms (using its internal visual verification), and updated the database in under four minutes.

    The Mission Control UI is the differentiator. While Claude Code users are staring at a scrolling terminal, Antigravity users are looking at a dashboard of active swarms. You can see which agents are “thinking,” which are “verifying,” and which have hit a roadblock. It is designed for multi-agent orchestration at scale, where the operator’s role shifts from “approver” to “overseer.”

    The Three-Layer Stack: Eyes, Brain, and Hands

    Desk with laptop, checklist notebook, and billing card ready before creating an Anthropic API key
    Three-layer stack — eyes, brain, hands.

    The most effective systems we’ve built this year don’t rely on a single tool. They use what we call the “Rare Three-Layer Stack.” Most people pick one layer and wonder why their automation is brittle. The real power is in the reconciliation of these three components:

    Layer 1: The Eyes (Notion AI Agents)

    Notion is no longer just a document store; it is the synthesis layer. We use notion ai agents to serve as the “Eyes” of the operation. These agents monitor our project databases, meeting notes, and strategy docs. They synthesize the human intent. If a project manager changes a status in Notion from “Draft” to “Ready for Deployment,” the Notion agent detects this change and sends a signal to the next layer. It provides the human-readable visibility that a terminal lacks.

    Layer 2: The Headless Engine (GCP)

    The “Brain” or “Engine” lives in GCP. We use Cloud Functions and Firestore to maintain the “Source of Truth.” This is where the business logic resides. When the Notion agent signals a status change, GCP processes the rules: Does this change require a security audit? Does it fit the budget? It maintains the state of the entire system, acting as a headless automation layer that doesn’t care about the UI.

    Layer 3: The Hands (Claude Code / Antigravity)

    Finally, the “Hands” execute the work. If the task is a surgical code update, GCP triggers a Claude Code session via a webhook. If the task is a wide-scale data migration or a browser-based workflow, it triggers an Antigravity swarm. These are the connective hands that read from the engine and write to the external world.

    The Reconciliation Ledger: Solving Agent Drift

    The biggest failure we see in agentic ai implementation is “drift.” Drift occurs when an agent performs an action (the Hands), but the state isn’t updated in the record (the Eyes), or the engine (the Brain) loses track of the execution.

    To solve this, we implemented a “Reconciliation Ledger.” Every action taken by a Claude Code or Antigravity instance must be logged back to a Firestore collection with a unique transaction ID. The Notion agent then periodically “audits” the ledger. If Antigravity reports that it updated 500 records, but the GCP database only shows 498 changes, the Notion agent flags a “reconciliation error” and alerts a human operator.

    Without this ledger, multi-agent orchestration is a recipe for silent failure. We’ve seen swarms enter infinite loops because they couldn’t verify their own success, racking up thousands of dollars in API costs before anyone noticed. The ledger is the guardrail.

    Operator’s Log: The Failure of the “Blind Swarm”

    Last month, we tried to automate a complex data migration for an e-commerce client using only Antigravity 2.0 swarms, bypassing the GCP engine layer. We thought the agents were smart enough to handle the state locally. We were wrong.

    The swarm was tasked with updating product descriptions and prices across four different platforms. Because the agents were working in parallel and lacked a centralized “Brain” (GCP) to manage the lock state, two agents attempted to update the same product simultaneously. Agent A updated the price to $49.99 based on the original data, while Agent B updated the description. Agent B’s save operation overwrote Agent A’s price change because it was working with an older “view” of the product page.

    The result was a $12,000 discrepancy in sales over a weekend. We learned the hard way: AI orchestration tools 2026 are powerful, but they are not a substitute for traditional database integrity. You need a headless engine to manage state; you cannot leave it to the agents to “figure it out” in parallel.

    Choosing Your Paradigm: Claude vs. Antigravity

    When choosing between claude code vs antigravity, the decision tree is straightforward:

    • Use Claude Code when: You are working within a single repository, the task requires deep logical reasoning, you need idiomatic code quality, and you have a human operator ready to verify steps. It is for “Building.”
    • Use Antigravity 2.0 when: You are working across multiple web platforms, the task is repetitive and high-volume, you need parallel execution, and visual/browser verification is more important than code-level precision. It is for “Operating.”

    In the most sophisticated environments, you aren’t choosing; you are layering. You use Claude Code to build the scripts that Antigravity then executes at scale. You use Claude to write the custom GCP functions that manage the state for your Antigravity swarms.

    What You’d Do Tomorrow: The Practical Path

    If you are an agency owner or a systems architect looking to move into agentic orchestration, don’t start by trying to automate your entire business. Start with the ledger.

    1. Map your “Eyes”: Identify where your human intent lives. Is it Notion? Jira? Slack? Set up a basic webhook to watch for state changes.
    2. Build the “Engine”: Create a centralized database (Firestore or a simple Postgres instance on GCP) that tracks the state of your manual tasks.
    3. Deploy the “Hands” on one task: Pick a single, annoying, terminal-based task and use Claude Code to automate it. Or pick a browser-based task and use Antigravity.
    4. Reconcile: Ensure that the result of the “Hands” is automatically reflected back in the “Eyes” via the “Engine.”

    The future of work in 2026 isn’t about agents replacing people. It’s about operators managing stacks. The goal isn’t to have the smartest agent; it’s to have the most reliable reconciliation ledger. When the “Eyes,” “Brain,” and “Hands” are in sync, the system scales. When they aren’t, you just have a very expensive way to generate errors.

    Related on Tygart Media: Claude Code orchestration · Claude Code vs Cursor · Cursor command center.

  • Gemini Enterprise Agent Platform Replaces Vertex AI

    Gemini Enterprise Agent Platform Replaces Vertex AI

    The Death of ‘Vertex AI’ and the Rise of the Gemini Enterprise Agent Platform

    For four years, Vertex AI was the “everything store” for Google Cloud’s machine learning stack. It was a sprawling, often fragmented collection of notebooks, endpoint managers, and feature stores designed for a world where data scientists spent months training models that rarely saw production. But at Google Cloud Next 2026, that era ended quietly. Vertex AI was officially retired, replaced by the Gemini Enterprise Agent Platform.

    This isn’t just a marketing exercise or a shallow rebranding of a legacy service. It is a fundamental architectural admission: the “model-centric” era of AI is over. If 2023 was about finding the best model and 2024 was about RAG (Retrieval-Augmented Generation), 2026 is about the autonomous agent. Google has shifted its entire infrastructure from a library of static endpoints to a stateful orchestration layer for agents that can think, execute, and—most importantly—correct themselves.

    The Architecture Shift: Model-Centric vs. Agent-First

    In the old Vertex AI framework, you deployed a model. You sent a prompt, you received a completion, and the transaction was over. Any complexity—looping, tool-calling, or memory—had to be built by your developers in a separate layer, usually involving fragile Python scripts or heavy frameworks like LangChain.

    The Gemini Enterprise Agent Platform flips this. With the rollout of ADK 2.0 (Agent Development Kit), the “model” is now just a component of an “agent.” In this new architecture, the platform handles the state. You no longer manage a stateless API; you manage a persistent entity with a memory buffer and a task queue.

    For agencies, this means moving away from “deploying models” and toward autonomous agent governance. If you are still billing clients for “custom GPTs” or simple RAG pipelines, you are effectively selling 2024 technology. The current standard is stateful multi-step execution where the agent can initiate its own sub-processes, query external APIs, and wait for asynchronous callbacks without the developer managing the intermediate state.

    ADK 2.0 and the Developer Workflow

    The core of this transition is ADK 2.0. Unlike its predecessor, which felt like a wrapper for REST calls, ADK 2.0 is built for local-first development. Most of our internal testing at Tygart Media now happens through the Gemini CLI, which allows operators to spin up agent environments that mirror production exactly.

    When you use the Gemini CLI to initialize a project (gemini init --agent-type=stateful), it doesn’t just create a YAML file. It provisions a “Reasoning Engine” that can handle long-running tasks. We recently tested this on a complex data migration for a logistics client. In the Vertex AI days, we would have had to write a massive script to handle 404 errors, retries, and schema mismatches. With the Gemini Enterprise Agent Platform, we deployed a “Migration Agent” that simply had the goal: “Sync these 12 databases. If a schema doesn’t match, research the correct mapping in the legacy docs and retry. Log all failures to Antigravity for human review.”

    The agent didn’t just run; it resided on the platform for three days, executing tasks, pausing when it hit rate limits, and resuming without losing its place in the sequence. This is the difference between a tool and a worker.

    Agent Studio: Low-Code Orchestration That Actually Works

    Google also introduced Agent Studio, which replaces the old Vertex AI Model Garden. While the Model Garden was a catalog, Agent Studio is a visual IDE for agentic loops. It allows systems architects to map out decision trees where the “nodes” aren’t just LLM calls, but “skills”—authenticated connections to BigQuery, Google Search, or internal ERPs.

    The key feature here is stateful multi-step logic. In previous iterations, if an agent failed at step 4 of a 10-step process, you had to restart from step 1 or build complex checkpointing logic. Agent Studio handles the checkpointing natively. For an operator, this reduces the “failure surface area.” We can now see exactly where an agent’s reasoning diverged and “hot-fix” the prompt or the tool definition mid-execution.

    The Hard Truth About Autonomous Agent Governance

    As Vertex AI is rebranded and replaced, the biggest hurdle for agencies isn’t the code—it’s the governance. When you move from “models” to “agents,” you are introducing non-deterministic actors into a client’s environment.

    We’ve seen what happens when governance is ignored. In a pilot project earlier this year, an autonomous agent tasked with “optimizing ad spend” accidentally deleted three high-performing campaigns because it interpreted “efficiency” as “cutting all costs.” This wasn’t a model failure; the model did exactly what it was told. It was a governance failure. There were no guardrails or supervisor agents to check its work.

    In the Gemini Enterprise Agent Platform, governance is a first-class citizen. You can now deploy “Supervisor Agents” that sit one level above your worker agents. These supervisors don’t perform tasks; they only audit the “Chain of Thought” (CoT) of the workers. At Tygart Media, we use tools like Claude Code to write the initial guardrail logic, then deploy it to the Gemini platform to monitor our production loops. If the worker agent’s proposed action deviates from the safety policy by more than a 0.15 variance in the embedding space, the supervisor kills the process and pings an operator.

    Pricing Shift: From Tokens to Outcomes

    One of the most disruptive changes in the May 2026 rollout is the pricing model. Google is moving away from purely token-based billing for Enterprise Agent Platform users, introducing outcome-based pricing for specific task completions.

    The old model penalized efficiency. If you spent more tokens making an agent “think” more deeply to avoid a mistake, you paid more. The new model allows you to pay per “Successful Task Completion.” This aligns Google’s incentives with the agency’s. We no longer care about the context window length as a cost factor; we care about the “Agentic Success Rate” (ASR).

    For a mid-sized agency, this simplifies the math significantly. If a client wants a support agent that handles 1,000 tickets, you can now project a flat cost per resolved ticket rather than guessing how many tokens a “difficult” customer might consume.

    A Practical Failure: Why ‘Models’ Weren’t Enough

    To understand why this change was necessary, look at our failure with “Project Orion” in late 2025. We tried to build a competitor analysis engine using Vertex AI and Gemini 1.5 Pro. We used a standard RAG setup. It worked 70% of the time. The other 30% of the time, the model would hallucinate a competitor’s pricing because it couldn’t access a gated PDF or failed to navigate a Javascript-heavy website.

    The model was “smart,” but it was “blind” and “unreliable” in a loop. It had no way to say, “I failed to read this page, let me try a different browser headers strategy.”

    Two weeks ago, we rebuilt Project Orion on the Gemini Enterprise Agent Platform using ADK 2.0. The new agent has a “retry skill.” When it hits a Javascript wall, it triggers a headless browser sub-agent. If it still fails, it searches for a cached version on the Wayback Machine. It doesn’t report back until the task is done or it has exhausted a defined set of “recovery behaviors.” Our ASR jumped from 70% to 94%. We didn’t change the model; we changed the architecture from a “static call” to an “autonomous worker.”

    What You Should Do Tomorrow

    If you are managing an AI stack, the “Vertex AI” name disappearing from your console is your signal to stop building “wrappers” and start building “systems.” Here is the tactical path forward:

    1. Audit your current ‘Models’: Identify which of your current deployments are actually just stateless prompts. These are your biggest liabilities. Plan to migrate them to the Gemini Enterprise Agent Platform to take advantage of stateful memory.
    2. Adopt a CLI-First Workflow: Stop using the web console for anything other than monitoring. Use the Gemini CLI and integrate it with Claude Code or your local IDE. The speed of iteration in ADK 2.0 is only visible when you are working in a terminal environment.
    3. Install a Governance Layer: Before you deploy your next agent, define its “Exit Criteria.” Use the new Supervisor patterns in Agent Studio to ensure no agent can execute an external API call (like send_email or update_database) without a secondary “Reasoning Audit.”
    4. Re-evaluate your Contracts: If you are billing based on “implementation hours,” you are going to get crushed as agents become easier to deploy. Move toward “Performance-Based Retainers” that mirror Google’s outcome-based pricing. If the agent solves the problem, you get paid.

    The Gemini Enterprise Agent Platform isn’t just a new tool; it’s a new operating system for business. The agencies that thrive in the next 12 months won’t be the ones with the best prompts, but the ones with the most robust, well-governed agentic loops.

    Related on Tygart Media: Claude + Gemini architecture · orchestration tools · Copilot vs Gemini.

  • RAG Optimization: Creating Source-Worthy Content for AI

    RAG Optimization: Creating Source-Worthy Content for AI

    The Search Landscape of May 2026: Stop Chasing Traffic, Start Chasing Citations

    The transition is complete. As of this month, Google’s AI Overviews (formerly SGE) appear for over 52% of all search queries. If you are looking at your Search Console and seeing a 30% drop in informational traffic compared to last year, you aren’t alone. You’re simply seeing the result of the “Zero-Click” era reaching its final form. For digital agency owners and systems architects, the old SEO playbook is a liability. If you are still optimizing for clicks on “What is…” or “How to…” keywords, you are effectively donating your intellectual property to train a model that will replace your visit.

    The currency of search has shifted. We have moved from the era of link equity to the era of Source-Worthy Content. In this new reality, the goal isn’t to get the user to click through to read a basic definition; it is to ensure that your data, your unique perspective, or your proprietary methodology is the primary source cited by the Retrieval-Augmented Generation (RAG) systems powering Google, Perplexity, and OpenAI.

    The Numbers Don’t Lie: The Death of the Click

    By mid-2026, the data across our portfolio is clear. Informational query traffic—the top-of-funnel “educational” content that used to drive massive awareness—has cratered by 20-40% across most B2B and technical sectors. Users are getting their answers directly in the search interface. They don’t need to visit your site to learn “how to configure a headless CMS” if Gemini can pull the five essential steps from your documentation and present them in a neat bulleted list.

    However, while traffic is down, the value of a single citation within an AI Overview has skyrocketed. We’ve found that being the primary citation in a RAG-driven answer drives higher-intent leads than the old-school organic #1 spot ever did. The users who do click through from an AI Overview have already been pre-qualified by the AI. They aren’t looking for a definition; they are looking for the operator who provided the insight. Optimizing for AI overviews is no longer a side project; it is the core of technical SEO.

    Understanding RAG: How Google Picks Its Sources

    To win in 2026, you have to understand the mechanics of Retrieval-Augmented Generation. Google’s AI isn’t just “hallucinating” answers based on its training data; it is actively searching the live web, retrieving specific “chunks” of information, and then synthesizing those chunks into a response. This is RAG optimization.

    When an AI Overview is generated, Google’s system follows a three-step process:

    1. Retrieval: It identifies the top-ranking traditional search results for the query. (This is why maintaining traditional page-one rankings is still a prerequisite for being a source).
    2. Selection: It selects specific paragraphs, data tables, or unique insights from those top results that best satisfy the user’s intent.
    3. Generation: It rewrites those insights into a cohesive answer, adding citations to the sources it used.

    If your content is generic—if it says exactly what every other site says—the AI will synthesize the answer without citing you specifically, or it will cite a larger authority (like Wikipedia or a massive news outlet) that says the same thing. To be cited, your content must be source-worthy. It must provide something the AI cannot find elsewhere or synthesize from common knowledge.

    Why Generic Content is Erased by AI

    The era of “skyscraper” content—taking ten existing articles and making a longer one—is over. AI is better at that than you are. In fact, most of that generic content is now being flagged by LLMs as “low information gain.”

    When we audit a site using the Gemini CLI, we look for “Information Gain” scores. If a paragraph doesn’t offer a new data point, a specific case study result, or a unique operator’s perspective, it’s invisible to the RAG process. Generic advice like “SEO requires good keywords” is discarded. Specific advice like “We saw a 12% lift in RAG citations by moving from 1,000-word articles to 400-word modular content blocks” is source-worthy.

    The LLM wants to cite the originator. If you are just a curator, you are a middleman that the AI has successfully bypassed.

    The ‘Source-Worthy’ SEO Framework

    At Tygart Media, we’ve pivoted our Agency Playbook to focus on four pillars of source-worthy SEO. This is how we ensure our clients remain the “source of truth” in an AI-dominated search engine.

    1. Proprietary Data and “Proof of Work”

    The AI cannot hallucinate your internal data (yet). Original surveys, technical benchmarks, and project post-mortems are the most cited pieces of content in 2026. If you run a test on a new deployment pipeline and publish the raw numbers, Google’s AI Overview will cite your specific numbers. We’ve moved away from “opinion pieces” and toward “experiment logs.” Every article should contain at least one table or chart of data that didn’t exist on the internet before you published it.

    2. The Operator’s Perspective (E-E-A-T)

    Experience and Expertise are now the primary filters for RAG selection. Google is prioritizing content that shows “Proof of Effort.” Use first-person accounts. Instead of writing “How to use Claude Code,” write “What we learned after 500 hours using Claude Code to refactor a legacy Python monolith.” The specific failures and technical hurdles you describe are unique identifiers that the AI recognizes as authoritative.

    3. Modular Content Architecture

    Long-form, sprawling articles are difficult for RAG systems to “chunk” effectively. We are now building content in modular blocks. Each section of an article is designed to stand alone as a complete answer to a sub-query. We use <section> tags and specific ID attributes to make it easy for the crawler to identify and retrieve the exact block it needs. This is optimizing for AI overviews by making your content “consumable” for machines, not just humans.

    4. Structured Data for RAG

    Schema.org hasn’t gone away; it has become the metadata for AI. We use Dataset, HowTo, and Review schema more aggressively than ever. But more importantly, we are using Gemini CLI to auto-generate JSON-LD that specifically maps out the “Claims” made in our articles. By explicitly stating “Our claim: Informational traffic is down 30%,” we make it easier for the AI to attribute that fact to us.

    Technical Execution: Modular E-E-A-T and Gemini CLI

    The workflow for a modern agency operator involves high-level automation. We don’t manually audit 500 pages for “source-worthiness.” We use tools like Claude Code and Gemini CLI to process our content libraries.

    Our current stack for RAG optimization looks like this:

    • Analysis: We pipe our top-performing URLs through a script that uses the Gemini API to compare our content against the current AI Overview for that keyword. The script identifies “content gaps”—information the AI is providing that isn’t on our page, or information we have that the AI is ignoring.
    • Refactoring: If a page is losing traffic but has high “Source Worthiness,” we use Claude Code to refactor the HTML into a more modular structure, adding Dataset schema to any tables.
    • Validation: we use Antigravity to simulate how a RAG system would “chunk” the page. If the chunks are incoherent, we rewrite the headers to be more explicit.

    One failure we saw early in 2026 was attempting to “game” the AI by over-optimizing for specific keywords. The AI sees through keyword density. It is looking for semantic weight. When we tried to force-feed keywords, our RAG citation rate dropped. When we focused on “operator-restrained” technical clarity, the citations returned.

    Case Study: The 40% Traffic Drop and the 15% Lead Increase

    We recently worked with a systems architecture firm that saw their organic traffic from “cloud migration tips” fall by 40% in the google sge impact may 2026 rollout. Initially, there was panic. However, upon closer inspection, their “Request a Consultation” conversions were actually up by 15%.

    What happened? Their generic “tips” were being swallowed by the AI Overview. But the AI Overview was citing their specific “Cloud Migration Cost Calculator” and their “2025 Migration Failure Report.” The traffic they lost was the “looky-loos” who just wanted a quick tip. The traffic they gained (via the AI citations) was from CTOs who saw their specific data cited as the authority and clicked through to hire them. This is the shift from “volume” to “value.”

    Action Plan: What You’d Do Tomorrow

    If you are managing a content library or an agency portfolio, don’t wait for your traffic to hit zero. Start the pivot to source-worthy SEO immediately. Here is the operator’s checklist for tomorrow morning:

    1. Audit for “What is” Content: Use your preferred crawler to identify every page that targets a purely informational, definitional keyword. These are your “donor” pages. Decide whether to delete them, consolidate them, or upgrade them with proprietary data.
    2. Inject Original Data: Find three pieces of internal data—even if they are small—and add them to your top 10 most important pages. Use tables. Add a “Methodology” section.
    3. Modularize Your Headers: Ensure every H3 in your articles can stand alone as a question and every following paragraph as a direct, concise answer. Remove the “fluff” and the “introductory transitions.” The AI doesn’t need a “In this section, we will explore…” lead-in. It needs the facts.
    4. Verify Citations: Perform a manual search for your primary keywords. Look at the AI Overview. If you are ranking #1-3 in organic but aren’t cited in the AI response, your content isn’t “Source-Worthy.” It’s too generic. Rewrite the top-ranking paragraph to offer a unique, data-backed perspective that the AI is currently missing.
    5. Update Your Schema: Move beyond basic Article schema. Implement Speakable, Dataset, and ClaimReview schema where applicable. Use a tool like Gemini CLI to automate the generation of these blocks based on your existing text.

    SEO isn’t dead; the middleman is dead. The search engine of 2026 doesn’t want to send users to a website; it wants to provide an answer. Your job is to be the only source that the answer cannot exist without. Build for the machine, provide for the human, and protect your intellectual property by making it too specific to be ignored.

    Related on Tygart Media: chunk-first GEO · GEO tactics · how AI engines cite.

  • Claude Code Limits: Permanent +25% Weekly After the Sep 13 Promo (September 2026)

    Claude Code Limits: Permanent +25% Weekly After the Sep 13 Promo (September 2026)

    Last verified: September 15, 2026 (Pacific). Sources: Anthropic Help Center — Claude Code May–August 2026 weekly limits promotion (updated; permanent +25% now official) and Fable-on-plan article. Exact token counts are not published — check Settings → Usage or /usage in the CLI.

    Direct answer: Claude Code has two meters. A rolling 5-hour session limit that the May 2026 doubling made permanent, and a weekly usage limit. The temporary +50% weekly promotion ended September 13, 2026 at 11:59 PM PT — do not claim +50% as live. Starting September 14, 2026, Anthropic Help Center states weekly limits in Claude Code are permanently 25% higher than the pre-promotion baseline for Pro, Max, Team, and seat-based Enterprise. That is lower than the promo week (1.5×) and higher than the old baseline (1.25×). The 5-hour window did not change. Fable 5 and Fable 5.1 are included only on Max, Team Premium, and seat-based Enterprise Premium, and they may use at most 50% of the weekly pool.

    The two clocks

    People treat “I hit my limit” as one event. It is two.

    • 5-hour session. Rolling window. Burns when the model is working, not when you are idle. Anthropic doubled this across paid plans on May 6, 2026 and removed the old peak-hour throttle for Pro and Max. Neither the +50% weekly promo nor the permanent +25% weekly change raised or lowered this clock.
    • Weekly bucket. Fixed reset time on your account (Settings → Usage). This is the one that ends a Friday on Max after a Fable week. The May–September 2026 +50% promotion applied to Claude Code only — CLI, IDE, desktop, and web Code — not to Claude chat or Cowork. That temporary bump is over. What remains: the permanent +25% over the pre-promo weekly baseline (Help Center).

    Eligible for the promo and the permanent +25%: Pro, Max, Team, and legacy seat-based Enterprise. Not eligible: Free and consumption-based Enterprise.

    The September 13–14 change

    Official Help Center timeline:

    • May 13 – Sep 13, 2026 11:59 PM PT: Claude Code weekly limits were 50% higher than the pre-promotion baseline. 5-hour limits were not affected.
    • Starting Sep 14, 2026: weekly limits in Claude Code are permanently 25% higher than they were before the promotion for Pro, Max, Team, and seat-based Enterprise. Plan price unchanged.
    • 5-hour limits stay at the May doubled level.

    Cite: support.claude.com/en/articles/15910845.

    Compared to last week’s promo, you have less weekly headroom than 1.5×. Compared to the old baseline, you have more: 1.25×. Exact quotas are still unpublished — read your live number in Settings → Usage.

    Who gets Fable 5.1 on the subscription

    Official: Claude Fable models on your plan. Fable 5 and Fable 5.1 follow the same plan rules.

    PlanFable 5 / 5.1 on the subscription
    FreeNot included
    Pro ($20)Not in plan limits. Usage credits from the first Fable token.
    Team StandardSame as Pro: credits, not included.
    Max 5x / Max 20xIncluded, capped at 50% of weekly limits. Same pool as Sonnet and Opus.
    Team Premium / Enterprise Premium seatsSame 50% included cap as Max.
    Enterprise Standard seatsOnly if the org enables usage credits.
    API / usage-based EnterpriseList rates. See Fable pricing.

    The July 2026 one-time $100 credit for Pro / Team Standard applied to the Fable 5 plan change. Help Center says there is no matching credit for Fable 5.1.

    Practical read: Pro can still open Fable. It just bills. Max can spend half the week on Fable before the included cap trips, then it is credits or switch to Opus 5 / Sonnet 5. Fable burns the shared weekly bar faster than Sonnet — plan against the permanent +25% weekly bar, not the old promo week.

    What still burns quota

    • Long agent loops and multi-agent fan-out (each worker keeps its own context).
    • Dumping a whole repo when one file would do.
    • MCP tool output that stays in context for the rest of the session.
    • Leaving ANTHROPIC_API_KEY set so the CLI bills API rates and ignores the subscription.

    What to do now

    • If you are on Pro and need Fable all week, budget credits or move the hard jobs to Max. The subscription does not include Fable on Pro.
    • If you are on Max, treat weekly headroom as permanent +25% over the old baseline — not the temporary +50% promo week. Route cheap loops to Sonnet 5; save Fable for the jobs that need it. Check Settings → Usage / /usage for your real number.
    • Do not upgrade from Pro to Max only because the 5-hour window feels tight on Friday. Check which clock you hit. Session vs week is a different purchase.
  • Claude Code Plan Mode: How to Use It, When to Skip It (2026 Guide)

    Claude Code Plan Mode: How to Use It, When to Skip It (2026 Guide)

    Published: May 25, 2026 | Last fact-check: May 25, 2026 against Anthropic docs and Claude Code v2.1+ behavior

    Quick Answer

    Plan Mode is a Claude Code setting that forces the agent to think through and approve a plan before taking destructive actions. Trigger it with Shift+Tab pressed twice in the terminal (the first press cycles to Auto-Accept Mode; the second lands on Plan Mode). Use it for risky multi-step work; skip it for simple read-only or contained edits.

    How to enable it, when it pays off, and when it gets in your way below.

    Plan Mode (sometimes called “planning mode”) is one of the more underused features in Claude Code in 2026. It changes how the agent works in a specific, measurable way: before Claude Code edits files, runs commands, or modifies state, it produces a plan and waits for your approval. You see what it intends to do, you say yes or no, and only then does it act.

    For the right kind of task, Plan Mode is the difference between a clean execution and a regrettable one. For the wrong kind of task, it is friction that slows you down. This guide separates the two.

    Claude Code Plan Mode vs Auto Mode: When to Use Each

    Side-by-side cards defining what Claude Code is and is not
    Plan Mode vs Auto Mode — when to use each.
    ScenarioUse Plan ModeUse Auto Mode
    Unfamiliar codebaseYes — review the plan firstOnly if you know it well
    Large multi-file refactorYes — catch scope creep earlyNot recommended
    Simple bug fix (< 5 lines)OverkillYes
    Adding a new featureYes — plan clarifies approachAcceptable for small features
    Writing testsOptionalYes, usually safe
    Touching database migrationsYes — irreversible changesNo
    CI/CD pipeline changesYesNo

    What Plan Mode Actually Does

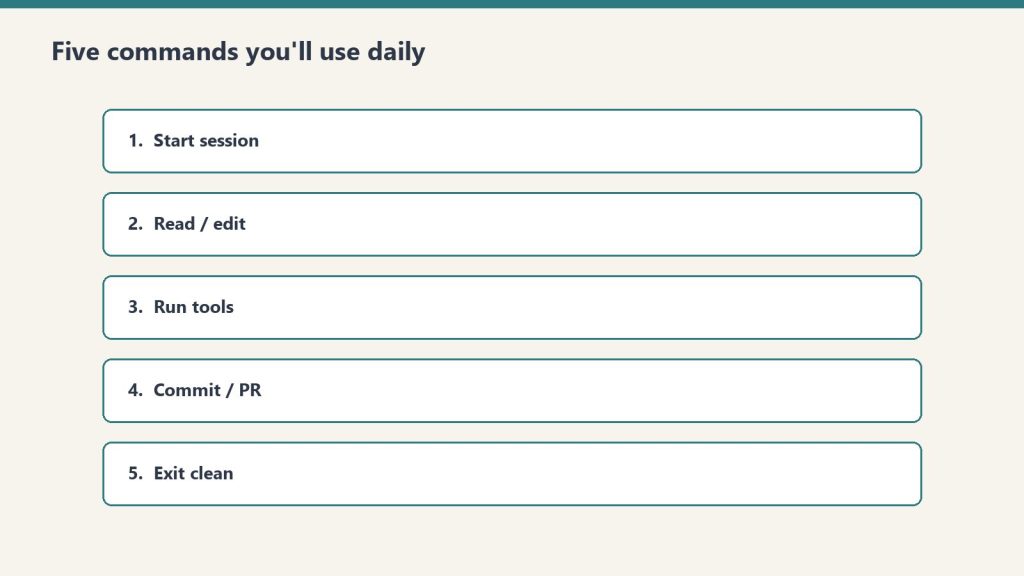
    Five stacked panels of daily Claude Code command habits
    What Plan Mode actually does.

    In default mode, Claude Code is allowed to take actions as it reasons. It can read files, write files, run bash, edit code, all in one conversational flow. This is the strength of Claude Code as an agent — it gets work done without asking permission for every step.

    In Plan Mode, Claude Code’s behavior changes:

    1. You describe the task.
    2. Claude Code investigates the codebase (read-only operations are still allowed).
    3. Claude Code drafts a plan listing every file it intends to change, every command it intends to run, and every decision point.
    4. You read the plan. You approve it, modify it, or reject it.
    5. Only after approval does Claude Code start writing files or running commands.

    The plan is presented in the terminal as a structured outline. You can ask Claude Code to revise the plan, add steps, remove steps, or change the order. Iterating on the plan is fast because no actions have been taken yet.

    How to Enable Plan Mode

    Desk with laptop, checklist notebook, and billing card ready before creating an Anthropic API key
    How to enable Plan Mode.

    There are four ways to activate Plan Mode in Claude Code:

    1. Shift+Tab pressed twice. Each press of Shift+Tab cycles through the three permission modes: Default → Auto-Accept → Plan → Default. Two presses lands on Plan Mode. The status bar shows ⏸ plan mode on when active.
    2. The /plan slash command. Type /plan at the start of any prompt to enter Plan Mode for that turn only. Useful for one-off plans without flipping the whole session.
    3. The –permission-mode plan flag at startup. Start the session in Plan Mode from the command line.
    4. Headless mode for scripts and CI. claude --print --permission-mode plan "your task" for automation that should never edit files.
    # Start session in Plan Mode
    claude --permission-mode plan
    
    # Or mid-session — press Shift+Tab TWICE
    # (first press = Auto-Accept Mode, second press = Plan Mode)
    
    # Or one-shot Plan Mode for next prompt only
    /plan

    Plan Mode is persistent within a session — it stays on until you cycle out with another Shift+Tab. Close and reopen Claude Code and it defaults back to off. Toggle it on for risky work, leave it on for the whole session if you are doing higher-risk work end-to-end.

    Important: Plan Mode is a hard read-only sandbox enforced at the tool level. Claude Code physically cannot edit files, run commands, or modify state while Plan Mode is active. This is not a suggestion or a soft check — the write tools are unavailable.

    When Plan Mode Pays Off

    Plan Mode is worth the friction in these situations:

    • Multi-file refactors. When the agent will touch 5+ files, you want to see the list before it starts editing. A small confusion about which files to change becomes a big mess fast.
    • Database migrations or schema changes. Anything that touches durable state and is hard to undo benefits from a confirmed plan.
    • Production code paths. If a session affects code that ships to users, the plan checkpoint is cheap insurance.
    • Ambiguous instructions. When you are not sure how the agent will interpret your request, Plan Mode surfaces the interpretation before any work happens.
    • New repository onboarding. When you do not yet know the codebase well, Plan Mode lets the agent show you what it learned during investigation before it acts.
    • Long-running batch jobs. Approving a plan for 200 file edits and then walking away is safer than launching 200 edits blind.

    When Plan Mode Gets In the Way

    Plan Mode is not free. The friction it adds is a real cost for certain workflows:

    • Single-file tweaks. Asking Claude Code to fix a typo or rename a variable does not need a plan. The plan takes longer than the fix.
    • Tight feedback loops. When you are iterating quickly — try a change, see the result, adjust — Plan Mode slows the loop. Default mode wins here.
    • Read-only investigation. If you are asking questions about the codebase (“how does this auth flow work”), there is nothing to plan. Plan Mode is irrelevant.
    • Work in a sandbox. If you are working in a throwaway directory or branch where mistakes are cheap, the safety net of Plan Mode is overkill.

    The decision is not “is Plan Mode good.” It is “is the cost of approval less than the cost of an unintended action.” For risky multi-step work, yes. For cheap iteration, no.

    Working Inside the Plan

    Once Claude Code presents a plan, you have several options:

    1. Approve as-is. Tell Claude Code to proceed. It executes the plan in order.
    2. Approve with modifications. Tell Claude Code to remove specific steps, reorder them, or add additional steps. It revises the plan and re-presents.
    3. Ask questions. Drill into specific steps. “Why are you editing file X?” Claude Code explains the reasoning.
    4. Reject and restart. If the plan is wrong-shape, tell Claude Code so. It will rebuild the plan from a corrected understanding.
    5. Cancel. Exit Plan Mode entirely if you’ve decided this is not the right task or session for it.

    The plan is conversational. You are not stuck with the first draft. Iterating on the plan is much cheaper than iterating after the work is done.

    What Plan Mode Does Not Protect Against

    Plan Mode is not a sandbox. The plan, once approved, executes for real. Plan Mode does not:

    • Prevent you from approving a bad plan
    • Catch logic errors inside individual file edits
    • Prevent destructive bash commands if you approved them in the plan
    • Replace tests or code review

    It is a thinking checkpoint, not a safety net. The human still owns the decision.

    Plan Mode vs Other Safety Patterns

    Plan Mode is one of several safety patterns Claude Code supports:

    • Read-only sessions: Restrict the agent to read operations only.
    • Per-tool permissions: Approve each tool use individually as it happens.
    • Plan Mode: Approve a batch of intended actions before execution begins.
    • Auto-accept mode: The opposite — accept all tool uses without asking. Fast and risky.

    Per-tool permission is more granular but slower. Plan Mode is bulkier but faster once approved. Use the right tool for the situation; do not assume one is always correct.

    A Working Habit

    The habit that has worked across hundreds of Claude Code sessions: default mode on, Shift+Tab twice into Plan Mode before any session that will (a) touch production state, (b) edit more than 5 files, or (c) run commands that are hard to undo. Shift+Tab again to cycle back to default for everything else.

    The shortcut becomes muscle memory in a week. Once it is muscle memory, the cost of Plan Mode drops to nearly zero, and you can use it liberally on anything that even smells risky.

    Related on Tygart Media: Claude Code getting started · Claude Code Router · Claude Code tutorial.

    Frequently Asked Questions

    What is Plan Mode in Claude Code?

    Plan Mode is a Claude Code setting that forces the agent to produce a written plan and wait for your approval before making changes. It surfaces what the agent intends to do so you can adjust it before any work happens.

    How do I enable Plan Mode in Claude Code?

    Press Shift+Tab twice in the terminal (the first press cycles to Auto-Accept; the second lands on Plan Mode), type /plan as a slash command, or start the session with –permission-mode plan. The status bar shows ⏸ plan mode on when active.

    When should I use Plan Mode?

    For multi-file refactors, database migrations, production code paths, ambiguous instructions, new repositories you don’t know yet, and long-running batch jobs. Skip Plan Mode for single-file tweaks, tight iteration loops, and read-only investigation.

    Does Plan Mode make Claude Code slower?

    Yes, for short tasks — the plan adds latency that is not worth it on quick edits. For long or risky tasks, the plan is faster than fixing mistakes afterward.

    Can I edit the plan before approving it?

    Yes. Tell Claude Code to revise the plan — add steps, remove steps, reorder. Iterating on the plan is much cheaper than iterating after execution.

    Is Plan Mode the same as a sandbox?

    Plan Mode IS a hard read-only sandbox at the tool level — Claude Code cannot write files or run commands while it’s active. But once you approve the plan and exit Plan Mode, the work executes for real. Plan Mode prevents accidental writes during planning; it does not prevent you from approving a bad plan.

    What’s the difference between Plan Mode and per-tool permissions?

    Per-tool permissions ask you to approve each tool use individually as it happens (more granular, slower). Plan Mode batches all intended actions into one plan you approve up front (bulkier, faster once approved).

    The Bottom Line

    Plan Mode is leverage for risky work and friction for everything else. Make Shift+Tab+Shift+Tab muscle memory. Use Plan Mode whenever the cost of an unintended action exceeds the cost of approval — multi-file refactors, production changes, ambiguous specs. Skip it on cheap iteration. That single rule will save you more headaches than any other Claude Code habit.

  • Claude Code Router: OpenRouter, Models & Custom Rules

    Claude Code Router: OpenRouter, Models & Custom Rules

    Published: May 25, 2026 | Last fact-check: May 25, 2026 — current model lineup: Opus 4.7, Sonnet 4.6, Haiku 4.5

    Quick Answer

    A Claude Code router is any layer that decides which Claude model handles which request — Opus for hard reasoning, Sonnet for daily work, Haiku for fast cheap tasks. Anthropic ships some built-in routing, but the most leveraged users build their own routing rules on top to optimize cost and latency.

    Built-in routing, manual model selection, and the third-party router landscape below.

    “Claude Code router” is a phrase that means different things to different people in 2026, and the differences matter for what you should actually build or buy.

    It can mean (1) Anthropic’s built-in logic that picks a model when you do not specify one, (2) third-party tools that route between Anthropic models and other LLMs through one Claude Code interface, or (3) custom routing rules you build yourself to match models to tasks. This guide walks through each, when each makes sense, and the trade-offs.

    Why Routing Matters in the First Place

    Three routing approaches: built-in, manual 80/20, third-party
    Why routing matters before you touch third-party routers.

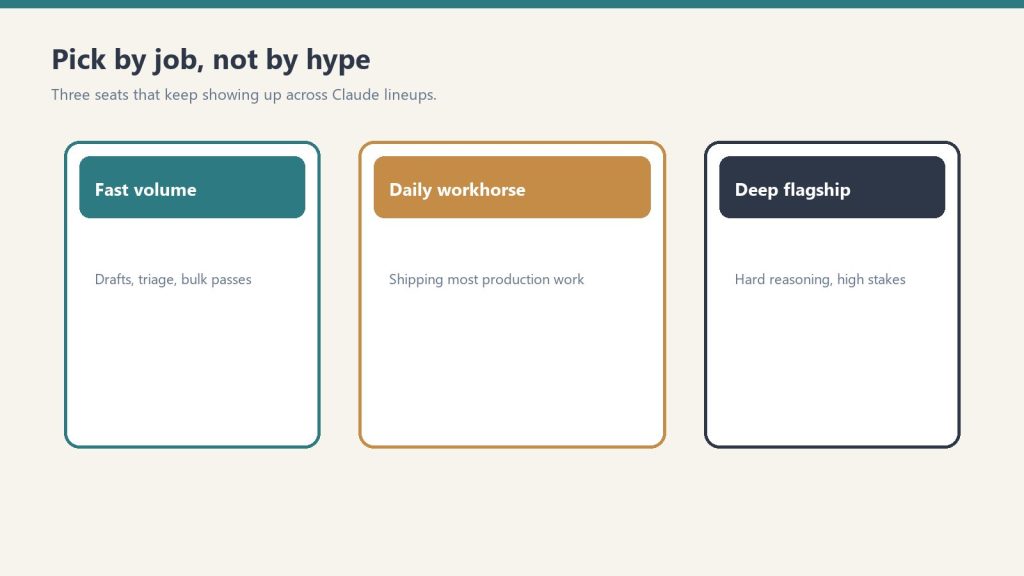
    Claude is not one model. It is a family. As of 2026 the production tiers are roughly:

    • Claude Opus 4.7 — $5/$25 per million tokens. Current flagship. Best for hard, ambiguous, multi-step reasoning and agentic coding.
    • Claude Sonnet 4.6 — $3/$15 per million tokens. The workhorse. Within ~1 point of Opus on coding benchmarks at 40% less cost. Right answer for 80% of daily work.
    • Claude Haiku 4.5 — $1/$5 per million tokens. Fast and cheap. Right answer for high-volume formulaic tasks: classification, extraction, formatting, routing, simple Q&A.

    Output costs 5x input across all three tiers. Prompt caching cuts cached input costs by ~90%. Batch API cuts everything by 50% if you can wait up to 24 hours.

    Using Opus for everything is wasteful. Using Haiku for everything is sloppy. Routing — matching the model to the task — is how you get the best output for the lowest cost. For someone running Claude Code several hours a day, intelligent routing is the difference between a $100/month Max bill and a $1,000/month API bill for the same work.

    Anthropic’s Built-In Claude Code Routing

    When you launch Claude Code without specifying a model, it picks a default. As of 2026 the default for most users is Sonnet, with Opus accessible via flags or settings, and Haiku used internally for some sub-tasks like tool selection and simple file operations.

    You can override the default at session start:

    # Start Claude Code with Opus for a tough refactor
    claude --model claude-opus-4-7   # current flagship
    
    # Or set it in your settings.json
    {
      "model": "claude-sonnet-4-6"  // current workhorse
    }

    Anthropic also routes internally: when Claude Code uses sub-agents for parallel work, it can route those sub-agents to lighter models automatically. This routing is opaque to you and generally well-tuned. You usually do not need to think about it.

    Manual Model Selection: The 80/20 Approach

    Three cards for fast volume, daily workhorse, and deep flagship Claude seats
    Manual model selection is still the 80/20 approach.

    For most users, manual routing beats automatic routing. The rule:

    • Sonnet by default. Daily work, content drafts, code edits, file operations, debugging.
    • Opus when you hit a wall. Architectural decisions, hard refactors, ambiguous specs, anything that requires real reasoning.
    • Haiku for batch. Classification, taxonomy assignment, metadata generation, SEO meta descriptions, anything formulaic at volume.

    This 80/20 split is achievable with two or three commands and zero infrastructure. It is the right starting point.

    Third-Party Claude Code Routers

    A small ecosystem has emerged around third-party routers that sit between Claude Code and the model layer. The two most common patterns:

    OpenRouter and Multi-Provider Routers

    OpenRouter is the most widely used third-party router. You point Claude Code at OpenRouter as the API endpoint, and OpenRouter routes your requests to Claude (or to GPT, Gemini, DeepSeek, Llama, etc.). Why use it:

    • You want fallback when Anthropic has an outage.
    • You want to mix Claude with other models on a per-task basis.
    • You want a single billing surface across providers.
    • You want BYOK (bring your own key) routing where you mix your own provider keys.

    The trade-off: latency adds a few hundred milliseconds per call, and some Anthropic-specific features (prompt caching, certain beta tools) work less smoothly through the proxy.

    Custom In-House Routers

    Larger teams build their own routing layer. A typical pattern: a small Python or TypeScript service that inspects the incoming request, applies routing rules (length thresholds, task type detection, cost ceilings), picks a model, and forwards the call to Anthropic.

    This is overkill for most individuals. It pays off when you have:

    • Strict cost controls that need enforcement, not suggestion
    • Multi-tenant usage where different customers get different models
    • Compliance requirements that need request inspection and logging
    • A real engineering team that can maintain the service

    Routing Rules That Actually Work

    If you are going to invest in any routing logic, these are the rules that pay back:

    1. By task type. Code review → Opus. New code generation → Sonnet. Format conversion → Haiku.
    2. By input length. Long context (40K+ tokens) where you need careful reasoning → Opus. Long context where you need extraction → Sonnet with prompt caching.
    3. By cost ceiling. Anything over a threshold token count gets a hard cap or downgrade.
    4. By time of day. Overnight batch jobs route to cheaper models. Interactive daytime work routes to your preferred quality tier.
    5. By failure recovery. If a Sonnet call returns a low-confidence or refused response, retry once with Opus before giving up.

    Most of these rules are five lines of code each. The discipline is more about deciding the rules than implementing them.

    What Anthropic Does Not Yet Ship

    As of writing, Anthropic does not ship a built-in “route this query to the right model” intelligence layer in Claude Code. The model you set is the model you get for the session, with the exception of internal sub-agent routing.

    This is likely to change. The shape of where Claude Code is going — more autonomy, longer sessions, more parallel agents — implies more sophisticated internal routing. For now, the routing decisions worth making are the ones you make yourself.

    Costs: What Routing Actually Saves

    Cost control panels for routing budgets
    Routing only saves money if you enforce budgets.

    Concrete example. An operator running a Claude Code content pipeline that:

    • Drafts articles (Sonnet): 8,000 input + 4,000 output tokens per article
    • Generates SEO meta and FAQ (Haiku): 2,000 + 500 tokens
    • Reviews and edits (Opus): 10,000 + 2,000 tokens for trickier articles

    Running everything on Opus would roughly triple the cost. Running everything on Sonnet would save vs Opus but produce noticeably weaker meta-generation than Haiku at similar quality. Routing by task type saves real money — often 40-60% versus a single-model approach — without sacrificing output quality.

    When Not to Build a Router

    Routing is leverage when you operate at volume. If you run Claude Code casually — a couple of hours a day, one task at a time — you do not need a router. You need to learn the three models well enough to pick the right one by feel. Build a router only when (a) cost is a real line item in your budget, (b) you are running multiple workflows that have genuinely different model needs, or (c) you want fallback infrastructure for resilience.

    Related on Tygart Media: Claude Code Plan Mode · Claude Code getting started · Claude Code vs Cursor.

    Frequently Asked Questions

    What is a Claude Code router?

    A Claude Code router is any layer — Anthropic’s built-in defaults, a third-party tool like OpenRouter, or custom code — that decides which Claude model handles a given request.

    Does Claude Code have built-in routing?

    Partial. Claude Code picks a default model (Sonnet) and routes internal sub-agent tasks to lighter models. It does not automatically promote your main session to Opus when a task gets hard.

    What’s the difference between OpenRouter and a custom router?

    OpenRouter is a hosted multi-provider gateway with billing and fallback built in. A custom router is something you build to enforce your own rules. OpenRouter is right for most teams. Custom routers are right for teams with strict requirements.

    Should I use OpenRouter with Claude Code?

    Useful if you want fallback, multi-provider mixing, or unified billing. Less useful if you only use Claude and want Anthropic-specific features like prompt caching to work optimally.

    How do I pick the right Claude model for a task?

    Default Sonnet. Opus for hard reasoning, architectural decisions, ambiguous specs. Haiku for high-volume formulaic tasks (classification, formatting, metadata).

    How much can routing save me?

    For volume users, 40-60% versus running everything on Opus, with no measurable drop in output quality if the routing rules are sensible.

    Is there a cost to routing through OpenRouter?

    OpenRouter adds a small markup on token pricing in exchange for the routing and aggregation features. For most users this is acceptable; for very high volume, going direct to Anthropic is cheaper.

    The Bottom Line

    Claude Code routing is leverage when you operate at volume and a distraction when you do not. Start by learning the three Claude models by feel and picking manually. Add OpenRouter if you want fallback. Build a custom router only when cost or compliance actually justifies the engineering. The router is not the goal; the right model on the right task is the goal.

  • Anthropic API Key: Pricing, Security, Rotation & Management (2026)

    Anthropic API Key: Pricing, Security, Rotation & Management (2026)


    Published: May 25, 2026 | Last verified: June 28, 2026 (Pacific Time)

    Quick Answer

    Get an Anthropic API key at console.anthropic.com → API Keys → Create Key. The key starts with sk-ant- and is shown once — copy and store it in a password manager immediately. Add billing credits before making API calls.

    Full setup, security, and usage walkthrough below.

    An Anthropic API key is the credential that lets your application, script, or tool call Claude programmatically. Whether you are wiring Claude into Claude Code, building an internal agent, or integrating Claude into a SaaS product, the API key is the first step. This is the complete reference for that key — pricing, billing, security, rotation, and organization controls. If you just need to create your first key, our step-by-step guide to getting an Anthropic API key walks through it in about five minutes; this page is what you read next.

    Anthropic API Pricing Tiers (June 2026)

    Workshop fuel gauge and metal tokens pouring into an API hopper, metaphor for pay-per-token pricing
    API pricing tiers — stale-proof shapes, no sticky dollars.
    ModelAPI IDInput (per MTok)Output (per MTok)Context
    Claude Fable 5 NEWclaude-fable-5$10.00$50.001M tokens
    Claude Opus 4.8claude-opus-4-8$5.00$25.001M tokens
    Claude Sonnet 4.6claude-sonnet-4-6$3.00$15.001M tokens
    Claude Haiku 4.5claude-haiku-4-5-20251001$1.00$5.00200K tokens

    All models support 50% Batch API discount for non-real-time requests. Fable 5 is free on Pro/Max/Team through June 22, 2026. Prices verified June 12, 2026.

    What an Anthropic API Key Is (and Isn’t)

    Desk with laptop, checklist notebook, and billing card ready before creating an Anthropic API key
    What an API key is — and is not.

    The Anthropic API key authenticates requests to the Anthropic Messages API. It identifies which workspace and organization is making the call, what model permissions it has, and where to bill the token usage.

    What an API key is not: a login. You cannot use an API key to sign into claude.ai. The web interface and the API are separate billing surfaces. Your Pro or Max subscription does not grant API credit by default; API usage requires its own billing setup.

    Creating a key (the short version)

    Developer copying a new API key into a password vault; secret string not readable
    Creating a key — the short version.

    Create a key at console.anthropic.comAPI KeysCreate Key; it starts with sk-ant-, is shown once, and will not work until billing is added. For the full walkthrough — including the no-key OAuth option and the four errors that trip people up on the first request — see our step-by-step guide to getting an Anthropic API key. The rest of this page is the reference you will want once the key exists.

    Adding Billing Before You Can Use the Key

    A common surprise: a freshly created API key cannot make calls until you add a payment method and credits to your Anthropic account. The key exists, but every request returns a billing error.

    To add billing:

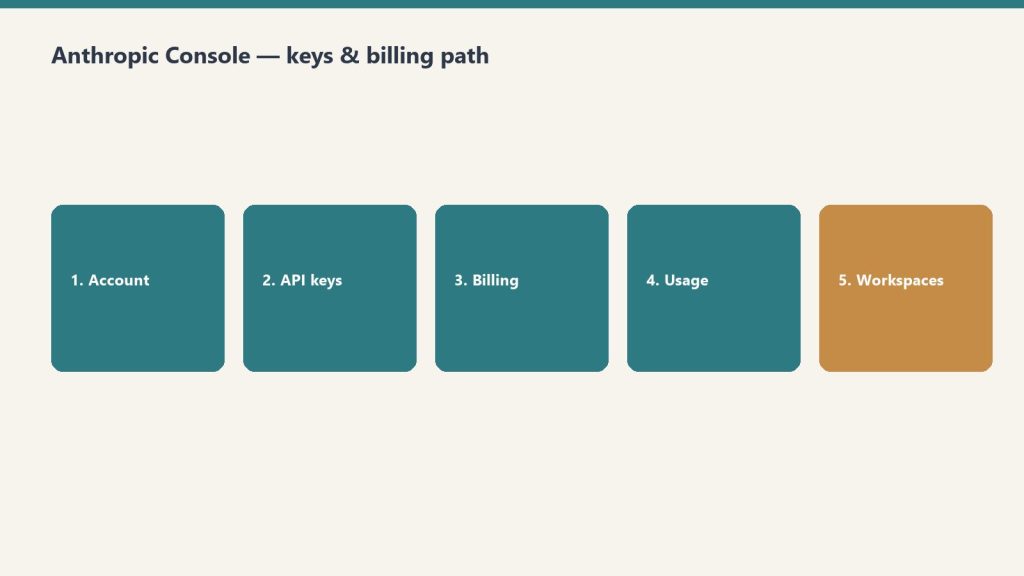
    1. In the Claude Console, click “Billing” or “Plans & Billing” in the left sidebar.
    2. Add a payment method (credit card; Anthropic also supports invoicing for enterprise).
    3. Either pre-purchase API credits or enable auto-recharge. Most users enable auto-recharge with a low threshold to avoid hitting empty mid-job.
    4. Set a monthly usage limit if you want a safety cap.

    Once billing is set up, your API key works.

    Anthropic API Key Format

    An Anthropic API key starts with the prefix sk-ant- followed by a long alphanumeric string. The full key is roughly 100 characters. If your key does not start with sk-ant-, you have copied something incomplete.

    Different key types exist:

    • Live keys (sk-ant-api...): Production calls, real billing.
    • Admin keys (sk-ant-admin...): Workspace admin operations, not for inference calls.

    Most developers only need a live key.

    Which Claude Models the API Key Works With

    A standard live API key gives you access to the current generation of Claude models:

    • Claude Fable 5 (claude-fable-5) — current top tier, released June 9 2026. $10/$50 per million tokens. Anthropic’s first Mythos-class model. Note: carries a mandatory 30-day data retention requirement (no zero data retention option). Full breakdown here.
    • Claude Opus 4.8 (claude-opus-4-8) — second tier, released April 16 2026. $5/$25 per million tokens. Supports zero data retention.
    • Claude Sonnet 4.6 (claude-sonnet-4-6) — released February 17 2026. $3/$15 per million tokens. The production default for most workloads.
    • Claude Haiku 4.5 (claude-haiku-4-5) — released October 15 2025. $1/$5 per million tokens. Fast and cheap for high-volume work.

    Earlier model versions (Sonnet 4, Opus 4.6, Haiku 3.5, etc.) are still callable by their specific snapshot IDs until Anthropic announces deprecation. Check the deprecation timeline in the Claude Console for any model you depend on in production.

    How to Use the API Key

    You pass the key in the x-api-key header on every request to the Messages API:

    curl https://api.anthropic.com/v1/messages \
      --header "x-api-key: $ANTHROPIC_API_KEY" \
      --header "anthropic-version: 2023-06-01" \
      --header "content-type: application/json" \
      --data '{
        "model": "claude-opus-4-8",
        // Other current options: claude-sonnet-4-6, claude-haiku-4-5
        "max_tokens": 1024,
        "messages": [{"role": "user", "content": "Hello"}]
      }'

    In Python or Node.js, the official SDKs read ANTHROPIC_API_KEY from your environment automatically. You should never hardcode the key in source code.

    Security: How to Not Leak Your Key

    Anthropic API keys leak constantly. Most leaks happen the same way:

    1. Committing the key to a public GitHub repo. The single most common leak. GitHub scans for known credential patterns and notifies Anthropic; your key gets auto-revoked within minutes. You will know because your calls suddenly start failing.
    2. Pasting the key into a shared chat or document. Anyone with access becomes a credential holder.
    3. Putting the key in client-side JavaScript. A browser app shipping its API key to users is giving the key away. Always proxy through a backend.
    4. Logging the key. Any logging system that captures HTTP headers can leak the key. Mask sensitive headers in your logger config.

    The good rule: treat your API key like a credit card number, because that’s what it functions as.

    Rotating an Anthropic API Key

    You should rotate keys quarterly at minimum, and immediately if a key is suspected compromised. Rotation in the Claude Console:

    1. Go to API Keys.
    2. Create a new key with a fresh name (e.g., “Claude Code Laptop 2026 Q3”).
    3. Update your application’s environment variable or secret manager to use the new key.
    4. Verify the new key works.
    5. Revoke the old key.

    The five-minute rotation is far cheaper than dealing with a leaked key that was used by an attacker for hours before you noticed.

    Workspace and Organization Keys

    Anthropic accounts are organized as: Organization → Workspaces → API Keys. Most individuals only use one of each. Teams use multiple workspaces to separate environments (production, staging, dev) or projects.

    Each key belongs to one workspace. Billing rolls up to the organization. If you need separate billing visibility per project, separate workspaces are the lever.

    Monitoring API Key Usage

    The Claude Console shows per-key usage in the “Usage” section. You can see:

    • Token spend per key per day
    • Model breakdown (Opus, Sonnet, Haiku usage)
    • Input vs output token split
    • Cache usage (if you have prompt caching enabled)

    Set up usage alerts in Billing. The Anthropic console can email you when daily or monthly spend crosses a threshold. This is the cheapest insurance against a runaway loop or compromised key.

    Frequently Asked Questions

    How do I get an Anthropic API key?

    Sign in to console.anthropic.com, open API Keys in the sidebar, click Create Key, name it, and copy the key immediately. You cannot retrieve the full key after closing the creation modal.

    Is the Anthropic API key free?

    The key itself is free to generate. Using it costs money — Anthropic bills per token at the API pricing in effect. You must add billing credits before the key works.

    Does my Claude Pro or Max subscription include API credits?

    No. Pro and Max subscriptions cover the chat interface and Claude Code (with usage caps). API usage is billed separately against your Anthropic account.

    What does an Anthropic API key start with?

    Live API keys start with sk-ant-api. Admin keys start with sk-ant-admin. The key is roughly 100 characters long.

    What happens if my Anthropic API key gets leaked?

    Anyone with the key can use it to make API calls billed to your account until the key is revoked. If you suspect a leak, revoke immediately in the Claude Console and check Usage for any suspicious activity.

    Can I use the same API key for Claude Code and my own app?

    You can, but you should not. Use separate keys per environment (Claude Code Laptop, Production Backend, Local Dev). Separate keys make revocation surgical instead of catastrophic.

    Where should I store my Anthropic API key?

    In a password manager (1Password, Bitwarden) for personal use, or in a secret manager (AWS Secrets Manager, GCP Secret Manager, HashiCorp Vault) for production. Never commit it to a repo or hardcode it in source.

    How do I rotate an Anthropic API key?

    Create a new key in the Claude Console, update your application to use the new key, verify it works, then revoke the old key. Rotate quarterly as a baseline.

    Get alerted when Claude pricing or limits change

    We track Anthropic’s models, pricing, and limits daily and send a short note when something changes that affects what you pay or build. Occasional, no spam.

    Subscription Form

    The Bottom Line

    Getting an Anthropic API key is a three-minute process. Keeping it safe is a discipline. Use a password manager, rotate quarterly, never put the key in client-side code, and set usage alerts in the Claude Console. Treat the key as production infrastructure, not a developer toy, and it will serve you for years without incident.

    You have your key. Now hit the ground running.

    The Solo Builder Seed Kit includes a ready-made Claude skill file, 20 tested prompts for solo operators, and a step-by-step setup guide. Paste your API key, install the skill, and you’re building — $47.

    Get the Solo Builder Kit →

    Frequently Asked Questions

    How do I get an Anthropic API key?

    Go to console.anthropic.com, sign in or create an account, then navigate to Settings > API Keys. Click ‘Create Key’, give it a name, and copy the key immediately — it is only shown once. You’ll need to add a credit card and funds to your account before making API calls.

    Is there a free tier for the Anthropic API?

    Anthropic does not offer a persistent free tier for the API. New accounts may receive a small initial credit to test the API. After that, all usage is billed at standard token rates. The free tier of claude.ai (the chat interface) is separate from API access.

    How much does the Anthropic API cost?

    As of June 2026: Claude Haiku 4.5 costs $1 input / $5 output per million tokens. Claude Sonnet 4.6 costs $3/$15. Claude Opus 4.8 costs $5/$25. Claude Fable 5 (newest, released June 9) costs $10/$50 per million tokens. The Batch API offers 50% off for non-real-time workloads.

    How do I keep my Anthropic API key secure?

    Never commit API keys to version control. Store them in environment variables or a secrets manager (AWS Secrets Manager, GCP Secret Manager, Vault). Use separate keys per application so you can rotate or revoke them independently. Set spending limits in the Anthropic console to cap accidental runaway costs.

    What happens if my Anthropic API key is compromised?

    Go to console.anthropic.com > Settings > API Keys immediately and click Revoke next to the compromised key. Create a new key and rotate it into your applications. Review your usage logs for unexpected spend. Anthropic will not refund charges made with a compromised key unless you contact support promptly.

    Can I use my Anthropic API key with Claude Code and Claude Cowork?

    Claude Code (the CLI tool) uses your API key when you run it outside a claude.ai subscription context. Claude Cowork (the desktop app) uses your subscription, not a raw API key. For self-hosted integrations, scripts, and Agent SDK workflows, your API key from console.anthropic.com is what you need.

  • Claude Code Pricing in 2026: Pro vs Max vs API Costs Explained

    Claude Code Pricing in 2026: Pro vs Max vs API Costs Explained

    Last verified: 8 September 2026. Seat and token dollars live on Claude pricing. Keys and prepaid credits: Anthropic Console.

    Direct Answer (8 September 2026): Claude Code ships with paid chat seats: Pro ($20/mo or $17 annual), Max (from $100, 5× or 20×), Team (Standard $20 annual / $25 monthly; Premium $100 / $125; 2–150 seats), Enterprise ($20/seat + API-rate usage). Free does not include Claude Code. A seat is not an API credit. Extra usage on paid plans, when enabled, bills at API rates.

    Two meters

    • Seat — claude.ai / Claude Code usage cap on Pro, Max, Team, Enterprise.
    • API — prepaid credits in the console. Same models, different bill.

    Official seats: claude.com/pricing and the Team Help Center article. Official tokens: API pricing.

    Token rates used inside Code (API path)

    Model In / out per MTok When
    Haiku 4.5 $1 / $5 Cheap lookups
    Sonnet 5 $2 / $10 Daily default
    Opus 5 $5 / $25 Hard refactors
    Fable 5.1 $10 / $50 Only if the job is worth it

    Older Sonnet 4.6 ($3/$15) and Opus 4.8 ($5/$25) remain listed. Do not start new work on them.

    Which seat

    • Light Code: Pro.
    • Several hours a day: Max 5×.
    • All-day / long agents: Max 20×.
    • 2–150 people, one bill: Team. Premium if those seats burn the weekly cap.
    • SSO / SCIM / audit and usage that should scale: Enterprise.
    • Unattended pipelines: console API key with a spend cap.

    Related: current models · console setup.

  • Sequential Image Generation: Creating Cohesive Sets

    Sequential Image Generation: Creating Cohesive Sets

    Most teams generate images for multi-piece content one API call at a time. The result is a set that shares general aesthetics but loses visual DNA at the seams. This article makes the case for generating cohesive image sets in one conversation context instead — and shows what each method actually produces.

    Sequential vs parallel image generation: Sequential generation creates multiple images inside one conversation with an image-capable model, so each image inherits visual DNA — palette, perspective, geometric language, compositional rhythm — from the prior images in the same context window. Parallel generation creates each image in a separate API call, with no shared context, producing sets that share keywords but not feel. Use sequential for cohesive image sets where the visual identity matters; use parallel for high-volume independent images.

    sequential vs parallel image generation  — Sequential Image Generation: Creating Cohesive Sets

    The image above is a simple visual contrast — one workflow on the left, a different workflow on the right, with an arrow pointing from one to the other. It’s also the kind of image you can only get reliably when you generate it as part of a series, in conversation with a model that already knows what visual language you’re working in. Generated cold, in isolation, the result drifts. Generated in context, alongside five other images sharing the same DNA, the result locks in.

    This article is about why that happens, what it means for content production, and when to use which method.

    What “in one context” actually means

    When you generate an image with a typical API call, the model receives your prompt with no memory of any prior image. Each call is a cold start. The model interprets your style instructions from scratch every time. If you ask for “isometric perspective, dark navy background, cyan and amber accents” five times in a row, you’ll get five images that broadly match those words — but they won’t actually share visual DNA. They’ll share keywords.

    When you generate in a single conversation with an image-capable model like Gemini, every image you’ve already made stays in the context window. The model sees what it just generated. The next image inherits the palette, the geometric vocabulary, the compositional rhythm, the lighting treatment, the specific aesthetic flavor of the prior images — not because you re-described those things, but because the model is continuing a project, not starting a new one.

    That distinction sounds small. The output difference is large.

    The conventional pipeline that produces parallel generation

    standard content pipeline image last — Sequential Image Generation: Creating Cohesive Sets

    The image above shows the standard content pipeline. Research the topic, outline the structure, write the document, generate an image to go with it. When the article needs more than one image, the last step gets parallelized — multiple API calls fired in sequence or in parallel, each one a separate request, each one independent of the others.

    This is how every CMS template works, how every batch image pipeline is built, and how most automated content systems run. It’s efficient. It’s fast. It scales to hundreds of images across hundreds of unrelated posts. And it’s exactly the right tool for that volume work.

    It is not the right tool when the images are meant to belong to each other.

    What parallel generation actually looks like

    parallel image generation drift — Sequential Image Generation: Creating Cohesive Sets

    The image above shows the contrast plainly. Six frames, each containing a different abstract composition. They share a general aesthetic because the prompts asked for it — there’s a recognizable common style budget. But look at the actual visual content: one frame leans cool cyan, another leans warm amber, one uses hexagonal circuit patterns, another uses soft organic blobs, another uses sharp angular fragments. The compositional logic drifts. The palette drifts. There are no threads between them because there’s nothing connecting them in the model’s understanding.

    This is what parallel image generation produces, even with carefully written prompts. Each call follows instructions in isolation. Each call invents its own interpretation of “dark navy with cyan and amber accents.” The instructions don’t lie — every frame is technically dark navy with cyan and amber — but the feel drifts because there’s nothing keeping it locked.

    A reader scrolling past doesn’t consciously notice. They just feel, vaguely, that the images don’t quite belong together. That vague feel is the cost.

    What sequential generation produces

    sequential image generation cohesion — Sequential Image Generation: Creating Cohesive Sets

    The image above shows the difference. Five frames, all generated in a single conversation. The visual continuity is immediately obvious — every frame uses the same palette, the same geometric vocabulary (hexagons, circuit traces, glowing nodes), the same compositional rhythm, the same slightly-elevated isometric perspective. The frames are different from each other in content — they’re not duplicates — but they belong to the same designed system.

    The connecting threads in the image are the metaphor. Visual DNA flows from one frame to the next. The model doesn’t reinvent the aesthetic on frame two; it continues it. By frame five, the system has cohered so tightly that the model is generating within a style rather than generating to a style.

    This is what context does. Every image you generate in that conversation is one more anchor point. The model has more to reference and less to invent. The fifth image is easier to make than the first, because the context has already done most of the work of specifying what the image should be.

    The seam test

    Here’s the practical diagnostic for whether your image set needs sequential generation: imagine the images displayed next to each other, maybe in a carousel or a grid, maybe as featured images for a series of related articles. Imagine a reader seeing them at a glance.

    Do the images need to feel like one project? Like five views of the same world?

    If yes, sequential generation is the right method. If the images can stand alone without referencing each other — a featured image on a daily blog post, a stock illustration for a generic article — parallel generation is fine and probably better. Speed and throughput matter more than coherence when nothing depends on coherence.

    The volume tier and the premium tier of image production are doing different jobs. Treating them like one tier and reaching for parallel generation by default is how most teams end up with image sets that almost work.

    How to actually do sequential generation

    The method is mechanical and worth spelling out:

    Open one conversation with an image-capable model that supports conversation context. Gemini works well for this; other models with image generation and persistent context can work too. Paste your style guardrails as the first message — palette, perspective, aesthetic, what you don’t want. Then send your image prompts one at a time, in the same conversation, in the order you want the visual DNA to flow.

    Don’t start a new session between images. Don’t summarize prior images in the next prompt. Trust the context window to do the carry-forward.

    If an image isn’t quite right, ask for a revision in the same conversation rather than starting over. The model will adjust within the established style instead of regenerating fresh.

    When you have all the images you need, the set is done. The cohesion you couldn’t have gotten from six separate API calls is now baked into the image files themselves.

    A related workflow worth naming

    inverted content pipeline image first — Sequential Image Generation: Creating Cohesive Sets

    The image above shows a different rearrangement of the same pipeline — one where the image step jumps forward, ahead of the writing. The article gets written to fit the images, not the other way around. That’s a different topic with its own trade-offs, and we’re covering it in a forthcoming companion piece. For now, the relevant point is that whichever order you use, sequential generation is what makes coordinated multi-image content tractable. Without it, the activation energy of coordinating images is high enough that most teams default to one-off illustrations.

    The reverse failure mode

    The opposite mistake is also worth naming. Some teams, having discovered sequential generation, try to use it for everything. This wastes effort. A single featured image for a daily blog post doesn’t need to share visual DNA with any other image — it stands alone. Running it through a long conversation is overhead for no benefit.

    The split is simple. If the images belong together, generate them together. If they stand alone, generate them alone.

    When to use each method

    Use sequential generation in one conversation context for:

    • Pillar plus cluster article sets where the visual identity matters
    • Multi-image articles where consistency across images is part of the message
    • Flagship content where readers will perceive the image set as designed
    • Brand-defining visual systems
    • Anything where seeing two images side by side and noticing they belong together is part of the value

    Use parallel generation across separate calls for:

    • Single featured images on unrelated daily posts
    • Site-wide batch fills where volume dominates
    • Stock-style illustrations for routine content
    • Background image work where nobody is looking at it twice
    • Anything time-sensitive enough that the activation energy of opening a conversation isn’t worth it

    The locked-together effect

    image text locked together cohesion — Sequential Image Generation: Creating Cohesive Sets

    The image above shows what coherent visual sets enable in the actual reading experience. When the images in an article share visual DNA, a reader can reference back and forth between them — visual element here, paragraph there — without the cognitive friction of feeling like the images are coming from different worlds. Specific points in one image connect to specific points in another, or to specific points in the text, and the reader’s eye treats them as a system.

    That’s what cohesion is worth. Not aesthetic prettiness in the abstract, but the reader’s ability to navigate the content as a unified whole instead of as a sequence of disconnected pieces.

    Parallel generation can’t produce this effect reliably. Sequential generation can. The method is the difference.

    The premise

    The core insight is small enough to fit in a sentence: generate cohesive image sets in one conversation, generate independent images in parallel calls, and don’t conflate the two cases. Everything else in this article is unpacking that one observation.

    The teams that get this right produce visual systems that look designed. The teams that get this wrong produce sets that look almost-designed — close enough that nobody complains, far enough that the work doesn’t quite land. The difference between those two outcomes is which workflow you use, and the workflow choice is essentially free once you know to make it.

    This very article is a small proof of concept. The six images above were generated in a single Gemini conversation, in sequence. The visual DNA flows across all of them. None of that would have survived parallel generation. The choice was free; the result is visible.

    Related on Tygart Media: Can Claude generate images · Claude for content · how to use Claude.

    Frequently asked questions

    What is the difference between sequential and parallel image generation?

    Sequential image generation creates multiple images inside a single conversation with an image-capable model, so each new image inherits visual DNA from the prior images in the same context window — palette, perspective, geometric language, and compositional rhythm carry forward automatically. Parallel image generation creates each image in a separate API call with no shared context, so each call is a cold start that follows style keywords but cannot inherit feel.

    Why does conversation context matter for image generation?

    When images are generated in one conversation, the model can see the prior images it generated and use them as anchors for the next image. This means visual specifications you set once are carried forward without you having to re-state them. The result is dramatically tighter cohesion than parallel API calls can produce, even when both methods use identical prompts.

    When should I use sequential image generation instead of parallel calls?

    Use sequential generation when the image set is part of the value proposition — pillar and cluster article sets, multi-image flagship articles, brand-defining visual systems, anything where readers will perceive the images as belonging to a designed whole. Use parallel generation for single featured images on unrelated daily posts, site-wide batch fills, stock-style illustrations, and routine content where volume matters more than coherence.

    Does this method only work with Gemini?

    No. The method works with any image-capable model that supports persistent conversation context — meaning the model can see prior turns in the same conversation and use them when generating new images. Gemini handles this well today. Other models with similar capabilities work just as well. The principle is about conversation context, not about a specific provider.

    What is the “seam test” for image set cohesion?

    The seam test asks whether your images need to feel like one project when seen at a glance — like five views of the same world rather than five separate illustrations. If yes, sequential generation is the right method. If the images can stand alone without referencing each other, parallel generation is faster and equally good. The split between volume work and premium work follows the seam test.

    Can I mix sequential and parallel generation in the same project?

    Yes, and it often makes sense. Generate the cohesive set sequentially for the article’s main illustrations, then use parallel generation for one-off support images, thumbnails, or social variants that don’t need to share DNA with the main set. The methods are tools, not ideologies. Match the method to the cohesion requirement of each image.