Tag: Restoration Industry

  • Mold Remediation Pricing Guide: Containment, PPE, and Clearance Line Items That Get Paid

    Mold Remediation Pricing Guide: Containment, PPE, and Clearance Line Items That Get Paid

    Mold remediation pricing differs from water and fire pricing in one crucial way: the work is governed by a written remediation protocol from a third-party assessor, which means every line item on the estimate has to map to a specific protocol requirement. Operators who price mold like a water job consistently under-bill, take on liability they did not price for, or get reductions because the protocol does not match the estimate.

    For broader pricing context, see our restoration pricing master guide. Here we focus on the specific line-item structure that wins on mold work.

    Start with the Protocol, Not the Estimate

    The remediation protocol from the Indoor Environmental Professional (IEP) is the source document for the entire estimate. Every line item — containment level, PPE class, antimicrobial type, equipment count, demolition extent, clearance criteria — must reference the protocol. Estimates that deviate from the protocol either lose work to a more compliant competitor or fail clearance and require costly re-work.

    The first thing to do with any mold job is read the protocol and build the estimate against it line by line.

    Containment Is the Largest Single Cost on Most Jobs

    Containment is where most mold estimates either succeed or fail. The IICRC S520 standard defines four containment levels: limited, source, full, and full with decontamination chamber. Each level has dramatically different labor and material costs, and each must be priced for the actual containment built, not the easiest one to install.

    Core containment line items include: poly sheeting (6-mil minimum), zipper doors, negative air machine setup, decontamination chamber framing, HVAC isolation, and signage. Each of these has its own labor and material line.

    PPE Is a Real Line Item, Not Overhead

    PPE for mold work is consumable, single-use, and required by protocol. Estimates that bury PPE in overhead lose 5 to 10 percent of the legitimate billable work per job. The right approach is per-technician, per-day PPE pricing for tyvek suits, full-face respirators with HEPA cartridges, gloves, and boot covers. Document the technician count and day count, and PPE flows naturally from the labor schedule.

    Antimicrobial and HEPA Vacuuming

    Antimicrobial application has three legitimate billable variants: spray-applied, fog-applied, and wipe-down. Each is a different rate per square foot. HEPA vacuuming of all surfaces in the affected area is a separate line, billed per square foot of surface area (not floor area, which is the most common pricing mistake).

    Demolition and Disposal

    Mold demolition is more aggressive than water demolition because the protocol typically requires removal of all visibly contaminated materials plus a buffer zone (often 12 to 24 inches beyond visible growth). Pricing must reflect the protocol’s demolition extent. Disposal is also more expensive: contaminated materials must be double-bagged in 6-mil poly and disposed of as Category III contamination.

    Equipment: HEPA Air Scrubbers and Negative Air

    HEPA air scrubbers run for the duration of containment plus typically 24 to 48 hours after demolition is complete. Negative air machines maintain pressure differential during containment. Both are billed daily, and both must be documented on the daily log to support invoicing.

    Clearance Testing and Re-Occupancy

    Clearance testing is performed by the IEP, not the remediator, but the remediator must price for re-cleaning if the initial clearance fails. Building this contingency into the estimate as a separate line item — “clearance failure re-cleaning, billable if required” — protects margin and sets expectations with the homeowner.

    Frequently Asked Questions

    What is the average price of a mold remediation job?

    Residential mold jobs average $2,500 to $15,000 depending on containment level and affected area. Severe contamination involving HVAC systems or whole-home remediation can exceed $30,000. Commercial mold projects routinely run $10,000 to $100,000+.

    Why is mold remediation so much more expensive than water damage?

    Mold work requires full PPE, more aggressive demolition, full containment, HEPA equipment, third-party protocol compliance, and clearance testing — none of which are required on standard water damage. The labor and disposal costs are roughly 2 to 3 times higher per affected square foot than equivalent water work.

    Should mold pricing be tied to Xactimate?

    Mold work performed for insurance carriers typically uses Xactimate or Symbility pricing. Cash mold work should be priced for value with tiered options. Operators doing significant cash mold volume often build their own internal pricing matrix referenced against current Xactimate values.

    What gets reduced most often on mold estimates?

    The most commonly reduced items are containment labor (cut as overhead), PPE charges (rolled into labor), HEPA equipment days, and antimicrobial application area. Each is defensible when the estimate ties back to the protocol and the daily log documents the actual work performed.

    Do I need an Indoor Environmental Professional for every mold job?

    Not legally in every state, but the best practice — and the only way to avoid liability — is to require an IEP-written protocol for any mold job exceeding 10 square feet of contamination. The IEP also performs the clearance test, which protects the remediator from re-call disputes.


  • Restoration Pricing Strategy and Margin: How Profitable Operators Avoid Racing to the Bottom

    Restoration Pricing Strategy and Margin: How Profitable Operators Avoid Racing to the Bottom

    Most restoration owners think their pricing problem is the matrix. It is not. The pricing problem is strategy: choosing which jobs to take, which programs to participate in, which markets to compete in, and what gross margin target to defend. Operators who get strategy right consistently produce 35 to 45 percent gross margins. Operators who do not consistently produce 12 to 18 percent gross margins on the same matrix.

    This article complements our restoration pricing master guide by focusing on the strategic choices that surround the line-item work.

    The Three Restoration Pricing Models

    Every restoration company runs on one of three pricing models, and the choice has more impact on profitability than any line-item decision:

    • Pure TPA / matrix pricing — high volume, lower margin, predictable referral flow, heavy paperwork burden
    • Hybrid TPA + cash — diversified revenue, higher blended margin, requires sales capability
    • Cash-only / direct-to-consumer — highest margin per job, requires marketing investment, more sensitive to local economy

    Each model has a different cost structure, a different sales motion, and a different capital requirement. The strategic mistake is trying to run all three with the same operations.

    Setting a Gross Margin Target

    Healthy restoration companies target 35 to 45 percent gross margin on the blended business. TPA-only operators trend toward the lower end; cash-heavy operators trend toward the higher end. Setting a target margin and walking away from jobs that do not meet it is the single most important strategic discipline in the business.

    The math works like this: if your overhead absorption requires 35 percent gross margin to break even, every job below that target consumes capacity that should go to better work. Saying yes to those jobs feels like growth but is actually destruction.

    Pricing for Value, Not Cost

    The most expensive mistake in restoration pricing is the cost-plus mindset: figure out your cost, add a margin, send the estimate. Cost-plus pricing leaves money on the table on every cash job and ignores the value the customer is actually receiving (immediate response, displacement avoidance, professional handling of insurance).

    Value-based pricing on cash work uses tiered options, value-anchoring (presenting the most expensive option first), and outcome framing (“we save you the displacement, the insurance battle, and the risk of secondary damage”).

    Defending Pricing Without Discounting

    Discounting is the gateway drug of restoration pricing. Once an operator starts discounting to win jobs, the local market remembers, and every future job comes in at the discounted rate. The discipline is to defend price without discounting: re-scope the work, drop optional line items, offer payment terms, but never cut the unit prices.

    The reps who close at full price are the reps who can articulate why the work costs what it costs and what happens if it is not done correctly. Training the sales conversation matters more than the price itself.

    Programs to Avoid

    Some TPA programs are not worth participating in at any margin level. The signals that a program is destructive: required participation in third-party billing platforms with high transaction fees, mandatory upfront deductible collection, slow pay (90+ days), excessive audit reductions, or volume requirements that consume more capacity than the revenue justifies.

    Walking away from bad programs is harder than joining them — but it is what separates 35 percent margin operators from 12 percent margin operators.

    Frequently Asked Questions

    What gross margin should a restoration company target?

    Healthy restoration companies target 35 to 45 percent gross margin. TPA-only operators commonly run 25 to 35 percent. Cash-only or premium-cash operators commonly run 45 to 60 percent. Below 25 percent gross margin, the business cannot absorb overhead and grow simultaneously.

    Should I price the same for cash and insurance jobs?

    No. Insurance jobs should be priced to the matrix with disciplined documentation. Cash jobs should be priced for value with tiered options. Pricing identically across both channels means under-charging on cash work or over-pricing insurance work that never gets approved.

    How do I compete with low-priced restoration companies in my market?

    You do not compete on price. You compete on response speed, scope clarity, communication, warranty, and outcome. Low-priced competitors win the customers who shop on price; you want the customers who shop on confidence. Marketing, sales training, and reputation are the real defenses against low pricing.

    When should I walk away from a TPA program?

    Walk away when the program requires capacity that would generate more gross profit elsewhere, when transaction fees and audit reductions push the effective margin below your target, or when payment terms exceed 60 days consistently. Calculate the true cost of participation, not just the headline volume.

    What is the right gross margin to target on cash jobs specifically?

    50 to 60 percent gross margin is the right target for cash work in most markets. Cash jobs carry more sales effort, more collection risk, and no TPA referral funnel — so the margin must compensate. Operators consistently producing 30 percent margin on cash work are leaving substantial profit on the table.


  • Cash vs Insurance Restoration Pricing: When to Use Which and How to Convert at Higher Margin

    Cash vs Insurance Restoration Pricing: When to Use Which and How to Convert at Higher Margin

    Cash and insurance restoration jobs look identical in the field but require completely different pricing strategies. Operators who use the same approach for both consistently under-price cash work and lose money to scope reductions on insurance work. The good news: separating the two pricing motions is one of the highest-impact changes a restoration company can make.

    This article builds on the foundation laid in our restoration pricing master guide.

    How to Tell the Difference at Intake

    Every job intake should answer one question early: is this an insurance job, a cash job, or undetermined? The answer drives every subsequent decision — sales process, estimate format, scope of work, payment terms, and pricing.

    Signals that a job will be cash: customer has no intention of filing a claim, deductible is high relative to job size, damage is below deductible, customer is uninsured, customer is sensitive to claim impact on premium. Signals that a job will be insurance: claim is already filed, adjuster is already assigned, TPA program is involved, large loss requiring carrier coverage.

    Insurance Pricing Discipline

    Insurance jobs should be priced to the matrix with full scope documentation. The discipline is completeness: every line item that should be on the estimate must be on the estimate, and every line item must be defensible with on-site documentation.

    Insurance pricing is a documentation game, not a negotiation game. The reps who get paid in full are the reps who photograph everything, log moisture readings daily, document equipment placement, and reference IICRC standards in the scope notes.

    Cash Pricing Strategy: Tiered Options Win

    Cash pricing should never be a single number. The conversion-rate-winning approach is a three-tier estimate:

    • Premium tier — full-service, highest scope, white-glove handling, longest warranty
    • Standard tier — recommended scope, normal warranty, structure plus contents
    • Budget tier — minimum to address the immediate problem, structure-only or critical-area-only

    This works because most customers want to feel like they are making a choice, not accepting a price. Tiered pricing converts more leads, lifts average ticket, and surfaces the actual customer budget faster than a single-price approach.

    Value Anchoring on Cash Work

    The order in which options are presented matters as much as the options themselves. Always present the premium tier first. The standard tier then feels reasonable, and the budget tier feels like a compromise. Reverse the order and the standard tier feels expensive while the budget tier becomes the default choice.

    Value-anchoring is not manipulation; it is helping the customer understand the full scope of what good restoration work looks like before they pick the level they want.

    Converting Cash Leads That Hesitate

    Cash leads who hesitate after seeing the estimate are usually responding to one of three concerns: the price feels high (compared to what?), the scope feels excessive (do I really need all this?), or the payment timing feels difficult (can I afford this now?).

    The right responses, in order: re-frame the comparison (“here is what happens if it is not done correctly”), explain each line item (“this is required because of contamination class”), and offer payment terms (“we can split this into three payments tied to milestones”). Never respond with a discount.

    Hybrid Cash + Insurance Scenarios

    Some jobs are partially insurance-covered and partially out of pocket. The pricing approach: build one comprehensive estimate at insurance pricing for the covered portion, then a separate cash estimate for additional work the customer wants. Mixing the two in a single estimate creates billing chaos and lost margin.

    Frequently Asked Questions

    Should I always recommend filing an insurance claim?

    No. For damage below or near the deductible, filing a claim costs the customer more than the cash estimate would. The right ethical position is to share the math and let the customer decide. Operators who push every job to claim status develop a reputation for opportunism that hurts long-term referrals.

    How much higher should cash pricing be than insurance pricing?

    Cash work typically prices 15 to 30 percent above the equivalent Xactimate estimate, reflecting the value of immediate response, no claim involvement, and the operator’s higher sales effort. The premium is justified by what the customer is actually buying — which is more than just the labor.

    What is the best way to present a cash estimate?

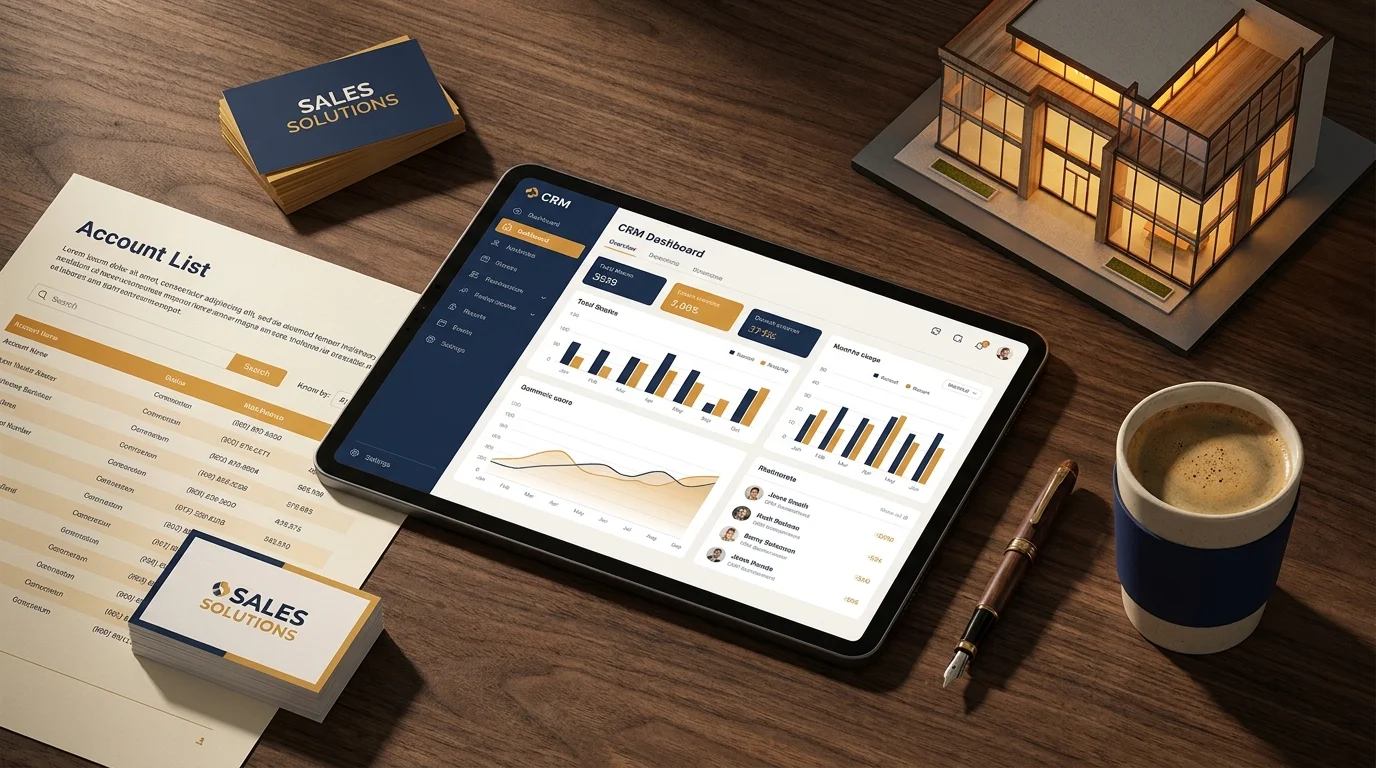
    In person, on a tablet, with three tiered options visible simultaneously. Walk through each option’s scope, warranty, and timeline. Let the customer ask questions. Never email a cash estimate cold and hope for a yes — that is the lowest-converting approach available.

    How do I handle a customer who says my cash price is higher than another quote?

    Ask to see the other quote. Most “lower” quotes are missing scope items, are quoting a different remediation level, or are from operators without IICRC credentials. Walking through the comparison line by line either justifies your pricing or surfaces a real scope gap to address.

    What payment terms should I offer on cash jobs?

    Standard terms: 50 percent deposit, 50 percent on substantial completion. For larger jobs: 25 percent deposit, 50 percent at midpoint, 25 percent on completion. Never start work without a deposit; collection becomes nearly impossible after the work is done.


  • Restoration Pricing Objections and Discounts: How to Defend Price Without Caving

    Restoration Pricing Objections and Discounts: How to Defend Price Without Caving

    Pricing objections are not a problem to solve; they are a normal part of the restoration sales conversation. The difference between reps who close at full price and reps who discount their way to a yes is not the words they use — it is the framework they use to think about objections in the first place.

    This article builds on the strategic foundation laid out in our restoration pricing master guide.

    The Three Objection Types

    Every pricing objection in restoration falls into one of three categories, and each requires a different response:

    • “It feels expensive” — comparison-based objection (compared to what?)
    • “I cannot afford this” — capacity-based objection (timing or amount?)
    • “You are higher than the other quote” — competitive objection (apples-to-apples?)

    Mis-diagnosing the objection type is what causes reps to discount when they should re-frame, or re-frame when they should offer payment terms.

    Responding to “It Feels Expensive”

    The “expensive” objection is almost always a comparison problem. The customer has a frame of reference (a kitchen renovation, a service call, a previous loss) that does not match restoration work. The right response is to expand the frame.

    “Expensive compared to what? When you think about the cost of secondary damage if this is not addressed properly, or the cost of mold remediation if drying is incomplete, our estimate represents the lower-cost outcome — not the higher-cost one.”

    Responding to “I Cannot Afford This”

    This objection is about timing or amount, and the right response depends on which. If timing, offer milestone payments. If amount, re-scope to a tiered alternative — never discount the original scope. Discounting the full scope teaches the customer that your prices are negotiable, which destroys margin on every future job.

    “I hear you — let me show you a tiered approach. We can address the immediate critical issues now and phase the rest as your budget allows. Same per-line pricing, smaller scope at each step.”

    Responding to “Other Quote Was Lower”

    Always ask to see the competing estimate. The honest answer to “lower quotes” is that they are usually missing scope, missing equipment days, missing required line items, or being submitted by operators without proper credentials. Walking through the comparison line by line either justifies your price or reveals a real gap.

    “Can I take a look? I want to make sure we are comparing the same scope. If they are doing the same work for less, that is information I need. If their estimate is missing scope, that is information you need.”

    Walk-Away Discipline

    The single most powerful pricing tool a restoration rep has is the willingness to walk away. Customers can sense when a rep needs the deal, and they will negotiate harder. Customers can also sense when a rep is genuinely indifferent to whether the job closes at full price or does not close at all.

    The reps who project walk-away energy close more jobs at full price than the reps who chase every deal. The math is counterintuitive but durable.

    When Discounting Is Appropriate

    Discounting is appropriate in exactly three situations: military or first-responder discounts (predictable, advertised, capped), bundled multi-property work (volume justifies it), and end-of-month margin trades on jobs that fit a slow week. Every other discount is a habit, not a strategy.

    Scripts That Hold the Line

    The right scripts for holding the line do not feel adversarial. They feel like a problem-solving conversation:

    “I want to make sure we get this right for you. The pricing reflects the IICRC-standard work this loss requires. If we can adjust the scope to fit your situation better, let me know what is most important — but I cannot reduce the unit pricing on what we do agree to do, because that would mean cutting corners on the work itself.”

    Frequently Asked Questions

    Should I ever discount restoration work?

    Rarely. Discounting on a single job teaches the local market that your pricing is negotiable. The better tools are tiered scope, payment terms, and walk-away discipline. Discount only when it fits a structured policy (military discount, multi-property volume, end-of-month margin trade).

    How do I respond when a customer says they will go with a cheaper competitor?

    Wish them well, leave the door open, and move on. “I understand — if their estimate covers the full scope, that is the right call for you. If you find later that something was missed, please call us. We are happy to come back out.” That response wins long-term reputation and frequently wins the job back when the cheaper estimate proves incomplete.

    What is the most common pricing objection in restoration?

    “It feels expensive” — almost always a comparison problem rather than a real budget issue. The customer is comparing the estimate to a frame of reference that does not match restoration work. Re-framing the comparison resolves most of these objections without any pricing change.

    How do I train new sales reps to defend pricing?

    Role-play the three objection types weekly. Train reps to ask diagnostic questions before responding. Audit closed-lost deals for the actual reason and feedback patterns. The reps who get good at defending pricing are the reps who get the most repetitions on the conversation.

    What is the right pricing posture during a slow market?

    Hold the line on unit pricing and adjust scope or payment terms as needed. Cutting unit pricing during a slow market makes the slow market permanent in the customer’s mind. The operators who emerge from slow markets strongest are the ones who held pricing through them.


  • Choosing Restoration ERP and Sales Software in 2026

    Choosing Restoration ERP and Sales Software in 2026

    The restoration software landscape in 2026 has consolidated into four recognizable categories. The wrong choice will cost a restoration operator three to five years of integration debt. The right one will quietly compound margin and visibility for the same period.

    This is a buyer’s framework, not a vendor ranking. Vendor names move quickly in this market through acquisition and rebranding. The categories below are stable, and the selection criteria are durable.

    The Four Categories of Restoration Software in 2026

    When operators talk about “restoration ERP” or “restoration sales software,” they are usually referring to one of four distinct categories that solve different problems:

    • End-to-end restoration ERPs — single platforms covering CRM, job management, scheduling, estimating, photo documentation, accounting integration, and reporting. The dominant choice for shops above roughly $5M revenue that want one system of record.
    • Sales-focused CRMs — platforms purpose-built for the commercial cultivation cycle, account mapping, and sales-pipeline management. Often paired with a separate job-management tool.
    • Job-management platforms — systems focused on the production side: dispatch, technician documentation, customer signatures, estimating, photo capture. The dominant choice for shops where production discipline drives the business.
    • Best-of-breed point tools — moisture mapping, photo documentation, equipment tracking, communication, scheduling — each from a separate vendor, integrated through APIs or middleware.

    The first selection question is which category fits the shop, not which vendor. Most software regret in the restoration industry comes from buying a vendor in the wrong category for the operating model.

    How to Choose the Right Category

    The right category is a function of revenue scale, operating model, and growth direction. A working framework:

    • Under $2M revenue, residential-led: a job-management platform plus a basic CRM is usually sufficient. Full ERP is overhead the shop cannot absorb.
    • $2M to $5M revenue, mixed residential and commercial: a job-management platform with a strong sales module, or an ERP with a clear sales workflow. The decision tilts on commercial growth ambition.
    • Above $5M revenue, multi-location or commercial-led: end-to-end ERP becomes the practical choice. The cost of stitching point tools together exceeds the cost of the ERP.
    • Heavy commercial sales motion: a dedicated sales CRM is often added regardless of the production platform, because commercial cultivation requires functionality production-led platforms do not prioritize.

    The Six Selection Criteria That Actually Matter

    Vendor demos make every platform look comparable. The differentiators show up in production. The six criteria that separate platforms operators stay on from platforms operators leave within 24 months:

    1. Documentation discipline. Does the platform enforce the documentation standard your insurance work requires, or does it allow technicians to skip critical fields? The IICRC S500 2026 documentation expectations make this non-negotiable.
    2. Estimating integration. Does the platform connect to the estimating tool your shop uses (Xactimate, Symbility, or alternatives) without a manual re-key? A re-key step is where margin leaks.
    3. Accounting integration. Does the platform write clean records into QuickBooks, Sage, or NetSuite? Without this, your controller is rebuilding the books every month.
    4. Mobile reliability. Does the technician-facing app work on a job site with intermittent connectivity? Field-side reliability is the most common reason adoption stalls.
    5. Sales pipeline depth. If you have a commercial sales motion, does the platform support named accounts, multi-contact account mapping, and stage-based cultivation? Most production-led platforms do not.
    6. Reporting and forecasting. Can ownership see revenue forecast, gross margin by job type, and sales pipeline in one view, or are these stitched together in spreadsheets?

    The Hidden Cost: Implementation

    The license fee is rarely the largest cost of restoration software. Implementation, data migration, and the productivity dip during the cutover typically run 1.5x to 3x the first-year subscription cost. Operators who underestimate this number end up on the platform without ever fully implementing it, which produces the worst possible outcome — paying for software no one trusts.

    The mitigations are well known: dedicate an internal champion who owns the rollout, plan for a 90-day cutover with parallel operation, and stage the implementation by department rather than going live everywhere at once.

    The AI Question

    Every restoration software vendor in 2026 is shipping AI features — automated photo tagging, voice-to-documentation, sketch generation from job photos, and project estimation assistance. The honest assessment is that the AI features that hold up in production are the ones that automate documentation entry, not the ones that promise to “do estimating for you.” Operators evaluating platforms in 2026 should weight the AI features by their effect on technician documentation discipline, not by demo polish.

    Switching Costs Are Real

    The cost of switching restoration platforms after 18 months on one is high — historical job data, customer records, and team training all get disrupted. This argues for thorough selection, not for paralysis. Most operators who report regretting their software choice cite either rushing the decision or buying for a future state of the business that never arrived. A platform that fits the next 18 months and is extensible into the next 36 is a better choice than the perfect platform for a future that may not happen.

    Frequently Asked Questions

    What is the difference between a restoration ERP and a job-management platform?

    An ERP covers the full operating system of the business — CRM, sales, job management, accounting integration, reporting — in one platform. A job-management platform focuses on the production side — dispatch, technician documentation, estimating, photo capture — and typically pairs with a separate CRM and accounting system.

    When should a restoration company invest in a dedicated sales CRM?

    When the commercial sales motion requires named-account cultivation, multi-contact account mapping, and stage-based pipeline management at a depth that production-led platforms do not support. Shops with serious commercial growth ambition typically run a dedicated sales CRM regardless of their production platform.

    How much should I budget for restoration software in 2026?

    License fees vary widely, but a working budget for a mid-sized restoration operation is 1% to 3% of revenue for software, with implementation and training adding 1.5x to 3x the first-year subscription cost in year one. The total software stack typically replaces a measurable amount of administrative labor, so the net cost is usually lower than the gross spend.

    Should I integrate AI tools into my restoration software stack?

    The AI features that hold up in production in 2026 are the ones that automate documentation entry — photo tagging, voice-to-documentation, sketch generation. AI features that promise to replace estimating or scoping judgment are not yet reliable enough to depend on. Evaluate AI by its effect on technician discipline, not demo polish.

    How long does a restoration software implementation take?

    A realistic implementation runs 90 days for a mid-sized restoration operation, with parallel operation against the legacy system for the first 30 to 60 days. Compressing the timeline below 60 days typically produces an incomplete implementation that erodes platform trust within the first year.

    For more on the technology layer of running a restoration business, see Restoration Tech Playbooks.


  • Xactimate X1 Platform Guide for Restoration Operators

    Xactimate X1 Platform Guide for Restoration Operators

    Xactimate X1 is Verisk’s unified estimating platform for property claims work. It runs across desktop, online, and mobile with cloud-synced data, which means a field tech can start a sketch on a tablet at a loss site and a project manager can finish the estimate on a desktop in the office without re-keying anything. For restoration operators, that field-to-office continuity is the single biggest workflow advantage X1 brings to the business.

    This guide assumes you already understand how Xactimate fits into a restoration company’s pricing workflow. If not, start with our restoration pricing and estimating master guide for the full context.

    What Makes X1 Different

    X1 is the modern Xactimate experience Verisk has been moving the platform toward over the last several years. The defining capabilities are cross-device sync (desktop, online, mobile share the same estimate state), Sketch AR for mobile measurement, customizable rules that enforce estimating practices in real time, and the Line Item Advisor that suggests appropriate codes from the roughly 17,000-item Xactimate library.

    The practical impact is that X1 reduces the amount of post-claim review time required to catch missed line items, mismatched scopes, and inconsistent estimating practices across a team. For multi-rep restoration companies, this is where the platform pays for itself.

    The Field-to-Office Workflow

    The intended X1 workflow for a restoration job looks like this: field tech arrives on site, opens the mobile app, runs a Sketch AR measurement of the affected rooms, captures damage photos tied to specific rooms, adds preliminary line items, and syncs to the cloud before leaving the site. Back at the office, the estimator opens the same estimate on desktop, adds the rest of the scope (equipment, labor, content manipulation), runs the rules check, and prepares the estimate for submission.

    Companies that adopt this workflow consistently report 30 to 50 percent reductions in time from loss to estimate submission, which directly improves cash flow and TPA scoring.

    Customizable Rules: The Quiet Margin Lever

    X1’s customizable rules feature is one of the most under-used capabilities on the platform. Rules let you encode your estimating practices (always include this line item with that one, always default to this dehumidifier class on Cat 2 jobs, always flag estimates above a certain dollar amount for senior review) directly into the platform.

    The rules then enforce themselves in real time as the estimator builds the estimate. This is the difference between a company whose estimates are inconsistent across reps and a company whose estimates look like they all came from the same hand. For TPA programs and audit defensibility, that consistency is worth real money.

    Line Item Advisor and the 17,000-Item Library

    Xactimate’s line item library has roughly 17,000 items, which is more than any human estimator can hold in memory. The Line Item Advisor in X1 suggests appropriate codes based on the context of the estimate, which speeds up estimate construction and reduces the chance of using the wrong code for a specific scope item.

    For new estimators, this feature shortens the learning curve significantly. For experienced estimators, it surfaces line items they might otherwise default away from out of habit.

    X1 vs Legacy Xactimate

    If your team is still working primarily on the legacy Xactimate experience, the migration to X1 is worth planning intentionally. The cloud-sync model, the mobile capabilities, and the rules system all require a workflow shift, not just a software update. Plan two to three months of dual-running before retiring legacy workflows entirely.

    Getting Your Team on X1

    Verisk offers an X1 training course covering the full platform, including importing and creating estimates, claim information setup, interior and roof Sketch diagrams, line item entry with localized pricing, and reporting. Third-party providers also offer X1-specific training. Whichever path you choose, formal training shortens onboarding time substantially compared to self-teaching.

    Frequently Asked Questions

    What is the difference between Xactimate X1 and the legacy Xactimate experience?

    X1 is the unified, cloud-synced version of Xactimate that runs identically across desktop, online, and mobile. The legacy experience was device-specific with manual sync. X1 also adds Sketch AR for mobile measurement, customizable rules, and the Line Item Advisor. Functionality is broadly similar, but the workflow and collaboration model are substantially different.

    Do I need separate Xactimate licenses for desktop, mobile, and online?

    No. An X1 license covers desktop, online, and mobile use under the same account. A user can move between devices on the same estimate without re-licensing. License pricing depends on the seat type and contract; verify current pricing directly with Verisk.

    How accurate is Xactimate Sketch AR for restoration measurement?

    Sketch AR is accurate enough for most residential interior measurements when the device camera and lighting allow for clean tracking. For jobs requiring high-precision measurement (insurance disputes, large commercial losses), traditional measurement methods are still recommended as a verification step.

    Can I use Xactimate X1 offline?

    Yes, the mobile app supports offline work for sketching and basic line item entry. Estimates sync to the cloud when connectivity returns. For full pricing data and the complete line item library, an internet connection is required.

    Should restoration owners learn X1 themselves or hire an Xactimate professional?

    Both. Owners benefit from understanding the platform well enough to review estimates intelligently and spot scope gaps. For high-volume estimate production, hiring or contracting a dedicated Xactimate professional almost always pays for itself in faster estimate turnaround and fewer scope misses.


  • Xactimate 2026 Labor Efficiency Models: Why Verisk Added the Large Restoration/Remodel Tier

    Xactimate 2026 Labor Efficiency Models: Why Verisk Added the Large Restoration/Remodel Tier

    One of the most consequential Xactimate updates in recent years arrived in February 2026: Verisk expanded the labor efficiency architecture from two models to three. The new Large Restoration/Remodel option fills a long-acknowledged gap between service-level work and full rebuild scenarios. For restoration operators handling mid-sized losses, the change is meaningful — and using the wrong model is a fast way to mis-price the labor on a job.

    This article assumes you understand how Xactimate fits into the broader pricing workflow. For that context, start with our restoration pricing and estimating master guide.

    The Old Two-Model Architecture

    Before the February 2026 update, Xactimate offered two labor efficiency models: a service-level model for small-scope, single-trade work and a restoration/remodel model for larger rebuilds. The two-tier architecture worked well at the extremes but struggled in the middle.

    Mid-sized restoration jobs — partial kitchen rebuilds after water loss, multi-room fire cleanup, large mold remediation projects — did not align cleanly with either model. Estimators routinely made judgment calls or layered manual workarounds to bridge the gap. The result was inconsistent labor pricing across similar jobs, depending on which estimator built the estimate.

    What the New Three-Model Architecture Looks Like

    The 2026 update keeps the existing service-level and restoration/remodel models and adds a third tier — Large Restoration/Remodel — designed for mid-sized work that involves multiple trades, longer durations, and more complex coordination than a service-level job, but does not reach the scale of a full rebuild.

    The practical effect is that estimators now have a defensible, system-supported choice for the work that previously required manual workarounds. This produces more consistent labor pricing across a portfolio of jobs and reduces the audit exposure that comes from improvised efficiency selections.

    How to Choose Between the Three Models

    The right model selection depends on job characteristics. Verisk’s documentation provides detailed selection criteria, but the field-level shorthand most experienced estimators use looks like this:

    • Service-level — single-trade, short-duration, minimal coordination, typical small water mitigation or single-room work
    • Large Restoration/Remodel — multi-trade, multi-week duration, moderate coordination, mid-sized fire/water/mold or partial rebuild
    • Restoration/Remodel — full rebuild scope, long duration, full general contracting coordination, large losses

    The Large Restoration/Remodel tier is the one most likely to be under-used initially because it is new and unfamiliar. Operators should review recent estimates that fell awkwardly between the two prior models and identify which would now fit the new tier.

    Why Labor Efficiency Matters for Margin

    Labor efficiency in Xactimate is not a discount or a multiplier — it is a coefficient that adjusts labor hours based on the type of work being performed. The same line item carries different labor hours under different efficiency models, because a service-level repair really does take less coordination overhead than a large rebuild.

    Selecting the wrong efficiency model on a job can shift the estimated labor by 10 to 25 percent, which is the difference between a profitable job and a job that loses money on labor underestimation.

    How TPAs Are Adopting the New Model

    TPA programs typically take a quarter or two to fully integrate new Xactimate methodology updates into their audit and review workflows. During the transition, expect inconsistency across reviewers — some will accept Large Restoration/Remodel selections without question, others will challenge them. Documenting the reasoning for the model selection in the estimate notes is the best defense.

    What to Update in Your Estimating Process

    Three things to update now that the three-model architecture is live: estimating templates should include the new Large Restoration/Remodel option as a standard selection for qualifying scopes, training materials should be refreshed to cover when to use each tier, and audit checklists should include a labor efficiency model review as a standard line item.

    Frequently Asked Questions

    What changed in Xactimate’s 2026 labor efficiency update?

    Verisk expanded the labor efficiency architecture from two models to three by adding the Large Restoration/Remodel option. The update was presented in February 2026 and is designed to bridge the gap between service-level work and full rebuild scenarios for mid-sized restoration jobs.

    When should I use the Large Restoration/Remodel labor efficiency model?

    Use it for mid-sized jobs that involve multiple trades, multi-week duration, and moderate coordination but do not reach the scale of a full rebuild. Common examples include partial kitchen rebuilds after water loss, multi-room fire cleanup, and large mold remediation projects.

    How much can the wrong labor efficiency model affect my estimate?

    Selecting the wrong efficiency model can shift the estimated labor on a job by roughly 10 to 25 percent depending on the scope. On a $30,000 estimate, that is $3,000 to $7,500 of labor either over- or under-stated. The model choice is a meaningful margin lever, not a minor technical detail.

    Do TPAs accept the new Large Restoration/Remodel model?

    Yes, but adoption is uneven during the early months after the release. Some reviewers accept the new tier without question, others challenge it. The best practice is to document the reasoning for the model selection in the estimate notes so the choice is defensible if questioned.

    Where can I learn more about the 2026 Xactimate labor efficiency update?

    Verisk has published webinar content covering the updated labor efficiencies architecture in detail. The on-demand webinar is the authoritative source for the methodology and selection criteria. Operator-level training providers have also begun including the new tier in their X1 curricula.


  • Xactimate Certification Levels: What Levels 1, 2, and 3 Cover and Which One Your Team Needs

    Xactimate Certification Levels: What Levels 1, 2, and 3 Cover and Which One Your Team Needs

    Xactimate offers three certification levels that progressively cover the platform’s depth. For restoration operators staffing an estimating function, knowing which level each role actually needs is the difference between an over-trained team that costs too much and an under-trained team that produces inconsistent estimates. This guide breaks down what each level covers, what it costs, and how to think about certification across roles.

    For broader context on how Xactimate fits into restoration operations, see our restoration pricing and estimating master guide.

    Level 1 — Fundamentals

    Level 1 covers the foundational use of Xactimate: navigation, project setup, creating estimates, adding line items, and basic sketching. It is designed for users who are new to the platform or want to solidify the fundamentals.

    For restoration teams, Level 1 is the right baseline for anyone who touches an estimate at any stage — field techs who capture initial sketches, project managers who review estimates, and ownership who needs to read estimates intelligently. The certification establishes a shared vocabulary across the team and prevents the most common usage mistakes.

    Level 2 — Proficiency / Power User

    Level 2 builds on Level 1 and goes deeper into the more advanced platform capabilities — complex sketching, custom price lists, advanced reporting, and platform-level configuration. It is the right target for the team members who actually build estimates daily.

    For most restoration companies, Level 2 should be the standard for senior estimators, project managers responsible for estimate sign-off, and anyone who configures price lists or custom rules for the company. The depth of Level 2 is what separates an estimator who builds defensible, complete estimates from one who produces work that triggers TPA reductions.

    Level 3 — Mastery

    Level 3 is reserved for the most complex scopes and is described as appropriate for veteran insurance adjusters with years of field experience handling the most complicated claims. The certification covers the full depth of the platform and the most nuanced estimating scenarios.

    For most restoration companies, Level 3 is overkill for the standard estimating workflow. The exception is companies that handle large-loss commercial work, work as TPA program subcontractors with audit responsibilities, or operate as third-party estimating services. For those use cases, Level 3 represents a meaningful credential.

    What the Exams Look Like

    Each certification level requires passing an exam administered by Verisk. The passing score is 70 percent. A current Xactimate license is required to take the exams. Once achieved, certification is valid for two years before renewal is required.

    The two-year renewal cycle matters for staffing planning — certifications are not lifetime credentials, and budgeting for re-certification every two years is part of running a properly trained estimating team.

    What Certification Costs

    Verisk offers training and exam options directly through its training platform. Third-party training providers also offer Xactimate Level 1 and Level 2 certification preparation, often bundled together. Pricing through major third-party providers tends to land around $650 for combined Level 1 and Level 2 training, with regional variation.

    For operators staffing multiple estimators, building a relationship with a single training provider and running team-wide certification cycles is often more cost-effective than ad hoc individual training. Some providers offer group rates and customized training for restoration-specific scopes.

    How to Think About Certification ROI

    The return on certification investment is not the credential itself — it is the reduction in estimating mistakes, audit reductions, and re-work that comes from a properly trained team. A single avoided $5,000 audit reduction pays for a team’s annual training budget several times over. Companies that under-invest in certification consistently leave more money on the table than they save in training cost.

    Recommended Certification Map for Restoration Teams

    A practical certification map for a restoration company:

    • Field techs and admin staff — Level 1 baseline, refreshed every two years
    • Senior estimators and project managers — Level 2 standard, refreshed every two years
    • Lead estimator / estimating manager — Level 2 minimum, Level 3 if handling large-loss commercial work
    • Owner / executive — Level 1 understanding to read and review estimates intelligently

    Frequently Asked Questions

    How many Xactimate certification levels are there?

    There are three certification levels: Level 1 (Fundamentals), Level 2 (Proficiency / Power User), and Level 3 (Mastery). Each level builds on the previous one, but you do not have to take them in sequence — a user can pursue Level 2 without holding Level 1.

    What score is required to pass an Xactimate certification exam?

    The passing score is 70 percent. A current Xactimate license is required to take the exam. Once passed, the certification is valid for two years before renewal is required.

    How much does Xactimate certification training cost?

    Pricing varies by provider. Third-party providers commonly offer combined Level 1 and Level 2 training in the $650 range, with regional and seasonal variation. Verisk also offers training and exam options directly through its platform. For up-to-date pricing, check the Verisk training site or your preferred third-party provider.

    Which Xactimate certification level do my estimators need?

    For most restoration companies, Level 1 is the right baseline for anyone who touches an estimate, and Level 2 is the standard for daily estimators and project managers. Level 3 is appropriate primarily for large-loss commercial estimators or third-party estimating professionals.

    How often do I need to renew Xactimate certification?

    Certifications are valid for two years. Renewal requires re-testing at the same level. Plan the recertification cycle into your annual training budget and stagger renewals across team members to avoid bunching the workload.


  • Xactimate Sketch AR and the Mobile-First Restoration Workflow

    Xactimate Sketch AR and the Mobile-First Restoration Workflow

    Field measurement has historically been the slowest step in restoration estimating. A tech walks the loss with a tape measure or laser, jots down dimensions, returns to the office, and re-keys everything into Xactimate before the estimate can begin. Xactimate Sketch AR collapses that workflow by moving the measurement and initial sketch into the field, on a mobile device, with cloud sync to the office.

    For broader context on how Xactimate fits restoration operations, see our restoration pricing and estimating master guide.

    What Sketch AR Does

    Sketch AR uses the camera and motion sensors on a tablet or phone to take measurements as the user walks through the loss site. The output is a 2D sketch with dimensions captured directly from the field, plus optional 3D cutaway views that help visualize the interior layout. The data syncs to the cloud and is available on the desktop estimate immediately.

    The headline benefit is time. Field measurement that previously took 30 to 60 minutes per loss can be completed in 10 to 20 minutes with Sketch AR, and the office no longer needs a separate sketching step before the line item work begins.

    The Mobile-First Restoration Workflow

    The mobile-first workflow Sketch AR enables looks like this on a typical water loss:

    • Arrival — tech opens the X1 mobile app and creates the estimate shell
    • Walkthrough — tech runs Sketch AR through each affected room, capturing dimensions and damage photos tied to specific rooms
    • Initial line items — tech adds preliminary line items for obvious scope (extraction, demo, equipment placement)
    • Sync — estimate uploads to the cloud before the tech leaves the site
    • Office completion — estimator opens the same estimate on desktop, refines line items, runs rules check, prepares for submission

    Companies that adopt this workflow consistently report 30 to 50 percent compression in time from loss to estimate submission. That speed flows directly into faster cash flow and improved TPA scoring.

    When Sketch AR Is the Right Tool

    Sketch AR is well-suited for typical residential interiors with reasonable lighting, distinguishable wall edges, and accessible spaces. It is the right default for most water loss, mold, and partial fire jobs in homes and small commercial spaces.

    It is less well-suited for: heavily damaged spaces where wall edges are obscured, dark or smoke-filled environments where the camera cannot track, very large open spaces with limited reference features, or any job requiring precision measurement for dispute defense (where traditional measurement should still be used as a verification step).

    Training and Adoption

    The technical learning curve on Sketch AR is short — most field techs are productive within a single training session. The harder change is workflow: moving the team from “measure on site, sketch at the office” to “sketch on site, refine at the office” requires deliberate process change.

    The most common adoption failure is leaving the workflow optional. Teams that allow some techs to sketch on site and others to defer to office sketching never realize the speed benefits. Standardizing on the mobile-first workflow as the company default is the difference between marginal improvement and dramatic cycle-time compression.

    Equipment and Device Considerations

    Sketch AR works best on modern tablets with strong motion sensors and good cameras. iPads with LiDAR sensors produce particularly clean tracking. Spec out devices for the field team based on actual job conditions — a $400 tablet that struggles in low light produces worse measurements than a $900 tablet that handles real conditions.

    Where Sketch AR Fits in the Larger X1 Workflow

    Sketch AR is one of several X1 capabilities that together produce the field-to-office continuity that defines the modern Xactimate workflow. It pairs naturally with cloud-synced estimates, the Line Item Advisor for quick line item suggestions, and customizable rules that catch missed scope items at the point of entry. None of these features stand alone — they reinforce each other.

    Frequently Asked Questions

    What is Xactimate Sketch AR?

    Sketch AR is the augmented-reality measurement and sketching feature in the Xactimate mobile app. It uses the device camera and motion sensors to capture room dimensions and produce a 2D sketch in the field, with optional 3D cutaway views. The output syncs to the cloud and is available on the desktop estimate immediately.

    How accurate is Sketch AR?

    Sketch AR is accurate enough for most residential interior measurements when conditions allow for clean camera tracking. For high-precision requirements (insurance disputes, large commercial losses), traditional measurement is still recommended as a verification step. Devices with LiDAR sensors typically produce cleaner results than camera-only devices.

    What kind of device do I need for Sketch AR?

    A modern tablet or phone with a good camera and motion sensors. iPads with LiDAR are particularly well-suited because the dedicated depth sensor improves tracking. Field teams should standardize on capable hardware rather than mixing devices that produce inconsistent results.

    Can Sketch AR replace traditional measurement entirely?

    For typical residential interior work in good conditions, Sketch AR can serve as the primary measurement method. For high-stakes jobs, large commercial spaces, dark or heavily damaged environments, or any situation that may end up in dispute, traditional measurement should still be used as either the primary method or a verification step.

    How long does it take to train field techs on Sketch AR?

    The technical training is short — most techs are productive within a single training session. The harder change is operational: standardizing the team on a mobile-first workflow rather than leaving it optional. Allow two to four weeks for the new workflow to become muscle memory across the team.


  • Xactimate Common Mistakes: The Line Items Restoration Estimators Forget Most

    Xactimate Common Mistakes: The Line Items Restoration Estimators Forget Most

    Xactimate is precise enough that small estimating mistakes show up clearly when the invoice closes out. The platform has roughly 17,000 line items, and the difference between the operators who consistently get paid in full and the operators who absorb chronic reductions is usually a small number of repeating mistakes. This article catalogs the mistakes that show up most often in restoration estimate audits and how to fix each one.

    This article assumes you are familiar with the broader Xactimate workflow. For that context, see our restoration pricing and estimating master guide.

    Mistake 1: Picking the Wrong Code from a Similar-Looking Group

    Xactimate often has multiple line items that look similar but apply to different scopes. Drywall repair, drywall replacement, and drywall hang/finish are three different items with three different prices. The Line Item Advisor in X1 helps surface the right code, but estimators who default to the first match they see consistently choose codes that under-bill the actual work.

    The fix is discipline: read the line item description before adding it, and use the Advisor’s suggestions when working on unfamiliar scope.

    Mistake 2: Under-Counting Equipment Days

    Equipment days are the most common source of audit reductions on water damage jobs. The pattern: the estimator counts contract days from project start to project close, but the audit counts only the days the equipment was physically on site per the daily monitoring log. Missing log entries mean missing days.

    The fix is operational: daily monitoring logs must be completed daily, with equipment counts and moisture readings, and equipment placement and removal must be photographed for documentation.

    Mistake 3: Missing Antimicrobial on Cat 1 Losses

    Antimicrobial application on Cat 1 water losses is sometimes treated as optional, but the IICRC S500 standard supports its use in many Cat 1 scenarios — especially when there is any risk of category escalation, when affected materials cannot be fully dried, or when the response time means microbial growth is a real risk.

    Skipping antimicrobial on Cat 1 losses out of a vague sense that “it might get cut” leaves real billable scope off the estimate. The fix is to document the reasoning for the antimicrobial line in the estimate notes.

    Mistake 4: Single Air Scrubber for Multi-Room Jobs

    The pricing matrix supports multiple air scrubbers when the affected area justifies them. Single-scrubber estimates on multi-room losses are routine, and they routinely under-bill the equipment scope. The fix is to scrubber-count by room and document placement on the equipment log.

    Mistake 5: Skipping Containment on Fire Cleanup

    Containment line items are routinely skipped on fire cleanup estimates because the estimator focuses on visible cleaning work. But proper fire cleanup requires HEPA negative air containment to prevent soot redistribution into adjacent unaffected areas. Skipping containment in the estimate produces work that either gets done un-billed or causes secondary contamination claims.

    Mistake 6: Missing the Second Floor When Water Migrated

    Water rarely stays on one floor. Estimates that scope only the floor where water originated routinely miss legitimate scope on the floor below (where ceiling damage is common) or above (where water can wick up baseboards). The fix is a complete walkthrough of the entire structure on intake, not just the affected room.

    Mistake 7: Outdated Local Price List

    Xactimate pricing updates monthly. Estimating templates that have not been refreshed against the current price list are systematically under-billing on items where prices have moved. The fix is a monthly refresh ritual: when the new price list drops, refresh the templates.

    Mistake 8: Generic Notes That Cannot Defend the Scope

    Estimate notes that say “per IICRC standards” without referencing the specific standard, scope item, or category provide no defense in audit. Notes that say “Cat 2 water loss per S500, antimicrobial applied per protocol due to documented contamination evidence (photos attached)” defend almost any scope item.

    Mistake 9: Wrong Labor Efficiency Model

    Now that Xactimate has three labor efficiency models as of February 2026, choosing the wrong one mis-prices the labor by 10 to 25 percent. The new Large Restoration/Remodel tier should be used for mid-sized multi-trade work that previously got force-fit into one of the two prior models.

    Mistake 10: Lump-Sum Estimates for Cash Jobs

    Lump-sum cash estimates feel simple but consistently under-price the work because the estimator forgets line items that would have been included in an itemized scope. The fix is to always build cash estimates itemized in Xactimate, then optionally summarize for the customer if a lump-sum presentation is preferred.

    Frequently Asked Questions

    What is the most common Xactimate mistake on water damage jobs?

    Under-counting equipment days. The pattern is estimating contract days while the audit counts only documented on-site days from the daily monitoring log. The fix is rigorous daily logging with equipment counts and moisture readings, plus photo documentation of placement and removal.

    How many line items does Xactimate have?

    Approximately 17,000 line items in the standard library. The Line Item Advisor in X1 surfaces appropriate codes based on context, which reduces the cognitive load of finding the right code without defaulting to the first plausible match.

    How often should I update my Xactimate estimating templates?

    Monthly, in line with the Verisk price list update cycle. Templates frozen at older pricing produce estimates that get reduced on submission because they do not reflect the current published research.

    What kind of estimate notes hold up to TPA audit?

    Notes that reference specific standards (IICRC S500, S520, S700), specific category and class documentation, specific scope decisions and the evidence supporting them, and photo references where applicable. Generic “per industry standard” notes provide no defense.

    Does the new 2026 labor efficiency model affect my older estimates?

    No. The Large Restoration/Remodel option applies to estimates built going forward. Estimates already submitted under the prior two-model architecture are not retroactively affected. New estimates should evaluate which of the three models best fits each job.