Tag: Developer Reference

  • OpenRouter Mental Model: The 5-Layer Hierarchy Explained

    OpenRouter Mental Model: The 5-Layer Hierarchy Explained

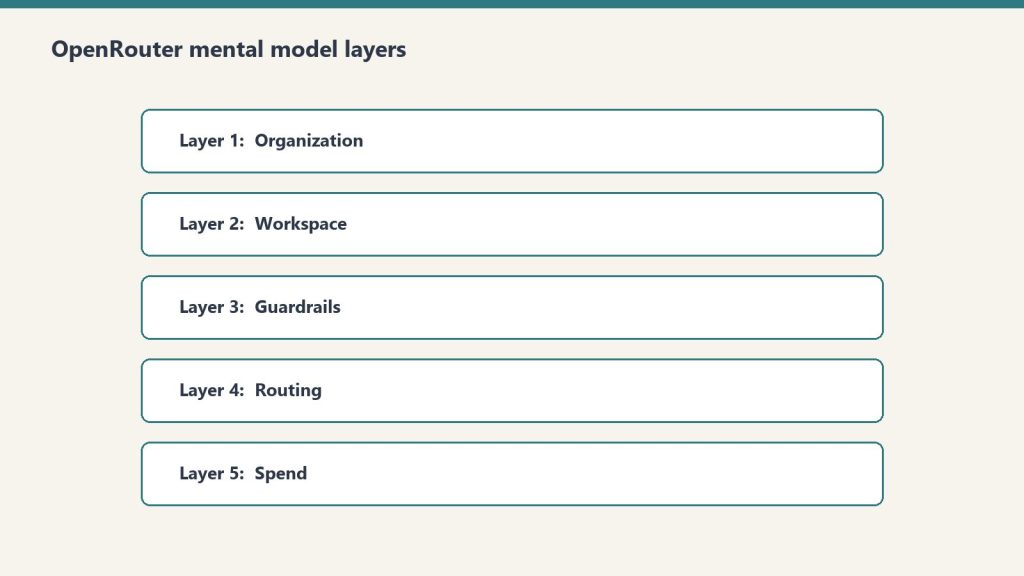
    The OpenRouter hierarchy in one sentence: Organizations contain Workspaces, Workspaces enforce Guardrails on API Keys, Keys call Presets, and Presets bundle prompts and models. Every operational decision you’ll ever make on the platform lives at exactly one of those five layers. Confuse them and you’ll spend hours looking for settings that live somewhere other than where you think.

    This is a companion to our OpenRouter operator’s field manual. The field manual covers why we use the platform and how it fits a fortress stack. This deep dive covers the mental model itself — the five-layer hierarchy that makes everything else legible.

    Why this matters before anything else

    OpenRouter’s UI presents a flat menu. The actual product is a hierarchy. Every operational decision you’ll ever make — who pays, what’s allowed, who’s allowed to call what, which model gets used — lives at exactly one of five layers. Get the layers wrong and you’ll wire your stack against the wrong nouns.

    The five layers, top to bottom: Organization → Workspace → Guardrail → API Key → Preset.

    Here’s what each one actually does and when you should care.

    Layer 1: Organization

    Sovereign billing. Sovereign member context. The top of the world.

    Each Organization has its own balance, its own billing details, and — critically — its own member roster. The catch: personal orgs don’t expose Members management. If you want to add teammates, you need a non-personal org.

    In our case we run two: a personal org tied to our primary email, and a Tygart Media org for agency operations. The personal org has 48 API keys and a working balance. The Tygart Media org is empty so far. Members management is the reason it exists.

    When to think about this layer: when you’re deciding whether to operate as an individual or as a team. If you’re solo and plan to stay solo, one personal org is fine forever. The moment you bring on a collaborator who needs their own keys and their own observability slice, you need a non-personal org.

    The mistake to avoid: running an agency out of a personal org. You’ll hit member-management limits at the worst possible time.

    Layer 2: Workspace

    Segmented guardrail, BYOK, routing, and preset domains inside an organization.

    By default, every org gets one Default Workspace. Most accounts never think about this layer. The moment you operate across multiple businesses with different data policies, multiple workspaces become valuable.

    Example: a healthcare client’s data should never touch first-party Anthropic, only Bedrock or Vertex. A consumer comedy site can use any provider. A B2B SaaS client wants Zero Data Retention enforced on every call. Three different fortress postures. Three workspaces.

    Each workspace gets its own Guardrail config, its own BYOK provider keys, its own routing defaults, and its own preset library. Keys created in one workspace can’t see resources in another.

    When to think about this layer: when you have two or more clients with materially different data policies. If everything you do has the same posture, one workspace is fine.

    The mistake to avoid: assuming workspace segmentation is a security boundary. It isn’t, exactly — it’s a policy boundary. Someone with org-level access can move between workspaces freely. Workspaces are for organizing intent, not for isolating threats.

    Layer 3: Guardrails

    The actual enforcement layer. Four categories, all configurable per workspace, all unconfigured by default.

    Budget Policies are the most useful and the most underused. Set a credit limit in dollars and a reset cadence (Day, Week, Month, Year, or N/A). Hit the limit and calls fail until the cadence resets. This is your protection against the runaway loop that drains a balance overnight.

    Model and Provider Access is where data-policy posture lives. Toggles for Zero Data Retention enforcement, Non-frontier ZDR, first-party Anthropic on or off (with Bedrock and Vertex always staying available), first-party OpenAI on or off (Azure stays), Google AI Studio on or off (Vertex stays), and three categories of paid and free endpoints with different training and publishing behaviors. There’s also an Access Policy mode (Allow All Except is the useful one) with explicit Blocked Providers and Blocked Models lists. The live Eligibility view shows you which providers and models are actually callable given your current policy.

    Prompt Injection Detection runs regex-based detection on inbound prompts. OWASP-inspired patterns. Four modes: Disabled, Flag, Redact, or Block. Free and adds no measurable latency. Worth enabling on every workspace that touches user input.

    Sensitive Info Detection runs pattern matching on prompts and completions. Built-in patterns for Email, Phone, SSN, Credit Card, IP address, Person Name, and Address. The latter two add latency. Custom regex patterns supported. A sandbox to test patterns before deploying. Useful for any workspace that processes customer data.

    When to think about this layer: every workspace, day one. Default-unconfigured is not a safe state. Set a budget cap before you do anything else.

    The mistake to avoid: treating Guardrails as something you’ll get to “later.” Later is after the runaway loop has drained the balance.

    Layer 4: API Keys

    Per-agent identity. Each key has its own credit cap, its own reset cadence, and its own guardrail overlay.

    The mental model that matters: one autonomous behavior, one key. When a scheduled task starts hemorrhaging tokens, the cap on its key contains the damage. The other 47 keys keep working.

    Our 48-key distribution is instructive. One testing key has spent $83.26. One development key has spent $33.05. The remaining 46 keys have collectively spent less than $120. That’s the shape of real AI operations: a few keys do most of the work, and a long tail barely moves the needle. Per-key caps make that distribution visible and bounded.

    API keys also carry the BYOK relationship. A bring-your-own provider key can be pinned to specific API keys, meaning specific agents. That lets you route a high-volume internal agent through a discounted enterprise contract while letting one-off testing keys fall through to OpenRouter’s pooled pricing. We cover this in depth in BYOK on OpenRouter.

    When to think about this layer: when you create any new autonomous behavior. New behavior, new key, new cap. No exceptions.

    The mistake to avoid: sharing one key across all your services. The first runaway loop will be the last thing that one key ever does, and the blast radius will be everything else that depended on it.

    Layer 5: Presets

    Versioned bundles of system prompt, model, parameters, and provider configuration. Called as "model": "@preset/your-preset-name" in any API call.

    Three tabs per preset: Configuration (the actual bundle), API Usage (how it’s been called), and Version History (every change, rollback-able).

    This is the closest OpenRouter comes to a software release artifact. You can ship a preset, test it in chat, version it, and roll back if v2 turns out to be worse than v1. Code that calls the preset stays the same; only the preset content changes.

    For autonomous behavior systems this is the unlock. A behavior’s behavior — its prompt, its model choice, its temperature — becomes a thing you can version and review like code, without touching the code that calls it. Promotion ledger says a behavior is graduating from one tier to the next? You publish a new preset version with tighter constraints and the calling code never changes.

    When to think about this layer: the moment you have any system prompt that’s used in more than one place, or that you’ll want to refine over time. If you’ve never copy-pasted a system prompt between two scripts, you don’t need presets yet.

    The mistake to avoid: putting the system prompt in the calling code. Every prompt update becomes a deploy. With presets, prompt updates become config changes.

    Putting the layers together

    Here’s the mental model in one sentence: Organizations contain Workspaces, Workspaces enforce Guardrails on Keys, Keys call Presets, Presets bundle prompts and models.

    If you walk into OpenRouter looking for a setting and you can’t find it, ask which of the five layers it should logically live at. The answer almost always tells you where to look.

    If you’re building a new integration, start at the bottom. Pick a model. Build a preset around it. Create a dedicated key with a tight budget cap. Sit that key under a workspace with sensible guardrails. The organization is just the billing wrapper.

    The whole point of the hierarchy is that each layer constrains the one below it. The organization caps the workspace. The workspace caps the keys. The keys cap the presets they can call. Errors propagate up; permissions cascade down. That’s the model. Everything else is UI.

    Frequently asked questions

    What are the five layers of OpenRouter?

    Organization, Workspace, Guardrails, API Keys, and Presets. Organizations handle billing and members. Workspaces segment policy domains. Guardrails enforce budget, provider access, prompt injection, and sensitive info rules. API Keys are per-agent identity with per-key caps. Presets are versioned bundles of system prompt, model, and parameters.

    Do I need multiple Workspaces in OpenRouter?

    Only if you operate across businesses with materially different data policies. A single Default Workspace is fine for most accounts. The moment a healthcare client requires Bedrock-only access while a consumer client can use any provider, workspace segmentation becomes valuable.

    What is the right way to use OpenRouter Presets?

    Treat them like software release artifacts. Bundle the system prompt, model, parameters, and provider config. Version every change. Test new versions in chat before promoting. Code that calls the preset stays the same; only the preset content evolves. This lets you refactor prompt behavior without redeploying.

    Are OpenRouter Workspaces a security boundary?

    No. They’re a policy boundary, not a security boundary. Someone with organization-level access can move between workspaces freely. Use workspaces to organize intent and enforce different fortress postures across clients — not to isolate threats from each other.

    What happens if I don’t configure OpenRouter Guardrails?

    By default every workspace has zero enforced budget cap, zero provider restrictions, and zero PII filtering. That’s fine for prototyping. It’s not fine for production. Set a budget cap on every workspace as the first action. The other three guardrail categories you can configure as you scale.

    See also: The Multi-Model AI Roundtable: A Three-Round Methodology for Better Decisions · What We Learned Querying 54 LLMs About Themselves (For $1.99 on OpenRouter)

  • Claude Code Managed Settings: Org-Wide Policy Guide

    Claude Code Managed Settings: Org-Wide Policy Guide

    Last week I wrote about the three-file split every team should set up in their repo: CLAUDE.md, .claude/settings.json, and .claude/settings.local.json. That gets a team to a sane shared baseline. It does not stop a single engineer with admin rights on their laptop from disabling every guardrail you wrote.

    If you are deploying Claude Code to more than a handful of engineers — anyone past Series B, anyone regulated, anyone whose CISO has asked a single pointed question about AI tooling — repo-level settings are insufficient. The control you want is managed-settings.json, and most teams I talk to either do not know it exists or have not deployed it.

    Where managed-settings.json Actually Lives

    Claude Code reads settings in a strict precedence order. Managed settings sit at the top and cannot be overridden by anything a user does in their repo, their home directory, or their environment. The file location depends on the OS:

    • macOS: /Library/Application Support/ClaudeCode/managed-settings.json
    • Linux / WSL: /etc/claude-code/managed-settings.json
    • Windows: C:\Program Files\ClaudeCode\managed-settings.json

    You push the file via whatever you already use to manage developer machines. On macOS that is MDM — Jamf, Kandji, Mosyle. On Windows it is Group Policy Preferences. On Linux fleets, your config management tool of choice — Ansible, Chef, whatever survived your last platform team rewrite. The file does not need to be created by Claude Code itself. It just needs to be present at the path above, owned and writable only by an admin account, and readable by the user running claude.

    The One Rule That Earns Its Keep: permissions.deny

    Of every field in managed-settings.json, the one that pays for the entire deployment effort is permissions.deny. Deny rules at the managed-settings tier take effect regardless of any allow or ask rules at lower scopes. A user cannot grant themselves permission to do something an admin has denied — not in their project settings, not in their personal settings, not via a one-time CLI flag.

    Concretely, here is a minimum-viable managed file for a team that wants to stop the obvious foot-guns:

    {
      "permissions": {
        "deny": [
          "Bash(curl:*)",
          "Bash(wget:*)",
          "Bash(rm -rf /*)",
          "Read(./.env)",
          "Read(./.env.*)",
          "Read(./**/credentials*)",
          "Read(./**/*secret*)"
        ]
      }
    }

    That blocks Claude from curl-ing arbitrary URLs (the most common vector for accidental data exfiltration in agentic loops), reading anything in an .env file, and deleting filesystem roots in a Bash one-liner gone wrong. It does not stop legitimate work. It stops the long tail of “I didn’t realize it would do that.”

    The Drop-In Directory Is the Underrated Piece

    The single-file model breaks the moment you have more than one team contributing policy. Security wants curl blocked, platform wants kubectl delete blocked, the data team wants reads against the /data/prod/ mount blocked. Funneling all three through a single admin-owned file becomes a coordination tax.

    Claude Code supports a drop-in directory at managed-settings.d/ in the same parent directory as managed-settings.json. Files in that directory are merged alphabetically — same convention as systemd and sudoers.d. Layout looks like this:

    /Library/Application Support/ClaudeCode/
    ├── managed-settings.json          # base policy
    └── managed-settings.d/
        ├── 10-security.json           # security team owns
        ├── 20-platform.json           # platform team owns
        └── 30-data.json               # data team owns

    Each team owns one file. They push their fragment through their own MDM channel without touching the others. Merge order is alphabetical, so the number prefix matters — later files override earlier ones for any overlapping keys, but permissions.deny rules always accumulate. Nothing a later file does can unblock something an earlier file denied.

    What Belongs in Managed Settings — and What Does Not

    Managed settings is a heavy hammer. Use it for things that must not be overridable. Everything else belongs in the repo’s .claude/settings.json, where engineers can iterate without filing a ticket.

    Belongs in managed:

    • Deny rules for credentials, network egress, destructive shell operations
    • Telemetry / opt-out flags if your contract with Anthropic requires training data opt-out
    • Default model if you have a real reason to pin — most teams should let repos choose
    • Audit log paths if you are forwarding to a SIEM

    Does not belong in managed:

    • Project-specific subagents or hooks (these live in the repo)
    • CLAUDE.md content (repo)
    • Allow rules — these are better as defaults at the repo scope, where engineers can adjust per-task

    Verifying the Policy Is Actually Active

    Pushing a config file is not the same as enforcing one. After deployment, run claude config list on a test machine and confirm the managed entries show up. Then attempt something the deny rule blocks — try a curl command, ask Claude to read an .env. The denial should be immediate and unambiguous, not a quiet skip. If a user can override it from their repo settings, the file is not at the right path or not readable by the user account running claude.

    Model Selection at the Org Level

    If you do pin a default model in managed settings — and I would argue most teams should not — read the model docs at docs.anthropic.com/en/docs/about-claude/models before writing the version string. Model identifiers change. As of this writing the workhorse is claude-sonnet-4-6, the flagship is claude-opus-4-7, and the fast option is claude-haiku-4-5-20251001. Hardcoding a model string in a managed file that nobody touches for six months is how you end up running last year’s model in production.

    Where This Approach Loses

    Managed settings cover the local Claude Code process. They do not cover the Anthropic Console, the Claude web app, or any MCP server an engineer connects to manually. If your threat model includes data leaving via the web app, managed settings on developer laptops are not the answer — the Enterprise plan’s org-level controls and SSO are. The two layers compose. Neither replaces the other.

    Managed settings also do nothing about an engineer who runs Claude Code on a personal machine outside MDM scope. That is a device management problem, not a Claude Code problem, and the fix is the same as it has always been: do not let unmanaged machines touch production code.

    The 30-Minute Rollout

    1. Pick one platform — start with whichever fleet is largest, usually macOS
    2. Write the minimum-viable managed-settings.json above
    3. Push it to one test machine via MDM, verify with claude config list
    4. Try three things the deny rules should block; confirm all three are blocked
    5. Roll to the rest of the fleet
    6. Set up the managed-settings.d/ directory so other teams can layer their own fragments without coordination

    The whole exercise is half a day of work for a platform engineer who already knows your MDM. The alternative is hoping every engineer reads the same Notion page about which commands not to run. Hope is not a security control.

  • Deploy Claude Code: The 2026 Production Team Guide

    Deploy Claude Code: The 2026 Production Team Guide

    Last refreshed: May 15, 2026

    Claude Code production deployment - install paths, CI integration, and team-scale cost controls
    Installing Claude Code is the easy part. Deploying it across a team in production is the part most guides skip.

    Most of the published guidance on installing Claude Code stops at “run npm install -g and you’re done.” That’s enough for a developer playing on a laptop. It is not enough for a team that wants to run Claude Code in production — in CI, in shared infrastructure, behind a firewall, with cost controls, and with the new Agent SDK billing model that takes effect June 15, 2026.

    This article is the production deployment guide. Triple-sourced against Anthropic’s own Claude Code documentation, the github.com/anthropics/claude-code-action repo, and Anthropic’s announced June 15 billing model. Verified May 15, 2026.

    The three install paths and which to pick

    Per Anthropic’s official Claude Code docs, there are three supported ways to install Claude Code. They produce the same underlying binary but make sense in different operational contexts.

    1. Standalone installer. A native installer for macOS, Windows, and Linux that drops the Claude Code binary in a system path. This is the cleanest install for individual developers — no Node.js required, no npm dependency, predictable upgrade behavior. Use this on workstations where the operator owns the machine.

    2. npm global package. npm install -g @anthropic-ai/claude-code. Requires Node.js 18 or later. Pulls the same native binary as the standalone installer through a per-platform optional dependency, then a postinstall step links it into place. Use this when you already manage developer tools through npm and want one less install path to track. Supported platforms: darwin-arm64, darwin-x64, linux-x64, linux-arm64, linux-x64-musl, linux-arm64-musl, win32-x64, win32-arm64.

    3. Desktop app. A desktop-class application distributed via .dmg on macOS and MSIX/.exe on Windows. This is the path most teams will deploy to non-developer staff, and it integrates with enterprise device management tools like Jamf, Kandji, and standard Windows MSIX deployment.

    If you are deploying across a team larger than a handful of developers, mix-and-match: standalone or npm for engineering workstations, desktop for everyone else.

    The npm install gotchas worth knowing before you ship

    Two things in Anthropic’s official docs are worth flagging because they will save you from a whole class of bug reports later:

    Don’t use sudo. Anthropic’s setup documentation explicitly warns against sudo npm install -g @anthropic-ai/claude-code. It can lead to permission issues and security risks. If you need a global install on a machine where your user can’t write to the npm prefix, fix the npm prefix first (point it at a user-writable directory) rather than escalating with sudo.

    Don’t use npm update for upgrades. The right command per Anthropic’s docs is npm install -g @anthropic-ai/claude-code@latest. npm update -g respects the original semver range and may not move you to the newest release. This trips up CI pipelines that try to keep Claude Code current via update; they will sit on a stale version forever.

    Production deployment considerations

    The single most important piece of context for a production Claude Code deployment in 2026: the billing model changes on June 15, 2026.

    Before June 15, Claude Code interactive sessions and claude -p non-interactive runs both draw from your normal subscription usage limits. Starting June 15, interactive Claude Code keeps using subscription limits as before, but claude -p and direct Agent SDK usage move to a separate per-user monthly Agent SDK credit pool ($20 Pro, $100 Max 5x, $200 Max 20x, $20-$100 Team, up to $200 Enterprise).

    For teams running Claude Code in CI, in cron jobs, in shell scripts, in GitHub Actions workflows — anywhere the trigger is automated rather than a human — this changes the economics. Plan capacity against the new credit pool, not the legacy shared subscription pool. Full breakdown in our Agent SDK Dual-Bucket Billing article.

    Three other production considerations:

    Network configuration. Behind a corporate firewall, you’ll need to allowlist Anthropic’s API endpoints, configure proxy settings, and potentially route through an LLM gateway. Anthropic’s network configuration documentation covers the specifics.

    Enterprise device deployment. Per Anthropic’s official docs, the desktop app distributes through standard enterprise tools — Jamf and Kandji on macOS via the .dmg installer, MSIX or .exe on Windows. If your IT team already has a deployment workflow for similar developer tools, Claude Code drops into it without anything special.

    API key management. If your team uses Claude Developer Platform API keys instead of (or alongside) subscription auth, manage them like any other production secret — vault them, rotate them, scope them per environment, never check them into source control. This becomes more important after June 15 because API key usage is the recommended path for sustained shared automation, and unintended sprawl gets expensive.

    Claude Code GitHub Actions: the team multiplier

    The fastest way to get team-level value from Claude Code is the official GitHub Actions integration. From Anthropic’s documentation and the public github.com/anthropics/claude-code-action repository:

    The setup command. The cleanest install is to run /install-github-app from inside Claude Code in your terminal. It walks you through installing the GitHub App, configuring the required secrets, and wiring the workflow file. Manual setup also works — copy the workflow YAML from Anthropic’s docs and add the ANTHROPIC_API_KEY secret to your repository settings — but the install command saves the assembly time.

    The interaction model. Once installed, mentioning @claude in a pull request comment or an issue triggers Claude Code to act on the context. Claude can analyze the diff, create new PRs, implement features described in an issue, fix reported bugs, and respond to follow-up comments — all while adhering to whatever conventions you’ve documented in your repository’s CLAUDE.md file.

    Three use cases worth separating clearly.

    • Automated code review. Claude Code reads the diff on every pull request and posts inline comments flagging potential issues, suggesting improvements, or checking for convention violations. Highest signal-to-noise when path-filtered to relevant code only.
    • Issue-to-PR automation. Tag @claude on a well-described issue and Claude Code opens a PR implementing it. Best for small, well-scoped changes; less useful for architectural work.
    • On-demand assistance. Reviewers tag @claude mid-PR to ask questions, request explanations, or get a second opinion before merging. The most defensible use case because it keeps a human in the decision loop.

    Pick the use case that matches your team’s actual bottleneck. Running all three at once on every PR is the fastest way to burn through your usage budget without proportionate value.

    Cost expectations at team scale

    Independent reports as of May 2026 put Claude Code GitHub Actions PR-review costs at roughly $15-25 per month for a team of 3-5 developers doing 10-15 PRs per week, billed against a Claude Developer Platform API key at Sonnet rates. That figure should be treated as directional — your actual cost depends on PR size, how many tools you’ve configured, model selection, and how aggressive your path-filtering is.

    Two cost controls that materially change the math:

    • Path filters. Trigger Claude Code only on file changes that actually need review. Skipping documentation, generated files, and lockfile-only PRs cuts the bill substantially.
    • Concurrency limits. GitHub Actions concurrency settings prevent Claude Code from running multiple instances against the same branch at once. Without this, force-pushes and rapid-fire updates can stack runs.

    If you are running Claude Code on every PR across an active team, you will hit Anthropic API rate limits. The mitigation is path filters, concurrency limits, and batching — none of which are speculative; they are documented patterns.

    The CLAUDE.md file is not optional

    Whatever your install path and whatever your use case, the single piece of project context that has the largest effect on Claude Code’s output is the CLAUDE.md file at the root of your repository. This is where you tell Claude Code what your project is, what conventions to follow, what tools are available, what to avoid, and what success looks like.

    If you skip it, Claude Code is reasoning from the files alone — useful but generic. If you write it, Claude Code is reasoning with your team’s context and your specific codebase rules. The difference shows up in the first ten minutes of use.

    A practical CLAUDE.md for a production team usually includes: the project’s purpose and stack, naming conventions and folder structure, testing requirements, lint and format rules, deployment considerations, what kinds of changes need human review, and explicit prohibitions (“never commit migrations directly to main”, “always update X when you change Y”). Keep it concise — verbose CLAUDE.md files inflate every per-turn token cost across the team.

    What to actually do this week

    1. Pick your install path per role (standalone or npm for developers, desktop for everyone else).
    2. Install Claude Code on one workstation and run through the quickstart end-to-end before rolling to the team.
    3. Write a real CLAUDE.md for your primary repository before anyone uses Claude Code on it. Even a 100-line version is far better than nothing.
    4. If you’re running anything automated, read the Agent SDK billing change before June 15.
    5. If you want team-level value, install the GitHub Actions integration — but pick one use case (code review, issue-to-PR, or on-demand help), not all three at once.
    6. Set path filters and concurrency limits in your workflow before you put Claude Code on every PR.

    Frequently Asked Questions

    What’s the difference between the npm install and the standalone installer?

    None functionally — both install the same native binary. The npm path is convenient if you already manage developer tools through npm. The standalone installer is cleaner if you don’t want a Node.js dependency. Both upgrade through their own mechanism.

    Why does Anthropic say not to use sudo with npm install?

    Per Anthropic’s official setup documentation, sudo with global npm installs can create permission issues and security risks. The recommended fix is to configure your npm prefix to a user-writable directory, then install without elevated privileges.

    How do I upgrade Claude Code installed via npm?

    Run npm install -g @anthropic-ai/claude-code@latest. Don’t use npm update -g — it respects the original semver range and may not move you to the latest release. This is documented in Anthropic’s setup guide.

    Does Claude Code work in CI/CD pipelines?

    Yes. The official GitHub Actions integration is the recommended path for GitHub-based workflows. For other CI systems (GitLab, CircleCI, Jenkins), the underlying tool is the Claude Agent SDK plus claude -p. Both move to the new Agent SDK monthly credit pool on June 15, 2026.

    How much does Claude Code GitHub Actions cost for a team?

    Independent reports as of May 2026 estimate $15-25/month for a 3-5 developer team running PR review on 10-15 PRs/week at Sonnet rates with a Claude Developer Platform API key. Actual cost varies with PR size, tool configuration, model selection, and path filtering aggressiveness.

    What’s the single biggest mistake teams make installing Claude Code?

    Skipping the CLAUDE.md file. Without it, Claude Code reasons generically against your codebase. With even a basic CLAUDE.md describing your conventions and constraints, output quality improves substantially across every interaction. It is the highest-leverage 30-minute setup task.

    Related Reading

    How we sourced this

    Sources reviewed May 15, 2026:

    • Anthropic Claude Code documentation: Set up Claude Code and Advanced setup at code.claude.com (primary source for install paths, npm gotchas, enterprise deployment patterns)
    • Anthropic Claude Code GitHub Actions documentation at code.claude.com/docs/en/github-actions (primary source for the GitHub Actions integration setup and use cases)
    • github.com/anthropics/claude-code-action public repository (primary source for the action’s interaction model)
    • Anthropic Help Center: Use the Claude Agent SDK with your Claude plan (primary source for the June 15, 2026 billing change)
    • Independent cost analyses (KissAPI, OpenHelm, Steve Kinney) for the team-scale cost estimates — Tier 2 confirming sources

    Cost figures and version specifics in this article are accurate as of May 15, 2026. Anthropic ships Claude Code updates frequently; the install paths and CLI commands are stable, but pricing and rate limits are the most likely figures to need re-verification.

  • LLMs.txt Spec: 2026 Guide, Robots.txt Rules & Verification

    LLMs.txt Spec: 2026 Guide, Robots.txt Rules & Verification

    If you publish an llms.txt file this week, no major model is going to fetch it tonight. That is the honest 2026 read on the spec — and yet the file is still worth shipping for narrow, specific reasons. This guide covers the 4-element specification published at llmstxt.org, the robots.txt pairing that actually controls AI crawler behavior right now, and a server-log filter you can run to verify whether anyone is reading the file you just shipped.

    What llms.txt actually is (and what it isn’t)

    llms.txt is a Markdown file served at the site root — /llms.txt — proposed by Jeremy Howard of Answer.AI on September 3, 2024. The spec at llmstxt.org defines four elements: a required H1 with the project or site name; a blockquote summary; zero or more Markdown content sections (no headings); and zero or more H2-delimited file-list sections containing annotated Markdown links to deeper content. That is the entire specification. There is no header convention, no schema requirement, no robots-style allow/deny syntax.

    What llms.txt is not: it is not a substitute for robots.txt, it is not an access-control mechanism, and as of May 2026 it is not consumed at inference time by ChatGPT, Claude, Gemini, Perplexity, or Copilot in any documented production system. Server-log audits across multiple independent practitioners show GPTBot, ClaudeBot, and Google-Extended do not request /llms.txt in meaningful volume during routine crawls.

    The realistic 2026 use case is developer tooling. AI coding assistants and IDE agents — Cursor, GitHub Copilot, Claude Code, and similar tools — retrieve docs in real time, and a curated llms.txt cuts token waste by pointing them at canonical Markdown sources instead of HTML-rendered pages bloated with nav and tracking. Companies like Anthropic, Stripe, Cursor, Cloudflare, Vercel, Mintlify, Supabase, and LangGraph ship llms.txt for that reason.

    The 4-element template — a working example

    Here is a real, valid llms.txt for a hypothetical SaaS docs site. Copy this structure, change the project name, and you have a shippable file in under 30 minutes:

    # Acme Analytics
    
    > Acme Analytics is a self-hosted product analytics platform for SaaS teams. This file points AI assistants and IDE agents at canonical Markdown documentation, not the rendered HTML.
    
    Authoritative Markdown sources for product, API, and SDK documentation. Use the `.md` variant of any docs page (append `.md` to the URL) for a clean, agent-friendly version.
    
    ## Getting Started
    
    - [Quickstart](https://acme.example/docs/quickstart.md): 10-minute setup, install through first event.
    - [Concepts](https://acme.example/docs/concepts.md): events, properties, identities, sessions — definitions and examples.
    
    ## API Reference
    
    - [REST API Reference](https://acme.example/docs/api/rest.md): every endpoint, request/response schema, rate limits.
    - [Webhook Reference](https://acme.example/docs/api/webhooks.md): payload contracts and retry behavior.
    
    ## SDKs
    
    - [JavaScript SDK](https://acme.example/docs/sdk/js.md): browser and Node, including server-side rendering notes.
    - [Python SDK](https://acme.example/docs/sdk/python.md): server-side ingestion patterns.
    
    ## Optional
    
    - [Changelog](https://acme.example/docs/changelog.md): version history, breaking changes flagged inline.
    

    Two practitioner notes. First, the spec uses an “Optional” H2 as a soft signal — links under that heading can be skipped by aggressive token budgets. Second, the file is most useful when every linked URL has a parallel .md Markdown version. If your site is pure HTML, llms.txt without paired Markdown does little.

    The robots.txt pairing — this is what actually controls AI bots today

    The lever that meaningfully controls AI crawler behavior in 2026 is robots.txt with user-agent–specific rules. Anthropic publishes official documentation for three bots — ClaudeBot for training, Claude-User for user-initiated fetches, and Claude-SearchBot for search indexing — and confirms all three honor robots.txt. OpenAI runs GPTBot (training) and OAI-SearchBot (live ChatGPT search). Google’s AI training opt-out is the Google-Extended user-agent. Perplexity uses PerplexityBot.

    The two-bucket pattern most practitioner sites should ship: block training-only crawlers, allow search and user-initiated retrieval so your content can still be cited in answers.

    # Allow AI search and user-fetch traffic (citations, attribution)
    User-agent: Claude-SearchBot
    Allow: /
    
    User-agent: Claude-User
    Allow: /
    
    User-agent: OAI-SearchBot
    Allow: /
    
    User-agent: PerplexityBot
    Allow: /
    
    # Block training-only crawlers
    User-agent: ClaudeBot
    Disallow: /
    
    User-agent: GPTBot
    Disallow: /
    
    User-agent: Google-Extended
    Disallow: /
    
    # Standard search crawler — leave open
    User-agent: Googlebot
    Allow: /
    
    Sitemap: https://example.com/sitemap.xml
    

    One operational caveat: robots.txt is policy, not enforcement. Anthropic, OpenAI, and Google have all publicly committed their named bots to compliance, but unnamed scrapers and residential-IP harvesters routinely ignore it. For sites with sensitive content, pair robots.txt with WAF or Cloudflare bot-management rules at the edge.

    Structured data still does more heavy lifting than llms.txt

    If your goal is AI citation rather than IDE-agent retrieval, structured data on the page itself moves the needle more than llms.txt. The minimum stack for any article you want cited: Article schema with named author and publisher, FAQPage schema on any post that answers a discrete question, and speakable markup on the answer paragraphs. These get parsed during normal HTML fetches by every major AI crawler — no separate file required.

    How to verify your llms.txt is actually being read

    Ship the file, then run this server-log filter weekly for 30 days. On any standard access-log format (nginx, Apache, or a Cloudflare log push), grep for requests to /llms.txt and break them down by user-agent:

    grep "GET /llms.txt" /var/log/nginx/access.log \
      | awk -F\" '{print $6}' \
      | sort | uniq -c | sort -rn
    

    What you will almost certainly see in May 2026: a steady trickle of human curl requests, the occasional IDE agent fetch tagged with a Cursor or VS Code user-agent, and effectively zero hits from GPTBot, ClaudeBot, or Google-Extended. That null result is itself the measurement — it tells you llms.txt is a developer-experience asset right now, not an AI-citation asset, and your investment should match that reality.

    The recommended 2026 rollout

    For most sites, the right sequence is: ship the robots.txt user-agent rules above first, because those are enforceable today and shape every AI crawler interaction. Add structured data to every article that competes for AI citation. Then publish llms.txt — under 30 minutes of work — for the IDE-agent and dev-tooling upside, with no expectation of immediate search lift. When OpenAI, Anthropic, or Google publicly confirm production llms.txt consumption, you are already in position.

  • Claude MCP Configuration: 2026 Setup & Token Savings

    Claude MCP Configuration: 2026 Setup & Token Savings

    Last refreshed: May 15, 2026

    If you set up Claude MCP six months ago and have not touched the config since, three things have changed underneath you: the recommended transport, how tools are loaded into context, and how teams share server configs. None of these are cosmetic. If you ignore them, you are leaving tokens, money, and stability on the table.

    This is the working Claude MCP setup I use in May 2026 — what the claude mcp add command actually does, which scope to pick, what the deprecation of SSE means in practice, and where Claude Code still falls short.

    The three-scope mental model

    Every MCP server you wire into Claude Code lives at exactly one of three scopes. Get this wrong and you will either leak credentials into git or wonder why your teammate cannot use the same database the AI just queried.

    • Local (default): the server is available only to you, only inside the current project. Config is written into your project’s entry inside ~/.claude.json. Good for project-specific servers like a dev database or a Sentry project key you do not want other repos to inherit.
    • User: the server is available to you across every project on your machine. Also stored in ~/.claude.json. This is where GitHub, search providers, and personal productivity servers belong.
    • Project: the server is written to a .mcp.json file at the repo root and shared with the whole team via git. Claude Code prompts for approval the first time a teammate opens the project — by design, because anyone who can push to the repo can wire a new server into your environment.

    When the same server is defined in more than one scope, Claude Code resolves it in this order: local beats project beats user beats plugin-provided. This is the part that bites people the most. If you have a “github” entry at user scope and someone adds a different “github” entry at project scope in .mcp.json, the project definition wins for that repo. Run claude mcp list when something behaves strangely.

    The commands you actually need

    The CLI is more useful than the docs make it look. Three commands cover ~90% of real setup work:

    # Add a remote HTTP MCP server at user scope (available everywhere)
    claude mcp add --transport http hubspot --scope user https://mcp.hubspot.com/anthropic
    
    # Add a local stdio server scoped only to this project
    claude mcp add my-db -s local -- node ./scripts/db-mcp.js
    
    # Share a server with your team via the repo's .mcp.json
    claude mcp add my-server -s project -- node server.js

    The short flag is -s, the long is --scope. The -- separator is required for stdio servers because everything after it is treated as the literal command to spawn. Forget it and Claude Code will try to interpret your Node arguments as its own flags.

    SSE is dead. Use Streamable HTTP.

    If your MCP server documentation still tells you to use the sse transport, the documentation is stale. The MCP spec dated 2025-03-26 introduced Streamable HTTP and simultaneously deprecated HTTP+SSE. Through 2026, vendor after vendor has set hard cutoff dates — Atlassian’s Rovo MCP server keeps SSE around until June 30, 2026 and then drops it; Keboola pulled SSE on April 1; Cumulocity’s AI Agent Manager flipped to Streamable HTTP on May 8.

    Why this matters beyond a name change: SSE required Claude Code to hold a persistent connection to a single server replica, which broke horizontal scaling and made every transient network blip a reconnection drama. Streamable HTTP is stateless. Multiple replicas behind a load balancer just work. If you have flaky MCP connections in production, the first thing to check is whether the server is still on SSE.

    For new setups, use --transport http. The older --transport sse still functions but is on the deprecation path.

    Tool Search is the feature you should actually care about

    The single biggest change in how Claude Code uses MCP in 2026 is lazy tool loading via Tool Search. Older MCP clients dumped every tool schema from every connected server into the model’s context window at the start of every conversation. With ten servers wired up that could easily be 20,000+ tokens of overhead before you typed a single character.

    Tool Search inverts this. Claude Code keeps only the server names and short descriptions resident. When a tool is actually needed, it fetches that tool’s full schema on demand. Anthropic’s own documentation says this reduces tool-definition context usage by roughly 95% versus eager-loading clients. In practice that means you can run a serious MCP fleet — GitHub, Sentry, a database, a search provider, your internal API — without quietly burning through your context budget. The Sonnet 4.6 and Opus 4.7 1M-token context window does not save you here, because anything you let crowd the prompt is also being re-read on every turn.

    Companion feature: list_changed notifications. An MCP server can now tell Claude Code “my tool list changed” and Claude Code refreshes capabilities without a disconnect-reconnect dance. If you build your own server, emit this when you swap tool definitions and you save users a restart.

    What it still gets wrong

    Honest take: claude mcp list still does not surface scope information for every entry in a useful way — there is an open issue on the anthropics/claude-code repo asking for it (#8288 if you want to track). Project-scoped servers from .mcp.json have a separate history of not appearing in the list output (#5963) depending on how you opened the project. If you cannot find a server, check both ~/.claude.json and ./.mcp.json directly.

    The other rough edge is the project-approval prompt. The first time you open a repo with a new .mcp.json, Claude Code asks you to approve each project-scoped server. That is the right security default. It is also infuriating in CI or any non-interactive shell, where the prompt blocks the session. The current workaround is to bake the servers in at user scope on build agents so the project-scope approval never fires in CI. A cleaner non-interactive approval flow is the single most-requested fix I see in real teams.

    The setup I would run on a new machine today

    User-scope: GitHub, a code search server, and a single notes/Notion server. Project-scope in each repo’s .mcp.json: whatever database the project owns and whatever observability backend it reports to. Local-scope: anything experimental I am evaluating but do not want my team or my other repos to inherit.

    Pin --transport http on everything remote. Skip Desktop Extensions (.dxt) for anything you want versioned with the codebase — they are a Claude Desktop convenience, not a Claude Code primitive, and they hide the config from your team. Run claude mcp list when something is off and read .mcp.json directly when list is unhelpful.

    That is the whole working model. The pieces that matter — three scopes, Streamable HTTP, Tool Search — fit on a single screen. The pieces that have not caught up yet — list output, non-interactive approvals — are visible in the issue tracker and will move.

  • Claude Code Hooks: Enforce Workflow Rules Automatically

    Claude Code Hooks: Enforce Workflow Rules Automatically

    Last refreshed: May 15, 2026

    You’ve been there. You add a rule to CLAUDE.md — “always run prettier after editing files” — and Claude follows it, most of the time. Then it doesn’t. The formatter doesn’t run, the lint check gets skipped, and you’re back to reviewing diffs manually.

    Hooks fix this. Claude Code hooks are shell commands, HTTP endpoints, or LLM prompts that fire deterministically at specific points in Claude’s agentic loop. Unlike CLAUDE.md instructions, which are advisory, hooks are enforced at the execution layer — Claude cannot skip them.

    As of early 2026, Claude Code ships with 21 lifecycle events across four hook types. This article covers the two that matter most for daily workflow: PreToolUse and PostToolUse.

    How Hooks Work Architecturally

    Claude Code’s agent loop is a continuous cycle: receive input → plan → execute tools → observe results → repeat. Hooks intercept this loop at named checkpoints.

    Every hook is defined in .claude/settings.json under a hooks key. A hook entry has three parts: the lifecycle event name, an optional matcher (a regex against tool names), and the handler definition — either a shell command, an HTTP endpoint, or an LLM prompt.

    {
      "hooks": {
        "PostToolUse": [
          {
            "matcher": "Write|Edit",
            "hooks": [
              {
                "type": "command",
                "command": "npx prettier --write "$CLAUDE_TOOL_INPUT_FILE_PATH""
              }
            ]
          }
        ]
      }
    }

    That’s it. Every file Claude writes or edits now auto-formats. No CLAUDE.md reminders, no hoping Claude remembers — the formatter runs on every single Write or Edit tool call, period.

    PreToolUse: Enforce Before Claude Acts

    PreToolUse fires before Claude executes any tool. Your hook receives the full tool call — name, inputs, arguments — and can return one of three signals:

    • Exit 0 → allow the tool call to proceed
    • Exit 2 → block the tool call; Claude receives your error message and adjusts
    • Exit 1 → hook error; Claude proceeds but logs the failure

    This makes PreToolUse the right place for guardrails. Here’s a real example: blocking npm in a bun project.

    #!/bin/bash
    # .claude/hooks/check-package-manager.sh
    # Blocks npm commands in projects that use bun
    
    if echo "$CLAUDE_TOOL_INPUT_COMMAND" | grep -qE "^npm "; then
      echo "Error: This project uses bun, not npm. Use: bun install / bun run / bun add" >&2
      exit 2
    fi
    exit 0

    Wire it in settings.json:

    {
      "hooks": {
        "PreToolUse": [
          {
            "matcher": "Bash",
            "hooks": [
              {
                "type": "command",
                "command": ".claude/hooks/check-package-manager.sh"
              }
            ]
          }
        ]
      }
    }

    Now when Claude tries npm install, the hook exits 2, Claude sees the error message, and it switches to bun install without you intervening. The correction happens in the same turn.

    Another production pattern: blocking writes to protected paths.

    #!/bin/bash
    # Prevent Claude from modifying migration files already run in production
    if echo "$CLAUDE_TOOL_INPUT_FILE_PATH" | grep -qE "db/migrations/"; then
      echo "Error: Migration files are immutable after deployment. Create a new migration instead." >&2
      exit 2
    fi
    exit 0

    PostToolUse: React After Claude Acts

    PostToolUse fires after a tool completes successfully. It can’t block execution, but it can provide feedback — and it can run any side-effect you need automatically.

    Auto-format every edit:

    {
      "hooks": {
        "PostToolUse": [
          {
            "matcher": "Write|Edit",
            "hooks": [
              {
                "type": "command",
                "command": "npx prettier --write "$CLAUDE_TOOL_INPUT_FILE_PATH" 2>/dev/null || true"
              }
            ]
          }
        ]
      }
    }

    Run tests after code changes:

    #!/bin/bash
    # Run affected tests after any source file edit
    FILE="$CLAUDE_TOOL_INPUT_FILE_PATH"
    if echo "$FILE" | grep -qE "\.(ts|js|py)$"; then
      if [ -f "package.json" ]; then
        npx jest --testPathPattern="$(basename ${FILE%.*})" --passWithNoTests 2>&1 | tail -5
      fi
    fi

    Desktop notification on task completion:

    {
      "hooks": {
        "Stop": [
          {
            "hooks": [
              {
                "type": "command",
                "command": "osascript -e 'display notification "Claude finished" with title "Claude Code"'"
              }
            ]
          }
        ]
      }
    }

    Environment Variables Available to Hooks

    Claude Code exposes context about the triggering tool call through environment variables. The ones you’ll use most:

    Variable Value
    $CLAUDE_TOOL_NAME Name of the tool being called (e.g., Edit, Bash, Write)
    $CLAUDE_TOOL_INPUT_FILE_PATH File path for Edit, Write, Read calls
    $CLAUDE_TOOL_INPUT_COMMAND Shell command for Bash calls
    $CLAUDE_SESSION_ID Current session ID — useful for audit logging
    $CLAUDE_TOOL_RESULT_OUTPUT Output of the tool (PostToolUse only)

    These are injected by Claude Code before your hook runs. You don’t configure them — they’re always there.

    The Model Question: Which Claude Runs Agentic Tasks?

    One practical consideration for hook-heavy workflows: the default model affects how well Claude responds to hook feedback. As of May 2026:

    • claude-opus-4-7 ($5/MTok input, $25/MTok output) — highest agentic coding capability; best at interpreting hook rejection messages and self-correcting without re-asking
    • claude-sonnet-4-6 ($3/MTok input, $15/MTok output) — strong balance of speed and reasoning; handles most hook-corrected flows well
    • claude-haiku-4-5-20251001 ($1/MTok input, $5/MTok output) — fastest; may require more explicit hook messages to course-correct reliably

    For workflows with complex PreToolUse guardrails — especially ones that provide long error messages with corrective instructions — Opus 4.7 handles the feedback loop most reliably. For simpler PostToolUse automation (formatters, notifications), model choice doesn’t matter; the hook runs regardless.

    To configure the model: export ANTHROPIC_MODEL=claude-opus-4-7 before launching Claude Code, or set it in your team’s .env.

    Hooks vs. CLAUDE.md: When to Use Each

    CLAUDE.md is the right place for context, preferences, and guidance — things you want Claude to know about your project. Hooks are the right place for behavior that must happen every time without exception.

    The practical test: if failing to follow the instruction costs you five minutes of manual cleanup, put it in a hook. If it’s a style preference or a reminder about architecture decisions, put it in CLAUDE.md. The two are complementary — you’ll likely end up with both in any mature project setup.

    A team that gets this right builds CLAUDE.md as documentation for Claude and hooks as the CI/CD equivalent for the agentic loop.

    Getting Started

    The fastest path to a working hook setup:

    1. Create .claude/settings.json in your project root if it doesn’t exist
    2. Add a PostToolUse hook wired to your formatter — this is low-risk and immediately valuable
    3. Test it by asking Claude to edit a file; the formatter should run automatically
    4. Add PreToolUse guardrails for any tool calls that have caused problems in the past

    The official hooks reference is at code.claude.com/docs/en/hooks — it covers all 21 lifecycle events, HTTP handler format, and the full JSON output schema for hook responses.

    Hooks are the difference between Claude Code as a powerful suggestion engine and Claude Code as a reliable automation layer. Once you have a PostToolUse formatter running on every edit, going back feels like working without version control.

  • Everett-Delta Transmission Line: Developer Capacity Guide

    Everett-Delta Transmission Line: Developer Capacity Guide

    The short version for developers: Snohomish County PUD’s new Everett-Delta 115-kV transmission line — 3.5 miles, connecting the Everett Substation to the Delta Switching Station near SR 529 / Marine View Drive — goes in service summer 2027. It adds the upstream transmission capacity PUD needs to connect the wave of new waterfront, downtown, and north-Everett developments at full load. If your building opens before summer 2027, confirm your electrical service agreement and any interim capacity arrangements with PUD now. If your opening is fall 2027 or later, you are in the planned capacity window.

    If you are developing, building out, or opening a business in Everett’s waterfront, downtown, or north-end corridor in 2026 or 2027, there is one piece of infrastructure that affects your electrical service capacity, your connection timeline, and your ability to run the systems your tenants and customers will expect. It is not a building permit. It is a power line.

    Snohomish County PUD’s new Everett-Delta 115-kilovolt transmission line is the upstream electrical capacity that the Millwright District, the downtown stadium, the Mosaic Apartments, and every other project in the corridor runs on. PUD held public open houses on May 7, 2026. Here is the business-owner and developer version of what you need to know. For the full project overview, see the complete Everett-Delta transmission line guide.

    The Capacity Problem the Line Solves

    Every large building in the waterfront corridor pulls electrical load. A 300-unit multifamily building with heat pumps, EV charging infrastructure, and commercial amenity spaces runs approximately 1 to 1.5 megawatts of peak demand. A restaurant with commercial kitchen equipment adds another 100 to 300 kilowatts per tenant. Stack the Millwright District Phase 2, Mosaic Apartments, the downtown stadium, and the Sage Investment Group conversion on top of projects already open at Waterfront Place — and you have a concentration of new load the existing north Everett transmission system was not designed to absorb.

    PUD’s language for why the line is being built is precise: “increasing electrical demand in the northern regions of the service territory” and “prevent the electric system from experiencing low voltage should local power be interrupted.” For a developer or building owner, that translates to: the existing infrastructure is operating with reduced headroom, and this line restores it.

    What Goes In Service and When

    The line connects PUD’s Everett Substation (west of I-5, between McDougall and Smith avenues) to the Delta Switching Station near SR 529 and West Marine View Drive. Construction is targeted to begin spring 2027. The line is planned to be in service by summer 2027, approximately six months of construction.

    The Practical Timeline Issue for Your Project

    If your building or commercial space is targeting an opening in 2026 or early 2027, you are opening before the Everett-Delta line is in service. For large-load projects — multifamily, high-load commercial anchors, destination restaurants with significant kitchen/HVAC load — confirm directly with PUD whether your project falls within the pre-line capacity envelope or whether there are interim arrangements needed.

    If your project is targeting a fall 2027 opening or later, you are timing well. PUD will have the upstream capacity in place and your service connection request goes into a queue that includes the new transmission headroom the Everett-Delta line creates.

    The Reliability Dimension

    Beyond raw capacity, the Everett-Delta line adds N-1 redundancy to the north Everett corridor. Once in service, PUD can reroute power around a failed line segment, maintaining voltage and continuity. For a restaurant, hotel, or high-density residential building where a power outage is a direct revenue and habitability event, this is a meaningful change in risk profile.

    The New Substation Implication

    PUD’s project documentation states the Everett-Delta line will “support at least one new substation in the Everett area” tied to the city’s 2044 Comprehensive Plan. The substation location has not been publicly announced. Developers planning projects in the 2028–2032 window should monitor PUD’s system improvements page for updates — the new substation’s location will directly affect which parts of the corridor have the most available service capacity after the line goes in. For the broader economic context, see the April 2026 Snohomish County market report.

    How to Stay Current

    PUD maintains a project page at snopud.com under System Improvements. For project-specific electrical service questions, PUD’s business services team handles large-load connection requests.

    Frequently Asked Questions for Developers and Business Owners

    Does the Everett-Delta line affect my electrical service connection timeline?

    For large-load projects opening before summer 2027, yes — confirm your connection capacity with PUD. For projects opening fall 2027 or later, the line adds upstream capacity that makes connection approvals more straightforward.

    When does construction begin and when is the line in service?

    Construction begins spring 2027; in service by summer 2027, approximately six months of construction.

    What load can existing north Everett transmission support now?

    PUD has not published a specific available capacity figure. Contact PUD’s business services team for a load study or capacity assessment for your specific project.

    Will there be construction disruption near Marine View Drive?

    Some work in the corridor is expected in spring-summer 2027. PUD will provide specific construction routing details as the project advances through permitting.

    Where is the new substation PUD mentioned?

    The location has not been publicly announced. PUD’s documentation states the line will support at least one new substation tied to Everett’s 2044 Comprehensive Plan. Watch snopud.com system improvements for updates.

  • Notion AI API Endpoints for Database Views: A Developer’s Tour

    Notion AI API Endpoints for Database Views: A Developer’s Tour

    The 60-second version

    Until Notion 3.4 part 2, working with database views via the API meant fetching the underlying database and replicating view logic in code. The new endpoints give direct programmatic access to view configurations — query a view, apply its filters server-side, modify its display properties, all via the API. For developers building agents and integrations, this removes a significant friction point.

    What the new endpoints enable

    1. Query a view directly.
    Fetch the rows a specific view shows, with the view’s filters and sorts already applied. Previously, you fetched the database and re-implemented filtering in client code. Now the server does it.
    2. Read view configuration.
    Inspect what a view’s filters, sorts, and column selections are. Useful for agents that need to understand what a view represents.
    3. Modify view properties programmatically.
    Update filters, sorts, or display settings via API. Useful for dynamic views that adapt based on agent context.
    4. List views per database.
    Enumerate all views attached to a database. Helpful for agents that need to discover the right view to query.

    Three patterns this enables

    1. View-driven agent context.
    Instead of giving an agent the entire database and a complex prompt about filtering, point the agent at a pre-configured view. The view defines the context; the agent works with the filtered subset.
    2. Dynamic view modification.
    An agent that adjusts a view’s filter based on conversation. “Show me last week’s high-priority items” becomes a real query against a view, not a search across the whole database.
    3. View-as-API.
    Treat each view as a parameterized data endpoint. Builders can expose specific views to specific agents, controlling exactly what data the agent sees through the view definition.

    Practical implementation notes

    • Fetching views: Use the database fetch tool first to discover view URLs. View URLs include the view ID after ?v=.
    • Multi-source databases: Views may apply to a specific source.
    • Permissions: API access to views inherits the database’s permission model.

    Where this goes wrong

    1. Treating views as static. Views can be modified by users in the UI. Agents that cache view configurations get stale.
    2. Over-fetching. Querying a view is more efficient than fetching the database and filtering client-side. Migrate.
    3. Confusion between views and data sources. Multi-source databases have both. Don’t mix the API parameters.

    What to read next

    Workers + External APIs, Workers in TypeScript, MCP, Designing Database Schemas for Autofill.

  • Workers for Agents in TypeScript: Patterns That Hold Up in Production

    Workers for Agents in TypeScript: Patterns That Hold Up in Production

    The 60-second version

    Workers reward a specific style of TypeScript: small, single-purpose, structured-input-and-output, well-typed. The constraints (30 seconds, 128MB, no state) push you toward this style automatically. Workers that hold up in production share patterns: typed input/output schemas, defensive HTTP calls with timeouts, structured error returns, no hidden side effects.

    Five production patterns

    1. Type your input and output.
    Type strictly. The agent works against the schema. Schema drift breaks the agent silently.
    2. Defensive HTTP with timeouts.
    External API calls inside a 30-second budget need their own timeouts. A 25-second API call leaves 5 seconds for everything else. Set explicit fetch timeouts shorter than the Worker timeout.
    3. Structured error returns instead of throws.
    Throw inside a Worker and the agent gets opaque failure. Return structured error objects and the agent can reason about the failure and respond gracefully.
    4. Idempotency where state matters.
    Workers have no persistent state, but they can hit external systems that do. If the external call is non-idempotent (e.g., creates a record), include an idempotency key derived from input. Calling the Worker twice should produce one record, not two.
    5. Approved domains as a deployment artifact.
    Track domain approvals in code. When a Worker stops working in production, “did the approved domains change” is the first thing to check.

    Three production failures to design around

    1. The 30-second wall. Aim for under 5 seconds typical, under 15 worst case. Long calls fail under retry loads.
    2. Silent domain blocks. A Worker calling a non-approved domain fails with an error that isn’t always obvious. Log every outbound destination.
    3. Memory leaks via large responses. Don’t pull a 50MB JSON response into a 128MB Worker. Stream, paginate, or pre-filter at the source.

    Testing strategy

    Unit-test the Worker logic separately from the agent. Use mock HTTP. Then integration-test with the actual agent calling the Worker. The two test layers catch different bugs.

    What to read next

    Workers + External APIs, Notion AI Meets MCP, Workers for Agents foundation piece, Security Posture.

  • Building Your First Notion Skill: A Step-By-Step Walkthrough

    Building Your First Notion Skill: A Step-By-Step Walkthrough

    The 60-second version

    Building a skill that works on the first try is rare. Building a skill that works after three iterations is normal. The discipline is starting with a narrow scope, writing specific instructions, testing against real inputs, and tightening based on what fails. Most operators build skills that are too broad and too vague. The fix is the opposite of intuition — narrower, more specific, more bounded.

    Step-by-step

    Step 1 — Pick the right first skill. Not the most ambitious one. The most repetitive one. “Weekly digest from project database” is a great first skill. “Generate our entire content strategy” is a terrible first skill.
    Step 2 — Write the instructions. Specific format. Specific sections. Specific length. Specific tone. “Summarize” produces variance; “Produce a one-page summary with these five sections in this order, max two sentences per section, in active voice” produces consistency.
    Step 3 — Bound the context. Which database does it read? Which pages? Which fields? Pin tightly. Expand only when needed.
    Step 4 — Test five times. Run the skill against five different real inputs. Look at outputs side by side. The variance you see is the variance you’ll get in production.
    Step 5 — Tighten based on failures. What was wrong in any output? Update the instructions to prevent that. Re-test. Loop.
    Step 6 — Document the skill. Note what it does, when to call it, and what its known failure modes are.

    Three patterns that fail

    1. The mega-skill. A skill that “drafts the weekly report including stakeholder updates and exec summary and content calendar.” Break it into three skills.
    2. The vague skill. “Help me write.” Define what kind of help, what kind of writing, in what format.
    3. The unbounded skill. No context boundaries. The agent reads everything and produces something that sounds related to nothing.

    Where this goes wrong

    1. Skipping the five-test step. Skills that work once fail differently. Test variance early.
    2. Treating skills as static. Skills need maintenance. When a database schema changes, the skill changes.
    3. Building too many skills too fast. Three great skills beat ten mediocre ones.

    What to read next

    How Notion Skills Work, Custom Agents vs Basic, Workers for Agents, Prompt Patterns That Work Inside Notion.