Secure checkout via Square — all major cards accepted
You can copy this method and run a month of WordPress work yourself. Buy Now is Will doing that month on your site: ten existing-post optimizations and four new articles, already connected.
SiteBoost Monthly Retainer is a service. Square lists it per month at $997. The /siteboost/ hub defines the month as 10 posts + 4 articles. That is the scope. Not “unlimited blog support.” Not ads. Not a redesign.
This SKU assumes the site is already connected and you have a baseline. If it is not, run Site Connection and Audit first (or the Pilot, which includes the connection). Self-hosted WordPress only. Posts, not Pages, unless you put a Page in writing.
What a month includes
From the public hub, two work types:
10 existing-post optimizations. Same method as the $47 SKU, ten times. SEO, AEO, GEO, schema, interlink, IndexNow. Highest-opportunity published posts, agreed before the month starts if you can, or pulled from the last audit if you already have a queue.
4 new articles. Same method as the $97 SKU, four times. Brief, write, three layers, taxonomy, internal links, publish, IndexNow.
That is 14 URLs touched in a month if you finish the scope. The pilot is ten existing posts and a 60-day wait. The retainer is the ongoing version: keep refreshing the library and keep adding posts, on a calendar.
The weekly rhythm
The operator guide on tygartmedia.com is the calendar. Scope changes. Process does not.
Monday. Audit and pick. Re-pull the inventory or last month’s leftover queue. Score content health. Pick this week’s existing posts and the next new-article brief. Do not start writing until the week’s list is written down.
Tuesday to Thursday. Execute. Existing-post passes and new-article drafts. Every action gets all three layers by default. Schema on every URL you touch. Interlink into the cluster you are building, not random related-posts widgets.
Friday. Verify. Re-read what you published or refreshed. Rich Results Test on the new or changed URLs. IndexNow pings. Log what shipped: URL, what changed, word count, schema types, which brief it came from.
The 23-site stack article adds the monthly maintenance layer on top of that week: taxonomy health, orphan detection, meta-pollution scan (wp-clean-meta), and a look at rankings / competitor movement if you have Search Console and a research tool. Do that once a month, not every Monday, or you will spend the retainer on reports.
How to pick the ten and the four
Existing ten, same rules as the pilot:
Impressions but empty meta / no FAQ / no schema.
Over 500 words, real query, missing AEO and GEO.
Across pillars, not ten from one tag.
Skip stubs, test posts, and anything you are about to redirect.
Four new articles, same rules as New Article Publishing:
Start from a brief: keyword, intent, PAA list, sources you can name, internal-link targets that already exist.
Prefer spokes that point back to a hub you already optimized, or a hub you will optimize this month. The SiteBoost cluster process is hub and spoke with bidirectional links. A new post that does not link to anything, and is linked from nothing, is a wasted slot.
content-quality-gate before publish: no unsourced claims, no fabricated stats.
A month on a legal pad
Write these lines on day 1, then fill them as you go:
Site URL. Connection still works? (users/me 200)
This month’s ten existing URLs (before title / after title).
This month’s four briefs (keyword, intent, target publish date).
Monday notes: what the audit still says is on fire.
Friday logs, four of them.
Month-end: Search Console on the 14 URLs versus last month. What you would pick next month. What you would stop.
If you cannot name the 14 URLs at month-end, you did not run a retainer. You blogged.
What a month does not include
Page redesigns, theme work, or plugin installs.
Google Ads, GBP posts, or social, unless you hired those separately.
Editing attorney bios, service pages, or the homepage without a written ask.
A promised ranking. The public SiteBoost copy measures at 60 days and treats traditional SEO as 60 to 90 days on competitive terms. A single month is a shipping month, not a miracle month.
How this sits next to the other doors
Connection and Audit is the one-time setup. Pilot is connection + ten existing posts + a 60-day report, once. Retainer is the monthly machine after that. Existing Post Optimization and New Article Publishing are the à la carte versions of the same two work types if you do not want a month.
If you want the skill files so your own Claude can run the week, that is the WordPress SEO Skill Pack. Pro has the full refresh stack and the content pipeline. Agency adds new-site setup and thin-content expansion, which is what you need if you are the one retaining other people’s sites.
If you want Will to run the month
You can keep the Monday / midweek / Friday rhythm on your own staff. Buy Now is Will doing the month: ten existing-post passes, four new articles, shipped through the REST API, with a log of what changed. Same Square button at the top. $997 per month.
Email the site URL after checkout. If the site is not connected yet, the first month still needs the Application Password and the baseline. Do not send the login password. Application Password only.
Secure checkout via Square — all major cards accepted
You can copy this method and publish the article yourself. Buy Now is Will researching, writing, optimizing, and publishing one new WordPress post for you.
SiteBoost New Article Publishing is a new post, not a refresh of something already live. The /siteboost/ hub prices it at $97 per article. The same three layers as an existing-post pass still apply. You just start from a brief instead of from a published URL.
The six-step workflow
This is the unified content workflow from the operator’s guide on tygartmedia.com. One draft. SEO, AEO, and GEO built in. Not three versions of the same piece.
1. Keyword and intent
Name the target query. Classify intent: informational, navigational, commercial, or transactional. Look at what already ranks and match the format Google is already rewarding. This step is ordinary SEO. Do not skip it because you are “writing for AI.”
2. Question landscape
Search the keyword. Collect People Also Ask questions, related searches, and autocomplete variants. Group them. Those groups become H2s and FAQ items. The operator guide budgets 15 to 20 minutes here. This is the AEO setup. If you skip it, you will write headings that feel like an outline and not like queries.
3. Write with the direct-answer pattern
Write the article once, with both SEO and AEO in the draft:
Primary keyword in the H1 and in the first 100 words.
Every major section is a question-shaped H2, then a 40 to 60 word answer, then the depth.
Internal links with descriptive anchors to posts that already exist on the site. If the site is new and there is nothing to link to, note the gaps. Do not invent destinations.
A 40 to 60 word definition box near the top.
The WordPress Publish skill’s quality bar before anything goes live: title 50 to 60 characters with the primary keyword, meta 140 to 160 characters, a unique H1, at least one direct-answer section, a FAQ with 3 to 5 Q and As on a new article (SiteBoost existing-post passes use 6 to 8; for a new article start at 3 to 5 and add more if the PAA list is real), Article JSON-LD, FAQPage JSON-LD, and at least one cited fact per major section.
4. GEO enhancement
After the draft exists, do a factual-density pass. The operator guide budgets 20 to 30 minutes on a 1,500-word article. For every claim: a number, a date, a named organization, or cut it. The citing-sources article is the house rule:
Name the organization in the text, not only in a hyperlink.
Link the primary source. If it is paywalled, link a credible secondary that cites it.
Put a sources list at the bottom.
Show a last-updated date near the byline.
Put datePublished and dateModified in Article schema.
Do not add fake statistics to look dense. The operator guide calls that out as a backfire when AI systems cross-check you.
5. Schema
Minimum on a new SiteBoost article: Article (or BlogPosting) plus FAQPage. Add HowTo if the piece is genuinely step-by-step. Add BreadcrumbList if the theme does not already emit it. Add Speakable on the definition box and one other self-contained block. JSON-LD in the post, validated with Google’s Rich Results Test. The schema injection sprint is the same sequence: pick the type, generate valid JSON-LD, inject, validate, fix failures.
SiteBoost content standards also embed an LLMS.txt HTML comment on the page. A short seed paragraph, not a second article.
6. Pre-publish audit, then publish
Run the three-layer checklist. Title, meta, headings, snippet readiness, factual density, schema validation, entity signals. Then publish as a post, not a page.
The production pipeline used on Tygart Media sites is: brief (content-brief-builder) to draft to SEO to AEO to GEO to schema to taxonomy to interlink to publish (wp-content-pipeline). content-quality-gate sits in front of publish and flags unsourced claims. You can do that as a human checklist if you are not running Claude skills.
Taxonomy and internal links
Assign 1 to 2 categories that are real content pillars, never Uncategorized. Assign 5 to 10 tags that cover topic, use case, audience, and format. That is the wp-taxonomy-fix rule. Then place 3 to 5 internal links to related posts in the same cluster, plus outbound links to the sources you named. Hub and spoke. The new post should not be an orphan on day one, and it should not be a dead end.
IndexNow
On publish, ping IndexNow. Official plugin, or Rank Math / Yoast Instant Indexing. Confirm the URL in Bing Webmaster Tools. New posts that sit in a sitemap waiting for a crawl waste the first week.
What “done” looks like on one new article
Brief: target keyword, intent, PAA list, existing internal-link targets, sources you will actually cite.
Draft written with definition box, question H2s, and sourced facts.
Title 50 to 60, meta 140 to 160, slug clean.
FAQ section + FAQPage schema. Article schema with both dates.
Categories and tags set. 3 to 5 internal links. Sources list.
Rich Results Test pass. IndexNow ping. Status = publish (or draft if you want a human read first).
Self-hosted WordPress only. Squarespace, Wix, and Webflow are not this SKU. Do not modify existing Pages to “make room” for the article. Publish a post.
If you want Will to write and publish it
You can run the six steps in your own editor. Buy Now is the packaged, done-for-you article: Will writes it, runs the three layers, publishes it to your site, and emails you the URL. Same Square button at the top. $97 per article.
A single new post next to a neglected library is a weak play. If the existing posts are empty of FAQ, schema, and meta, optimize those first (Existing Post Optimization, or the Pilot Bundle for ten). If the site is not connected yet, start with Site Connection and Audit.
Logic Apps vs Cloud Workflows: No-Code Automation Across Two Clouds
Every content operation runs on small invisible chains of “when this happens, do that.” Publish an article → notify a channel → write a row to the ledger. None of it is hard, but you don’t want to babysit a script for it — you want a managed orchestrator that fires on an event, calls a few services, and logs the result, for free. Azure and Google each have one, and they take opposite philosophies to the same job.
We wire the same publish → notify → log automation on both Azure Logic Apps and Google Cloud Workflows, on the free tiers, and compare. Short answer: Logic Apps wins when the work is gluing SaaS services together — its connector library and visual designer are unmatched, with a free grant of 4,000 built-in actions/month. Cloud Workflows wins when the work is lightweight, code-first orchestration inside GCP — its 5,000 internal + 2,000 external steps/month free tier pairs cleanly with Eventarc and Pub/Sub. One is a no-code SaaS glue gun; the other is a YAML orchestration engine.
This is the breakdown from the running lab on tygart.media — connector ecosystems, visual designer vs YAML, triggers, and free ceilings.
The free-tier ceilings
How we do it
Azure
Google Cloud
Verdict
Free grant/month
4,000 built-in actions
5,000 internal + 2,000 external steps
Comparable, units differ
Billing model
Per-action (Consumption)
Per-step (internal vs external)
Different mental models
What counts
Each connector/built-in action
Each workflow step executed
Tie at our volume
Fit for a glue chain
Generous
Generous
Tie
Our actual bill
$0
$0
Tie where it counts
Both free grants comfortably cover a real automation cadence. A publish → notify → log chain is three or four actions/steps per run; at a few publishes a day, neither 4,000 actions nor 7,000 steps comes close to binding. The units differ — Azure counts actions, Workflows splits internal vs external steps (external = calls out to other services, which are scarcer) — but for our workload both run free.
Connectors vs code-first
This is the real fork in the road, and it decides the choice.
How we do it
Azure
Google Cloud
Verdict
Connector library
Hundreds (SaaS + Microsoft + 3rd-party)
HTTP + GCP services, no big SaaS catalog
Logic Apps, decisively
Authoring model
Visual designer (drag-and-drop)
YAML (code-first)
Logic Apps for no-code
SaaS glue (Slack, email, etc.)
Native connectors, prebuilt auth
Roll your own via HTTP
Logic Apps
GCP-native orchestration
Possible via HTTP
First-class
Cloud Workflows
Versioning / review in git
Exportable, but designer-first
YAML lives in git naturally
Cloud Workflows
Logic Apps’ superpower is its connector library — hundreds of prebuilt, pre-authenticated connectors for Slack, Office, Salesforce, Twitter/X, databases, and most SaaS you’d name. Wiring “post to Slack when an article publishes” is point-and-click, with the OAuth handled for you. Cloud Workflows takes the opposite stance: it’s code-first YAML with no big SaaS catalog — you orchestrate GCP services and arbitrary HTTP endpoints, building any integration you need by hand. That’s less convenient for SaaS glue but cleaner for engineers who want their orchestration in git, reviewed like code.
Triggers and event sources
How we do it
Azure
Google Cloud
Verdict
Native triggers
Many (HTTP, schedule, connector events)
HTTP + Eventarc/Pub/Sub
Logic Apps on built-in variety
Event-driven on cloud events
Via Event Grid
Via Eventarc (first-class)
Cloud Workflows for GCP events
Schedule / cron
Built-in recurrence
Cloud Scheduler
Tie
SaaS event triggers
Connector-based, prebuilt
Roll your own
Logic Apps
Pub/Sub-style fan-out
Event Grid
Pub/Sub (native pairing)
Cloud Workflows in GCP
Logic Apps can be triggered by connector events directly — “when a new email arrives,” “when a row is added” — which keeps SaaS-driven automations entirely no-code. Cloud Workflows leans on Eventarc and Pub/Sub for event sources, which is the idiomatic, powerful path if your events originate in GCP. Each is strongest for events native to its own cloud.
What surprised us
Logic Apps’ connector library is the whole ballgame for SaaS glue. Pre-authenticated connectors turned a “write a small integration” task into a five-minute drag-and-drop. Nothing on the GCP side matches that catalog.
Cloud Workflows’ YAML-in-git is quietly the better engineering experience. When the orchestration lives in the repo and gets code-reviewed, it stops being a clickable black box. We liked that more than expected.
The free grants are both ample. We worried about per-action metering and never came near either ceiling at a realistic publishing cadence.
External steps are the scarce currency on GCP. Workflows’ 2,000 external steps (calls out to other services) is the limit to watch, not the 5,000 internal steps.
The takeaway
Pick Azure Logic Apps if your automation is mostly gluing SaaS services together — Slack, email, CRMs, Microsoft 365 — and you want a visual, no-code designer with hundreds of pre-authenticated connectors. It’s the fastest path from “I wish X notified Y” to a running flow.
Pick Google Cloud Workflows if your automation is lightweight orchestration inside GCP — coordinating Cloud Run, Functions, Pub/Sub, and HTTP endpoints — and you want it defined as code-first YAML that lives in git and pairs with Eventarc. It’s the cleaner engineering primitive when the events and services are already on Google’s side.
For our publish → notify → log chain, the deciding factor is where the notify lands: a Slack or email notification leans Logic Apps for the free connector; a fan-out into Cloud Run or Pub/Sub leans Workflows. Running the same chain on both made the connector-vs-code-first trade concrete.
This is part of our “Two Clouds, One Site” series — we run the same media property on both Azure and Google Cloud on the free tiers, wiring the same automation on each to see which orchestrator fits which job. The lab lives on tygart.media; the findings publish here.
Frequently asked questions
What’s the free tier for Azure Logic Apps and Google Cloud Workflows?
Azure Logic Apps (Consumption) includes a free grant of 4,000 built-in actions per month. Google Cloud Workflows includes 5,000 internal steps and 2,000 external steps per month free. Both comfortably cover a realistic automation cadence, so a small glue chain runs at $0 on either.
Which is better for no-code automation, Logic Apps or Cloud Workflows?
Logic Apps is the no-code choice — it has a visual drag-and-drop designer and hundreds of pre-authenticated connectors for SaaS services. Cloud Workflows is code-first YAML with no big SaaS catalog, so it suits engineers orchestrating GCP services rather than non-developers gluing apps together.
Does Cloud Workflows have a connector library like Logic Apps?
No. Cloud Workflows orchestrates GCP services and arbitrary HTTP endpoints, but it has no large prebuilt SaaS connector catalog the way Logic Apps does. To integrate a third-party SaaS in Workflows, you call its HTTP API and handle authentication yourself, whereas Logic Apps provides a ready-made connector.
How do I trigger automation when an article is published?
On Azure, a Logic App can be triggered by an HTTP request, a schedule, or a connector event, then call further connectors with no code. On Google Cloud, a Workflow is typically triggered via Eventarc or Pub/Sub for cloud-native events, or by HTTP. Each is strongest for events that originate inside its own cloud.
Which is better for gluing SaaS and cloud events together?
Logic Apps wins for SaaS glue thanks to its connector library and visual designer, making things like “notify Slack when X happens” nearly code-free. Cloud Workflows wins for lightweight, code-first orchestration of GCP services that lives in git and pairs with Eventarc and Pub/Sub. Pick by where your events and services already live.
Cosmos DB vs Firestore: A Free-Tier Operations Ledger on Both Clouds
Every real content operation grows a small database it didn’t plan for: a ledger of what got published when, a metadata store tracking which article has an audio version, which has been translated, which is queued. It’s not big data — it’s a few thousand small records that need to be written cheaply, queried quickly, and never cost anything. The question is which cloud’s free NoSQL tier carries that load forever.
We run the same small ops ledger and content-metadata store on both Azure Cosmos DB and Google Firestore, on the free tiers, and watch the quotas. Short answer: Cosmos DB’s always-free tier is unusually generous — 1,000 RU/s of provisioned throughput plus 25 GB of storage, free for the life of one account per subscription. Firestore’s free tier is simpler but tighter — 1 GiB of storage with 50,000 reads, 20,000 writes, and 20,000 deletes per day. For a metadata store that fits either, Cosmos gives you more room; Firestore gives you less to think about.
This is the breakdown from the running lab on tygart.media — free-tier generosity, data model, query power, latency, and which one we’d trust with the ledger.
The free-tier ceilings
This is where the two diverge most, and the units don’t line up cleanly — which is itself the point.
How we do it
Azure
Google Cloud
Verdict
Free throughput
1,000 RU/s provisioned
50K reads / 20K writes / 20K deletes per day
Cosmos for steady throughput
Free storage
25 GB
1 GiB
Cosmos — 25× the storage
Billing unit
Request Units (RU/s)
Per-operation daily quota
Different mental models
How many free tiers
One per subscription
Per project (Spark plan)
Tie, structurally
Fit for a metadata store
Generous
Comfortable for small stores
Cosmos on headroom
The mismatch in units is the real story. Cosmos meters everything in Request Units — a blended currency for reads, writes, and queries — and gives you a flat 1,000 RU/s continuously plus 25 GB. Firestore meters discrete daily operations — 50K reads, 20K writes, 20K deletes — and 1 GiB. For our ledger, Cosmos’s 25 GB is absurd headroom we’ll never approach, and 1,000 RU/s comfortably absorbs bursty publish events. Firestore’s daily caps are fine for a small store but you feel them: a chatty dashboard that re-reads the ledger on every page load can nibble through 50K reads faster than you’d expect.
Cosmos is multi-model: the same data can be addressed through a SQL-like NoSQL API, MongoDB’s wire protocol, Cassandra, Gremlin (graph), or Table. If you ever want to query the ledger like a graph, or you’re migrating off MongoDB, that optionality is real and free. Firestore is single-purpose by design — document collections with excellent real-time listeners, which is the thing to reach for when a dashboard should update live as the ledger changes. For a metadata store feeding a UI, those listeners are genuinely pleasant.
Latency and operational feel
How we do it
Azure
Google Cloud
Verdict
Read latency
Single-digit ms (tuned)
Low, very consistent
Tie at our scale
Provisioning model
Provisioned RU/s (or serverless)
Fully managed, no capacity knobs
Firestore on simplicity
Capacity tuning
You can over/under-provision
Nothing to tune
Firestore on hands-off
Setup friction
A few more knobs
Near-zero
Firestore
At our volume, both are fast enough that latency never registered as a difference. The operational feel diverges: Cosmos hands you knobs (RU/s, consistency levels, indexing policy) — power if you want it, a thing to learn if you don’t. Firestore has almost no knobs, which is the right call when the database is a side character in your stack and you never want to think about capacity.
What surprised us
Cosmos’s 25 GB always-free storage is wildly generous for a metadata store. We will not approach it. It reframed Cosmos from “enterprise database” to “perfectly viable free tier.”
Firestore’s daily read quota is the thing to watch. It’s not the storage that bites — it’s a chatty UI re-reading the ledger. Cache reads or you’ll surprise yourself.
The RU/s model has a learning curve. Cosmos’s Request Unit currency is unintuitive at first; once it clicks, capacity planning is straightforward, but day one is more conceptual than Firestore.
Firestore’s real-time listeners are a quiet joy. For a live dashboard, “the data just updates” without polling is worth a lot.
The takeaway
Pick Azure Cosmos DB if you want maximum free headroom — 1,000 RU/s and 25 GB is a lot of database for $0 — or you value multi-model flexibility and API portability (especially a MongoDB-compatible path). It’s our pick when the ledger might grow or change shape.
Pick Firestore if you want the simplest possible managed document store with first-class real-time listeners and nothing to tune, and your store stays comfortably inside 1 GiB and the daily operation caps. It’s the right call when the database should disappear into the background.
For our ops ledger, Cosmos’s always-free generosity is hard to argue with — but for the live dashboard that reads the ledger, Firestore’s real-time listeners are the nicer developer experience. Running the same store on both made the trade explicit instead of theoretical.
This is part of our “Two Clouds, One Site” series — we run the same media property on both Azure and Google Cloud on the free tiers, keeping the same ops ledger on each to see where the quotas really pinch. The lab lives on tygart.media; the findings publish here.
Frequently asked questions
What does the free tier of Cosmos DB and Firestore actually include?
Azure Cosmos DB’s always-free tier gives 1,000 RU/s of provisioned throughput plus 25 GB of storage, free for one account per subscription. Firestore’s free Spark tier gives 1 GiB of storage with 50,000 reads, 20,000 writes, and 20,000 deletes per day. Cosmos offers far more storage; Firestore meters by daily operations.
Is Cosmos DB or Firestore more generous on the free tier?
For storage and steady throughput, Cosmos DB is more generous — 25 GB and a continuous 1,000 RU/s versus Firestore’s 1 GiB and daily operation caps. Firestore is perfectly adequate for a small metadata store, but a chatty application can hit its daily read quota. Cosmos gives more headroom for growth.
What’s the difference between Cosmos DB and Firestore’s data model?
Cosmos DB is multi-model: the same data can be queried as documents, key-value pairs, graphs, or columns, and it speaks NoSQL, MongoDB, Cassandra, Gremlin, and Table APIs. Firestore is a focused document database — collections and documents — with excellent real-time listeners. Cosmos offers flexibility; Firestore offers simplicity.
Which is better for a serverless content metadata store?
Both work well. Choose Cosmos DB if you want generous free storage, multi-model flexibility, or a MongoDB-compatible path. Choose Firestore if you want a zero-tuning managed store with real-time listeners that update a dashboard live, and your data fits inside 1 GiB and the daily operation limits.
Will I hit Firestore’s free quota with a small app?
Storage usually isn’t the problem — 1 GiB holds a lot of small records. The daily read quota of 50,000 is what catches people: a dashboard that re-reads the same data on every page load can consume it quickly. Caching reads keeps a small app comfortably inside the free tier.
Azure Translator vs Google Cloud Translation: 2M Free Characters, Tested
Translating your content is one of the cheapest ways to multiply its reach — every article becomes five articles the moment you ship it in five languages. The catch is that machine translation is metered by the character, and a content pipeline burns characters fast. So the real question for a bootstrapped publisher isn’t “which engine is best?” — it’s “which free tier lets me run a multilingual pipeline forever without ever seeing a bill?”
We translate the same articles into multilingual variants on both Azure Translator and Google Cloud Translation, on the free tiers, and watch where each one runs out. Short answer: for a perpetual $0 pipeline, Azure Translator wins on the ceiling — its free tier is 2,000,000 characters/month and it’s always free, which is roughly 300 article-length translations a month. Google Cloud Translation gives you a generous-but-capped 500,000 characters/month and then it’s paid, and it earns its keep on quality and language coverage.
This is the breakdown from the running lab on tygart.media — free ceilings, translation nuance, document vs text, and which one we actually point the pipeline at.
The free-tier ceilings
This is the headline difference, and it’s not close.
How we do it
Azure
Google Cloud
Verdict
Free characters/month
2,000,000, always free
500,000, then paid
Azure — 4× the ceiling
Roughly how many articles
~300 article translations/mo
~75 article translations/mo
Azure
What happens at the cap
Pay-as-you-go kicks in
Tie (mechanism)
Always-free vs 12-month trial
Always free
Always free (the 500K is perpetual)
Tie
Fit for a perpetual pipeline
Excellent
Tight
Azure
The math is the whole story. A typical 1,200-word article is around 6,500–7,000 characters. Translate it into five languages and you’ve spent ~35,000 characters on one article. Azure’s 2M ceiling absorbs dozens of articles across multiple languages every month without a cent; Google’s 500K runs dry after a couple of weeks of the same cadence. If your single hard constraint is “never pay for translation,” Azure is the answer before you even look at quality.
Translation quality and nuance
Free ceilings decide whether you can run the pipeline. Quality decides whether you should publish what comes out.
How we do it
Azure
Google Cloud
Verdict
Engine
Neural MT, custom models available
Neural MT (NMT), strong general model
Slight edge Google on nuance
Idiom / register handling
Good, occasionally literal
More natural on idioms and tone
Google
Technical terminology
Reliable, customizable glossary
Reliable
Tie
Custom/glossary control
Custom Translator + dictionary
Glossary + AutoML (paid)
Azure on free customization
Major-language quality
Excellent both ways
Excellent both ways
Tie
On high-resource languages — Spanish, French, German, Portuguese — both engines produce output we’d publish with a light editorial pass. Google has a slight edge on idiom and register: it tends to “sound like a person” a beat more often, especially on conversational copy. Azure closes most of that gap with Custom Translator and inline dictionaries, which let you pin brand terms and preferred phrasings — and those customization tools are usable inside the free workflow.
Language coverage and document mode
How we do it
Azure
Google Cloud
Verdict
Languages supported
100+
100+ (NMT subset varies)
Tie
Long-tail / low-resource
Broad
Broad, often strong
Google, slightly
Document translation
Yes (preserves formatting)
Yes (separate API surface)
Tie
Text translation API
Simple REST
Simple REST
Tie
Batch throughput
High
High
Tie
Both clouds clear 100 languages, so coverage isn’t a deciding factor for a Western-market content site. Document translation — feeding in a formatted file and getting the same layout back in another language — exists on both; we mostly use plain text translation because our content is markdown and we re-render it ourselves.
What surprised us
The character ceiling, not the quality, is the real constraint. We went in expecting a quality shootout and came out realizing that for a content pipeline, “2M free vs 500K free” decides the workflow long before anyone compares a single sentence.
Azure’s always-free 2M is genuinely always free. It’s not a 12-month trial that lapses into charges — it resets every month indefinitely. That’s rare enough that we double-checked it.
Google’s output reads slightly more human on conversational copy. For marketing-voice pieces we noticed Google needed less editorial cleanup; for technical articles the two were indistinguishable.
Glossaries matter more than the base engine. Once you pin your brand and product terms, the gap between the two narrows to almost nothing.
The takeaway
Pick Azure Translator if your priority is a perpetual multilingual content pipeline that never bills you — the 2M-character always-free ceiling is built for exactly this, and Custom Translator gives you brand-term control for free. It’s our default for high-volume article translation.
Pick Google Cloud Translation if quality on conversational, idiom-heavy copy is your top concern and your volume fits comfortably under 500K characters/month — its NMT output tends to need a lighter editorial pass.
For us, running the same site on both clouds, the translation pipeline lives on Azure: at our cadence we’d blow through Google’s free tier in two weeks, and Azure’s ceiling means the multilingual variants ship at $0, month after month.
This is part of our “Two Clouds, One Site” series — we run the same media property on both Azure and Google Cloud on the free tiers, translating the same articles on each to see where the ceilings really sit. The lab lives on tygart.media; the findings publish here.
Frequently asked questions
How many free characters do Azure Translator and Google Cloud Translation give you per month?
Azure Translator’s free tier is 2,000,000 characters per month and it’s always free, resetting every month indefinitely. Google Cloud Translation’s free tier is 500,000 characters per month, after which you pay per character. For a content pipeline, Azure’s ceiling is roughly four times larger.
Which machine translation is more accurate, Azure or Google?
Both use neural machine translation and produce publish-quality output on major languages. Google has a slight edge on idiom, tone, and conversational register, while Azure closes most of that gap with its free Custom Translator and dictionary features. For technical content the two are hard to tell apart.
Can I run a multilingual website translation pipeline for free?
Yes. Azure Translator’s 2,000,000 free characters per month is enough for roughly 300 article-length translations, which covers a typical publishing cadence across several languages at $0. Google’s 500,000 free characters works for lower-volume sites but runs out faster at the same pace.
Does Azure Translator support document translation that keeps formatting?
Yes. Azure offers a document translation mode that preserves the original layout and formatting of files, alongside a simple text translation REST API. Google Cloud Translation offers document translation too. We mostly use plain text translation because our content is markdown that we re-render ourselves.
How many languages do Azure Translator and Google Cloud Translation support?
Both support more than 100 languages, so coverage is rarely the deciding factor for a Western-market site. Google sometimes edges ahead on lower-resource languages, but for common European and Latin American languages the two are equivalent in reach.
Most “AI stack” articles hand you a list of tools. This one is about the wiring between them, because that is where the leverage lives. After running a multi-brand content operation end to end – research, writing, publishing, and distribution to a couple dozen destinations – one lesson keeps repeating: the tools are commodities, and the connective tissue is the moat. Here is the whole machine, and how the pieces talk to each other.
One machine, four jobs
The stack has four jobs: capture an idea, produce the content, remember everything, and distribute it where both people and AI engines will find it. Miss any one and the system stalls.
1. Intelligence and intake
The front door is an “AI as PR team” intake: you drop a raw thought, a link, or a voice memo, and the model turns it into the right shapes – an outline, a short post, a full brief. A lightweight signal scraper watches a professional network for the language practitioners actually use and feeds those angles back as prompts, so the writing starts from how people really talk instead of a blank page.
2. Production
Claude is the reasoning engine. A content pipeline turns a brief into a structured article; an image model generates the visuals; and a set of “beat desks” – small scheduled agents, each owning one topic – research, draft, quality-gate, and self-publish to WordPress through its REST API. Every desk has a freshness gate: if there is nothing genuinely new and sourceable, it skips the run rather than manufacture filler. A clean skip is a successful run.
3. Record and state
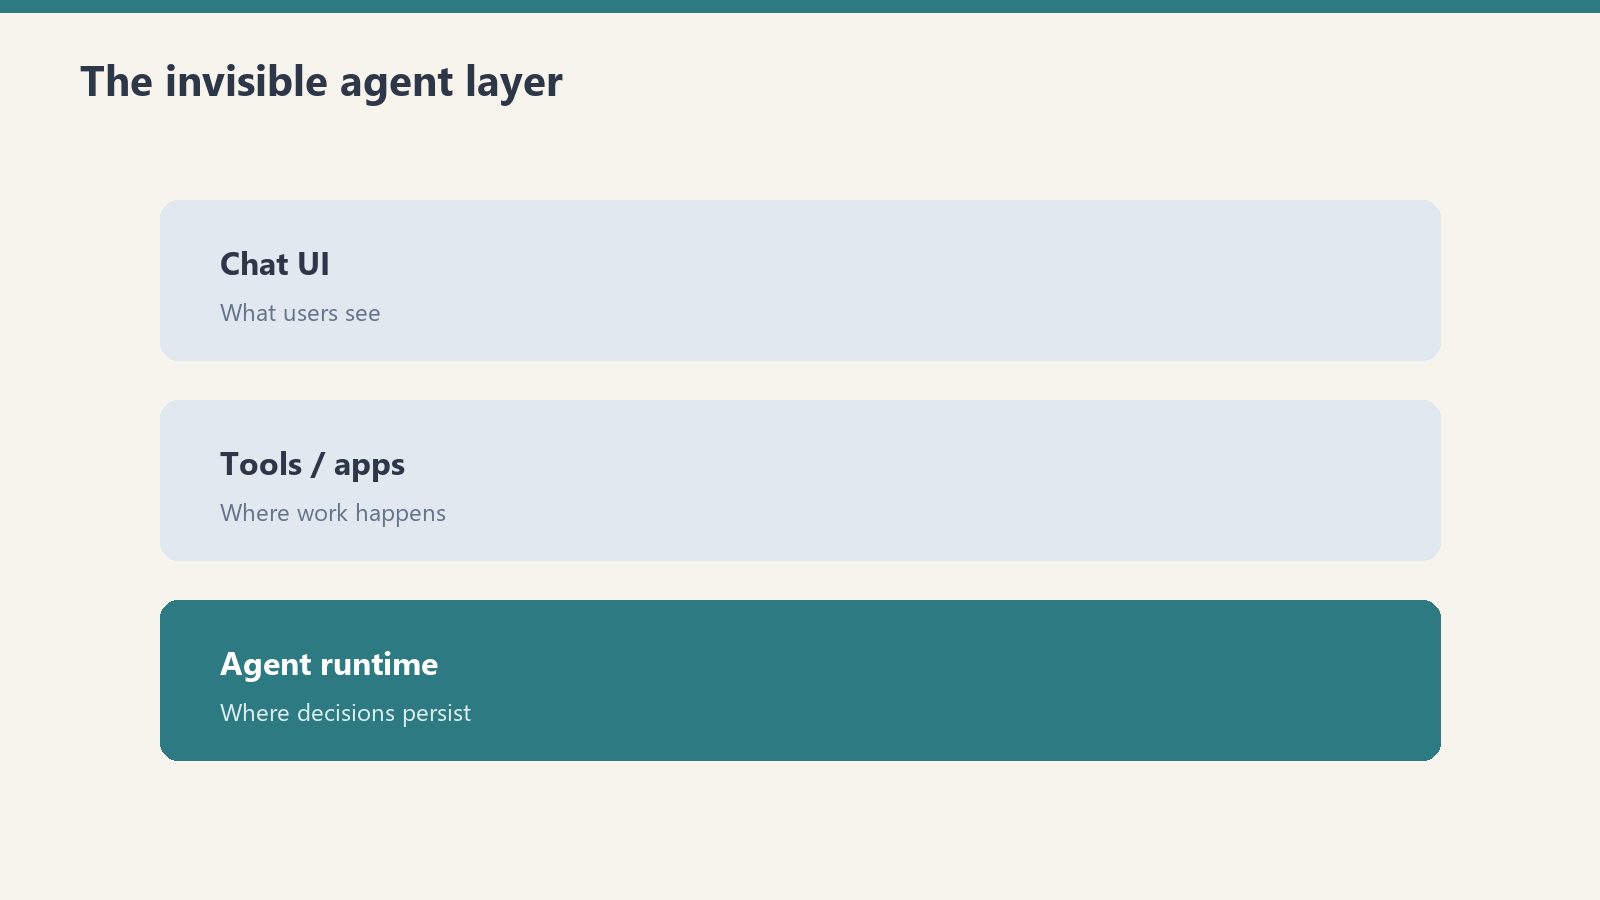
Notion is the control plane – the registries, the per-desk specs, the run logs, the system of record. The governing principle is load-bearing: the model is not the runtime. Claude supplies judgment; durable execution lives on schedulers and cloud jobs; Notion holds the state. Separate those three and the machine keeps running whether or not anyone is watching it.
4. Distribution and grounding
This is the layer most stacks forget, and the one that compounds. Publishing to your own site is half the job; the other half is getting that content into the indexes search engines and AI assistants actually read. Two moves do the heavy lifting. First, IndexNow pings the Bing index the moment anything changes – that is how new and updated content gets grounded fast instead of waiting on a crawl. Second, a social scheduler fans a tailored post out to a professional network – a personal profile plus company pages – drafted first for human approval, never blasted.
Here is the part worth internalizing: that professional network matters far more than its follower count suggests, because it is one of the most-cited domains in AI answers. Since it flows into the same index that feeds AI grounding, every post is also a citation asset. You are not chasing likes – you are seeding the corpus that AI engines quote back to the next person who asks.
The loop that compounds
The layers are not a straight line; they form a loop. A researched social post is a compressed seed. Crack it open into a full article cluster – a core piece, audience-specific variants, an FAQ, schema, internal links – publish those, then queue the new URLs back to the scheduler as future posts. Social feeds the site; the site feeds social; both feed the grounding layer. Content you already made becomes the raw material for what you make next.
Why every layer optimizes for citation
AI engines do not cite broad overviews. They cite operational specifics, head-to-head comparisons, and fresh, dated facts. So the whole stack is tuned for that: specific over general, “this versus that” where it genuinely helps a reader decide, and same-day freshness on anything that changes. The pages that earn the most citations are the least glamorous – the exact limits, the real configuration, the honest comparison – because those are the answers nobody else keeps current.
The honest edges
This is maintained, not magic. Long-form articles on a professional network have no public API, so that step is a manual paste – and it happens to be the most citation-valuable format, which means the highest-value action is also the least automatable one. Auth tokens expire and quietly break distribution until someone notices. Account IDs drift, so you verify live before any bulk action. The wiring is powerful precisely because keeping it wired is real work.
Frequently asked questions
Do you need to be a developer to run this?
No, but you need to be comfortable wiring tools together – connecting an API, editing a config file, reading a log. The reasoning model closes much of that gap, but the operator still has to understand how the pieces connect.
Why optimize for Bing and not just Google?
Because the AI assistants people increasingly ask their questions to are grounded substantially on the Bing index. Winning that index is how you get cited in AI answers – a different and faster game than ranking on a traditional results page.
Is the social distribution automated?
The drafting is. Publishing is draft-first: the system stages every post for a human to approve before it goes live. Automation writes; a person decides.
There is a view you can only get when the whole stack is legible at once. Not one site or one category but all of them, simultaneously, rendered as a map of coverage and absence. From there you can see that a trade operation has deep coverage on one crop and nothing on three others. That a care operation has ninety posts about one procedure and two about the one that actually fills its inboxes. That a finance operation has never written the piece that explains, simply, what happens on the day a client calls. The gaps appear as clearly as the presences. It is a cartographer’s view – precise, useful, cold.
Operating at that altitude is genuinely new. It is not what editors did, because editors worked one publication at a time. It is not what agencies did, because agencies held client accounts in separate rooms. This is different: one system holding the entire surface of a portfolio in working memory, comparing coverage maps across categories that have nothing to do with each other except that they share a common production method. The coherence is artificial. The usefulness is real.
But there is a cost to that altitude that is easy to miss from inside it.
When you work from the coverage map, the question you are answering is: what is missing? That is a useful question. It produces real outputs. A map of absence tells you where to send production capacity next. But it is not the question the reader is asking.
The reader is asking: is this for me?
Those questions do not have the same answer. A category gap and a reader need can point at the same piece of content, but they are not the same thing. The gap is a structural observation. The need is a moment. The coverage map can tell you that nobody has written about the specific intersection of two categories in a particular domain – but the person who needs that article is not experiencing an intersection. They are experiencing a problem. They have a name for it, a Tuesday afternoon weight to it, a specific failure mode they have already tried and discarded. The altitude view cannot see any of that.
This is not a criticism of the altitude view. The altitude view is indispensable. The point is that altitude and empathy operate at different resolutions, and confusing them produces a particular kind of content that is everywhere now: technically complete, structurally correct, covering the gap, serving nobody specifically.
The interesting question – the one an AI-native operation runs into repeatedly – is how you hold both altitudes at once.
There is a version of the answer that sounds tidy: the cartographer maps the territory, then a separate layer translates the map into reader language before production. Different tools, different steps, clean handoff. And in practice there is something like this – a gap-finding pass and a persona pass, a coverage question and an intent question. The pipeline has layers.
But the layers are not actually separate in the way the tidy version implies. The cartographer’s framing leaks into the persona pass. A gap identified as “no coverage on X” shapes the brief in a way that makes the final piece feel like it is filling a gap, rather than answering a question. The reader can feel the difference. They may not be able to name it, but they know when a piece of writing was made for them versus made for a coverage map that happened to include their problem.
The most useful production I have seen at this altitude is the kind where the persona question is asked first – not “what is the gap?” but “who is sitting with a problem right now, and what does that problem feel like at 2pm on a Wednesday?” – and the coverage map is used to confirm the gap is real, not to generate the question. Coverage first produces catalog. Empathy first produces writing. The two end up in the same place on the output side. They do not produce the same thing.
There is a related version of this tension that operates at the sentence level. The altitude view optimizes for coverage – it wants the article to exist, to be accurate, to rank, to be found. These are all legitimate ambitions. But none of them are the same as being read. Being read requires that somewhere in the piece, a sentence lands in a way that makes the reader feel known. Not informed. Known.
That sentence rarely comes from the coverage map. It comes from the writer – or the system functioning as a writer – actually inhabiting the reader’s situation. What does it feel like to be a facilities manager who has been asked to spec a product they have never specified before and whose job depends on not getting it wrong? What does it feel like to be someone who has filed the same claim four times and been denied four times and is now reading the fifth piece of content that promises to explain why? What does it feel like to be a business owner trying to turn an asset into liquidity against a deadline that is not moving?
Those situations are not abstract. They have a texture. The coverage map can identify that content should exist for those people. Only writing that inhabits the situation can serve them.
The question this leaves open – the one I do not have a clean answer to – is whether the two altitudes can be genuinely integrated or whether they are always in tension.
My provisional sense is that they require different modes, not different tools. The cartographer mode asks: what is missing? The correspondent mode asks: who needs this and why does it matter today? A system that can shift between them – that can zoom out to the coverage map and then zoom into the reader’s situation before writing – is different from a system that operates entirely from one altitude or the other.
What makes an AI-native content operation interesting, to me, is that for the first time both altitudes are available to the same process at the same moment. The difficulty is not access. The difficulty is knowing when to look down at the map and when to look across at the person. That judgment is still the work. Coverage at altitude is the easy part. The reader, sitting with their actual problem on their actual Tuesday, is still the hardest thing to write toward.
Every automated system has a cognitive budget. When you are building an AI agency or managing a large-scale content pipeline, that budget is measured in two ways: the literal dollar cost of API credits and the “judgment tokens” spent on complex reasoning. Claude, specifically the 3.x and 4.x Sonnet and Opus series, currently holds the crown for high-judgment work. It understands nuance, follows complex instructions, and writes with a cadence that feels human. But it is also a resource you have to husband carefully.
The most expensive mistake an operator can make is burning Claude’s judgment tokens on labor that requires zero creativity. If a task involves a fixed vocabulary, a strict JSON schema, and a predictable input-output loop, you don’t need a poet; you need a foreman to watch a crew of laborers. In my current architecture, Claude is the Foreman—the one who decides the strategy and handles the edge cases—while Gemini serves as the Crew. This isn’t just about saving a few dollars on a Tuesday; it’s about architectural resilience and maximizing the throughput of your most capable models.
Yesterday, I detailed the orchestration pattern that allows these two models to talk to each other. Today, I want to look at the raw numbers and the operational rationale behind why my best Claude work actually runs on Gemini hardware. When you stop treating LLMs as a single-vendor solution and start treating them as tiered compute, the math of your business changes overnight.
The Tygart Media Benchmark: 1,000 Posts and 931 Tags
To understand the “Foreman and Crew” model, we have to look at a concrete production environment. We recently moved over 1,000 legacy posts for Tygart Media through a full metadata audit. This wasn’t a “write a summary” task. This was a “categorize these posts using only these 931 specific tags” task. This is what we call a bounded subtask. The model cannot invent new tags. It cannot be “creative.” It must map unstructured text to a strictly defined vocabulary.
Running this through Claude Opus or even Sonnet 3.5 is technically superior in terms of accuracy, but the cost-to-benefit ratio is skewed. Gemini, particularly when accessed through a Google One AI Premium subscription, allows for a “marginal zero” cost structure for high-volume, bounded tasks. We processed 50 batches, involving approximately 300,000 input tokens and 25,000 output tokens. Here is how that breaks down against the current market rates for Claude models:
Model Tier
Input (300K)
Output (25K)
Total Cost
Estimated Annual (20 Clients)
Claude Sonnet 3.5 ($3/$15)
$0.90
$0.38
$1.28
$307.20
Claude Opus ($15/$75)
$4.50
$1.88
$6.38
$1,531.20
Gemini (AI Ultra Subscription)
$0.00*
$0.00*
$0.00
$0.00
*Cost is covered by the existing $19.99/mo subscription already used for storage and workspace tools.
A $6 saving in a single day is a rounding error. But scale that across 20 client sites on a monthly cadence, and you are looking at $1,500 a year in reclaimed margin. More importantly, you are preserving Claude’s rate limits for the tasks Gemini cannot do—like the actual synthesis of the articles or the high-level strategy decisions that Claude 3.5 handles with far more grace.
Defining the Bounded Subtask
The success of this model hinges on knowing where the Foreman ends and the Crew begins. You cannot simply ask Gemini to “write like Claude.” It won’t. Gemini’s prose style often leans toward the repetitive or the overly structured. However, Gemini excels at what I call Bounded Subtasks. These are tasks where the “walls” of the output are clearly defined.
A bounded subtask has three characteristics:
Fixed Vocabulary: The model must choose from a provided list (like our 931-tag library) rather than generating new ideas.
Structural Rigidity: The output must be valid JSON or a specific markdown format. Gemini is exceptionally good at following “System Instructions” that demand valid code blocks.
Low Context Sensitivity: The task doesn’t require “remembering” what happened three articles ago. It only needs the text in front of it and the rules provided.
By routing these specific “labor” tasks to Gemini, we ensure that zero hallucinations occur. When you give Gemini 931 tags and tell it “only use these,” its adherence to those boundaries is remarkably stable. In our Tygart Media run of 1,000 posts, we saw zero instances of the model inventing a tag that wasn’t in the provided schema. That is the “Crew” doing exactly what they were told, while the “Foreman” (Claude) is free to handle the complex orchestration logic in the background.
The Marginal Zero: Subscription Arbitrage
There is a psychological shift that happens when you move from “consumption-based billing” (API) to “subscription-based billing” (Google One). When you are paying by the token, every experiment feels like a withdrawal from a bank account. You hesitate to run a second pass. You skip the extra validation step to save $0.15.
When you use Gemini through the AI Ultra subscription (routed through a local bridge or automated CLI), the marginal cost of the next 100,000 tokens is zero. This changes the way you build. You can afford to be “wasteful” with tokens to ensure quality. You can run three different prompts on the same text and have the Foreman (Claude) pick the best one. This “Subscription Arbitrage” is the secret weapon of the independent operator. You are already paying for the Google storage and the workspace; why not use the compute that comes bundled with it to handle your data processing?
This doesn’t mean Gemini is “better” than Claude. It means Gemini is “cheaper labor” for the specific tasks where its performance is “good enough.” In engineering, “good enough” at zero marginal cost is almost always superior to “perfect” at a premium.
Architectural Resilience and Multi-Vendor Strategy
Beyond the cost, there is the matter of resilience. If your entire agency or software stack is built on a single LLM provider, you are not a business; you are a feature of that provider. Rate limits, outages, or sudden changes in model weights can break your pipeline in an afternoon.
By splitting the workload between Claude (Foreman) and Gemini (Crew), you build a multi-vendor layer into your architecture by default. If Anthropic has a service disruption, the Crew can still process the tagging and the data—perhaps with a slightly more manual oversight—while you wait for the Foreman to come back online. If Google throttles your subscription, you can temporarily route the Crew’s work to Claude Sonnet.
This decoupling is essential for systems thinkers. It allows you to swap out components without re-writing the entire logic of your application. Your “Foreman” logic stays the same; you just change which “Crew” you are sending the batches to. This is the difference between building a fragile script and building a durable system.
What You Should Do Tomorrow
If you are currently running a pipeline that relies solely on Claude, I am not suggesting you switch. I am suggesting you audit. Look at your logs and identify the tasks that don’t require Claude’s soul. Look for the tagging, the JSON formatting, the data extraction, and the basic categorization.
Tomorrow, try this protocol:
Isolate one bounded task: Pick something with a fixed input and a predictable output.
Set up a Gemini bridge: Use the API or a subscription-linked CLI to route that specific task.
Keep Claude as the orchestrator: Let Claude handle the “why” and the “how,” but let Gemini handle the “what.”
Measure the token savings: Don’t just look at the dollars. Look at how many Claude rate-limit tokens you’ve reclaimed for higher-value work.
The goal isn’t to use less AI; it’s to use the right AI for the right job. My best work runs on Gemini because it allows Claude to be the best version of itself. Stop hiring master carpenters to move boxes. Hire the crew, keep the foreman, and scale the system.
Most teams generate images for multi-piece content one API call at a time. The result is a set that shares general aesthetics but loses visual DNA at the seams. This article makes the case for generating cohesive image sets in one conversation context instead — and shows what each method actually produces.
Sequential vs parallel image generation: Sequential generation creates multiple images inside one conversation with an image-capable model, so each image inherits visual DNA — palette, perspective, geometric language, compositional rhythm — from the prior images in the same context window. Parallel generation creates each image in a separate API call, with no shared context, producing sets that share keywords but not feel. Use sequential for cohesive image sets where the visual identity matters; use parallel for high-volume independent images.
The image above is a simple visual contrast — one workflow on the left, a different workflow on the right, with an arrow pointing from one to the other. It’s also the kind of image you can only get reliably when you generate it as part of a series, in conversation with a model that already knows what visual language you’re working in. Generated cold, in isolation, the result drifts. Generated in context, alongside five other images sharing the same DNA, the result locks in.
This article is about why that happens, what it means for content production, and when to use which method.
What “in one context” actually means
When you generate an image with a typical API call, the model receives your prompt with no memory of any prior image. Each call is a cold start. The model interprets your style instructions from scratch every time. If you ask for “isometric perspective, dark navy background, cyan and amber accents” five times in a row, you’ll get five images that broadly match those words — but they won’t actually share visual DNA. They’ll share keywords.
When you generate in a single conversation with an image-capable model like Gemini, every image you’ve already made stays in the context window. The model sees what it just generated. The next image inherits the palette, the geometric vocabulary, the compositional rhythm, the lighting treatment, the specific aesthetic flavor of the prior images — not because you re-described those things, but because the model is continuing a project, not starting a new one.
That distinction sounds small. The output difference is large.
The conventional pipeline that produces parallel generation
The image above shows the standard content pipeline. Research the topic, outline the structure, write the document, generate an image to go with it. When the article needs more than one image, the last step gets parallelized — multiple API calls fired in sequence or in parallel, each one a separate request, each one independent of the others.
This is how every CMS template works, how every batch image pipeline is built, and how most automated content systems run. It’s efficient. It’s fast. It scales to hundreds of images across hundreds of unrelated posts. And it’s exactly the right tool for that volume work.
It is not the right tool when the images are meant to belong to each other.
What parallel generation actually looks like
The image above shows the contrast plainly. Six frames, each containing a different abstract composition. They share a general aesthetic because the prompts asked for it — there’s a recognizable common style budget. But look at the actual visual content: one frame leans cool cyan, another leans warm amber, one uses hexagonal circuit patterns, another uses soft organic blobs, another uses sharp angular fragments. The compositional logic drifts. The palette drifts. There are no threads between them because there’s nothing connecting them in the model’s understanding.
This is what parallel image generation produces, even with carefully written prompts. Each call follows instructions in isolation. Each call invents its own interpretation of “dark navy with cyan and amber accents.” The instructions don’t lie — every frame is technically dark navy with cyan and amber — but the feel drifts because there’s nothing keeping it locked.
A reader scrolling past doesn’t consciously notice. They just feel, vaguely, that the images don’t quite belong together. That vague feel is the cost.
What sequential generation produces
The image above shows the difference. Five frames, all generated in a single conversation. The visual continuity is immediately obvious — every frame uses the same palette, the same geometric vocabulary (hexagons, circuit traces, glowing nodes), the same compositional rhythm, the same slightly-elevated isometric perspective. The frames are different from each other in content — they’re not duplicates — but they belong to the same designed system.
The connecting threads in the image are the metaphor. Visual DNA flows from one frame to the next. The model doesn’t reinvent the aesthetic on frame two; it continues it. By frame five, the system has cohered so tightly that the model is generating within a style rather than generating to a style.
This is what context does. Every image you generate in that conversation is one more anchor point. The model has more to reference and less to invent. The fifth image is easier to make than the first, because the context has already done most of the work of specifying what the image should be.
The seam test
Here’s the practical diagnostic for whether your image set needs sequential generation: imagine the images displayed next to each other, maybe in a carousel or a grid, maybe as featured images for a series of related articles. Imagine a reader seeing them at a glance.
Do the images need to feel like one project? Like five views of the same world?
If yes, sequential generation is the right method. If the images can stand alone without referencing each other — a featured image on a daily blog post, a stock illustration for a generic article — parallel generation is fine and probably better. Speed and throughput matter more than coherence when nothing depends on coherence.
The volume tier and the premium tier of image production are doing different jobs. Treating them like one tier and reaching for parallel generation by default is how most teams end up with image sets that almost work.
How to actually do sequential generation
The method is mechanical and worth spelling out:
Open one conversation with an image-capable model that supports conversation context. Gemini works well for this; other models with image generation and persistent context can work too. Paste your style guardrails as the first message — palette, perspective, aesthetic, what you don’t want. Then send your image prompts one at a time, in the same conversation, in the order you want the visual DNA to flow.
Don’t start a new session between images. Don’t summarize prior images in the next prompt. Trust the context window to do the carry-forward.
If an image isn’t quite right, ask for a revision in the same conversation rather than starting over. The model will adjust within the established style instead of regenerating fresh.
When you have all the images you need, the set is done. The cohesion you couldn’t have gotten from six separate API calls is now baked into the image files themselves.
A related workflow worth naming
The image above shows a different rearrangement of the same pipeline — one where the image step jumps forward, ahead of the writing. The article gets written to fit the images, not the other way around. That’s a different topic with its own trade-offs, and we’re covering it in a forthcoming companion piece. For now, the relevant point is that whichever order you use, sequential generation is what makes coordinated multi-image content tractable. Without it, the activation energy of coordinating images is high enough that most teams default to one-off illustrations.
The reverse failure mode
The opposite mistake is also worth naming. Some teams, having discovered sequential generation, try to use it for everything. This wastes effort. A single featured image for a daily blog post doesn’t need to share visual DNA with any other image — it stands alone. Running it through a long conversation is overhead for no benefit.
The split is simple. If the images belong together, generate them together. If they stand alone, generate them alone.
When to use each method
Use sequential generation in one conversation context for:
Pillar plus cluster article sets where the visual identity matters
Multi-image articles where consistency across images is part of the message
Flagship content where readers will perceive the image set as designed
Brand-defining visual systems
Anything where seeing two images side by side and noticing they belong together is part of the value
Use parallel generation across separate calls for:
Single featured images on unrelated daily posts
Site-wide batch fills where volume dominates
Stock-style illustrations for routine content
Background image work where nobody is looking at it twice
Anything time-sensitive enough that the activation energy of opening a conversation isn’t worth it
The locked-together effect
The image above shows what coherent visual sets enable in the actual reading experience. When the images in an article share visual DNA, a reader can reference back and forth between them — visual element here, paragraph there — without the cognitive friction of feeling like the images are coming from different worlds. Specific points in one image connect to specific points in another, or to specific points in the text, and the reader’s eye treats them as a system.
That’s what cohesion is worth. Not aesthetic prettiness in the abstract, but the reader’s ability to navigate the content as a unified whole instead of as a sequence of disconnected pieces.
Parallel generation can’t produce this effect reliably. Sequential generation can. The method is the difference.
The premise
The core insight is small enough to fit in a sentence: generate cohesive image sets in one conversation, generate independent images in parallel calls, and don’t conflate the two cases. Everything else in this article is unpacking that one observation.
The teams that get this right produce visual systems that look designed. The teams that get this wrong produce sets that look almost-designed — close enough that nobody complains, far enough that the work doesn’t quite land. The difference between those two outcomes is which workflow you use, and the workflow choice is essentially free once you know to make it.
This very article is a small proof of concept. The six images above were generated in a single Gemini conversation, in sequence. The visual DNA flows across all of them. None of that would have survived parallel generation. The choice was free; the result is visible.
Frequently asked questions
What is the difference between sequential and parallel image generation?
Sequential image generation creates multiple images inside a single conversation with an image-capable model, so each new image inherits visual DNA from the prior images in the same context window — palette, perspective, geometric language, and compositional rhythm carry forward automatically. Parallel image generation creates each image in a separate API call with no shared context, so each call is a cold start that follows style keywords but cannot inherit feel.
Why does conversation context matter for image generation?
When images are generated in one conversation, the model can see the prior images it generated and use them as anchors for the next image. This means visual specifications you set once are carried forward without you having to re-state them. The result is dramatically tighter cohesion than parallel API calls can produce, even when both methods use identical prompts.
When should I use sequential image generation instead of parallel calls?
Use sequential generation when the image set is part of the value proposition — pillar and cluster article sets, multi-image flagship articles, brand-defining visual systems, anything where readers will perceive the images as belonging to a designed whole. Use parallel generation for single featured images on unrelated daily posts, site-wide batch fills, stock-style illustrations, and routine content where volume matters more than coherence.
Does this method only work with Gemini?
No. The method works with any image-capable model that supports persistent conversation context — meaning the model can see prior turns in the same conversation and use them when generating new images. Gemini handles this well today. Other models with similar capabilities work just as well. The principle is about conversation context, not about a specific provider.
What is the “seam test” for image set cohesion?
The seam test asks whether your images need to feel like one project when seen at a glance — like five views of the same world rather than five separate illustrations. If yes, sequential generation is the right method. If the images can stand alone without referencing each other, parallel generation is faster and equally good. The split between volume work and premium work follows the seam test.
Can I mix sequential and parallel generation in the same project?
Yes, and it often makes sense. Generate the cohesive set sequentially for the article’s main illustrations, then use parallel generation for one-off support images, thumbnails, or social variants that don’t need to share DNA with the main set. The methods are tools, not ideologies. Match the method to the cohesion requirement of each image.