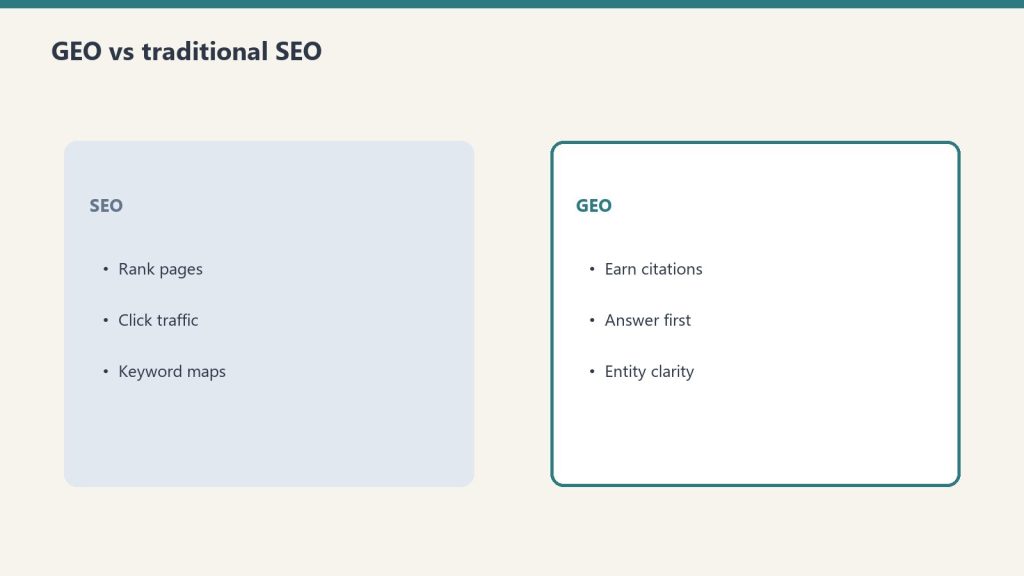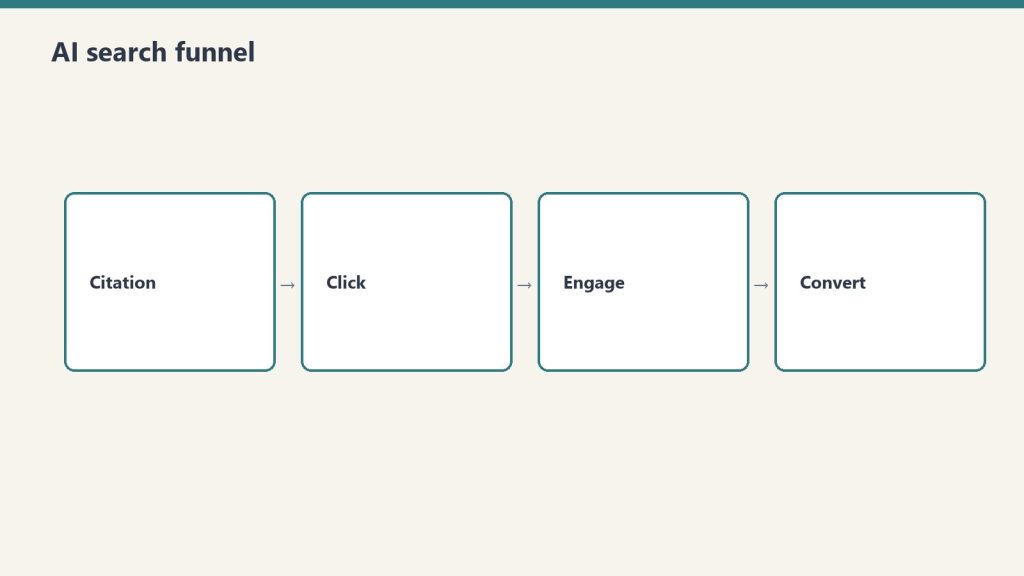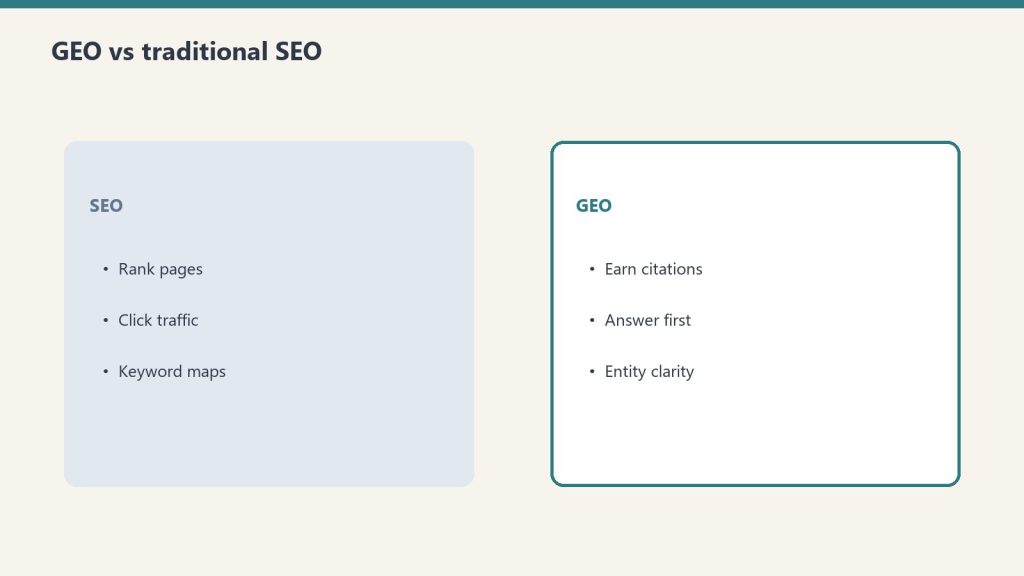
Blog

  • EPA Radon Testing Protocol: Official Guidelines Explained

    EPA Radon Testing Protocol: Official Guidelines Explained

    The Distillery
    — Brew № 1 · Radon Mitigation

    The EPA’s radon testing protocols are the foundation for nearly every state radon program, real estate testing standard, and measurement professional certification in the United States. Understanding what the EPA actually requires — not what a neighbor summarizes or a contractor implies — lets you evaluate whether your testing was conducted correctly and whether your results are defensible.

    EPA Radon Testing Guidance: Overview

    The EPA’s primary radon testing guidance documents for homeowners are the A Citizen’s Guide to Radon and the Home Buyer’s and Seller’s Guide to Radon. For measurement professionals, the EPA Radon Measurement Proficiency Program established the original certification framework that NRPP and NRSB now administer. AARST-ANSI measurement standards (MAMF, ANSI/AARST Series) build on EPA guidance and are the operative standards for professional measurement.

    Closed-House Conditions: The Core Protocol Requirement

    Closed-house conditions are the most important and most frequently violated component of EPA’s short-term testing protocol. Without closed-house conditions, short-term results are not comparable to the EPA action level and may significantly underestimate actual radon levels.

    What Closed-House Conditions Mean

    • Keep all windows and exterior doors closed during the test and for 12 hours before the test device is placed
    • Do not operate whole-house fans, attic fans, or similar ventilation during the test or the 12-hour pre-test period
    • Normal HVAC operation is permitted — heating and cooling systems that recirculate interior air (central HVAC) may run normally
    • Ceiling fans: permitted
    • Kitchen and bathroom exhaust fans: minimize use; brief operation for cooking or showering is acceptable, but extended operation creates pressure differential
    • Fireplace dampers: keep closed if not in use; do not operate fireplaces during the test

    Why Closed-House Conditions Matter

    Open windows introduce large volumes of outdoor air (~0.4 pCi/L radon) that dilute indoor radon levels to artificially low values. A home with actual indoor radon of 8.0 pCi/L may test at 3.0–4.0 pCi/L with windows routinely open — below the action level, creating a false impression of safety. This is why summer testing with open windows is unreliable and why EPA requires closed-house conditions for short-term tests.

    Device Placement Protocol

    EPA’s placement requirements for radon test devices:

    • Level: Lowest level that is used or could be used as living space — including unfinished basements if they could be finished, and basements where family members spend any time regularly
    • Height: At least 20 inches above the floor, within the breathing zone
    • Wall distance: At least 12 inches from any wall
    • Avoid: Drafts from windows, doors, HVAC supply/return vents, exterior walls; direct sunlight; humidity sources (sump pits, laundry, showers)
    • Do not place in: Kitchens, bathrooms, crawl spaces, or closets
    • Placement in room: Central to the room is ideal; near where occupants typically spend time is the goal — not in an uninhabited corner

    EPA’s Two-Test Decision Protocol

    For initial testing of a home, EPA’s protocol is designed to balance speed against accuracy:

    If Initial Short-Term Test is Below 4.0 pCi/L

    No immediate action required. Retest in 2 years. If the result was between 2.0 and 3.9 pCi/L, consider a long-term test to confirm the annual average. Levels in this range may be higher during different seasons or weather conditions.

    If Initial Short-Term Test is 4.0–7.9 pCi/L

    Follow up with either a second short-term test or a long-term test before making a mitigation decision. The rationale: a single 48-hour test in this range has sufficient measurement uncertainty that a confirmatory test substantially improves confidence in the true annual average level. If the confirmatory test also comes in at or above 4.0 pCi/L, mitigate. Average the two short-term results if using two short-term tests.

    If Initial Short-Term Test is 8.0 pCi/L or Higher

    EPA recommends proceeding to mitigation without waiting for a confirmatory test. At this concentration, the risk from continued exposure during a second test period is not justified by the additional certainty. Contact a certified radon mitigator and schedule installation.

    The 4.0 pCi/L Action Level: Context and Criticism

    EPA’s 4.0 pCi/L action level was established in the 1980s based on risk assessments available at the time and the practical cost of mitigation. It has not been formally revised since, despite significant advances in radon health research.

    Notable context:

    • The World Health Organization reference level is 2.7 pCi/L (100 Bq/m³) — lower than EPA’s threshold
    • EPA itself notes that “radon levels less than 4 pCi/L still pose a risk, and in many cases may be reduced” — the 4.0 level is an action threshold, not a safety threshold
    • EPA’s own long-term goal is to reduce indoor radon to outdoor air levels (0.4 pCi/L), acknowledging that any indoor radon above background carries some risk
    • Several European countries have adopted national reference levels of 1.4–2.7 pCi/L (50–100 Bq/m³)

    For practical purposes: the 4.0 pCi/L threshold determines when EPA recommends mandatory action. Below 4.0 pCi/L, mitigation is EPA-recommended for consideration between 2.0–3.9 pCi/L and is always a personal risk decision.

    EPA Guidance on Specific Testing Situations

    Real Estate Transactions

    EPA recommends testing in real estate transactions. When time is limited (common in transaction timelines), short-term tests are acceptable. EPA provides guidance that real estate tests should follow closed-house protocols strictly and that buyers should understand the limitations of a single 48-hour test relative to annual average exposure.

    Post-Mitigation Testing

    EPA recommends testing 24+ hours after system activation (if continuous monitor) or placing a charcoal canister at least 24 hours post-activation for a minimum 48-hour test. If results are still at or above 4.0 pCi/L, contact the mitigator — the system requires adjustment.

    New Construction (RRNC)

    EPA recommends testing new homes with RRNC passive systems after at least 60 days of occupancy, under normal living conditions (closed-house protocol not required for this application — the extended occupancy averages conditions sufficiently). If results are at or above 4.0 pCi/L, activate the passive system with a fan.

    Frequently Asked Questions

    What is EPA’s recommended radon action level?

    EPA’s action level is 4.0 pCi/L — the concentration at which EPA recommends mitigation. EPA also recommends considering mitigation at 2.0–3.9 pCi/L, acknowledging that radon at those levels still poses meaningful cumulative health risk, particularly for households with smokers or young children.

    Does EPA require professional radon testing?

    EPA does not federally mandate professional testing for homeowners conducting their own radon assessments. DIY test kits from NRPP- or NRSB-certified labs are EPA-endorsed for homeowner use. Professional certified testing is required for real estate transactions in some states, for regulatory compliance contexts, and when chain-of-custody documentation is needed.

    What is the difference between EPA and WHO radon action levels?

    EPA’s action level is 4.0 pCi/L (148 Bq/m³). The WHO reference level is 2.7 pCi/L (100 Bq/m³). The WHO level reflects more recent health evidence and is lower. In practice, both acknowledge significant risk below their respective thresholds — the difference is where each organization draws the line for recommended action.


  • Post-Mitigation Radon Testing: When, How, and What Results to Expect

    Post-Mitigation Radon Testing: When, How, and What Results to Expect

    The Distillery
    — Brew № 1 · Radon Mitigation

    Installing a radon mitigation system is not the final step — testing after installation is. A mitigation system without post-mitigation testing is a system with no verified outcome. You do not know it is working; you only know it is running. Post-mitigation testing is how you confirm the system achieved its purpose, satisfy warranty requirements, and establish a baseline for future monitoring.

    When to Conduct Post-Mitigation Testing

    EPA and AARST recommend testing within 24 hours of system activation if using a continuous electronic monitor, or placing a short-term charcoal canister at least 24 hours after the fan is turned on and running it for a minimum of 48 hours. The 24-hour delay allows the system to fully pressurize the sub-slab zone and reach equilibrium — results taken in the first few hours of operation may not represent steady-state performance.

    Do not wait weeks or months to test. The purpose of post-mitigation testing is to verify the system is performing as designed while any issues are still under the contractor’s workmanship warranty. Most warranties require the homeowner to conduct post-mitigation testing and notify the contractor of any elevated results within a defined window.

    What Test to Use for Post-Mitigation Verification

    A 48-hour charcoal canister is the standard post-mitigation test for residential applications. It provides a fast result (3–7 business days after mailing) and is the test type most commonly specified in contractor warranties and real estate disclosure contexts.

    Closed-house conditions are required during the 48-hour test period and for 12 hours prior to device placement. This is the same protocol used for any short-term test — windows closed, no whole-house fans, normal HVAC operation permitted.

    Some contractors conduct post-mitigation testing themselves using a professional continuous monitor, providing same-day or next-day results. This is faster but has a potential conflict of interest — a contractor confirming their own work. For independent verification, homeowners can place their own charcoal canister alongside the contractor’s device.

    Where to Place the Post-Mitigation Test Device

    Same placement protocol as any residential radon test:

    • Lowest livable level of the home — typically the same floor where the pre-mitigation test was conducted
    • Breathing zone: at least 20 inches above the floor, at least 12 inches from any wall
    • Away from drafts, HVAC vents, sump pits, and exterior walls
    • Undisturbed for the full 48-hour period

    Do not place the test directly under the suction point, adjacent to the riser pipe, or in the mechanical room where the fan vibration could affect the device. Place in the living area or bedroom where occupants actually spend time — the location most relevant to actual exposure.

    What Post-Mitigation Results to Expect

    A properly installed single-suction-point ASD system with good sub-slab aggregate and thorough slab sealing typically achieves:

    • 85–99% reduction from pre-mitigation levels
    • Final levels of 0.3–1.5 pCi/L for most homes
    • Homes that previously tested at 20+ pCi/L commonly achieve 0.5–2.0 pCi/L post-mitigation

    EPA’s target is below 4.0 pCi/L. Most certified mitigators target below 2.0 pCi/L as a workmanship standard, and well-executed installations on homes with good aggregate routinely achieve 0.5 pCi/L or lower.

    What If Post-Mitigation Results Are Still Elevated?

    A post-mitigation result at or above 4.0 pCi/L indicates the system is not achieving adequate reduction. This is not uncommon — national data suggests that 10–15% of initial installations require a callback before achieving target levels. The most common causes:

    • Insufficient suction field coverage: One suction point is not covering the full slab footprint — additional suction points needed
    • Unsealed bypass pathways: Gaps in the slab sealing — expansion joints, floor drains, sump pit, pipe penetrations — allow radon to enter the home directly without passing through the sub-slab vacuum zone
    • Fan undersized for aggregate conditions: Post-construction reveal that sub-slab fill is denser than the diagnostic suggested — a higher-capacity fan or additional suction point is needed
    • Block wall contribution: In CMU block basement homes, the block wall cores are a radon pathway that sub-slab depressurization alone does not address
    • Test conditions violated: Radon post-mitigation tests that are conducted with windows open or whole-house fans running produce unreliable results that may understate or overstate actual levels

    Contact your mitigator immediately when post-mitigation results are elevated. Most reputable contractors include workmanship warranties of 1–5 years that cover exactly this scenario — returning to add suction points, improve sealing, or upgrade fan capacity at no additional charge if results do not meet the contractual target.

    Ongoing Retesting After Mitigation

    EPA recommends retesting a mitigated home every 2 years. Reasons:

    • Fan performance can degrade over time — a failing fan that still runs may not generate adequate suction
    • Foundation settling creates new cracks and pathways that the existing system may not fully address
    • Remodeling work — finishing a basement, adding a room over a crawl space — changes the building’s pressure dynamics
    • Real estate transactions require current test results even in mitigated homes

    The U-tube manometer provides daily visual confirmation that the fan is generating suction, but it does not measure actual radon concentration. Monthly manometer checks plus biennial radon tests is the recommended maintenance protocol for a mitigated home.

    Frequently Asked Questions

    How soon after radon mitigation can I test?

    Place the test device at least 24 hours after the mitigation system is activated and run it for a minimum of 48 hours under closed-house conditions. Testing in the first few hours of system operation may not reflect steady-state performance. Most contractors recommend testing within the first 30 days of installation.

    What radon level should I expect after mitigation?

    Most properly installed ASD systems achieve 0.3–2.0 pCi/L regardless of the pre-mitigation starting level. EPA’s target is below 4.0 pCi/L; reputable contractors target below 2.0 pCi/L as a workmanship standard. If your post-mitigation result is at or above 4.0 pCi/L, contact your contractor immediately — a callback is almost always covered under the workmanship warranty.

    Do I need to retest after radon mitigation every year?

    EPA recommends retesting every 2 years in a mitigated home. Annual retesting is not required but provides more frequent confirmation of continued system performance. A long-term alpha track detector left in place for 90 days to a year provides the most accurate ongoing average.

    My post-mitigation test shows 3.5 pCi/L — is that acceptable?

    It is below EPA’s 4.0 pCi/L action level, but it is also not what a well-performing system typically achieves. Most single-point ASD installations in homes with standard aggregate conditions reach 0.5–2.0 pCi/L. A result of 3.5 pCi/L suggests the system may have room for improvement — additional sealing, a second suction point, or a fan upgrade. Discuss with your contractor whether a callback is warranted.


  • Short-Term Radon Test vs. Long-Term: Which Do You Need?

    Short-Term Radon Test vs. Long-Term: Which Do You Need?

    The Distillery
    — Brew № 1 · Radon Mitigation

    The difference between a short-term and long-term radon test is not just duration — it is what each result actually tells you. A 48-hour test gives you a snapshot of radon during specific conditions. A 90-day test gives you a seasonal average. A year-long test gives you the most accurate picture of your true annual exposure. Understanding when each applies prevents both under-reaction to real risk and over-reaction to a weather-influenced spike.

    Short-Term Tests: The Screening Tool

    Short-term radon tests run from a minimum of 48 hours up to 90 days. The most common residential short-term test is the activated charcoal canister, run for 48–96 hours under closed-house conditions.

    How Charcoal Canister Tests Work

    An activated charcoal canister absorbs radon gas from the surrounding air during the exposure period. At the end of the test, you seal the canister and mail it to a laboratory. The lab measures gamma radiation emitted by radon decay products that have accumulated in the charcoal, calculates the average radon concentration over the test period, and reports the result in picocuries per liter (pCi/L).

    Short-Term Test Accuracy and Limitations

    Short-term results are inherently variable because radon levels fluctuate by 30–50% day to day in many homes, driven by:

    • Barometric pressure: Low pressure pulls more soil gas into the home; high pressure suppresses it
    • Temperature differential: Greater indoor-outdoor temperature difference strengthens stack effect and increases radon draw
    • Wind: Wind pressure against the house affects sub-slab pressure dynamics
    • Precipitation: Rain saturates soil, reducing gas permeability and temporarily suppressing radon entry
    • HVAC operation: Forced-air systems can both dilute and redistribute radon within the home

    A single 48-hour test during an unusually high-pressure, warm, dry period may significantly underestimate actual levels. The same home tested during a cold snap with falling barometric pressure may read 30–50% higher than average. This variability is why EPA guidance does not recommend making final mitigation decisions solely on a single short-term result in the 4.0–8.0 pCi/L range.

    When Short-Term Tests Are the Right Choice

    • Initial screening: If you have never tested your home, a short-term test is the fastest way to identify whether a problem may exist
    • Real estate transactions: When time constraints (contract deadlines) prevent long-term testing, short-term tests are universally accepted with appropriate disclosure
    • Post-mitigation verification: After installing a radon system, a 48-hour charcoal test placed at least 24 hours post-installation verifies the system is working; EPA recommends this within 24 hours of system activation
    • Initial high-result screening: If the initial test returns 8.0 pCi/L or higher, EPA recommends proceeding to mitigation without waiting for a confirmatory long-term test — the risk is sufficient

    Long-Term Tests: The Accurate Baseline

    Long-term tests run for a minimum of 90 days; one-year tests are the gold standard. The standard device is an alpha track detector — a small card with a clear plastic film (CR-39 or similar) that records microscopic damage tracks from alpha particles emitted by radon decay products over the exposure period. At the end of the test, the lab chemically etches the film and counts the tracks under a microscope, calculating average radon concentration.

    Why Long-Term Tests Are More Accurate

    By averaging radon levels across multiple seasons — or ideally a full year — long-term tests smooth out the barometric, temperature, and weather-driven variability that makes short-term results uncertain. A 90-day winter test captures the highest-radon season and provides a reasonably conservative estimate of annual average. A full-year test captures all seasonal patterns.

    Studies comparing matched short-term and long-term measurements in the same homes consistently show that short-term tests, when compared to annual averages, overestimate the annual average in about half of cases and underestimate it in the other half — with individual test variance of ±40–50% common. Long-term tests reduce this uncertainty substantially.

    When Long-Term Tests Are the Right Choice

    • Confirming a short-term result in the 4.0–8.0 pCi/L range: Before investing $1,000–$2,500 in mitigation, a long-term confirmation test establishes that elevated levels are chronic rather than a test-period anomaly
    • Establishing a baseline in a new home: A one-year test after moving in provides the most accurate picture of actual exposure
    • Routine monitoring in a mitigated home: An annual alpha track detector run year-round provides ongoing confirmation of system performance
    • Research or legal purposes: Situations requiring the highest-accuracy radon measurements

    EPA Decision Protocol: Which Test When

    Situation Recommended Test Action if Elevated
    First-time testing, no rush Long-term (90+ days) Mitigate if annual avg ≥ 4.0 pCi/L
    First-time testing, want quick answer Short-term (48–96 hrs) Follow up with long-term if 4.0–8.0 pCi/L
    Short-term result ≥ 8.0 pCi/L Mitigate immediately No confirmatory test needed
    Short-term result 4.0–8.0 pCi/L Second short-term or long-term Mitigate if confirmed ≥ 4.0 pCi/L
    Real estate transaction Short-term (48–96 hrs) Negotiate mitigation in contract
    Post-mitigation verification Short-term (48–96 hrs), 24+ hrs after install Retest or callback if still ≥ 4.0 pCi/L
    Ongoing monitoring (mitigated home) Long-term (annual alpha track) Schedule callback if ≥ 4.0 pCi/L

    Continuous Radon Monitors: The Third Option

    Continuous electronic radon monitors (Airthings Wave, Corentium, RadonEye) provide real-time radon readings and running averages. They do not replace lab-analyzed test kits for official measurements but offer ongoing visibility into radon fluctuations that neither charcoal canisters nor alpha track detectors can provide.

    Continuous monitors are most valuable for:

    • Monitoring a mitigated home between formal retests
    • Understanding diurnal and seasonal radon patterns in your home
    • Detecting rapid changes that indicate fan failure or new entry pathways
    • Confirming that closed-house conditions during a short-term test are being maintained

    Consumer-grade continuous monitors have measurement uncertainty of ±10–20% at low radon levels and are not accepted as certified measurements for real estate transactions or regulatory compliance. They are monitoring tools, not certification tools.

    Frequently Asked Questions

    Which radon test is more accurate — short-term or long-term?

    Long-term tests are more accurate representations of actual annual average radon exposure because they average out the weather- and pressure-driven fluctuations that make short-term results variable. A 90-day or one-year alpha track test provides a more reliable basis for mitigation decisions than a single 48-hour charcoal test.

    Can I use a short-term test to decide whether to mitigate?

    Yes, with caveats. If your short-term result is 8.0 pCi/L or higher, EPA recommends mitigation without a confirmatory test. If it is between 4.0 and 8.0 pCi/L, a follow-up long-term or second short-term test is advisable before investing in mitigation, to confirm the result is not an anomalous spike.

    How long should I run a radon test?

    Minimum 48 hours for a charcoal short-term test under closed-house conditions. For the most accurate annual average, run an alpha track detector for 90 days to one year under normal living conditions. Longer is more accurate.

    Do I need closed-house conditions for a long-term radon test?

    No. Long-term tests (alpha track detectors, 90+ days) are designed to run under normal living conditions — windows open in summer, closed in winter, normal HVAC operation. The extended duration averages out all of these variations. Closed-house conditions are required only for short-term charcoal tests (48–96 hours).


  • How to Test for Radon in Your Home: Complete Guide

    How to Test for Radon in Your Home: Complete Guide

    The Distillery
    — Brew № 1 · Radon Mitigation

    Radon testing is the only way to know whether your home has elevated radon levels. You cannot smell it, see it, or detect it with any sense — and the homes with the highest radon levels often show no correlation with geography, age, or construction style. The EPA estimates that 1 in 15 U.S. homes has elevated radon. Testing takes as little as 48 hours and costs $15–$30 for a DIY kit.

    Why You Need to Test

    Radon is the second leading cause of lung cancer in the United States after cigarette smoking, responsible for approximately 21,000 deaths annually according to the EPA. The risk is cumulative — it is the product of concentration and time. A home at 4.0 pCi/L poses roughly the same lifetime lung cancer risk as smoking half a pack of cigarettes per day. A home at 20 pCi/L — not uncommon in high-radon zones — roughly equals smoking two packs per day.

    The only way to know your home’s radon level is to test it. No map, no neighborhood average, and no visual inspection can substitute for a measurement in your specific home.

    Short-Term vs. Long-Term Radon Tests

    Short-Term Tests (2–90 Days)

    Short-term tests are the most commonly used initial screening method. The standard residential short-term test is a charcoal canister test run for 48–96 hours. Results are available within 3–7 business days after mailing the device to a lab.

    • Duration: 48 hours minimum (EPA); 48–96 hours typical for charcoal devices
    • Device type: Activated charcoal canister or electret ion chamber
    • Conditions required: Closed-house conditions (see below)
    • Best for: Initial screening, pre-purchase testing, post-mitigation verification
    • Limitation: A single short-term test captures a snapshot — radon levels fluctuate with barometric pressure, temperature, and season. A short-term result may be higher or lower than the home’s true annual average.

    Long-Term Tests (90+ Days)

    Long-term tests provide a more accurate picture of the home’s actual annual average radon exposure. The standard device is an alpha track detector — a small card with a special plastic film that records radon decay particle tracks over time.

    • Duration: 90 days to 1 year (one year is ideal)
    • Device type: Alpha track detector
    • Conditions required: Normal living conditions (no closed-house protocol)
    • Best for: Confirming short-term results, annual monitoring, determining true annual average
    • Advantage: Averages out seasonal and pressure fluctuations — provides the most accurate basis for mitigation decisions

    EPA guidance: if a short-term test shows between 4.0 and 8.0 pCi/L, conduct a follow-up long-term test or a second short-term test before deciding on mitigation. If the initial short-term test shows 8.0 pCi/L or higher, proceed to mitigation without waiting for a confirmatory test — the risk is sufficient to act immediately.

    Where to Place the Radon Test Device

    Placement determines whether your result is meaningful. The EPA’s placement protocol:

    • Level: Test in the lowest level of the home that is currently used or could be used as living space — even if you do not currently occupy it. If you have an unfinished basement you plan to finish, test there.
    • Location within the room: Place the device in the breathing zone — at least 20 inches above the floor and at least 12 inches from any wall
    • Away from drafts: Do not place near windows, doors, HVAC vents, or exterior walls where air movement can dilute results
    • Away from humidity sources: Do not place near sump pits, laundry areas, or bathrooms — excessive humidity can affect charcoal canister performance
    • Accessible but undisturbed: The device should be able to sit undisturbed for the full test duration — not in a high-traffic area where it might be moved

    Closed-House Conditions

    Short-term tests require closed-house conditions during the test and for 12 hours before the test begins. Closed-house means:

    • All windows and exterior doors closed except for brief normal entry/exit
    • No whole-house fans or attic fans running
    • Normal HVAC operation is permitted (heating and cooling systems can run — they recirculate interior air)
    • Ceiling fans are permitted
    • Fireplace dampers closed (if not in use)

    Closed-house conditions prevent outdoor air from diluting indoor radon to artificially low levels during the test. When conditions are not maintained, short-term results systematically underestimate actual radon levels — exactly the wrong direction for a safety measurement.

    Interpreting Your Results

    • Below 2.0 pCi/L: Below EPA’s average indoor radon level of 1.3 pCi/L if the home is new. No action required; retest in 2 years.
    • 2.0–3.9 pCi/L: Between the national average and the EPA action level. Consider a long-term test to confirm. Some homeowners choose to mitigate at this level regardless, particularly if they have young children or smokers in the home.
    • 4.0–7.9 pCi/L: At or above EPA action level. EPA recommends mitigation. Conduct a confirmatory long-term or second short-term test if time allows, then mitigate.
    • 8.0 pCi/L or higher: Mitigate without waiting for confirmatory testing. At this level the health risk warrants immediate action.

    DIY vs. Professional Testing

    DIY test kits (charcoal canisters or alpha track detectors) purchased from hardware stores or online labs are the most cost-effective option for initial and ongoing screening. Cost: $15–$30 including lab analysis. Most state radon programs recommend purchasing from a lab certified by the National Radon Proficiency Program (NRPP) or National Radon Safety Board (NRSB).

    Professional testing uses the same device types but is conducted and placed by a certified radon measurement professional. Professional testing is required or preferred in specific situations:

    • Real estate transactions where the buyer requires a certified measurement
    • Post-mitigation verification where the mitigator or a warranty requires professional confirmation
    • Rental properties in states where landlord testing requirements specify professional measurement
    • Situations involving litigation or insurance where certified chain-of-custody testing is required

    How Often to Test

    • Initial test: If you have never tested, test now — regardless of when you moved in or how long you have lived there
    • After mitigation: Test within 24 hours of system installation (if using a continuous monitor) or place a short-term test 24+ hours post-installation; run for 48 hours minimum
    • Routine retesting: EPA recommends retesting every 2 years even in mitigated homes — to confirm continued performance and catch new entry pathways from foundation settling or renovation
    • After renovations: Any work that involves the foundation, basement, or significant changes to the HVAC system warrants a new test
    • When buying a home: Always test — or require a recent test result — before closing

    Frequently Asked Questions

    How accurate are DIY radon test kits?

    DIY charcoal canister kits analyzed by NRPP- or NRSB-certified labs are accurate to within ±10–15% under controlled conditions. This is sufficient precision for screening decisions. The larger source of variation is not the device itself but testing conditions — an improperly placed device or violated closed-house conditions introduce more error than the device’s inherent measurement uncertainty.

    What time of year is best to test for radon?

    Winter typically produces higher radon readings than summer — windows are kept closed, stack effect is stronger, and atmospheric pressure patterns tend to draw more soil gas into the home. Testing in winter gives a closer approximation of worst-case conditions. However, because any result at or above 4.0 pCi/L warrants mitigation regardless of season, the best time to test is simply now — not after waiting for an optimal season.

    Can I test for radon myself or do I need a professional?

    DIY testing is appropriate and recommended for the vast majority of homeowners. Purchase a certified short-term or long-term kit, follow the placement and closed-house instructions, and mail to the lab. Professional testing is required only for real estate transactions in some states, post-litigation measurements, or situations where certified chain-of-custody documentation is needed.

    My neighbor’s home tested low — does that mean mine will too?

    No. Radon levels vary dramatically between adjacent homes — sometimes between rooms in the same home. Differences in sub-slab aggregate, foundation type, construction methods, HVAC configuration, and soil permeability can produce completely different radon levels in homes built side by side. Your home must be tested independently.


    Related Radon Resources


  • Why AI Agents Are Different From Chatbots, Automations, and APIs

    Why AI Agents Are Different From Chatbots, Automations, and APIs

    These terms get used interchangeably. They’re not the same thing. Here’s the actual distinction between each one, where the lines get genuinely blurry, and which category fits what you’re actually trying to build.

    Chatbots

    A chatbot is a software interface designed to simulate conversation. The defining characteristic: it’s stateless and reactive. You send a message; it responds; the exchange is complete. Each interaction is largely independent.

    Traditional chatbots (pre-LLM) operated on decision trees — “if the user says X, respond with Y.” Modern LLM-powered chatbots use language models to generate responses, which makes them dramatically more capable and flexible — but the fundamental architecture is the same: you ask, it answers, you ask again.

    What chatbots are good at: answering questions, providing information, routing conversations, handling defined service scenarios with natural language flexibility. What they’re not: action-takers. A chatbot can tell you how to cancel your subscription. An agent can cancel it.

    Automations

    Automations are rule-based workflows that execute when triggered. Zapier, Make, and similar tools are the canonical examples. When event A happens, do B, then C, then D.

    The key characteristic: the path is predefined. Every step is specified by the person who built the automation. If an unexpected situation arises that the automation wasn’t built for, it either fails or skips the step. There’s no reasoning about what to do — there’s only executing the specified path or not.

    Automations are highly reliable for well-defined, stable processes. They break when edge cases arise that weren’t anticipated. They scale perfectly for the exact task they were built for; they don’t generalize.

    APIs

    An API (Application Programming Interface) is a communication contract — a defined way for software systems to talk to each other. APIs are infrastructure, not agents or automations. They’re the mechanism through which agents and automations take action in external systems.

    When an AI agent “uses Slack,” it’s calling Slack’s API. When an automation “posts to Twitter,” it’s calling Twitter’s API. The API is the door; agents and automations are the things that open it.

    Conflating APIs with agents is a category error. An API is a tool, not a behavior pattern.

    AI Agents

    An AI agent takes a goal and figures out how to accomplish it, using tools available to it, handling unexpected situations along the way, without a human specifying each step.

    The distinguishing characteristics versus the above:

    • vs. Chatbots: Agents take action in the world; chatbots respond to messages. An agent can book the flight, not just tell you how to book it.
    • vs. Automations: Agents reason about what to do next; automations execute predefined paths. When an unexpected situation arises, an agent adapts; an automation fails or skips.
    • vs. APIs: APIs are tools an agent uses; they’re not the agent itself. The agent is the reasoning layer that decides which API to call and what to do with the result.

    Where the Lines Actually Blur

    In practice, real systems often combine these categories:

    LLM-powered chatbots with tool access: A customer service chatbot that can look up your order status, initiate a return, and send a confirmation email is starting to look like an agent — it’s taking actions, not just responding. The boundary between “advanced chatbot” and “limited agent” is genuinely fuzzy.

    Automations with AI decision steps: A Zapier workflow with an OpenAI or Claude step in the middle isn’t purely rule-based anymore — the AI step can produce variable outputs that affect what the automation does next. This is a hybrid: mostly automation, partly agentic.

    Agents with constrained scopes: An agent restricted to a single tool and a narrow task class starts to look like a sophisticated automation. The more constrained the scope, the more the distinction collapses in practice.

    The useful question isn’t “what category is this?” but “is this system reasoning about what to do, or executing a predefined path?” That’s the actual distinction that matters for how you build, monitor, and trust it.

    Why the Distinction Matters Operationally

    Reliability profile: Automations fail predictably — when an edge case hits a path that wasn’t built. Agents fail unpredictably — when their reasoning goes wrong in a way you didn’t anticipate. Different failure modes require different monitoring approaches.

    Maintenance overhead: Automations require explicit updates when processes change. Agents adapt to process changes automatically — but may adapt in unexpected ways that need to be caught and corrected.

    Auditability: Automations are fully auditable — you can read the workflow and know exactly what it does. Agents are less auditable — you can inspect their actions, but not fully predict them in advance. For compliance-sensitive contexts, this matters significantly.

    Build cost: Automations are faster to build for well-defined, stable processes. Agents are faster to deploy when the process is complex, variable, or not fully specified — because you’re specifying a goal rather than a procedure.

    For what agents can actually do in production: What AI Agents Actually Do. For a business owner’s introduction: AI Agents Explained for Business Owners. For hosted agent infrastructure: Claude Managed Agents FAQ.


    Hosted agent infrastructure pricing: Claude Managed Agents Pricing Reference.

  • What AI Agents Actually Do (Not the Hype Version)

    What AI Agents Actually Do (Not the Hype Version)

    Not the version where AI agents are going to replace all human jobs by 2030. The actual version, right now, based on what’s deployed in production.

    The Actual Definition

    What an AI agent is

    Software that takes a goal, breaks it into steps, uses tools to execute those steps, handles errors along the way, and keeps working without you directing every action. The distinguishing characteristic is autonomous multi-step execution — not just answering a question, but completing a task.

    The Key Distinction: One-Shot vs. Agentic

    Most people’s experience with AI is one-shot: you type something, the AI responds, the exchange is complete. That’s a language model doing inference. An AI agent is different in one specific way: it takes actions, checks results, and takes more actions based on what it found — often dozens of steps — without you approving each one.

    Example of one-shot AI: “Summarize this document.” You paste the document, the AI returns a summary. Done.

    Example of an AI agent doing the same task: “Research this topic and produce a summary with verified sources.” The agent searches the web, reads multiple pages, identifies conflicts between sources, runs additional searches to resolve them, synthesizes findings, and returns a summary with citations — without you specifying each search query or each page to read. You gave it a goal; it handled the steps.

    What Agents Can Actually Do

    The tools an agent can use define its capability surface. Common tool categories in production agents:

    • Web search: Query search engines and retrieve current information
    • Code execution: Write and run code in a sandboxed environment, use results to inform next steps
    • File operations: Read, write, and modify files — documents, spreadsheets, data files
    • API calls: Interact with external services — CRMs, databases, project management tools, communication platforms
    • Browser control: Navigate web pages, fill forms, extract information
    • Memory: Store and retrieve information across steps within a session, sometimes across sessions

    The combination of these tools is what makes agents capable of genuinely autonomous work. An agent that can search, write code, execute it, check the results, and write findings to a document can complete a research and analysis task that would otherwise require hours of human work — without you steering each step.

    What “Autonomous” Actually Means in Practice

    Autonomous doesn’t mean unsupervised indefinitely. Production agents are typically configured with:

    • Defined scope: The tools the agent can use, the systems it can access, the actions it’s allowed to take
    • Guardrails: Actions that require human confirmation before proceeding — making a payment, sending an email externally, modifying a production database
    • Reporting: Checkpoints where the agent surfaces what it’s done and asks whether to continue

    Autonomy is a dial, not a switch. You set how much the agent handles independently versus checks in. Most production deployments start more supervised and reduce oversight as trust in the agent’s behavior is established.

    Real Production Examples (Not Hypotheticals)

    Concrete examples from confirmed public deployments as of April 2026:

    • Rakuten: Deployed five enterprise Claude agents in one week on Anthropic’s Managed Agents platform — handling tasks across their e-commerce operations including data processing, content tasks, and operational workflows
    • Notion: Background agents that autonomously update workspace pages, synthesize database content, and process meeting notes into structured summaries without manual triggers
    • Sentry: Agents integrated into developer workflows — monitoring error streams, triaging issues, and surfacing relevant context to engineers
    • Asana: Project management agents that update task statuses, synthesize project health, and move work items based on defined triggers

    These are not pilots. These are production systems handling real operational load.

    How They’re Built

    An agent is built from three components:

    1. A language model: The reasoning layer — the part that decides what to do next, interprets tool results, and determines when the task is complete
    2. Tools: The action layer — APIs, code execution environments, file systems, or anything else the model can call to take action in the world
    3. Orchestration: The loop that connects them — manages the sequence of model calls and tool executions, maintains state between steps, handles errors

    Historically, builders had to construct the orchestration layer themselves — a significant engineering investment. Hosted platforms like Claude Managed Agents handle the orchestration layer, letting builders focus on defining the agent’s goals, tools, and guardrails rather than the mechanics of running the loop.

    What Agents Are Not Good At (Yet)

    Honest calibration on current limitations:

    • Long-horizon planning with many unknowns: Agents perform best on tasks with relatively defined scope. Open-ended exploratory work over many days with fundamentally uncertain requirements is still better handled by humans in the loop at each major decision point.
    • Tasks requiring physical world interaction: No production general-purpose physical agent exists. Software agents operating through APIs and interfaces are the current state.
    • Tasks where errors are catastrophic: Agents make mistakes. For any irreversible, high-stakes action — financial transactions, production data modifications, external communications to important relationships — human confirmation steps should remain in the loop.

    For how hosted agent infrastructure works: Claude Managed Agents FAQ. For the difference between agents and chatbots: AI Agents vs. Chatbots, Automations, and APIs. For an SMB-focused explanation: AI Agents Explained for Business Owners.


    For pricing specifics on hosted agent infrastructure: Claude Managed Agents Complete Pricing Reference.

  • How to Write Content That AI Systems Actually Cite

    How to Write Content That AI Systems Actually Cite

    Tygart Media / Content Strategy
    The Practitioner JournalField Notes
    By Will Tygart
    · Practitioner-grade
    · From the workbench

    Being cited by AI systems is not luck and it’s not purely a domain authority game. There are structural characteristics of content that make AI systems more or less likely to pull from it. Here’s what those characteristics are and how to build them in deliberately.

    Why Content Structure Determines Citation Likelihood

    AI systems — whether Perplexity, ChatGPT with web search, or Google AI Overviews — are trying to answer a question. When they search the web and retrieve candidate content, they’re looking for the passage or page that most directly and reliably answers the query. The content that wins is the content that makes the answer easiest to extract.

    This has direct structural implications. A 3,000-word narrative essay that eventually answers a question on page 2 loses to a 600-word page that answers the question in the first paragraph, provides supporting evidence, and includes a definition. Not because shorter is better, but because clarity of answer placement is better.

    The Structural Characteristics That Drive Citation

    1. Direct Answer in the First 100 Words

    Every piece of content you want AI systems to cite should answer the primary question it’s targeting before the first scroll. AI retrieval systems don’t read like humans — they identify the most relevant passage, and that passage needs to contain the answer, not just lead toward it.

    Test: take your target query and your first 100 words. Does the answer exist in those 100 words? If not, restructure until it does. The rest of the piece can develop nuance, context, and supporting evidence — but the answer must be front-loaded.

    2. Explicit Q&A Formatting

    Question-and-answer structure signals to AI systems that the content is explicitly organized around answering queries. H3 headers phrased as questions, followed by direct answers, are one of the most reliable patterns for citation capture.

    This is why FAQ sections work — not because of FAQPage schema specifically, but because the underlying structure gives AI systems a clean extraction target. Schema reinforces it; the structure is the foundation.

    3. Defined Terms and Named Concepts

    Content that defines terms clearly — “X is Y” statements — becomes citable for queries looking for definitions. AI systems frequently answer “what is X” queries by pulling the clearest definition they can find. If your content doesn’t include a crisp definitional sentence, it’s not competing for definition queries even if you’ve written a thorough treatment of the topic.

    Add definition boxes. State “AI citation rate is the percentage of sampled AI queries where your domain appears as a cited source.” Don’t bury the definition in the third paragraph of an explanation.

    4. Specific, Verifiable Facts

    AI systems weight specificity. “$0.08 per session-hour” gets cited. “A relatively modest fee” does not. “60 requests per minute for create endpoints” gets cited. “Limited rate limits apply” does not.

    Replace hedged language with concrete numbers and specific claims wherever your content supports it. Don’t fabricate specificity — wrong specific numbers are worse than honest hedging. But wherever you have real, verifiable data, make it explicit and prominent.

    5. Entity Clarity

    Content that makes clear who is speaking, what organization they represent, and what their basis for authority is gets cited more reliably. This is the E-E-A-T signal applied to AI citation: the system needs to assess whether this source is credible enough to cite.

    Name the author. State the organization. Link to primary sources. Include dates on time-sensitive claims (“as of April 2026”). These signals tell the AI system this content has an accountable source, not anonymous text.

    6. Freshness on Time-Sensitive Topics

    For any topic where recency matters — product pricing, regulatory status, current events — AI systems heavily weight recently indexed, recently updated content. A page published April 2026 beats a page published January 2025 for queries about current status, even if the older page has higher domain authority.

    Update time-sensitive content. Add “last updated” dates. Re-publish with fresh timestamps when the underlying facts change. Freshness signals are real citation drivers for volatile topic areas.

    7. Speakable and Structured Data Markup

    Speakable schema explicitly marks the passages in your content best suited for AI extraction. It’s a direct signal to AI retrieval systems: “this paragraph is the answer.” Combined with FAQPage schema, Article schema, and HowTo schema where relevant, structured markup makes your content more parseable.

    Schema doesn’t replace the underlying structure — it reinforces it. A well-structured page with schema beats a poorly structured page with schema. But a well-structured page with schema beats a well-structured page without it.

    8. Internal Link Architecture

    AI systems that crawl the web assess topical depth partly through link structure. A page that sits within a tight cluster of related pages — all cross-linking around a topic — signals topical authority more strongly than an isolated page, even if the isolated page’s content is comparable.

    Build the cluster. The hub-and-spoke architecture is as relevant for AI citation as it is for traditional SEO. Every spoke article should link to the hub; the hub should link to every spoke.

    What Doesn’t Work

    A few patterns that are intuitively appealing but don’t translate to citation lift:

    • More content for its own sake: 5,000 words of padded content is not more citable than 900 words of dense, accurate content. AI retrieval is looking for passage quality, not page length.
    • Keyword density: Traditional keyword repetition strategies don’t make content more citable. The query match is handled at retrieval; the citation decision is about answer quality, not keyword frequency.
    • Generic authority claims: “We’re the leading experts in X” is not citable. A specific data point that demonstrates expertise is.

    The Compound Effect

    These characteristics compound. A page with a direct front-loaded answer, Q&A structure, defined terms, specific facts, clear entity signals, fresh timestamps, and schema markup sitting within a well-linked cluster is materially more citable than a page with only two or three of these characteristics. The full stack produces disproportionate results.

    For the monitoring layer: How to Track When AI Systems Cite You. For the metrics: What Is AI Citation Rate?. For the full citation monitoring guide: AI Citation Monitoring Guide.


    For the infrastructure layer: Claude Managed Agents Pricing Reference | Complete FAQ Hub.

  • AI Citation Monitoring Tools — What Exists, What Doesn’t, What We Built

    AI Citation Monitoring Tools — What Exists, What Doesn’t, What We Built

    The Lab · Tygart Media
    Experiment Nº 570 · Methodology Notes
    METHODS · OBSERVATIONS · RESULTS

    You want to monitor whether AI systems are citing your content. What tools actually exist for this, what they do, what they don’t do, and what we’ve built ourselves when nothing on the market fit.

    The Market as of April 2026

    The AI citation monitoring category is real but nascent. Here’s an honest inventory:

    Established SEO Platforms Adding AI Visibility Metrics

    Several major SEO platforms have added “AI visibility” or “AI search” modules in the past 6–12 months. These generally track:

    • Whether your domain appears in AI Overviews for tracked keywords (via SERP scraping)
    • Brand mentions in AI-generated snippets
    • Comparative visibility versus competitors in AI search results

    Ahrefs, Semrush, and Moz have all moved in this direction to varying degrees. Verify current feature availability — this has been an active development area and capabilities have changed rapidly.

    Mention Monitoring Tools Expanding to AI

    Brand mention tools like Brand24 and Mention have begun tracking AI-generated content that includes brand references. The challenge: they’re tracking brand name occurrences in crawled content, not necessarily AI citation events. Useful for brand visibility in AI-generated content that gets published, less useful for tracking in-session citations.

    Purpose-Built AI Citation Tools (Emerging)

    Several purpose-built tools targeting AI citation tracking specifically have launched or raised funding in early 2026. This category is moving fast. As of our last check:

    • Tools focused on tracking specific brand or entity mentions across AI platforms
    • API-first tools targeting developers who want to build citation monitoring into their own workflows
    • Dashboard tools with pre-built query sets for common industry categories

    Treat any specific product recommendation here as a starting point for your own research — the category will look different in 6 months.

    Google Search Console

    The strongest existing tool, and it’s free. AI Overviews that cite your pages register as impressions and clicks in GSC under the relevant queries. This is first-party data from Google itself. Limitation: covers only Google AI Overviews, not Perplexity, ChatGPT, or other platforms.

    What We Built

    When no existing tool covered the specific workflows we needed, we built our own. The stack:

    Perplexity API Query Runner

    A Cloud Run service that runs a predefined query set against Perplexity’s API on a weekly schedule. It parses the citations field from each response, checks for domain appearances, and writes results to a BigQuery table. Total engineering time: roughly one day. Ongoing cost: minimal (Cloud Run idle cost + Perplexity API usage).

    The output: a weekly BigQuery record per query showing which domains Perplexity cited, with timestamps. Trend queries show citation rate over time by query cluster.

    GSC AI Overview Monitor

    Not a custom build — just systematic review of GSC data. We check weekly which queries are generating AI Overview impressions for our tracked sites. The signal: if a page is generating AI Overview impressions on new queries, that’s a citation event.

    Manual ChatGPT Sampling

    For highest-priority queries, manual weekly sampling of ChatGPT with web search enabled. We log results to a shared spreadsheet. Less scalable than the API approach, but ChatGPT’s web search activation is inconsistent enough that API automation adds complexity without proportional reliability gain.

    What Doesn’t Exist (That Would Be Useful)

    The tool gaps that we still feel:

    • Cross-platform citation dashboard: A single view showing citation rate across Perplexity, ChatGPT, Gemini, and AI Overviews for the same query set. Nobody has built this cleanly yet.
    • Historical citation rate database: Knowing your citation rate is useful. Knowing whether it improved after you published a new piece of content is more useful. The temporal correlation is hard to establish with spot-check sampling.
    • Competitor citation tracking at scale: Easy to check manually for specific queries; hard to monitor systematically across a large competitor set and query space.

    These gaps exist because the category is new, not because the problems are technically hard. Expect the tool landscape to fill in significantly over the next 12 months.

    How to calculate citation rate: What Is AI Citation Rate?. How to set up tracking: How to Track When ChatGPT or Perplexity Cites Your Content. How to optimize for citations: How to Write Content That AI Systems Cite.


    The Perplexity API monitoring stack we built runs on Claude. For the hosted infrastructure context: Claude Managed Agents Pricing Reference | Complete FAQ.

  • What Is AI Citation Rate? (And How to Calculate Yours)

    What Is AI Citation Rate? (And How to Calculate Yours)

    AI citation rate is a metric that doesn’t have a standard definition yet, which means everyone using the term might mean something slightly different. Here’s what it is, how to calculate it, and what it actually measures — and doesn’t.

    Definition

    AI Citation Rate

    The percentage of sampled AI queries where a specific domain or URL appears as a cited source in the AI system’s response.

    Formula: (Queries where your domain appeared as a source) ÷ (Total queries sampled) × 100

    A Concrete Example

    You run 50 queries in Perplexity across your core topic cluster. Your domain appears as a cited source in 12 of those responses. Your AI citation rate for that query set on that platform: 12/50 = 24%.

    That’s the basic calculation. The complexity is in what you define as your query set, which platforms you sample, and what counts as a “citation.”

    What Counts as a Citation

    Not all AI source mentions are equal. Some distinctions worth tracking separately:

    • Direct URL citation: The AI explicitly lists your URL as a source. Highest confidence — trackable programmatically via API.
    • Domain mention: Your domain name appears in the response text but not necessarily as a formal source citation.
    • Brand mention: Your brand name appears in the response. May or may not correlate with your web content being the source.
    • Implied citation: Content clearly derived from your page but no explicit attribution. Only detectable through content fingerprinting — difficult at scale.

    For tracking purposes, direct URL citation is the most reliable signal. Brand mentions are noisier but still worth tracking for brand visibility purposes.

    How to Calculate It

    Step 1: Define Your Query Set

    Select 20–100 queries where you want to appear. Good sources for your query set:

    • Your highest-impression GSC queries (you rank for these — do AI systems cite you?)
    • Queries where you’ve published dedicated content
    • Queries from your keyword research that match your expertise
    • Questions your clients or prospects actually ask

    Step 2: Sample Across Platforms

    Run each query in Perplexity (most trackable — consistent citation format), ChatGPT with web search enabled, and Google AI Overviews (via organic search). Track results separately by platform — citation rates vary significantly between platforms for the same query set.

    Step 3: Log Results

    For each query on each platform, record:

    • Whether your domain appeared as a citation (binary: yes/no)
    • Position if ranked (first citation, third citation, etc.)
    • Date of query

    Step 4: Calculate Rate

    Aggregate by time period (weekly or monthly). Calculate separately by platform and by topic cluster — aggregate rate across all platforms and queries hides the variation that’s actually useful.

    Step 5: Establish Baseline, Then Track Change

    Your first 4–6 weeks of data sets your baseline. After that, track directional change — is the rate improving, declining, or stable? Correlate changes with content updates, new publications, and competitor activity.

    What Citation Rate Actually Measures (And Doesn’t)

    AI citation rate is a proxy for content authority signal in AI systems — not a direct ranking factor you can optimize mechanically. It reflects:

    • Whether your content is being indexed and surfaced by AI systems for your target queries
    • Whether your content structure and freshness match what AI systems prefer to cite
    • Relative authority versus competitors for the same query space

    It doesn’t measure:

    • Whether AI systems are using your content without citation (training data influence)
    • User behavior after AI responses (do they click through to your site?)
    • Revenue impact of being cited (cited ≠ converting)

    Benchmarks and Context

    Because this metric is new, industry benchmarks don’t exist yet. What matters is your own trend line, not comparison to a published standard. A 20% citation rate in a highly competitive topic cluster might represent strong performance; 20% in a niche you should dominate might indicate underperformance. Context is everything.

    For the full monitoring setup: How to Track When ChatGPT or Perplexity Cites Your Content. For tools available: AI Citation Monitoring Tools Comparison. For content optimization: How to Write Content That AI Systems Actually Cite.


    For the agent infrastructure behind automated citation tracking: Claude Managed Agents Pricing and FAQ Hub.

  • Types of Radon Mitigation Systems Explained

    Types of Radon Mitigation Systems Explained

    The Distillery
    — Brew № 1 · Radon Mitigation

    There is no single radon mitigation system. There are six primary system types, each designed for specific foundation conditions — and most homes with elevated radon require one primary method plus supplemental sealing. Knowing which system type applies to your home’s foundation eliminates confusion about what a contractor is proposing and whether the approach matches your situation.

    1. Active Sub-Slab Depressurization (ASD)

    Active Sub-Slab Depressurization is the most widely installed radon mitigation system in the United States. It is the standard approach for slab-on-grade homes and basement homes with concrete slab floors.

    How ASD Works

    A suction pipe penetrates the concrete slab, connecting to the aggregate or soil layer beneath. A continuously running electric fan draws air (and with it, radon) from beneath the slab, routing it through PVC pipe to discharge above the roofline. This creates negative pressure in the sub-slab zone relative to the home’s interior — preventing radon from finding pathways through cracks, joints, and penetrations into the living space.

    ASD Applications

    • Slab-on-grade homes (full footprint slab, no basement)
    • Basement homes with concrete slab floors
    • Homes with both a basement and upper-level slab additions
    • Garage slabs connected to the main living area slab

    ASD Governing Standard

    AARST-ANSI SGM-SF (Standard of Practice for Mitigation of Radon in Schools and Large Buildings, adapted for single-family) governs ASD installation requirements including diagnostic testing, pipe sizing, fan placement, and performance verification.

    2. Active Sub-Membrane Depressurization (ASMD)

    Active Sub-Membrane Depressurization is the crawl space equivalent of ASD. Instead of drilling through concrete, the system creates negative pressure beneath a vapor barrier (membrane) installed over the crawl space soil.

    How ASMD Works

    A heavy-duty polyethylene vapor barrier (minimum 6-mil; professional installations use 10–20 mil) is installed across the entire crawl space floor, lapped up foundation walls, and sealed at all edges and penetrations. A suction pipe penetrates the barrier and connects to the soil or aggregate below via a perforated collection mat. The fan draws soil gas from beneath the barrier, routing it above the roofline through the same type of PVC pipe system used in ASD.

    ASMD Requirements

    • Foundation vents must be sealed — open vents allow outdoor air into the crawl space, defeating the sub-membrane vacuum
    • Barrier seams must be lapped (minimum 12″ overlap) and taped
    • Multiple suction points are often needed — crawl spaces typically require 2–4 collection points versus the 1–2 typical in ASD installations
    • AARST-ANSI RMS-LB governs ASMD installation standards

    3. Drain-Tile Depressurization

    Many basement homes — particularly those built after 1980 — were constructed with a drain-tile system: a perforated pipe network running around the interior or exterior perimeter of the foundation, at or below the footing level, designed to channel groundwater to a sump pit. This drain tile can serve as a highly effective radon collection network.

    How Drain-Tile Depressurization Works

    When a sump pit is present and the drain tile is functional, the mitigator creates suction at the sump pit — either by sealing the pit with an airtight lid and connecting a fan, or by installing a dedicated suction pipe into the drain tile network. Because the drain tile runs around the full foundation perimeter, a single suction point at the sump can create negative pressure across a very large area — often the entire foundation footprint without any slab drilling.

    Advantages Over Standard ASD

    • No slab drilling required (the drain tile network is already in place)
    • Often achieves better sub-foundation coverage than a single slab core hole
    • Sump pit is already present — lid modification is the primary work
    • Lower installation cost when drain tile is accessible

    Limitations

    • Requires a confirmed functional drain-tile system — older or poorly maintained tile may be silted or blocked
    • Not present in all homes — many older homes and slab-on-grade construction have no drain tile
    • May need to be supplemented with slab suction point(s) if tile coverage is incomplete

    4. Block-Wall Depressurization

    Concrete masonry unit (CMU) block foundation walls have hollow cores that communicate directly with the soil — a significant secondary radon entry pathway in older homes. Block-wall depressurization addresses this specifically.

    How Block-Wall Depressurization Works

    Small holes (2″–3″ diameter) are drilled through the interior face of the CMU block wall, typically just above the slab level, at 6–8 foot intervals around the affected perimeter. PVC pipe connects these holes, manifolding into the main ASD fan system or a dedicated fan. The fan draws radon from inside the block core cavities before it can migrate through mortar joints and wall cracks into the basement air.

    When Block-Wall Depressurization Is Needed

    • Post-mitigation testing still shows levels above 4.0 pCi/L after standard ASD is installed
    • Visual inspection reveals significant efflorescence, spalling, or moisture infiltration through block walls (indicating active soil gas pathways)
    • Home is pre-1975 CMU construction with no poured concrete wall facing

    Block-wall depressurization is almost always an add-on to ASD, not a standalone system. Cost: $300–$600 in additional materials and labor when added to an existing ASD installation.

    5. Heat Recovery Ventilator (HRV) or Energy Recovery Ventilator (ERV)

    HRV and ERV systems are whole-house mechanical ventilation systems that exchange stale indoor air with fresh outdoor air while recovering heat (HRV) or both heat and moisture (ERV). They are sometimes used as a radon reduction strategy — primarily in situations where other methods are impractical or as a supplemental approach.

    How HRV/ERV Reduces Radon

    By continuously introducing fresh outdoor air into the home, HRV/ERV dilutes indoor radon concentrations. They also reduce the negative pressure differential that draws radon into the home from the soil, because they balance indoor and outdoor pressure rather than allowing the home to depressurize relative to the soil.

    Limitations as Radon Mitigation

    • Less reliable reduction than ASD/ASMD — radon dilution depends on outdoor air exchange rate, and results vary significantly by climate and home tightness
    • Higher operating cost — HRV/ERV units consume 100–400 watts versus 20–90 watts for a radon fan
    • Does not address the root cause (radon entry from soil) — only dilutes after entry
    • Not accepted as primary mitigation in all state radon programs
    • Best suited as supplemental to ASD in homes where additional air quality improvement is also desired

    EPA and AARST consider ASD/ASMD the preferred primary mitigation method. HRV/ERV may be appropriate as supplemental mitigation or in unusual foundation situations where ASD is genuinely impractical.

    6. Natural Ventilation Enhancement

    Natural ventilation — opening windows, operating exhaust fans, increasing air exchange — can temporarily reduce radon concentrations. It is not a mitigation system and is not recommended by EPA or AARST as a radon control strategy for several reasons:

    • Effective only while windows are open — unpractical in most U.S. climates for the majority of the year
    • Increases heating and cooling costs significantly
    • Can create negative pressure that worsens radon entry
    • Provides no permanent solution

    Natural ventilation may be used as a short-term measure while a permanent system is being installed, but it is not a substitute for ASD, ASMD, or other mechanical systems.

    Choosing the Right System: Decision Guide

    Foundation Type Primary System Common Add-On
    Slab-on-grade ASD Sealing (cracks, joints)
    Basement — poured concrete ASD Drain-tile depressurization if sump present
    Basement — CMU block walls ASD Block-wall depressurization
    Crawl space — vented ASMD (with encapsulation) Foundation vent sealing
    Crawl space — encapsulated ASMD Additional suction points if needed
    New construction (RRNC) Passive pipe (fan-ready) Fan activation if post-construction test elevated
    Combination foundation ASD + ASMD (separate systems or manifolded) Sealing at transition zones

    Frequently Asked Questions

    What is the most common type of radon mitigation system?

    Active Sub-Slab Depressurization (ASD) is the most commonly installed radon mitigation system in the U.S. It applies to slab-on-grade and basement homes — the two most prevalent residential foundation types. For crawl space homes, Active Sub-Membrane Depressurization (ASMD) is the standard.

    Can one system work for multiple foundation types in the same home?

    Yes, but it typically requires separate or manifolded systems. A home with a basement and a slab-on-grade addition, for example, may need ASD suction points in both zones, connected to a single fan via manifold pipe — or two separate fans if the zones are not contiguous. An experienced mitigator will design for the full footprint, not just the primary foundation type.

    Does the type of radon system affect the cost?

    Yes, significantly. A standard single-point ASD in a poured concrete basement is the least expensive ($800–$1,500). Adding drain-tile depressurization at the sump typically adds $100–$300. Block-wall depressurization adds $300–$600. ASMD with full crawl space encapsulation can run $2,500–$5,000+ depending on crawl space size and membrane quality.

    What type of radon system works in a home with no basement and no crawl space?

    Slab-on-grade homes use ASD — a suction pipe drilled through the concrete slab connects to the aggregate beneath. Interior routing typically runs through a garage wall or utility closet to the attic. Exterior routing is an alternative when interior access is limited. The challenge in slab homes is pipe routing to above the roofline without a basement or crawl space to work through — but it is fully achievable in almost all cases.

    What is the difference between ASD and ASMD?

    Both use a fan to create negative pressure below the home’s floor system. ASD drills through a concrete slab and draws suction from the sub-slab aggregate or soil. ASMD installs a vapor barrier over the crawl space soil and draws suction from beneath the barrier — no concrete is present to drill through. The fan, pipe, and discharge components are identical; only the suction connection method differs.