Secure checkout via Square — all major cards accepted
You can copy this method and do the on-page work yourself in the WordPress editor. Buy Now is the five packaged Claude skill files so your own Claude can connect to the site and run the same steps.
Starter is the first tier of the WordPress SEO Skill Pack. The live sales page at /wordpress-seo-skills/ lists five skills: wp-connect, wp-post-fetch, wp-site-audit, wp-seo-refresh, wp-clean-meta. $29. It is the connect-and-on-page layer. It is not the AEO, GEO, schema, or interlink stack. Those start at Pro.
What you need before any skill runs
Claude Pro, Max, or Team. The sales page names those tiers.
A self-hosted WordPress site with the REST API on.
A WordPress Application Password. Users → Profile. Thirty seconds. Not the login password.
No plugin is required. Everything in this pack talks to /wp-json/wp/v2/.
If you bought the zip: drop the skill files into Claude Desktop (Cowork) or Claude Code. Then say “connect to my WordPress site” and give the URL, username, and Application Password. The skills ship with placeholders (USER:PASS, SITE). You fill those in. There are no client credentials in the pack.
The five skills, and the method each one encodes
1. wp-connect
Gateway. Must run first. Takes site URL, username, Application Password. Tests GET /wp-json/wp/v2/users/me. Returns whether you are authenticated and which endpoints answered. No other wp- skill works until this is green. If you are doing it by hand, that same curl is the test.
2. wp-post-fetch
Load one post so you can see it the way the editor sees it. The refresh skills fetch with context=edit. By hand: GET /wp-json/wp/v2/posts/{id}?context=edit. Read title, slug, excerpt, content, categories, tags. Do not write yet. You cannot refresh what you have not read.
3. wp-site-audit
Run this at the start of a site, not after you have already rewritten three posts. Fetch published posts (per_page=100, paginate). For each post, mark:
Missing tags, categories, featured image, excerpt / meta
Metadata pollution (raw JSON or leftover code in the excerpt)
Orphans (no internal links in) and dead-ends (no internal links out)
Thin content (under 500 words)
Schema present or not
Taxonomy health
Output a prioritized report: Critical (taxonomy / metadata), High (SEO / AEO / quality), then optimization opportunities. That report is your work order. Starter will not auto-fix taxonomy or inject schema. It will tell you which posts are dirty.
4. wp-clean-meta
Strip pollution. The 23-site stack article describes this as removing legacy artifacts from excerpts. The audit skill flags raw JSON / code in excerpt fields. Do this before you write a new meta description, or you will be fighting leftover plugin junk. By hand: open the post, clear a garbage excerpt, save a real 140 to 160 character description.
5. wp-seo-refresh
The on-page pass. Fetch the post, name the target keyword from the topic, then write:
Title, max about 60 characters, keyword-rich, front-loaded
Meta description, about 155 to 160 characters
Slug: lowercase, hyphenated, keyword-rich (only change it if the current slug is junk)
H2 / H3 hierarchy
Keyword distribution, including the first 100 words
A note of internal-link opportunities (Starter does not run wp-interlink; you place the links yourself or upgrade)
Then update the post via the REST API and report what changed.
A Starter session you can run today
Connect. users/me returns 200.
Audit the site. Write the Critical and High lists.
Clean meta on anything the audit marked as polluted.
Pick one High post that is over 500 words. Fetch it. Run the SEO refresh fields above.
Validate the title and meta lengths. Ping IndexNow (Rank Math Instant Indexing, Yoast, or the official IndexNow plugin). Confirm in Bing Webmaster Tools.
That is the honest Starter method: connect, see the mess, clean the excerpt, fix on-page SEO on one post. Title, slug, meta, headings. Not FAQ schema. Not entity saturation. Not a link graph.
What Starter does not do
No wp-aeo-refresh. No definition box, no 6 to 8 FAQs, no FAQPage schema.
No wp-geo-refresh. No speakable / LLMS.txt / named-entity pass as a skill.
No wp-schema-inject, wp-interlink, wp-taxonomy-fix, wp-full-refresh, or content pipeline.
No new-article factory. You can still write a post by hand using the six-step workflow on the New Article Publishing page.
If you want those, Pro is the 14-skill stack. Agency adds onboarding and thin-content expansion. If you want Will to do the post instead of running skills, that is SiteBoost Existing Post Optimization.
If you want the packaged files
You can keep a checklist and do every Starter step in wp-admin. Buy Now is the five .skill files delivered by email after checkout, genericized, with placeholders for your own site. Same Square button at the top. $29.
Install, connect, audit, clean, refresh. That is the pack. The sales page’s “full refresh post 123” line (SEO then AEO then GEO then schema then interlink) is the Pro orchestrator, not Starter.
Secure checkout via Square — all major cards accepted
You can copy this method and run the full three-layer stack yourself. Buy Now is the 14 packaged Claude skill files so your own Claude can do it on your WordPress site.
Pro is the middle tier of the WordPress SEO Skill Pack. $79. The live sales page lists 14 skills: everything in Starter, plus wp-aeo-refresh, wp-geo-refresh, wp-schema-inject, wp-taxonomy-fix, wp-interlink, wp-full-refresh, wp-content-pipeline, content-brief-builder, and content-quality-gate. That is the production sequence Tygart Media uses on a single post: SEO, then AEO, then GEO, then schema, then interlink.
Install and connect
Same requirements as Starter. Claude Pro / Max / Team. Self-hosted WordPress. Application Password. Drop the skill files into Claude Desktop (Cowork) or Claude Code. Say “connect to my WordPress site.” wp-connect tests /wp-json/wp/v2/users/me. Stop if that is not a 200.
The sales page’s operator line for this tier: “full refresh post 123.” That trigger is wp-full-refresh. It is the orchestrator. Do not start there on a site you have never audited.
The 14 skills, in the order you should actually use them
Foundation (from Starter)
wp-connect. Authenticate. Gateway.
wp-post-fetch. Load one post with context=edit.
wp-site-audit. Inventory, orphans, thin posts, missing meta, schema gaps. Run first on a new site.
wp-clean-meta. Strip excerpt pollution before you write new meta.
wp-seo-refresh. Title (about 60 characters), meta (about 155 to 160), slug, H2/H3, keyword in the first 100 words.
Taxonomy, before you interlink
wp-taxonomy-fix has two modes: one post, or site-wide. Design 3 to 7 top-level categories. Each post gets 1 to 2 categories (never Uncategorized) and 5 to 10 tags (topic, technology, use case, audience, format). Create missing terms via the API, assign, then normalize duplicate tags. Toolbox lists this as a prerequisite for wp-interlink. If categories are a junk drawer, your link graph will be a junk drawer.
The same skill can write two-layer descriptions on category and tag archives: a 140 to 160 character meta excerpt, then a 400 to 600 word hub body with internal links to the top posts in that cluster. PATCH /wp/v2/categories/{id} and /wp/v2/tags/{id} on the description field. Most themes print that above the post grid.
The three-layer refresh
wp-aeo-refresh. Direct-answer opening, question H2s, FAQ pairs, list-shaped answers, FAQPage schema. SiteBoost existing-post copy uses a 40 to 60 word definition box and 6 to 8 FAQs. The older publish skill used 3 to 5. Use the PAA list in front of you, not a fake number.
wp-geo-refresh. Entity saturation, factual density, context richness, source attribution, topical breadth, semantic clarity. Schema it adds: richer Article metadata, entity markup, Speakable. The citing-sources article is the house rule: name the organization, link the primary source, sources list at the bottom, visible last-updated, dateModified in schema. No fabricated stats.
wp-schema-inject. Detect the type the post actually is and inject JSON-LD. The schema injection sprint’s menu: FAQPage, Article, HowTo, Service, LocalBusiness, Speakable, BreadcrumbList. Validate with Google’s Rich Results Test. Fix failures. Do not leave plugin-bloated invalid markup in the body.
wp-interlink. Hub and spoke, orphan resolution, contextual links. The Copilot / cluster articles on tygartmedia.com use 3 to 5 related posts in the same topical group, descriptive anchors. Do this after the post has a real topic and a real category, not before.
wp-full-refresh. Runs SEO + AEO + GEO + schema + interlink in that sequence on one existing post. This is the “do everything to this post” skill. Use it when the audit already said the post is worth the pass.
New content, not just refreshes
content-brief-builder. Keyword research to a brief, before anyone writes. Feeds the pipeline. A brief that cannot name the query, the intent, the PAA list, and the internal-link targets is not a brief.
wp-content-pipeline. Draft to live: write → SEO → AEO → GEO → schema → taxonomy → interlink → publish. Toolbox order. Same six-step human workflow as the New Article Publishing page, encoded as a skill chain.
content-quality-gate. Pre-publish. Unsourced claims and fabricated numbers get flagged. Run this before any publish, batch or single. The operator guide’s failure mode is the same: fake density backfires when an AI system checks you.
A Pro session on one site
Connect. Audit. Clean polluted excerpts.
Fix taxonomy on the posts you are about to touch (and on the hub category if it has no description).
For each chosen existing post: wp-full-refresh, or the layers by hand in SEO → AEO → GEO → schema → interlink order.
For a new article: brief → pipeline → quality gate → publish.
IndexNow on every URL you created or updated. Confirm in Bing Webmaster Tools.
The operator guide’s weekly rhythm still applies if you are using Pro on a real site: Monday audit, Tuesday to Thursday execute, Friday verify. Pro is the toolkit. It is not a retainer.
What Pro still does not include
Agency adds three reference guides (SEO, AEO, GEO), wp-content-expand (deepen thin posts without overwriting), and wp-new-site-setup (client onboarding). If you are onboarding other people’s sites every week, that is the Agency door. If you want Will to run the posts instead of running skills, that is SiteBoost.
If you want the packaged files
You can run every layer above in the block editor with a checklist. Buy Now is the 14 .skill files delivered by email after checkout. Same Square button at the top. $79.
Starter is the five-skill on-page subset if you only need connect / audit / SEO refresh. Agency is this stack plus onboarding and expansion.
Secure checkout via Square — all major cards accepted
You can copy this method and run it across more than one WordPress site yourself. Buy Now is the 19 packaged Claude skill files plus the three reference guides, so your own Claude can onboard a site, expand thin posts, and run the full stack.
Agency is the top tier of the WordPress SEO Skill Pack. $149. The live sales page lists 19 skills: everything in Pro, plus an SEO reference guide with schema templates, an AEO reference guide, a GEO reference guide, wp-content-expand, and wp-new-site-setup. The thesis on the launch page: genericized versions of the production wp- skills, no client credentials, placeholders you fill with your own Application Passwords.
What “agency” means here
Not a Tygart Media retainer. The pack is for someone who already has (or is about to have) more than one self-hosted WordPress site and wants the same connect → audit → refresh → publish machine on each. The 23-site stack article is the operating picture: one Application Password per site, one audit at the start, skills composed so a full refresh is a named sequence instead of a vibe.
Requirements stay the same: Claude Pro / Max / Team, REST API on, Application Password, no plugin required. Install the files in Claude Desktop (Cowork) or Claude Code. Connect per site. Do not reuse one app password across clients.
Onboard a site (wp-new-site-setup)
The 23-site article times a new site at about 20 minutes: generate the Application Password, add the site to your registry, run the setup / audit skill, and the stack is usable. wp-new-site-setup is that onboarding workflow. By hand, the same steps are:
Create an Application Password for an editor-capable user. Label it with the client and the date.
wp-connect. users/me = 200.
wp-site-audit. Full published-post inventory. Critical / High / optimization lists.
Note the SEO plugin (Yoast, Rank Math, AIOSEO) because meta fields differ. A WeConvene audit note in Notion called this out: a skill that only knows Yoast / Rank Math will miss AIOSEO fields.
Write the four baseline artifacts from the SiteBoost audit page: inventory, schema gaps, FAQ gaps, before numbers in Search Console.
Agree the first ten posts or the first briefs before anyone writes. Agency without a queue is just a folder of skills.
Toolbox rule you should keep: posts, not pages, unless the client put a Page in writing. Do not “clean up” the homepage on day one.
Expand thin posts (wp-content-expand)
This is the Agency skill Pro does not have. Never overwrite. Fetch with context=edit. Flag sections under 150 words, intros under 100, missing subtopics, missing examples, outdated stats, missing close. Add 250 to 400 words per new section. Append. Update the modification date because you actually changed the content. Report the word-count increase. The skill’s own bar: get the post over 500 words before you pretend it has SEO authority.
Then run the Pro refresh stack on the expanded post. Expansion without SEO / AEO / GEO / schema is just a longer stub.
The Pro stack, still the daily work
Once a site is onboarded, Agency work is Pro work, repeated:
wp-seo-refresh → wp-aeo-refresh → wp-geo-refresh → wp-schema-inject → wp-interlink, or wp-full-refresh to run that chain.
wp-taxonomy-fix, including the two-layer category / tag descriptions if archive pages are stubs.
content-brief-builder → wp-content-pipeline → content-quality-gate for new articles.
wp-clean-meta whenever an excerpt is polluted.
The three reference guides are the templates sitting next to those skills: SEO (on-page + schema templates), AEO (direct-answer / FAQ / PAA), GEO (entities, density, speakable, citations). Use them as the written standard when more than one person is allowed to run a refresh. If the guide and the skill disagree, the skill’s field list wins for execution; the guide wins for “what good looks like.”
A week across more than one site
Same rhythm as the operator guide, scoped to a roster:
Monday: per-site audit score. What is still Critical. This week’s existing posts and this week’s briefs, named by URL and keyword.
Tuesday to Thursday: expand anything under 500 words that you committed to, then full-refresh. New articles through the pipeline and the quality gate.
Friday: Rich Results Test, IndexNow, log. One log line per URL. If you cannot say what changed, it did not ship.
Monthly, not weekly: taxonomy health, orphan scan, meta-pollution scan, Search Console versus last month. That is the maintenance layer from the 23-site article. Do not burn a week on dashboards.
IndexNow on every publish and every update. Official plugin or Rank Math / Yoast Instant Indexing. Confirm in Bing Webmaster Tools. Agency volume without a ping is a lot of work the engines have not been told about.
What this pack is not
It is not SiteBoost. SiteBoost is Will (or Tygart Media) doing the work on the site. This pack is the skill files so you can do it.
It is not the $297 Connection and Audit service, the $597 pilot, or the $997 retainer. Those are done-for-you doors. The methods on those pages are the same layers. The deliverable is different.
It is not a prompt pack of 50 one-liners. The launch page’s distinction: workflows with error handling and a report, genericized from production skills.
If you only have one site and you only need on-page, Starter is enough. If you have one site and you want the full refresh + pipeline, Pro is enough. Agency is the onboarding + expansion + reference-guide tier.
If you want the packaged files
You can run every step in this article with Application Passwords and a checklist. Buy Now is the Agency zip: 19 skills and the three reference guides, delivered by email after checkout, placeholders only, no one else’s credentials. Same Square button at the top. $149.
If you would rather not run Claude at all, buy the matching SiteBoost service instead of this pack.
Secure checkout via Square — all major cards accepted
You can copy this method and run a ten-post pilot yourself. Buy Now is Will connecting the site, picking the ten, running the three-layer pass on each, and sending the 60-day impact report.
The Square catalog names this SKU “Connection + 10 Posts.” The /siteboost/ hub calls it the best-value door at $597. The public vertical pages (law firms and the rest of the cluster) spell out the same package: Site Connection and Audit, ten existing-post optimizations, and a 60-day impact report. They price the pieces at $767 if you bought them separate ($297 audit + 10 × $47). The bundle is the cheaper way to get a first measured pass.
What the pilot is, and is not
It is a retrofit of ten published posts. SEO + AEO + GEO + schema on each. Changes via the WordPress REST API. No plugin left behind. Results looked at around day 60. It is not a retainer, not a redesign, and not ten brand-new articles. New Article Publishing is a different SKU. The monthly retainer is the ongoing door after you like the pilot.
Self-hosted WordPress only. Squarespace, Wix, and Webflow are out. Posts, not Pages, unless you put a specific Page in writing.
How to run the pilot yourself
Week 0. Connect and baseline
Do the connection and audit first. The method is on the Site Connection and Audit page. Short version:
Create a WordPress Application Password (Users → Profile). Not the login password.
Test GET /wp-json/wp/v2/users/me with that user and app password. If that fails, stop. Nothing else will work.
Pull published posts (per_page=100, paginate if you have more). Inventory every post: title, slug, word count, excerpt/meta, categories, tags, featured image, internal links in, internal links out, schema present or not, FAQ present or not.
Write four artifacts and keep them. Content inventory. Schema gap report. FAQ gap report. Before baseline (the numbers you will compare at day 60: rankings and impressions you can actually see in Search Console, plus a note on AI visibility if you check Perplexity / ChatGPT / AI Overviews on a few queries).
wp-site-audit’s priority stack: Critical = taxonomy and metadata problems. High = SEO / AEO / content quality. Then link and expansion opportunities. Use that order when you pick the ten.
Pick the ten
Highest-opportunity existing articles, with your approval before anyone starts rewriting. That is the rule on the public SiteBoost pages. A practical pick list, from the same audit fields:
Posts that already get impressions but have empty meta, no FAQ, and no schema. Those move first.
Posts over 500 words that are still missing the AEO and GEO layer. Do not spend the pilot on stubs.
Posts that sit on a real query (you can name the keyword). Skip diary posts and leftover test content.
A mix across your actual topic pillars, not ten posts from one tag.
Write the ten URLs down. Get a yes. Then do not swap them mid-pilot unless a post is broken.
Weeks 1 to 3. Ten existing-post passes
For each of the ten, run the same method as Existing Post Optimization:
SEO: title 50 to 60, slug, meta 140 to 155, H2/H3, keyword in the first 100 words.
AEO: 40 to 60 word definition box, question H2s with 40 to 60 word answers, 6 to 8 FAQ pairs, FAQPage JSON-LD.
Article schema. Validate. Two to five internal links into the rest of the cluster. IndexNow on the update.
Sequence on a single post is SEO, then AEO, then GEO, then schema, then interlink. That is wp-full-refresh. Do not GEO a post whose title and meta are still empty.
If a chosen post is under 500 words, expand it first (append real sections, do not overwrite) or swap it for a thicker post on the same topic. Thin content wastes a slot.
Day 60. Impact report
The public pages measure three things: traditional rankings and impressions, People Also Ask / snippet placements, and AI citation visibility. Pull Search Console for the ten URLs (and the queries they were aimed at) versus the before baseline. Recheck the same AI prompts you wrote down in week 0. Do not invent a win. If nothing moved, say so. The report is the point of a pilot. You are deciding whether a retainer is worth it.
Traditional SEO on competitive terms is often 60 to 90 days. The same pages note that FAQPage / PAA and some AI crawlers can show sooner (they cite 2 to 4 weeks for PAA). Treat those as ranges from the public SiteBoost copy, not a guarantee.
What you should have on disk at the end
Connection notes (site URL, that an app password was created, who holds it).
The four audit artifacts from week 0.
The list of ten URLs and the before/after for each (title, meta, word count, FAQ count, schema types).
The 60-day comparison. What moved, what did not, what you would do next (more existing posts, new articles, or stop).
If you want Will to run the pilot
You can do every step above with an Application Password and a spreadsheet. Buy Now is the packaged pilot: Will connects, audits, agrees the ten with you, runs the three layers on each post, and sends the 60-day impact report. Same Square button at the top. $597.
After a pilot you like, the Monthly Retainer is 10 existing-post passes plus 4 new articles per month. If you only need the connection and the baseline, buy Site Connection and Audit. If you only need one post touched, buy Existing Post Optimization.
Secure checkout via Square — all major cards accepted
You can copy this method and publish the article yourself. Buy Now is Will researching, writing, optimizing, and publishing one new WordPress post for you.
SiteBoost New Article Publishing is a new post, not a refresh of something already live. The /siteboost/ hub prices it at $97 per article. The same three layers as an existing-post pass still apply. You just start from a brief instead of from a published URL.
The six-step workflow
This is the unified content workflow from the operator’s guide on tygartmedia.com. One draft. SEO, AEO, and GEO built in. Not three versions of the same piece.
1. Keyword and intent
Name the target query. Classify intent: informational, navigational, commercial, or transactional. Look at what already ranks and match the format Google is already rewarding. This step is ordinary SEO. Do not skip it because you are “writing for AI.”
2. Question landscape
Search the keyword. Collect People Also Ask questions, related searches, and autocomplete variants. Group them. Those groups become H2s and FAQ items. The operator guide budgets 15 to 20 minutes here. This is the AEO setup. If you skip it, you will write headings that feel like an outline and not like queries.
3. Write with the direct-answer pattern
Write the article once, with both SEO and AEO in the draft:
Primary keyword in the H1 and in the first 100 words.
Every major section is a question-shaped H2, then a 40 to 60 word answer, then the depth.
Internal links with descriptive anchors to posts that already exist on the site. If the site is new and there is nothing to link to, note the gaps. Do not invent destinations.
A 40 to 60 word definition box near the top.
The WordPress Publish skill’s quality bar before anything goes live: title 50 to 60 characters with the primary keyword, meta 140 to 160 characters, a unique H1, at least one direct-answer section, a FAQ with 3 to 5 Q and As on a new article (SiteBoost existing-post passes use 6 to 8; for a new article start at 3 to 5 and add more if the PAA list is real), Article JSON-LD, FAQPage JSON-LD, and at least one cited fact per major section.
4. GEO enhancement
After the draft exists, do a factual-density pass. The operator guide budgets 20 to 30 minutes on a 1,500-word article. For every claim: a number, a date, a named organization, or cut it. The citing-sources article is the house rule:
Name the organization in the text, not only in a hyperlink.
Link the primary source. If it is paywalled, link a credible secondary that cites it.
Put a sources list at the bottom.
Show a last-updated date near the byline.
Put datePublished and dateModified in Article schema.
Do not add fake statistics to look dense. The operator guide calls that out as a backfire when AI systems cross-check you.
5. Schema
Minimum on a new SiteBoost article: Article (or BlogPosting) plus FAQPage. Add HowTo if the piece is genuinely step-by-step. Add BreadcrumbList if the theme does not already emit it. Add Speakable on the definition box and one other self-contained block. JSON-LD in the post, validated with Google’s Rich Results Test. The schema injection sprint is the same sequence: pick the type, generate valid JSON-LD, inject, validate, fix failures.
SiteBoost content standards also embed an LLMS.txt HTML comment on the page. A short seed paragraph, not a second article.
6. Pre-publish audit, then publish
Run the three-layer checklist. Title, meta, headings, snippet readiness, factual density, schema validation, entity signals. Then publish as a post, not a page.
The production pipeline used on Tygart Media sites is: brief (content-brief-builder) to draft to SEO to AEO to GEO to schema to taxonomy to interlink to publish (wp-content-pipeline). content-quality-gate sits in front of publish and flags unsourced claims. You can do that as a human checklist if you are not running Claude skills.
Taxonomy and internal links
Assign 1 to 2 categories that are real content pillars, never Uncategorized. Assign 5 to 10 tags that cover topic, use case, audience, and format. That is the wp-taxonomy-fix rule. Then place 3 to 5 internal links to related posts in the same cluster, plus outbound links to the sources you named. Hub and spoke. The new post should not be an orphan on day one, and it should not be a dead end.
IndexNow
On publish, ping IndexNow. Official plugin, or Rank Math / Yoast Instant Indexing. Confirm the URL in Bing Webmaster Tools. New posts that sit in a sitemap waiting for a crawl waste the first week.
What “done” looks like on one new article
Brief: target keyword, intent, PAA list, existing internal-link targets, sources you will actually cite.
Draft written with definition box, question H2s, and sourced facts.
Title 50 to 60, meta 140 to 160, slug clean.
FAQ section + FAQPage schema. Article schema with both dates.
Categories and tags set. 3 to 5 internal links. Sources list.
Rich Results Test pass. IndexNow ping. Status = publish (or draft if you want a human read first).
Self-hosted WordPress only. Squarespace, Wix, and Webflow are not this SKU. Do not modify existing Pages to “make room” for the article. Publish a post.
If you want Will to write and publish it
You can run the six steps in your own editor. Buy Now is the packaged, done-for-you article: Will writes it, runs the three layers, publishes it to your site, and emails you the URL. Same Square button at the top. $97 per article.
A single new post next to a neglected library is a weak play. If the existing posts are empty of FAQ, schema, and meta, optimize those first (Existing Post Optimization, or the Pilot Bundle for ten). If the site is not connected yet, start with Site Connection and Audit.
Secure checkout via Square — all major cards accepted
You can copy this method and do it yourself on one published WordPress post. Buy Now is Will running the same three-layer pass on that post and pushing the changes live for you.
SiteBoost Existing Post Optimization is one post, already on your site. Not a new article. Not a redesign. The public SiteBoost pages call this the post-publish layer: SEO, then AEO, then GEO, written back through the WordPress REST API. No plugin install. Self-hosted WordPress only.
What you are optimizing
Pick one published post (post type post, not a Page). Fetch it. Read it as it sits today. Then run three passes in this order. The operator guide on tygartmedia.com is explicit: the layers are concentric, not three separate rewrites. One piece of content. Structure, density, and markup.
Pass 1. SEO
This is the foundation. Do not skip it to chase snippets or AI citations. The SiteBoost vertical pages and the wp-seo-refresh skill agree on the same fields:
Title tag. Primary keyword front-loaded. Target 50 to 60 characters. This is the H1 / browser title, not a clever headline that hides the query.
Slug. Lowercase, hyphenated, keyword-rich. Change it only if the current slug is junk. If the post already ranks on the old URL, leave the slug and add a redirect if you must change it.
Meta description. 140 to 155 characters on the SiteBoost sales pages, 155 to 160 in the wp-seo-refresh skill. Write a real sentence a human would click. Empty meta is the most common miss.
Heading structure. Real H2 / H3 hierarchy. No skipped levels. No H2 that is just a label with no answer under it.
Primary keyword in the first 100 words.
Note internal link opportunities. You will place them after the GEO pass, not while you are still rewriting the title.
Workflow from wp-seo-refresh: fetch the post with context=edit, analyze current on-page SEO, name the target keyword from the actual topic, generate the new title / meta / headings, write the post back, then report what changed.
Pass 2. AEO
Answer Engine Optimization. Same post. Restructure so a featured snippet or a People Also Ask box can lift a clean answer.
Add a 40 to 60 word definition box near the top. One sentence that answers “what is this?” without a wind-up.
Turn implied questions into H2s. Under each H2, put a 40 to 60 word direct answer, then the depth.
Add 6 to 8 FAQ pairs that match real People Also Ask questions for the topic. The older WordPress Publish skill used 3 to 5. The SiteBoost vertical pages use 6 to 8. Use 6 to 8 on a SiteBoost-style pass.
Add FAQPage JSON-LD for those pairs. Question and acceptedAnswer. Valid markup, not a plugin dump.
wp-aeo-refresh also looks for list-shaped answers and natural-language replies a voice result can read. If a section is a process, a numbered list beats a paragraph.
Pass 3. GEO
Generative Engine Optimization. Make the post citable by ChatGPT, Perplexity, Claude, Gemini, and Google AI Overviews.
Entity saturation. Name the real organizations, standards, statutes, places, and tools the topic depends on. Entity density, not keyword stuffing.
Factual density. Replace “many companies” and “studies show” with a named source and a number you can actually point to. If you cannot name the source, cut the claim. The citing-sources article on tygartmedia.com is the rule: name the organization in the text, link the primary source, put a sources list at the bottom.
Speakable blocks. Short, self-contained sentences an AI or a voice assistant can lift without the rest of the page.
LLMS.txt as an HTML comment. A seed paragraph the page can carry for LLM citation signals. SiteBoost content standards put this on every page.
Visible last-updated date near the byline, and dateModified in Article schema that matches a real edit. Do not bump the date without changing the content.
wp-geo-refresh also asks for context richness (define the term, do not just mention it) and semantic clarity (connect related concepts in the same section).
Schema and IndexNow
After the three passes, the post should carry Article JSON-LD (headline, author, publisher, datePublished, dateModified) plus FAQPage. BreadcrumbList if the theme does not already emit it. Validate with Google’s Rich Results Test before you walk away. The schema injection sprint on tygartmedia.com is the same rule: pick the type the content actually is, inject JSON-LD, validate, fix failures.
Then tell the engines the URL changed. IndexNow: official WordPress plugin, or the IndexNow / Instant Indexing toggle in Rank Math or Yoast. Confirm the ping in Bing Webmaster Tools. A publish or an update that nobody recrawls is a pass you did for yourself.
What you do not touch
Posts, not Pages. SiteBoost does not rewrite service pages, bios, or the homepage unless someone asked in writing. Do not install a plugin to do this. Do not empty the excerpt into raw JSON. If the excerpt is polluted, strip it (that is the wp-clean-meta job) and write a real meta description.
A honest one-post checklist
Current title, slug, meta, word count, FAQ count, schema present or not. Write those six lines down. That is your before.
SEO pass. Title, slug, meta, headings, first 100 words.
Two to five internal links to related posts on the same site, descriptive anchors, plus one or two outbound links to primary sources.
Validate schema. Ping IndexNow. Write the after: new title, new meta, new word count, FAQ count, schema types.
If the post is under 500 words, expand it before you call the SEO pass done. wp-content-expand’s rule: find H2s under 150 words, add 250 to 400 words of real section, append, do not overwrite. Thin posts do not earn the AEO or GEO layer.
If you want Will to do this post
You can run the three passes in the block editor this afternoon. Buy Now is the packaged, done-for-you version: Will connects, refreshes that one existing post through the REST API, and emails you what changed. Same Square button at the top of this page. $47 per post.
If you have ten posts that all need this, the Pilot Bundle is the volume door. If you do not have a connection or a baseline yet, start with Site Connection and Audit. This SKU assumes the post already exists and you already know which one.
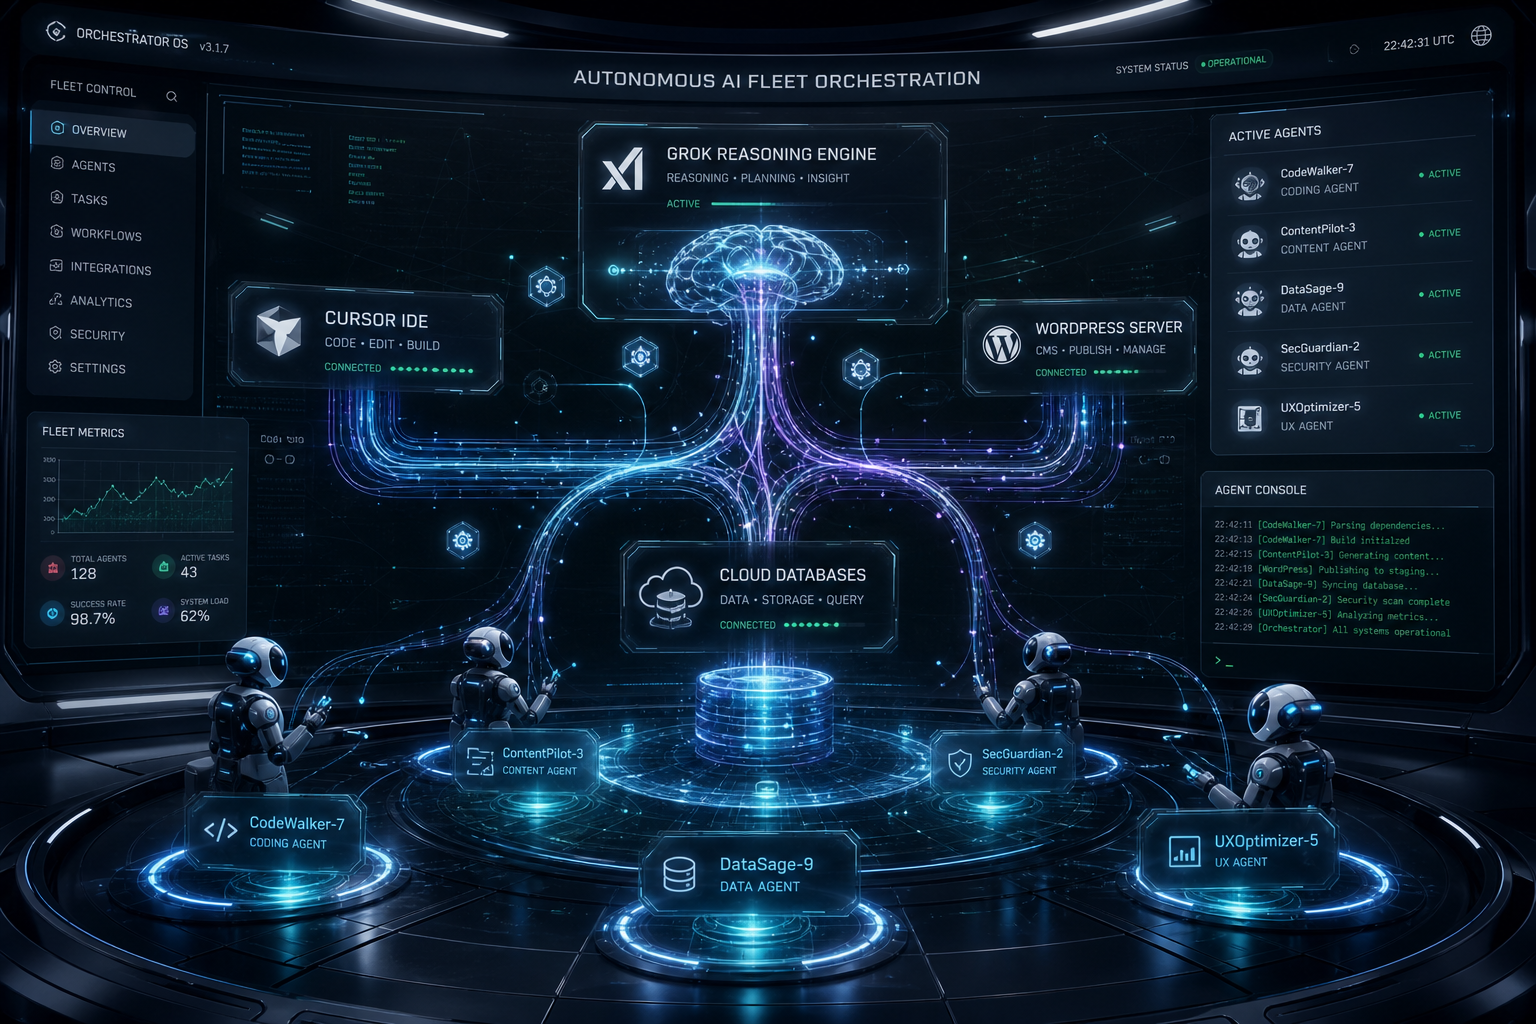
Most “AI stack” articles hand you a list of tools. This one is about the wiring between them, because that is where the leverage lives. After running a multi-brand content operation end to end – research, writing, publishing, and distribution to a couple dozen destinations – one lesson keeps repeating: the tools are commodities, and the connective tissue is the moat. Here is the whole machine, and how the pieces talk to each other.
One machine, four jobs
One machine, four jobs.
The stack has four jobs: capture an idea, produce the content, remember everything, and distribute it where both people and AI engines will find it. Miss any one and the system stalls.
1. Intelligence and intake
The front door is an “AI as PR team” intake: you drop a raw thought, a link, or a voice memo, and the model turns it into the right shapes – an outline, a short post, a full brief. A lightweight signal scraper watches a professional network for the language practitioners actually use and feeds those angles back as prompts, so the writing starts from how people really talk instead of a blank page.
2. Production
Claude is the reasoning engine. A content pipeline turns a brief into a structured article; an image model generates the visuals; and a set of “beat desks” – small scheduled agents, each owning one topic – research, draft, quality-gate, and self-publish to WordPress through its REST API. Every desk has a freshness gate: if there is nothing genuinely new and sourceable, it skips the run rather than manufacture filler. A clean skip is a successful run.
3. Record and state
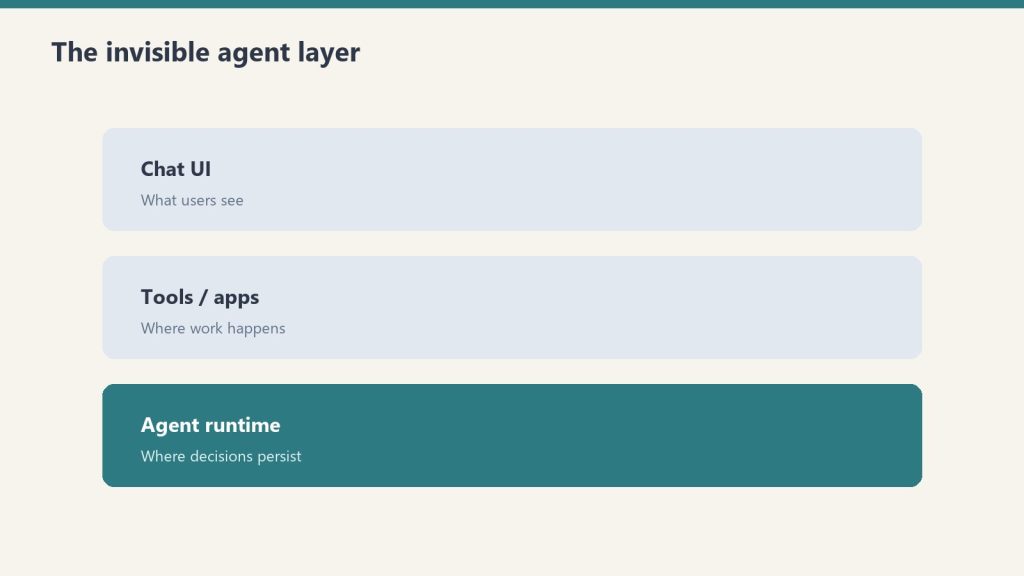
Notion is the control plane – the registries, the per-desk specs, the run logs, the system of record. The governing principle is load-bearing: the model is not the runtime. Claude supplies judgment; durable execution lives on schedulers and cloud jobs; Notion holds the state. Separate those three and the machine keeps running whether or not anyone is watching it.
4. Distribution and grounding
This is the layer most stacks forget, and the one that compounds. Publishing to your own site is half the job; the other half is getting that content into the indexes search engines and AI assistants actually read. Two moves do the heavy lifting. First, IndexNow pings the Bing index the moment anything changes – that is how new and updated content gets grounded fast instead of waiting on a crawl. Second, a social scheduler fans a tailored post out to a professional network – a personal profile plus company pages – drafted first for human approval, never blasted.
Here is the part worth internalizing: that professional network matters far more than its follower count suggests, because it is one of the most-cited domains in AI answers. Since it flows into the same index that feeds AI grounding, every post is also a citation asset. You are not chasing likes – you are seeding the corpus that AI engines quote back to the next person who asks.
The loop that compounds
The loop that compounds.
The layers are not a straight line; they form a loop. A researched social post is a compressed seed. Crack it open into a full article cluster – a core piece, audience-specific variants, an FAQ, schema, internal links – publish those, then queue the new URLs back to the scheduler as future posts. Social feeds the site; the site feeds social; both feed the grounding layer. Content you already made becomes the raw material for what you make next.
Why every layer optimizes for citation
Why every layer optimizes for citation.
AI engines do not cite broad overviews. They cite operational specifics, head-to-head comparisons, and fresh, dated facts. So the whole stack is tuned for that: specific over general, “this versus that” where it genuinely helps a reader decide, and same-day freshness on anything that changes. The pages that earn the most citations are the least glamorous – the exact limits, the real configuration, the honest comparison – because those are the answers nobody else keeps current.
The honest edges
This is maintained, not magic. Long-form articles on a professional network have no public API, so that step is a manual paste – and it happens to be the most citation-valuable format, which means the highest-value action is also the least automatable one. Auth tokens expire and quietly break distribution until someone notices. Account IDs drift, so you verify live before any bulk action. The wiring is powerful precisely because keeping it wired is real work.
No, but you need to be comfortable wiring tools together – connecting an API, editing a config file, reading a log. The reasoning model closes much of that gap, but the operator still has to understand how the pieces connect.
Why optimize for Bing and not just Google?
Because the AI assistants people increasingly ask their questions to are grounded substantially on the Bing index. Winning that index is how you get cited in AI answers – a different and faster game than ranking on a traditional results page.
Is the social distribution automated?
The drafting is. Publishing is draft-first: the system stages every post for a human to approve before it goes live. Automation writes; a person decides.
How We Automated Our Newsroom Using Claude 4.6 in 48 Hours
Tygart Media does not employ a massive bullpen of writers frantically refreshing Twitter for AI news. Instead, we built an autonomous newsroom powered by Claude 4.6.
The Architecture
We use a custom Omni-Brain system hooked into n8n. Our “Beat Desk” constantly scrapes Reddit and X for developer sentiment. When a high-signal trend is detected, Claude 4.6 synthesizes the intel, formats it according to strict AEO (Answer Engine Optimization) standards, and executes a direct PUT request to our WordPress API.
The result? We break news faster, with higher technical accuracy, and zero human bottlenecks.
The Architecture of Delegation: Moving Beyond the Chat Interface
The architecture of delegation — beyond the chat interface.
I spent today wiring Claude Code to boss around the Gemini CLI, clearing a 1,256-post WordPress tagging backlog without a single hallucinated tag. If you operate an agency or manage technical strategy at any reasonable scale, you already know the fundamental truth about current AI tools: the chat interface is a massive bottleneck. Copying, pasting, and waiting for a typing animation isn’t a workflow; it’s theater. Real, scalable throughput requires system-to-system communication and architectural delegation.
The goal for today wasn’t just to write a python script. The goal was to establish a functional hierarchy between two distinct AI systems operating locally on my machine. Claude Code, operating directly in my terminal, would act as the lead engineer and orchestrator. It would handle the logic, map out the API calls, write the Python bridges, and manage the error handling. Gemini, accessed via its official command-line interface, would act as the high-context, high-throughput worker.
The setup was brutally simple but effective. I installed the Gemini CLI using a standard node package manager command (npm install -g @google/gemini-cli) and authenticated it with a Google One AI Ultra account. This gave my local environment direct, command-line access to Google’s most capable models without needing to manage raw API keys or custom curl requests. From there, Claude Code was instructed to shell out via bash, calling the gemini command non-interactively to pass massive data payloads for processing, and then ingesting the structured output back into the orchestration pipeline.
It is an assembly line in the truest sense. Claude builds the machinery and defines the parameters; Gemini operates the heavy press, stamping out classifications at a volume that would break a standard chat context window.
Quantifying the Backlog and the Taxonomy Threat
Before you throw compute at a problem, you have to measure it accurately. I directed Claude to run a full audit of tygartmedia.com using the native WordPress REST API. The numbers came back clean, but the scale of the maintenance debt was daunting.
Total published posts: 2,529 individual pieces of content.
SEO infrastructure: RankMath confirmed healthy and active across the board.
Existing tag vocabulary: 931 distinct, strategically established tags.
The deficit: 1,256 posts sitting entirely untagged, orphaned from the site’s primary taxonomy.
In the past, solving this was a lose-lose proposition. It was either a job for a junior employee spending three agonizing weeks in the wp-admin panel, or it was a job for a messy automated script that inevitably hallucinates a thousand new, slightly misspelled tags. When you let an LLM tag 1,256 posts without strict, physical constraints, you don’t get an organized site. You get “Marketing”, “marketing”, “digital-marketing”, and “Digital Marketing Strategy” added as four completely separate taxonomy terms, permanently bloating your wp_terms table and diluting your internal link equity.
The constraint I set for this pipeline was absolute. The system had to read the 1,256 untagged posts, assign 5 to 8 highly relevant tags to each post, and only use tags from the exact 931-item vocabulary we already had. Zero deviation. Zero hallucination. If a perfect tag didn’t exist in the vocabulary, the system had to settle for the closest existing match rather than inventing a new one.
The Pilot Test and the Strict JSON Constraint
We started small to validate the pipeline. Claude pulled a pilot batch of 10 untagged posts from the WordPress API, along with the complete, raw list of 931 acceptable tags. It packaged this massive block of text into a single, dense prompt and fired it over to the Gemini CLI.
The instruction was clear and unforgiving: read the text of the posts, evaluate them against the vocabulary, and return ONLY a valid JSON object. I did not want markdown formatting. I did not want a polite introductory sentence. I needed a raw JSON string mapping each specific post_id to an array of its assigned tag IDs.
If you’ve spent any significant time wrestling with large language models, you know that asking for strict adherence to a vocabulary and strict, unformatted JSON output is exactly where things usually break down. Models inherently want to chat. They want to explain their reasoning. They want to invent a 932nd tag because it felt slightly more semantically accurate for a specific paragraph.
Gemini didn’t flinch. It processed the prompt and returned a raw, perfectly formatted JSON string directly to the standard output. Claude parsed it in memory, validated the suggested tags against the local vocabulary list, and found a 100% match rate. Every single tag suggested by Gemini was real. There was no conversational filler, no missing structural brackets, and no invented taxonomy. Claude immediately took that JSON, formatted the correct POST requests, and pushed the updates back to WordPress via the REST API.
Scaling Up: Hitting the Windows Bottlenecks
With the pilot completely successful, it was time to scale. Processing 1,256 posts one by one is inefficient, both in terms of time and system calls. We grouped the remaining posts into chunks of 25. This meant Claude would need to loop through roughly 50 distinct batches. For each batch, it would dynamically construct the prompt with the 931 tags and the 25 new post payloads, call Gemini, parse the resulting JSON, and patch the WordPress database.
That is where the friction started. Building a local orchestration pipeline means you are no longer just dealing with AI limitations; you are dealing with local OS limits. Windows had two specific, technical walls waiting for us.
Failure 1: WinError 2 (File Not Found)
The initial Python orchestration script used the standard subprocess.run(['gemini', '-p', prompt]) command to invoke the CLI. It failed almost immediately with a WinError 2. The issue? When npm installs global packages on a Windows machine, it doesn’t create a raw binary; it creates a .cmd wrapper. Python’s subprocess module doesn’t automatically resolve these wrappers unless you pass shell=True, which introduces a host of security and string parsing headaches. The clean, robust fix was forcing Claude to locate the executable and use the absolute, fully qualified path to gemini.cmd in the subprocess call. It’s a minor detail, but one that breaks entire automation pipelines if you don’t know what you’re looking at.
Failure 2: “The command line is too long”
Once the executable actually resolved, the script crashed again on the very first batch. Windows threw a fatal error: “The command line is too long.” Windows enforces a strict character limit on command-line arguments—roughly 8,191 characters depending on the exact environment. Our dynamically generated prompt, containing the full text of 25 blog posts and 931 taxonomy terms, hovered around 20KB. Trying to pass that payload via the standard -p argument flag was physically impossible for the operating system to handle.
The solution was architectural. Instead of trying to cram the prompt into an argument, Claude rewrote the Python script to pipe the prompt directly into Gemini’s standard input (stdin). By restructuring the workflow to write the 20KB payload to a temporary text file on disk, and then piping it via a standard input redirect (gemini < prompt.txt), we bypassed the OS argument limit entirely. The data flowed, and the pipeline spun back up to full speed.
The Verdict: The Orchestrator vs. The Worker
The orchestrator vs the worker.
Watching this script hum through 50 consecutive batches crystalized a specific, actionable opinion about the current state of local agentic workflows. You do not need one god-model to do everything; you need specialized roles operating within a hierarchy.
Claude Code is unmatched as an orchestrator. It understands the local filesystem, it navigates REST API documentation with ease, it writes robust, defensive Python, and it can dynamically debug Windows-specific OS errors on the fly. But using Claude for the repetitive, high-volume, token-heavy classification of thousands of posts is an expensive and slow use of a strategic brain. It is the equivalent of having your lead architect nailing drywall.
Gemini, operating locally via its CLI, proved to be the ultimate high-throughput worker. It absorbed the massive context window of 931 tags and 25 full articles simultaneously, over and over again, without degrading in quality. It maintained absolute discipline over the JSON output structure across 50 separate invocations. It didn’t need to understand how the WordPress API worked, and it didn’t need to know how to write Python. It only needed to process the classification task it was handed and get out of the way.
When Gemini acts as the worker and Claude acts as the boss, you get the absolute best of both architectures. You get the system-level problem-solving and environmental awareness of Claude, combined with the raw, reliable, high-context processing power of Gemini.
Tomorrow’s Takeaway
Tomorrow’s takeaway.
If you operate an agency and have a massive backlog of unstructured data—whether it is untagged content, uncategorized financial transactions, or messy CRM records—stop trying to fix it manually inside a browser window. The chat interface is dead for real, scalable work.
Tomorrow, install an agentic CLI like Claude Code. Give it access to a high-context execution model via a secondary CLI, like Gemini. Tell the orchestrator to write a local script that batches your data, hands the batches to the execution model, forces a strict, structured JSON return, and posts the results directly back to your database or CMS. Expect the script to break on local OS limits. Fix the pipes, use standard input instead of arguments for massive payloads, and let the machines clear the backlog while you focus on actual strategy.
What OpenRouter actually is: A routing and policy layer that sits between your code and AI model providers. It replaces the place where you’d otherwise write direct API calls to Anthropic or Vertex AI, adding budget caps, guardrails, prompt-injection filtering, PII redaction, model fallbacks, and observability hooks — with access to hundreds of models behind one unified endpoint. It does not replace your memory system, your hosting environment, your operator console, or the models themselves.
The 30-second version
OpenRouter is one of the most useful AI infrastructure tools we’ve adopted, but the value lives at exactly one layer of the stack: the model-calling layer. It replaces the place where you’d otherwise write fetch("https://api.anthropic.com/...") or call Vertex AI directly. It does not replace your memory system, your hosting environment, your operating console, or the models themselves. Get that framing wrong and you’ll build a house of cards. Get it right and you’ve added budget controls, guardrails, observability, and hundreds of models with one config change per agent.
This is how we use it across a stack that runs 27+ WordPress client sites, autonomous content pipelines, multi-model decision tools, and an autonomous behavior promotion system. None of this is theory. Every number in this article comes from our own usage logs.
What OpenRouter actually is
What OpenRouter actually is — a router, not a model.
Strip away the marketing and OpenRouter is a routing and policy layer for AI model calls. You point your code at one endpoint — openrouter.ai/api/v1/chat/completions — and OpenRouter handles model selection, provider fallback, budget enforcement, content filtering, and observability.
It is not a model. It is not a runtime. It is not a database. It is a smarter middle layer between your code and the dozens of providers whose models you might want to call.
The mistake we almost made early on was framing it as “replace GCP and Notion with this.” That framing is wrong in a specific way that’s worth naming: OpenRouter has no servers, no operational memory, no execution environment, no isolated network. It has hundreds of models behind one API and a thoughtful policy layer in front of them. That’s the entire product, and it’s enough — at the right layer.
The 5-layer hierarchy nobody tells you about
The five-layer hierarchy nobody tells you about.
When you log into OpenRouter, the UI presents a flat set of menus. The actual mental model — the one that maps to real operational decisions — is a five-layer hierarchy:
Organization is the top. Sovereign billing and member context. We run two: one personal, one for Tygart Media. The personal org has 48 API keys and a balance; the Tygart Media org has empty balance but exposes Members management that personal accounts can’t access. If you’re operating as an agency, you want the agency org as primary so you can add seats.
Workspaces sit inside organizations. They’re segmented domains for guardrails, BYOK provider keys, routing rules, and presets. Most accounts run on a single Default Workspace and never think about this layer. The moment you operate across multiple businesses with different data policies, workspace segmentation becomes a real decision.
Guardrails are workspace-level enforcement policies. Four categories: Budget Policies, Model and Provider Access, Prompt Injection Detection, and Sensitive Info Detection. By default they’re all unconfigured, which means your workspace has no enforced budget cap, no provider restrictions, and no PII filtering. This is fine until it isn’t.
API Keys are per-agent identity. Each key carries a credit cap, a reset cadence, and a guardrail overlay. The mental model that matters: one autonomous behavior = one API key. If a scheduled task starts hemorrhaging tokens, the cap on its key contains the damage to that key alone.
Presets are versioned bundles of system prompt, model, parameters, and provider config. You call them as "model": "@preset/name" in any API call. They’re the closest thing OpenRouter has to a software release artifact — a thing you can version, test, and roll back.
That hierarchy is the entire operational surface. Everything you’d want to do with the platform happens at one of those five layers. Confuse them and you’ll spend hours hunting for a setting that lives at a different tier than you think.
What OpenRouter replaces (and what it doesn’t)
The honest answer: OpenRouter replaces the direct API call. Nothing more, nothing less.
In our case, every scheduled task, every skill that calls a model, every Claude Project — all of them used to make direct calls to Anthropic’s API or Vertex AI. OpenRouter sits in front of those calls and adds budget caps, guardrails, prompt-injection filtering, PII redaction, model fallbacks, observability hooks, and access to a model catalog of hundreds of options instead of the handful any single provider exposes.
What it does not replace:
Your memory system. Notion remembers; OpenRouter doesn’t. OpenRouter’s logs are call-level telemetry — what model was called, what it cost, what the response was. That’s not operational memory. It can’t tell you “this customer pitch was sent three weeks ago and got no response.” For that, you need a real second brain.
Your hosting environment. OpenRouter has no servers, no WordPress, no database, no VPC. If you’re running a fortress architecture on GCP — VPC isolation, Cloud SQL, Cloud Run services — none of that goes away. OpenRouter sits next to that infrastructure, not in place of it.
Your operator console. Wherever you actually do the work — Claude in chat, your terminal, your IDE — that surface stays. OpenRouter is a transport layer for model calls, not a place you live.
The models themselves. OpenRouter is one path to reach Anthropic’s Claude; Vertex AI is another; the direct Anthropic API is a third. They’re interchangeable transports. The model is the model.
Mapping OpenRouter to an autonomous behavior system
Here’s where the framing gets interesting. We run an autonomous behavior system where every long-running task — a scheduled content pipeline, an SEO audit, a publishing job — sits on a promotion ledger that tracks its trustworthiness over time. Tier C behaviors run autonomously. Tier B requires a human in the loop. Tier A is proposal-only.
OpenRouter maps to that system with almost no friction:
Each behavior becomes a versioned Preset — system prompt, model, parameters, all bundled and versioned.
Each preset is bound to its own API Key with a monthly credit cap and reset cadence.
That key sits under a Workspace whose Guardrail enforces the appropriate data policy.
Observability is broadcast to a webhook that writes back to the operational memory layer.
The result: when a behavior misbehaves — hits its spend cap, trips a policy violation, gets blocked by Sensitive Info Detection — the failure is auto-logged at the routing layer and surfaced to the operator console. The promotion ledger row catches the gate failure and demotes the behavior automatically.
This is the concrete answer to a question every operator running autonomous AI work eventually asks: how will I know when something goes wrong? The answer is: you build the routing layer so that going wrong is itself a signal.
The 270/238 reality check
A small piece of grounding before we go further. As of mid-May 2026, our personal OpenRouter org showed a balance of $31.93 remaining of $270 total credits purchased. That’s $238.07 of actual usage across roughly two months. Spread across 48 API keys, that’s an average of about $5 per key.
The highest-spend key was a testing key at $83.26. The next was a development key at $33.05. Most keys had spent less than $1. That distribution tells you something true about real-world AI operations: a handful of behaviors do most of the work, and the long tail of agents barely registers.
We mention this for one reason: if you’re evaluating OpenRouter, the cost is not the story. The cost is small. The story is whether the policy layer is worth wiring into your stack. Our answer is yes — but the work of wiring it is real, and it requires you to first understand what layer you’re wiring.
The Cloud Run reality
One real-world note that any production team needs to internalize: when we ran AI calls from Cloud Run services on GCP, we occasionally hit 402 responses from OpenRouter that we did not hit when calling Anthropic’s API directly from the same services. We don’t have conclusive evidence of where the issue originated — Cloud Run’s egress IP ranges are widely shared and trip fraud-detection thresholds at many providers, including direct calls to first-party APIs. The lesson is not about OpenRouter specifically. The lesson is that production routing requires deployment-context testing.
Our policy now: for services where reliability is mission-critical, we maintain a fallback path that can switch routing layers under failure. OpenRouter is the default. Direct Anthropic is the fallback. The decision logic lives in the service itself, not in OpenRouter’s config. This is defense in depth, not a critique of any one provider.
The standing rule we wish we’d had earlier
The standing rule we wish we had earlier: budgets before routing.
In March 2026 we ran a security audit on 122 Cloud Run services and discovered five of them had hardcoded OpenRouter API keys baked into environment variables — all sharing the same key. We stripped the keys, rotated, and re-scanned to zero. Then we wrote a standing rule into operational memory:
OpenRouter is off-limits for any task without explicit per-task permission. Image generation always goes through Vertex AI.
The reason for the second half of that rule deserves naming. Image generation via OpenRouter is technically possible, and the model variety is appealing. But image calls are expensive, latency-sensitive, and easy to fire by accident in a loop. One misconfigured behavior can drain a development budget in a single session. Vertex AI’s first-party image generation runs through GCP service accounts with project-level budget alerts, which gives us a natural circuit breaker. We use OpenRouter for the right jobs. We use Vertex for image work.
This is the kind of operational rule you only write after you’ve lost money to a runaway script. Save yourself the lesson.
When OpenRouter is the right answer
Use OpenRouter when:
You want model variety and a unified API across providers
You need workspace-level budget caps that work across many keys
You want PII detection and prompt-injection filtering at the routing layer instead of in every service
You need observability broadcast to your existing stack (we ship to webhooks)
You’re running an autonomous behavior system that needs per-agent identity and per-agent budget enforcement
You want the option to swap models without redeploying code
When it isn’t
Don’t reach for OpenRouter when:
You only call one model from one app and don’t need policy enforcement
You need single-digit-millisecond latency (the extra hop matters)
You’re running image generation at scale (use the first-party provider directly)
You need network isolation guarantees that only your own infrastructure can provide
You’re deploying from an environment with shared egress IPs to a provider that flags those ranges (test first)
The bottom line
OpenRouter is excellent at exactly one thing: being a thoughtful policy layer between your code and the AI models you call. Don’t ask it to be more than that. Don’t replace your memory, hosting, console, or models with it. Wire it into the model-calling layer of an existing system that already has those other pieces sorted, and you get budget controls, guardrails, observability, and hundreds of models with about a day’s worth of integration work.
The framing that works: the model layer of an existing system. Not the system itself.
If you’re operating multiple autonomous AI behaviors and you don’t yet have per-agent budget caps and per-agent observability, OpenRouter is probably the fastest path to getting them. If your stack is one app calling one model, you’re paying for complexity you don’t need yet.
Going deeper
This pillar is the operator’s overview. Each of the five layers and the major workflows we built on top of OpenRouter has its own deep dive:
OpenRouter is a routing and policy layer for AI model API calls. It sits between your application code and AI providers like Anthropic, OpenAI, and Google, providing one unified API endpoint that handles model selection, budget enforcement, guardrails, fallback routing, and observability across hundreds of models from dozens of providers.
Does OpenRouter replace direct Anthropic or OpenAI API calls?
Yes, that’s exactly what it replaces. Your code calls one endpoint (openrouter.ai/api/v1/chat/completions) instead of provider-specific endpoints. The model is selected via a parameter rather than the URL. Everything else about your stack — your memory system, hosting, and operator console — stays the same.
Can OpenRouter replace GCP, Notion, or my hosting infrastructure?
No. OpenRouter is a routing layer for model calls. It has no servers, no database, no operational memory, and no network isolation. If you’re running a fortress architecture on GCP with VPC isolation, Cloud Run services, and Cloud SQL, OpenRouter sits alongside that infrastructure, not in place of it.
How expensive is OpenRouter in practice?
For most operational workloads the platform fee is negligible compared to the underlying model costs. Our personal organization spent $238 over roughly two months across 48 API keys serving multiple autonomous behaviors. The distribution is heavily skewed — a few keys do most of the work, and the long tail barely registers. Cost is rarely the decision factor; the policy layer is.
What is the right way to think about OpenRouter API keys?
One autonomous behavior, one key. Each key gets its own credit cap and reset cadence. When a scheduled task starts hemorrhaging tokens, the cap on its key contains the damage to that key alone. Sharing one key across all services is the single fastest way to lose visibility and bound risk.
Should I use OpenRouter for image generation?
We don’t. Image generation runs through first-party providers (Vertex AI in our case) where project-level budget alerts give a natural circuit breaker. Image calls are expensive, latency-sensitive, and easy to fire by accident in a loop. The routing layer is for text-completion workloads where the policy benefits compound.
What’s the deal with Cloud Run and OpenRouter 402 errors?
Cloud Run egress IP ranges are widely shared, and they sometimes trip fraud-detection thresholds at various providers — including direct calls to first-party APIs, not just OpenRouter. The lesson is that production routing requires deployment-context testing. Maintain a fallback path that can switch routing layers under failure, and you’ve got defense in depth instead of a single point of failure.