Penetration testing — also known as ethical hacking or pen testing — is a controlled cyberattack simulation conducted against an organization’s systems, networks, and applications to identify exploitable vulnerabilities before malicious actors do. This visual guide provides a comprehensive gallery of penetration testing environments, tools, methodologies, and deliverables used by cybersecurity professionals worldwide. With average engagement costs ranging from $10,000 to $100,000+ for enterprise assessments, penetration testing represents one of the highest-value services in the cybersecurity industry.
Penetration Testing Photo Gallery: Tools, Environments, and Methodologies
The following images document the complete penetration testing lifecycle — from the Security Operations Center where monitoring begins, through the ethical hacker’s workstation and toolkit, to the executive boardroom where findings are presented to stakeholders. Each image represents a critical phase of a professional penetration testing engagement.


The Five Phases of Penetration Testing
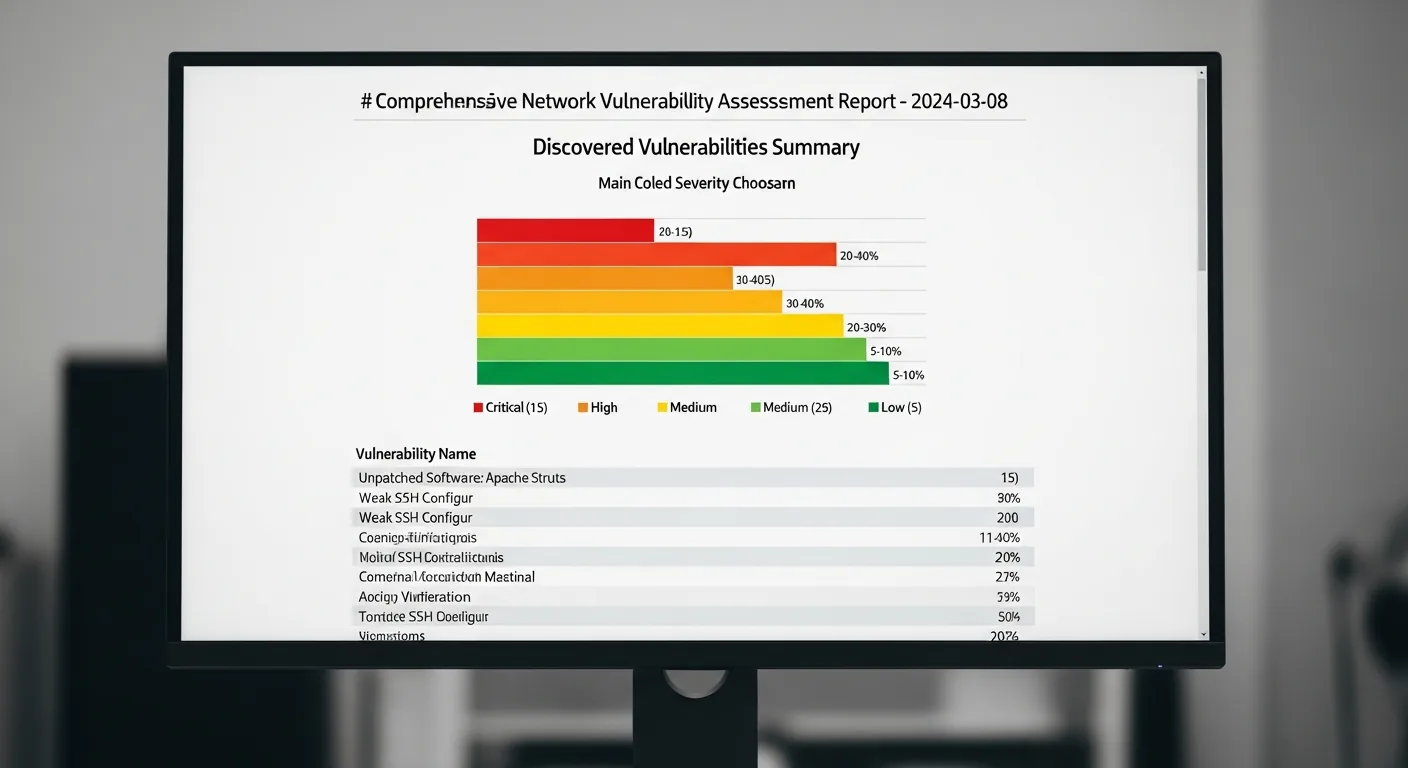
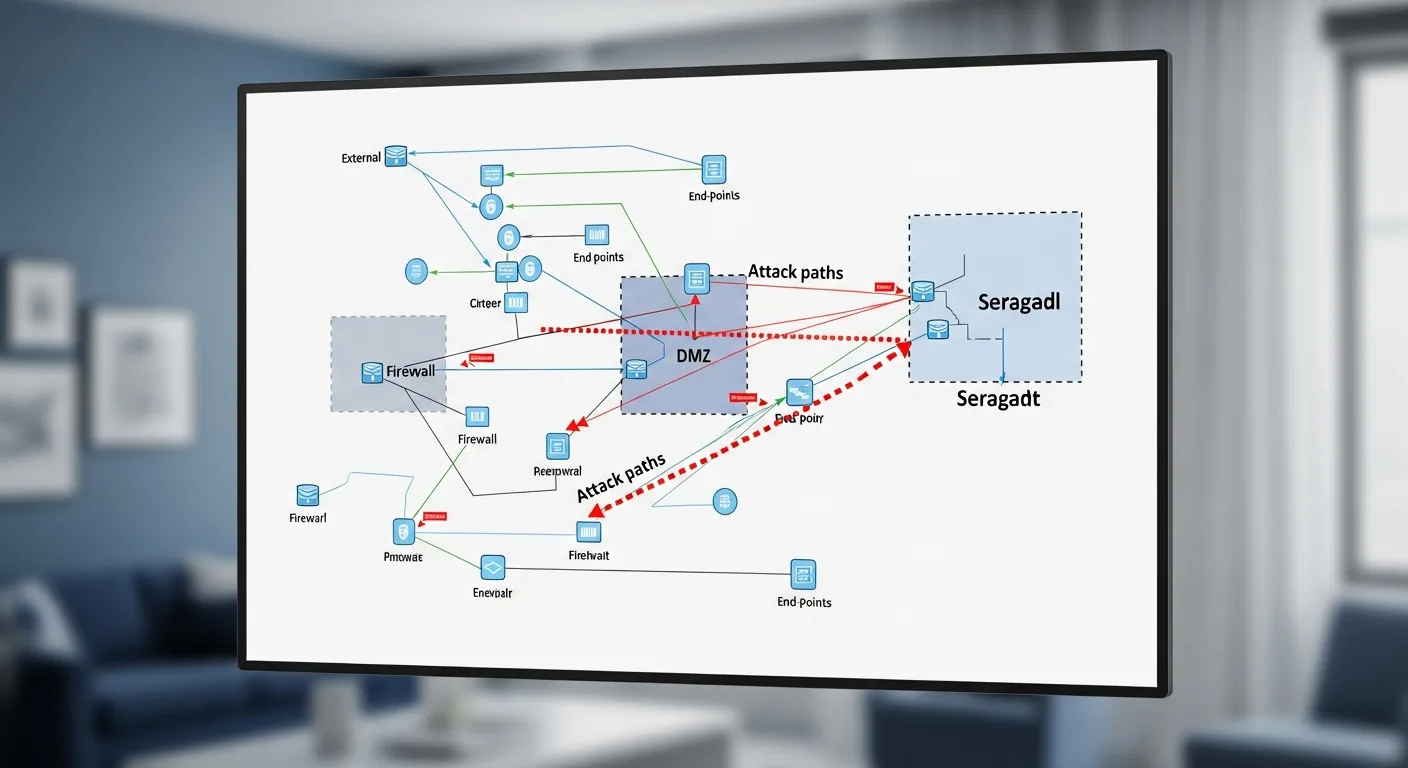
Professional penetration testing follows a structured methodology defined by frameworks like the PTES (Penetration Testing Execution Standard) and OWASP Testing Guide. The five phases are: Reconnaissance (passive and active information gathering about the target), Scanning (port scanning, vulnerability scanning, and service enumeration using tools like Nmap and Nessus), Exploitation (attempting to breach identified vulnerabilities using frameworks like Metasploit), Post-Exploitation (privilege escalation, lateral movement, and data exfiltration simulation), and Reporting (documenting findings with CVSS severity scores and remediation recommendations).
Red Team vs Blue Team: Adversarial Security Testing
Beyond traditional penetration testing, many organizations conduct red team engagements — extended adversarial simulations where an offensive team (red) attempts to breach the organization’s defenses while the defensive team (blue) works to detect and respond to the attacks in real time. Purple team exercises combine both perspectives, with the red team sharing techniques and the blue team improving detection capabilities. These exercises test not just technical controls but also the organization’s incident response procedures, employee security awareness, and communication protocols under pressure.
Essential Penetration Testing Tools and Equipment
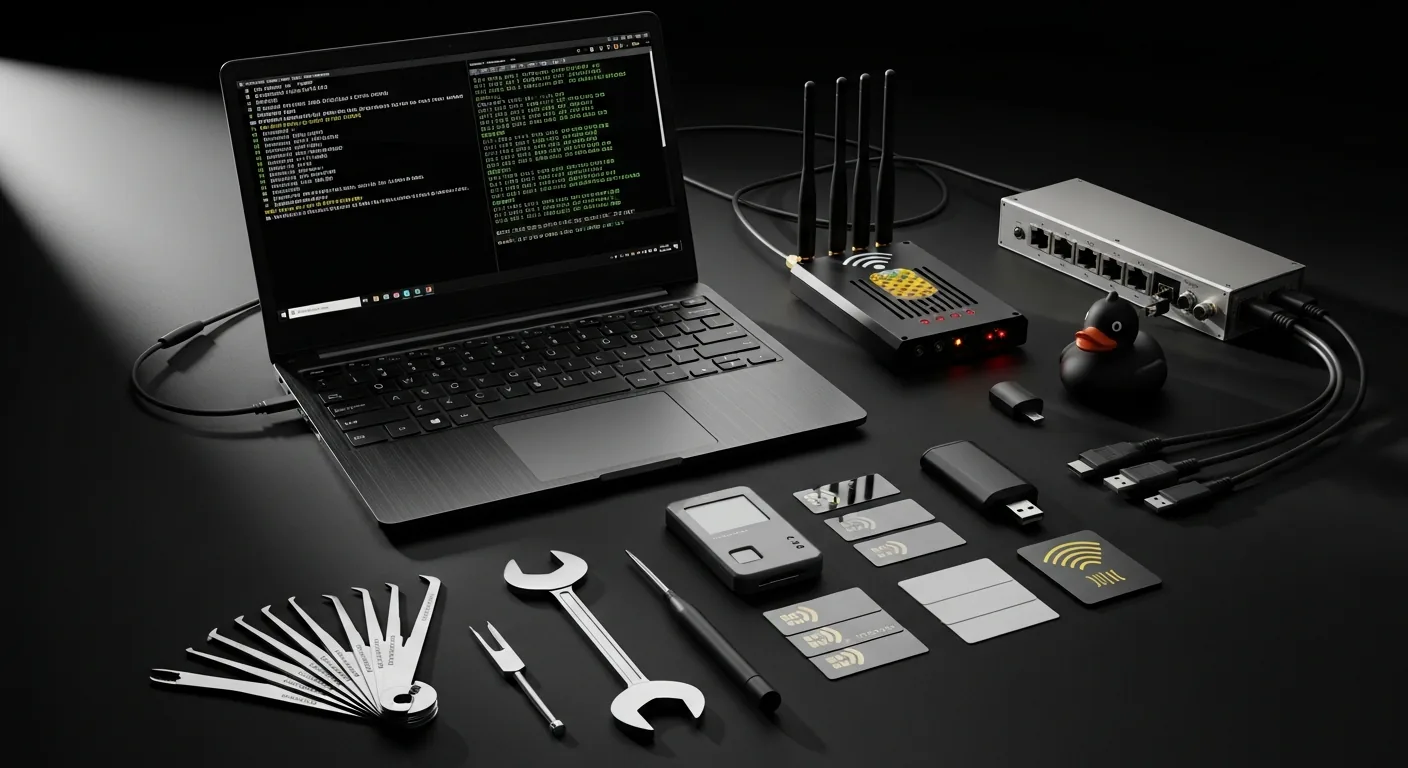
A professional penetration tester’s arsenal includes both software and hardware tools. On the software side, Kali Linux serves as the primary operating system, bundling over 600 security tools including Burp Suite for web application testing, Metasploit for exploitation, Wireshark for network analysis, and John the Ripper for password cracking. Physical penetration testing adds hardware devices like the WiFi Pineapple for wireless attacks, USB Rubber Ducky for keystroke injection, Proxmark for RFID cloning, and traditional lock picks for physical access testing. The complete toolkit shown in this gallery represents approximately $5,000-$15,000 in equipment investment.
Frequently Asked Questions About Penetration Testing
How much does a penetration test cost?
Penetration testing costs vary significantly based on scope, complexity, and the type of assessment. A basic web application pen test typically ranges from $5,000 to $25,000. A comprehensive network penetration test for a mid-size enterprise costs $15,000 to $50,000. Red team engagements with physical testing, social engineering, and extended timelines can exceed $100,000. Organizations in regulated industries like healthcare (HIPAA), finance (PCI DSS), and government (FedRAMP) often require annual penetration testing as a compliance requirement.
What is the difference between a vulnerability scan and a penetration test?
A vulnerability scan is an automated process that identifies known vulnerabilities in systems using databases like the CVE (Common Vulnerabilities and Exposures) list — it finds potential weaknesses but does not attempt to exploit them. A penetration test goes further by having skilled security professionals actively attempt to exploit those vulnerabilities, chain multiple findings together, and demonstrate the real-world impact of a successful attack. Vulnerability scans cost $1,000-$5,000 and take hours; penetration tests cost $10,000-$100,000+ and take days to weeks.
How often should an organization conduct penetration testing?
Industry best practice and most compliance frameworks recommend penetration testing at least annually, with additional testing after significant infrastructure changes, application deployments, or security incidents. Organizations handling sensitive data should consider quarterly testing. PCI DSS requires annual penetration testing and retesting after significant changes. Many mature security programs implement continuous penetration testing programs that combine automated scanning with periodic manual assessments.
What certifications should a penetration tester hold?
The most respected penetration testing certifications include OSCP (Offensive Security Certified Professional), widely considered the gold standard due to its hands-on 24-hour exam; GPEN (GIAC Penetration Tester) from SANS; CEH (Certified Ethical Hacker) from EC-Council; and CREST CRT/CCT recognized internationally. For web application testing specifically, the OSWE (Offensive Security Web Expert) and BSCP (Burp Suite Certified Practitioner) are highly valued. When selecting a penetration testing firm, verify that their testers hold at minimum OSCP or equivalent hands-on certifications.
![Water Damage Restoration Photos — Complete Visual Guide [2026]](https://tygartmedia.com/wp-content/uploads/2026/03/water-damage-flooded-living-room.webp)