Model Context Protocol (MCP) is the most important infrastructure development in Claude’s ecosystem in 2026. It’s an open standard for connecting AI models to external tools, data sources, and services — replacing fragmented one-off integrations with a universal interface. This guide explains what MCP is and how to set up your first server.
What Is MCP?
What is MCP?
MCP defines a universal interface: any tool that implements the MCP server specification can connect to any AI application implementing the MCP client specification. Build once, connect anywhere. Before MCP, connecting Claude to external systems required custom integration code for every integration — and none of it worked across different AI tools.
MCP Architecture
MCP Host: The AI application (Claude desktop, Claude Code, your custom app)
MCP Client: Built into the host; manages connections to servers
MCP Server: Lightweight program exposing tools, resources, or prompts
Setting Up MCP in Claude Desktop
Setting up MCP in Claude Desktop.
Go to Settings → Developer → Edit Config. Add your server configuration:
Current flagship: Claude Opus 4.7 (claude-opus-4-7). Current models: Opus 4.7 · Sonnet 4.6 · Haiku 4.5. Claude Opus 4.7 (claude-opus-4-7) is the current flagship as of April 16, 2026. Where this article references Opus 4.6 or earlier models, those references are historical. See current model tracker →. See current model tracker →
Claude AI · Fitted Claude
The Claude API gives you programmatic access to Claude in your own applications and scripts. This guide gets you from zero to a working integration in Python or JavaScript.
message = client.messages.create(
model="claude-sonnet-4-6",
max_tokens=1024,
system="You are a helpful customer support agent for Acme Corp.",
messages=[{"role": "user", "content": "How do I reset my password?"}]
)
Streaming Responses
Streaming responses.
with client.messages.stream(
model="claude-sonnet-4-6",
max_tokens=1024,
messages=[{"role": "user", "content": "Write a 500-word blog post about AI."}]
) as stream:
for text in stream.text_stream:
print(text, end="", flush=True)
Model Selection
Model
String
Best For
Claude Opus 4.6
claude-opus-4-7
Complex reasoning, coding
Claude Sonnet 4.6
claude-sonnet-4-6
Balanced everyday tasks
Claude Haiku 4.5
claude-haiku-4-5-20251001
Fast lightweight tasks
Frequently Asked Questions
How much does the Claude API cost?
Pricing is per token (input and output separately). Check anthropic.com/pricing. Haiku is cheapest, Sonnet offers the best cost/quality balance for most applications.
Do I need a Claude subscription to use the API?
No. API access is separate. Create an Anthropic Console account and pay per token used.
Installing a crawl space vapor barrier is the most DIY-accessible component of a full encapsulation system — and the one that saves the most money if done correctly. Material cost for a 1,200 sq ft crawl space is $480–$2,400 depending on barrier quality; professional labor for barrier installation alone is $1,000–$2,500. The $1,000–$2,500 in potential savings is real, but only if the installation is done correctly. Improperly installed barriers — unsealed seams, missed penetrations, inadequate wall coverage — provide significantly less protection than a properly installed system. This guide covers the complete installation process step by step.
Materials and Tools Needed
Inspection is a sequence, not a vibe.
Materials
Vapor barrier: Minimum 12-mil reinforced polyethylene (for a full encapsulation; 6-mil is insufficient for most real-world crawl spaces). Calculate quantity: crawl space square footage × 1.35 to account for wall coverage and seam overlaps. For a 1,200 sq ft crawl space: 1,200 × 1.35 = 1,620 sq ft of barrier material needed.
Seam tape: Compatible reinforced polyethylene tape designed for vapor barrier seaming — not duct tape, not standard packing tape. Must be labeled as compatible with the barrier material. Budget: 4–6 rolls of 3″ × 180′ tape for a 1,200 sq ft crawl space.
Mechanical fasteners: Hammer-drive concrete anchors or Hilti pins (powder-actuated) for fastening the barrier to the foundation wall at the top edge. Alternatively, a construction adhesive compatible with polyethylene.
Wall termination strip: A plastic or aluminum channel that holds the top edge of the barrier against the wall and provides a clean termination line. Optional but provides a more professional finished appearance.
Pipe penetration seals or tape: Pre-cut penetration seals or compatible tape for sealing around pipes, conduit, and columns.
Backer rod: For sealing large gaps at the floor-wall joint before applying the barrier.
Tools
Utility knife with extra blades (barrier material dulls blades quickly)
Tape measure and chalk line
Hammer drill with concrete bit (for mechanical fasteners)
Seam roller or J-roller (a wallpaper seam roller) for pressing seam tape firmly
Knee pads
Bright LED work light
N95 respirator, Tyvek coveralls, gloves, and eye protection
Phase 1: Preparation (Day 1, 2–4 hours)
Measure before you argue about mold.
Clear the Crawl Space
Remove everything from the crawl space floor that would create a puncture hazard or prevent full barrier coverage: old vapor barrier material, rocks and concrete rubble, construction debris, and any stored items. Knock down or smooth sharp concrete protrusions from footings and foundation walls. This preparation step is often skipped by quick-service installers but is essential — sharp debris beneath the barrier causes punctures that undermine the entire installation.
Remove Old Insulation (If Present)
Deteriorated fiberglass batt insulation between floor joists must be removed before installing a new vapor barrier. Old insulation harbors mold, pest material, and moisture — leaving it above the vapor barrier creates a micro-environment that defeats the moisture control the barrier is intended to achieve. Use heavy-duty contractor bags for removal; expect 4–8 bags for a 1,200 sq ft crawl space. This is unpleasant work but non-negotiable for a quality installation.
Identify and Plan for All Penetrations
Walk the crawl space and identify every penetration through the barrier that will be needed: foundation piers, support columns, plumbing pipes, and electrical conduit. Plan the barrier strips to minimize the number of cuts required around each penetration — in many cases, placing the barrier strip to approach a column from one direction allows a simpler cut than if the column is in the middle of a strip.
Begin at the wall farthest from the access point. This allows the installation to progress toward the exit — you will not be crawling over freshly installed, untaped barrier material as you work. Unroll the first strip from the back wall across the crawl space toward the front.
Wall Coverage
The barrier must extend up the foundation wall — not just cover the floor. The minimum wall coverage is 6 inches above the visible soil or moisture line; 12 inches is better practice; the full height of the foundation wall is best practice for a complete encapsulation. At the back wall:
Unroll the barrier strip to extend up the back wall to your target height
Secure the top edge to the wall using hammer-drive anchors or construction adhesive, spaced every 12–18 inches
The barrier lies flat on the ground from the base of the wall toward the access end
Seam Overlapping and Taping
Each subsequent strip overlaps the previous strip by a minimum of 12 inches — 18–24 inches is better practice. The overlap seam is the most critical quality point in the installation. Apply seam tape as follows:
Ensure both surfaces at the seam are clean and dry before taping — dust and moisture prevent adhesion
Apply the tape centered on the overlap, pressing it firmly down the entire length of the seam
Use a seam roller or J-roller to apply firm pressure along the entire tape length — hand pressure alone is insufficient for long-term adhesion
Check every seam after taping by attempting to lift the tape at multiple points — it should be firmly adhered with no lifting edges
Sealing Around Penetrations
Every penetration through the barrier is a potential moisture pathway. For each penetration:
Round pipes and conduit: Cut an X or cross in the barrier, pull the flap up around the pipe, and seal with compatible tape wrapped around the pipe and adhered to the barrier surface. Pre-cut penetration seals (rubber pipe collars with adhesive flanges) provide cleaner results for round penetrations.
Square columns and piers: Cut the barrier to the perimeter of the pier base. Apply tape along all four sides where the barrier meets the pier surface — press firmly with the seam roller.
Odd-shaped penetrations: Use a combination of cuts, patches, and tape to achieve a continuous sealed barrier around the penetration. Take extra time on these — they are the most common point of future moisture intrusion.
Completing the Side and Front Wall Coverage
As each strip is laid, the side walls must also be covered. Cut barrier strips to run up the side walls and tape them to the edge of the floor strips. The barrier should cover all ground-contact surfaces — walls included — to create a true continuous envelope. The front wall (nearest the access) is done last, with the barrier running up and being secured at the top edge near the access opening.
Phase 3: Quality Check Before Closing
Containment first — then removal.
Before the access door is closed, conduct a final walkthrough:
Inspect every seam — no lifting tape edges, no gaps in the overlap
Inspect every penetration — tape fully adhered on all sides
Inspect wall attachment — barrier secured at top, no gaps at floor-wall junction
Photograph the completed installation from multiple angles and distances — this creates your baseline documentation for future inspections and any warranty claims
How long does it take to install a crawl space vapor barrier yourself?
For a solo homeowner in a standard-height (36″+) crawl space: 2–3 full days for a 1,200 sq ft crawl space, including preparation and cleanup. Low-clearance crawl spaces (under 24″) are significantly slower — add 50–100% to time estimates. Working with one other person reduces time by approximately 30% and significantly reduces the difficulty of handling full barrier rolls in a confined space.
How do I calculate how much vapor barrier I need?
Measure the crawl space floor area. Multiply by 1.35 to account for seam overlaps and wall coverage (assuming 12″ of wall coverage on all sides). For a 1,200 sq ft crawl space: 1,200 × 1.35 = 1,620 sq ft of barrier material. Add 10% for waste from cuts around penetrations in complex crawl spaces. Most barrier products are sold in standard roll sizes (e.g., 10′ × 100′ = 1,000 sq ft per roll) — purchase in the next roll increment above your calculated need.
What is the best tape for sealing crawl space vapor barrier seams?
Use tape specifically designed and labeled for vapor barrier seaming — typically a reinforced polyethylene tape or a butyl rubber tape compatible with the barrier material. Do not use standard duct tape (it fails in temperature and humidity extremes), packing tape, or general-purpose seam tape. Products from companies like Nashua, Poly-America, and the barrier manufacturers themselves typically offer compatible seam tape. Confirm compatibility on the packaging — some premium barriers require manufacturer-specific tape to maintain the product warranty.
Extended thinking is Claude’s most powerful reasoning mode — and the one most people never use correctly. This guide explains what extended thinking does, when it genuinely improves outputs, how to enable it, and when you’re better off with a standard prompt.
What Is Extended Thinking?
What is extended thinking?
Extended thinking gives Claude a dedicated reasoning phase before generating its final response. Claude works through a problem on “scratch paper” before writing its answer — exploring multiple approaches, identifying errors in its own reasoning, and building a more deliberate chain of thought. On current Claude models (Fable 5, Opus 4.8, Sonnet 4.6), this works through adaptive thinking — Claude dynamically decides when and how much to think based on problem complexity, instead of you setting a fixed token budget.
When Extended Thinking Genuinely Helps
When extended thinking genuinely helps.
Complex math and logic problems requiring step-by-step reasoning
Multi-step coding tasks with many interdependent components
Strategic analysis requiring weighing many variables
Difficult research synthesis where accuracy matters most
Any task where “think step by step” would help — extended thinking does this automatically
When Extended Thinking Is Overkill
Simple factual questions with clear answers
Routine writing tasks (emails, summaries, short copy)
Format conversion or data transformation
Tasks where speed matters more than depth
How to Enable Extended Thinking
How to enable extended thinking.
In Claude.ai: Look for the thinking toggle before sending your message.
Via API (current models — Fable 5, Opus 4.8, Sonnet 4.6): Use adaptive thinking and let Claude decide the depth:
The effort parameter — low, medium, high, xhigh, or max — controls how much Claude thinks and how many tokens it spends. Default is high. Use xhigh for coding and agentic work; low for fast, simple tasks. (xhigh is available on Fable 5 and Opus 4.7+; max on Opus-tier 4.6+ and Sonnet 4.6.)
⚠ budget_tokens is deprecated. The old "thinking": {"type": "enabled", "budget_tokens": N} form returns a 400 error on Fable 5, Opus 4.7, and Opus 4.8. It is deprecated but still functional on Opus 4.6 and Sonnet 4.6. Only legacy models (e.g. Sonnet 4.5) still require it, where budget_tokens must be less than max_tokens. For all new code, use adaptive thinking plus effort instead.
What You See During Extended Thinking
In claude.ai, Claude shows a collapsed “thinking” section before its response. Expand it to see the reasoning chain — useful for verifying logic or understanding how Claude approached a problem. The thinking section is exploratory and may contain dead ends; this is normal.
Via API, on Fable 5, Opus 4.7, and Opus 4.8 the thinking text is omitted by default (the blocks stream but their text is empty). To see summarized reasoning, request "thinking": {"type": "adaptive", "display": "summarized"}.
Claude’s memory feature changes the product from a stateless chatbot into something that actually knows you. Without memory, Claude starts from zero every conversation. With memory configured, Claude builds a growing knowledge base about you that it draws on automatically. This guide explains how it works and how to get the most from it.
How Claude Memory Works
How Claude memory works.
Claude’s memory is an auto-synthesized knowledge base. Approximately every 24 hours, the system reviews recent conversations and extracts facts, preferences, and patterns worth remembering — then stores those as structured memory entries. Memory is separate for Projects vs. standalone conversations — each Project has its own memory space.
What Claude Can Remember
Your name, role, and professional context
Preferred communication style and tone
Ongoing projects and their context
Tools, frameworks, and workflows you use
Output format preferences
Things you’ve asked Claude not to do
How to Configure Memory
How to configure memory.
In Claude.ai, go to Settings → Memory. You’ll see auto-generated memory entries. You can review, edit, delete, or manually add memories. You can also instruct Claude directly: “Remember that I prefer bullet points” or “Don’t forget my target audience is non-technical executives.”
Memory vs. Project Instructions
Memory vs project instructions.
Project instructions are static — written once, apply to every conversation. Memory is dynamic — evolves as Claude learns. Use Project instructions for consistent role context. Use memory for personal preferences and evolving project context.
CLAUDE.md for Claude Code
For Claude Code, place a CLAUDE.md file in your project root. Claude Code reads it at the start of every coding session. Use it for: project architecture, coding standards, common patterns, known issues. This is the most powerful memory tool for developers.
Frequently Asked Questions
Does Claude remember everything I say?
No. Memory synthesizes and stores key facts and preferences, not verbatim conversation logs. It’s selective — designed to capture what’s useful.
Can I delete Claude’s memories about me?
Yes. Go to Settings → Memory in Claude.ai to view and delete any memory entries.
The most common question new Claude users ask: can Claude generate images? The direct answer is no — Claude cannot create images from text prompts. But Claude’s actual image-related capabilities are extensive and genuinely useful. This guide covers everything Claude can and cannot do with images.
What Claude Cannot Do: Image Generation
What Claude cannot do — image generation.
Claude is a text-based AI model. It cannot generate, create, or render images of any kind. Use these tools instead: Midjourney (best quality artistic/photorealistic), DALL-E 3 (via ChatGPT), Adobe Firefly (strong for commercial use), Stable Diffusion (open-source, runs locally), or Imagen (via Gemini).
What Claude CAN Do With Images
What Claude can do with images.
Image Analysis and Description
Upload any image and Claude analyzes it in detail — describing content, identifying objects, reading text, interpreting charts, and answering specific questions about visual content.
Text Extraction from Images
Upload a photo of a document, whiteboard, or screen and Claude extracts and transcribes the text — including handwriting, unusual fonts, and partial visibility.
Chart and Data Interpretation
Upload a chart or visualization and Claude interprets the data, identifies trends, extracts specific values, and explains what the visualization shows.
SVG Generation
Claude generates SVG graphics — scalable vector graphics written as code that render as visual output. Useful for diagrams, icons, and simple visualizations. This is code-based, not AI image generation.
Image Generation Prompts
Claude writes excellent prompts for image generation tools. Describe what you want and ask for “a detailed Midjourney prompt” — Claude understands the syntax and conventions of major image tools.
Claude Projects are the most underutilized feature on paid Claude plans. Without Projects, every new conversation starts from scratch. With Projects, you create persistent knowledge bases that Claude draws on automatically. This guide shows you how to set up Projects that actually improve your work.
Claude Projects Features by Plan (June 2026)
Feature
Free
Pro ($20/mo)
Team ($25/seat)
Enterprise
Projects available
No
Yes
Yes
Yes
Number of Projects
—
Unlimited
Unlimited
Unlimited
Files per Project
—
Up to 20 files
Up to 20 files
Custom
Custom instructions
No
Yes
Yes
Yes
Shared Projects (team)
No
No
Yes
Yes
Persistent context
No
Yes
Yes
Yes
What Claude Projects Do
What Claude Projects do.
Persistent system prompts: Instructions Claude follows in every Project conversation
Knowledge base files: Documents, PDFs, and data Claude references without re-uploading
Conversation history: All Project conversations are grouped and accessible
Separate memory spaces: Each Project has isolated memory
Setting Up a Project
Setting up a project.
In Claude.ai, click “New Project” in the left sidebar
Name your Project specifically (“Content Writing” not “Work”)
Write your system prompt in Project Instructions
Upload knowledge base files
Start a conversation within the Project
Writing an Effective System Prompt
Writing an effective system prompt.
A strong system prompt tells Claude: who you are and what you do, primary tasks for this Project, tone and style preferences, output format requirements, domain-specific knowledge to assume, and anything Claude should never do in this Project. A weak system prompt (“You are a helpful assistant”) gives Claude nothing useful.
Project Ideas by Role
Writers: Upload brand voice guide, audience personas, and style examples
Developers: Upload architecture docs, API documentation, and coding standards
Legal: Upload relevant statutes, prior contracts, and compliance frameworks
Researchers: Upload literature review, key papers, and research notes
Frequently Asked Questions
Are Claude Projects available on the free plan?
No. Projects require a Claude Pro subscription or higher.
Does Claude remember everything across Project conversations?
Claude has access to Project knowledge base files and system prompt in every conversation. Specific conversation memory depends on whether Claude’s memory feature is enabled.
Claude Projects is a feature in claude.ai (Pro, Max, Team, Enterprise plans) that lets you create persistent workspaces. Each Project has its own custom instructions, uploaded knowledge files, and conversation history that carries across sessions. Claude remembers everything in the Project — unlike regular conversations that start fresh each time.
How do I create a Claude Project?
In claude.ai, click ‘New Project’ in the left sidebar. Give it a name, write custom instructions (what Claude should know about you and the work), and upload any relevant files — PDFs, text documents, code files, CSVs. Then start a conversation. Everything in the Project persists — new conversations in the same Project share the same context.
What files can I upload to a Claude Project?
Claude Projects support text files (.txt, .md), PDFs, code files (.py, .js, .ts, etc.), CSV files, and images. Maximum file size is 30MB per file, up to 20 files per Project on Pro/Max/Team plans. For best results, upload reference documents, style guides, company knowledge, and anything Claude should know consistently across conversations.
Can my team share a Claude Project?
Yes, on Claude Team and Enterprise plans, Projects can be shared across team members. Shared Projects give everyone the same custom instructions and knowledge base, so the whole team benefits from the same context setup. Individual conversations within a shared Project remain private unless explicitly shared.
June 2026 note: Anthropic’s compute expansion in May 2026 roughly doubled rate limits across paid tiers (covered in our May 2026 updates), and the lineup grew again with Claude Fable 5 in June. The API tier tables below reflect current published limits.
Direct Answer (August 2026): Claude rate limits scale by plan: Free users get dynamic session limits (~5-10 messages); Pro ($20/mo) provides roughly 5x capacity (~45 messages per 5-hour rolling window); Max ($100–$200/mo) offers extended quotas for Claude Code. API rate limits operate on rolling token buckets from Tier 1 (50 RPM) to Tier 4 (4,000 RPM), with cached tokens exempt from input rate caps.
Claude AI · Fitted Claude
Claude rate limits are the single most complained-about aspect of the product. A viral Reddit post on the topic received over 1,060 upvotes. This guide explains what the limits are at every plan tier, why they exist, and every community-tested strategy for getting more out of your plan before hitting the wall.
Why Rate Limits Exist
The ceiling is the product working — not a personal rejection.
Claude’s rate limits are primarily about compute capacity, not money. Running Claude Opus 4.8 on complex tasks requires enormous GPU resources. Anthropic limits usage to ensure consistent performance for all users. The limits are enforced per rolling time window, not per calendar day.
Rate Limits by Plan
Higher seats buy headroom. Check Anthropic for the live numbers.
Free Plan
Access to Claude Sonnet 5 with limited daily usage. Heavy users hit limits after 5-10 substantive prompts. Anthropic adjusts dynamically based on system load.
Claude Pro ($20/month)
Roughly 5x the usage of free. Community consensus: approximately 12 heavy prompts per session before throttling. Light prompts run much longer before hitting limits.
Claude Max 5x ($100/month)
Approximately 5x Pro limit. Claude Code users get roughly 44,000-220,000 tokens per 5-hour window depending on model and task.
Claude Max 20x ($200/month)
20x the Pro limit. Introduced for developers running Claude Code for extended sessions and professionals processing large document volumes daily.
API Rate Limits (Tier 1–4)
API limits are measured in requests per minute (RPM), input tokens per minute (ITPM), and output tokens per minute (OTPM), enforced per model class at the organization level. Your usage tier advances automatically as your cumulative API credit purchases cross each threshold:
Usage tier
Credit purchase to advance
Monthly spend limit
Tier 1
$5
$500
Tier 2
$40
$500
Tier 3
$200
$1,000
Tier 4
$400
$200,000
Monthly Invoicing
—
No limit
Rate limits apply separately per model, so you can run different models up to their respective limits simultaneously. The Opus limit is a single combined pool across all Opus 4.x versions; the Sonnet limit is combined across all Sonnet 4.x versions.
Tier 1
Model
RPM
ITPM
OTPM
Claude Fable 5
50
100,000
20,000
Claude Opus 4.x
50
500,000
80,000
Claude Sonnet 4.x
50
30,000
8,000
Claude Haiku 4.5
50
50,000
10,000
Tier 2
Model
RPM
ITPM
OTPM
Claude Fable 5
1,000
500,000
100,000
Claude Opus 4.x
1,000
2,000,000
200,000
Claude Sonnet 4.x
1,000
450,000
90,000
Claude Haiku 4.5
1,000
450,000
90,000
Tier 3
Model
RPM
ITPM
OTPM
Claude Fable 5
2,000
1,500,000
300,000
Claude Opus 4.x
2,000
5,000,000
400,000
Claude Sonnet 4.x
2,000
800,000
160,000
Claude Haiku 4.5
2,000
1,000,000
200,000
Tier 4
Model
RPM
ITPM
OTPM
Claude Fable 5
4,000
4,000,000
800,000
Claude Opus 4.x
4,000
10,000,000
800,000
Claude Sonnet 4.x
4,000
2,000,000
400,000
Claude Haiku 4.5
4,000
4,000,000
800,000
Cache-aware ITPM: for current models, only uncached input tokens count toward your ITPM limit — cache_read_input_tokens do not. With an 80% cache-hit rate against a 2,000,000 ITPM limit you can effectively process ~10,000,000 total input tokens per minute, so prompt caching is the single best lever for raising effective throughput.
When you hit a limit, the API returns a 429 with a retry-after header (seconds to wait), plus anthropic-ratelimit-* headers showing remaining requests/tokens and reset times. Limits use a token-bucket algorithm — capacity replenishes continuously rather than resetting at a fixed clock time. The Message Batches API and Managed Agents endpoints have their own separate limits.
Community-Tested Workarounds
429 means wait, backoff, then retry. Panic-spamming makes it worse.
Use Projects with persistent system prompts — reduces token overhead per conversation
Use Sonnet for routine tasks, Opus 4.8 for complex ones, and Fable 5 for the most demanding work — don’t burn your limit budget on tasks Sonnet handles equally well
Batch related work into single long sessions — starting five conversations uses more overhead than one long one
Compress your inputs — extract only relevant sections from long documents before pasting
Use the API for high-volume predictable workflows — more limit-efficient than the consumer interface for automated tasks
No published exact number — depends on message complexity. Community estimates suggest roughly 12 heavy messages per session before throttling begins on Pro.
Do Claude rate limits reset daily?
Rate limits use a rolling time window, not a fixed midnight reset.
Get alerted when Claude pricing or limits change
We track Anthropic’s models, pricing, and limits daily and send a short note when something changes. Occasional, no spam.
The crawl space access door is one of the most neglected components in a crawl space improvement project — and in an encapsulated, sealed crawl space, it is also one of the most critical. An uninsulated, leaky access door can be the largest single air infiltration point in an otherwise sealed crawl space, undermining the moisture control and thermal performance of a system that cost $8,000–$15,000 to install. This guide covers what to look for in a crawl space access door, how to size it, and how to install one that actually performs.
Why the Access Door Matters in an Encapsulated Crawl Space
The door is part of the envelope.
In a vented crawl space, the access door is essentially irrelevant from a performance standpoint — the space already communicates freely with outdoor air through foundation vents. In an encapsulated, sealed crawl space, the access door is one of the few remaining connections between the sealed interior and the exterior. An unsealed, uninsulated access door:
Allows outdoor humid air to enter in summer, raising crawl space humidity and working against the dehumidifier
Allows conditioned crawl space air to escape in winter, increasing heating load
Provides a pest entry pathway — the most common entry point for mice in homes with sealed crawl spaces is an improperly sealed access opening
Reduces the radon containment of the sealed enclosure if radon is a concern (the access point is a pressure equalization pathway)
Standard Access Doors vs. Insulated Crawl Space Doors
Insulation and seals are measurable.
Standard Plywood or OSB Access Panel
Most existing crawl space access openings are covered with a simple piece of plywood or OSB cut to fit, resting in a rough opening in the floor or foundation wall. These provide essentially no insulation value and almost no air sealing. They are held in place by gravity and friction, creating significant air infiltration around all four edges.
For a vented crawl space that remains vented: the plywood panel is adequate — a leaky access door is not meaningfully worse than an open foundation vent. For an encapsulated crawl space: a plywood panel is not adequate and should be replaced.
Insulated Crawl Space Access Doors
Insulated crawl space access doors specifically designed for sealed crawl spaces include:
Rigid foam core: A door constructed with a rigid foam (EPS or XPS) core surrounded by a rigid plastic or aluminum frame, providing R-10 to R-25 depending on foam thickness
Weatherstripping on all four sides: Compressible foam or rubber weatherstrip that creates a seal when the door is closed
Positive closure mechanism: A latch, turn button, or magnetic closure that holds the door firmly against the weatherstripping rather than relying on gravity
Vapor barrier integration: Some dedicated encapsulation system doors include attachment flanges that allow the vapor barrier to be sealed to the door frame, creating a continuous vapor boundary
Products to know: The Bilco Company and Centurion Products make dedicated crawl space access doors for encapsulated applications. Some encapsulation contractors build custom insulated doors on-site using rigid foam and PVC trim. The DIY approach — a frame-and-foam custom door — is viable and commonly used.
Exterior vs. Interior Access
Exterior Access (Through the Foundation Wall)
An exterior access opening cut through or built into the foundation wall is the most common crawl space access configuration. It allows entry to the crawl space from the outside, typically at grade level. In an encapsulated crawl space, this opening must be sealed with an insulated door that provides:
Weatherstripping on all four sides
A positive latching mechanism
Insulation value consistent with the rest of the encapsulation system (minimum R-10; R-15 to R-20 is better)
Protection from water intrusion — the door should have a positive drainage angle so rain cannot pool at the threshold
Cost for an exterior insulated access door installation: $150–$400 for a pre-manufactured door, or $100–$200 in materials for a site-built rigid foam door with PVC trim framing. Professional installation adds $200–$400 in labor.
Interior Access (Through the Floor)
Some homes access the crawl space through a hatch in the floor — often in a closet, utility room, or laundry room. For an encapsulated crawl space, a floor access hatch requires:
An insulated hatch cover (rigid foam core, minimum R-10) that sits in a weatherstripped frame
A positive closure mechanism — floor hatches are particularly vulnerable to air convection when improperly sealed, because warm crawl space air naturally rises through the gap
Vapor barrier sealed to the hatch frame rather than cut around the opening
Pre-manufactured insulated floor access hatches (such as those made by Bilco) are available but sized for basements and may be oversized for typical crawl space applications. Custom site-built solutions are common.
Sizing the Access Opening
If the gear won’t fit, the SOP fails.
The access opening must be large enough to allow the passage of equipment that may need to enter the crawl space — a dehumidifier, HVAC equipment, a roll of vapor barrier material. Minimum practical size:
Foundation wall exterior access: Minimum 22″ wide × 30″ tall. This allows passage of a standard dehumidifier (typically 14″–16″ wide × 18″–24″ tall) and a person with equipment. For tight crawl spaces where a full-size dehumidifier must be passed through, 24″ × 36″ is more practical.
Floor hatch interior access: Minimum 22″ × 22″. Larger is better for equipment passage — 24″ × 36″ is standard for a utility closet hatch that also serves as an HVAC access point.
What kind of door do I need for an encapsulated crawl space?
An insulated door with rigid foam core (minimum R-10), weatherstripping on all four sides, and a positive latching mechanism. For exterior foundation wall access, the door should also protect against water intrusion at the threshold. Pre-manufactured options are available from Bilco and Centurion; site-built rigid foam doors with PVC trim framing are a common contractor approach that provides equivalent performance at lower material cost.
Can I just seal my existing crawl space access door?
If the existing door is solid and structurally sound, adding weatherstripping on all four sides and a positive latch can significantly improve performance without full replacement. If the door is a simple plywood panel with no frame and relies on gravity for closure, replacement with a properly framed, weatherstripped, insulated door is a better investment. Test the existing door’s performance by running a hand around the perimeter on a cold day — air movement indicates infiltration that weatherstripping must address.
How much does a crawl space access door cost?
A pre-manufactured insulated crawl space access door: $150–$400 for the door unit. Professional installation (framing, weatherstripping, latching hardware): $200–$400 in labor. Total installed cost for a new insulated exterior access door: $350–$800. A site-built rigid foam door with PVC trim and weatherstripping: $80–$150 in materials, plus labor if professionally installed.
A crawl space inspection is the foundation of every crawl space repair decision. Without knowing what is actually in the crawl space — the moisture levels, the wood condition, the mold extent, the drainage situation — any contractor proposal or DIY plan is a guess. This guide walks through a complete DIY crawl space inspection: how to prepare, what to bring, what to look for in each area, and how to document findings so you can get accurate contractor quotes and make informed decisions about what needs to be addressed.
Before You Enter: Safety and Equipment
Inspection is a sequence, not a vibe.
A crawl space inspection requires minimal equipment but non-negotiable safety preparation:
N95 or P100 respirator: Crawl spaces contain mold spores, fiberglass insulation particles, rodent droppings (which can carry hantavirus), and general dust. A dust mask is insufficient — a rated respirator is essential.
Tyvek coveralls or dedicated clothing: Whatever you wear in the crawl space should not be worn back into the living space.
Nitrile gloves
Eye protection (safety glasses or goggles)
Bright work light or headlamp: A single flashlight is insufficient for a thorough inspection. A rechargeable LED work light that can be set down provides hands-free illumination.
Knee pads
Pin-type moisture meter ($20–$60 from hardware stores or Amazon): The single most important diagnostic tool for wood condition assessment.
Digital hygrometer ($15–$30): Measures relative humidity and temperature in the crawl space air.
Sharp awl or large screwdriver: For the probe test of wood condition.
Smartphone or camera: Document everything with photographs and video.
The Inspection Sequence
Measure before you argue about mold.
Step 1: Before Entering — Exterior Check
Before entering the crawl space, inspect the exterior foundation from grade level:
Is the soil grading away from the foundation (should slope away at least 6″ over 10 feet)?
Where do downspouts discharge? Are they directed away from the foundation or do they dump at the foundation wall?
Are foundation vents present? Are they open or blocked?
Is there any visible evidence of water staining or efflorescence on the exterior foundation face?
Are there any visible cracks in the foundation wall?
Step 2: Initial Entry — Air Quality Assessment
When you first enter the crawl space, note the air quality before your senses adjust:
Musty odor: Indicates mold or high moisture. Severity of odor correlates (imperfectly) with extent of mold growth.
Earthy/wet soil smell: Indicates high soil moisture or recent water presence.
Rodent odor: Ammonia-like smell indicates active rodent activity.
Place the digital hygrometer and allow it to stabilize for 15–20 minutes before recording the reading.
Step 3: Floor and Soil Assessment
Standing water: Any pooled water after rain is a drainage problem.
Saturated soil: Soil that holds an indentation when pressed, or that releases water when stepped on, indicates high moisture content from water intrusion or very high water table.
Existing vapor barrier: Is one present? What condition is it in — intact, torn, punctured, pushed aside? Is it taped at seams?
Drain tile: Is there an existing perimeter drainage system? Visible gravel channel at the foundation perimeter indicates drainage infrastructure.
Sump pit: Is one present? Is the pump operational (turn it on manually if there is a test button, or pour water in to activate the float)? Is the pit covered and sealed?
Watermarks: High-water marks on piers, columns, or the foundation wall face indicate past water level — measure the height from the floor to establish how deep water has been.
Test structural wood at minimum 10–15 locations across the crawl space, focusing on the highest-risk areas:
Sill plate (priority): Use the moisture meter on the sill plate at each accessible location around the perimeter. This is the highest-moisture wood member in most crawl spaces — it sits on concrete, which wicks moisture from both directions.
Rim joist: The band joist atop the foundation wall. Test at multiple locations — particularly corners and any areas showing discoloration.
Floor joists: Test the bottom face of joists at midspan and at the bearing ends (where they rest on the sill plate or beam). The bearing ends are where rot typically initiates.
Support posts and columns: Test the base of each post where it contacts the pier footing.
Beams: Test at bearing points and at any visible discoloration.
Interpreting moisture meter readings:
Below 15% MC: Dry. No active moisture problem in this member.
15–19% MC: Elevated but not yet problematic. Monitor; address moisture source.
19–28% MC: Wood rot fungi can be active. Remediation appropriate.
The probe test: Push a sharp awl or large screwdriver firmly into any wood showing discoloration, staining, or high moisture meter readings. Sound wood resists penetration — it requires significant force to penetrate more than 1/8″. Rotted wood allows easy penetration, and the wood around the probe entry may crumble or separate. If the probe penetrates easily to 1/4″ or more, that section of wood has significant decay.
Step 5: Mold Assessment
Identify all visible mold growth: Look for fuzzy or powdery growth on joists, blocking, and the underside of the subfloor. White, green, black, and gray growth are all possible mold colors.
Estimate extent: Roughly estimate the percentage of joist surfaces with visible growth. Under 10% is limited; 10–30% is moderate; over 30% is extensive.
Distinguish from bluestain: Blue-gray staining that penetrates the wood surface without surface fuzziness is bluestain (sapstain) — not the same as surface mold, though it indicates past or present elevated moisture.
Photograph all visible mold: Multiple photos from different distances. Contractors and mold remediation professionals will want to see the extent and location.
Step 6: Insulation Assessment
Is insulation present between the floor joists?
Is it intact and in contact with the subfloor, or is it sagging, falling, or hanging?
Does it show signs of moisture (discoloration, compression, or black spotting indicating mold)?
Deteriorated, wet, or rodent-damaged fiberglass batt insulation must be removed before encapsulation — note the extent for contractor quotes.
Step 7: Pest Evidence
Termite mud tubes: Pencil-width earthen tubes running up foundation walls or pier surfaces indicate active subterranean termite activity. This is a significant find requiring immediate pest control treatment.
Wood damage: Galleries or channels in wood surfaces, powder post beetle exit holes (small round holes 1/16″–1/8″ diameter with fine powder beneath), or structural wood that sounds hollow when tapped.
Rodent signs: Droppings, nesting material (insulation pulled into clumps, paper, fabric), gnaw marks on insulation, wiring, or wood.
Entry points: Gaps in the foundation or between the sill plate and foundation where pests could enter.
Step 8: HVAC and Plumbing Equipment
Is there HVAC equipment (air handler, furnace, or ductwork) in the crawl space? Note the condition of ductwork — sweating ducts or disconnected duct sections are common moisture sources.
Are there any plumbing leaks, drips, or condensation on pipes?
Is a dryer vent routed through the crawl space? Dryer vents that exhaust into the crawl space (prohibited by code) are a major moisture source. Note if present.
Are there any open floor drains that could allow gas or pest entry from the drain system?
Documenting and Using Your Inspection
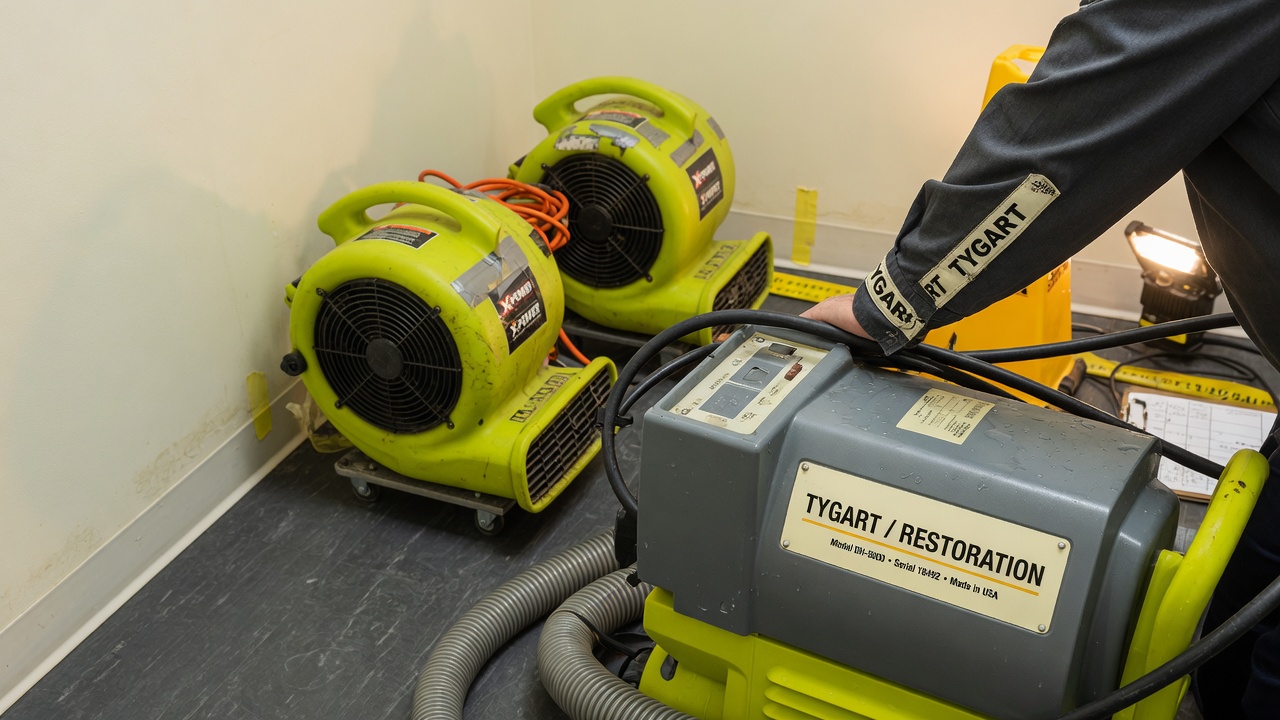
The truck is the shop — protocols have to fit the van.
After the inspection, compile your findings into a summary:
Highest wood moisture content reading and location
Relative humidity reading and temperature
Any probe test failures and their locations
Mold extent estimate (percentage of joist surfaces affected)
Water intrusion evidence (standing water, watermarks, efflorescence)
Pest evidence summary
Existing drainage and vapor barrier condition
Photographs organized by category
Share this documentation with every contractor who provides a quote. A contractor who receives specific data (wood MC: 24% at northeast corner sill plate, RH: 82%, visible mold on approximately 20% of joist surfaces, no standing water) can provide a more accurate scope than one who is basing the quote on a quick visual walk-through. Contractors who conduct their own thorough inspection should be arriving at similar conclusions — significant discrepancies between contractor findings and your own assessment warrant investigation.
Yes, with appropriate safety equipment: N95 or P100 respirator, Tyvek coveralls, gloves, and eye protection. The inspection tools — moisture meter, digital hygrometer, sharp awl, and a bright work light — are inexpensive and available at hardware stores. A thorough DIY inspection before contractor meetings gives you independent data to compare against contractor findings.
What is the most important thing to check in a crawl space inspection?
Wood moisture content at the sill plate and floor joist bearing ends — measured with a pin-type moisture meter. This is the single most diagnostic measurement in a crawl space inspection. A sill plate reading above 19% means active or past moisture problem; above 28% means wood rot is likely active. Everything else in the inspection informs the cause and the solution; the moisture meter tells you whether structural damage is occurring or imminent.
How do I know if I have termites in my crawl space?
Look for mud tubes — pencil-width earthen tunnels running up foundation walls, pier surfaces, or structural wood. Termites build these tubes to travel between soil and wood while maintaining the humid environment they need. Mud tubes are the most reliable visual indicator of subterranean termite activity. Also look for wood that sounds hollow when tapped or crumbles when probed, and for small wings near foundation vents (shed during swarming season). Any suspected termite evidence warrants immediate professional pest control inspection.